background image

Service Action Codes

7-9

22 June 2004


30

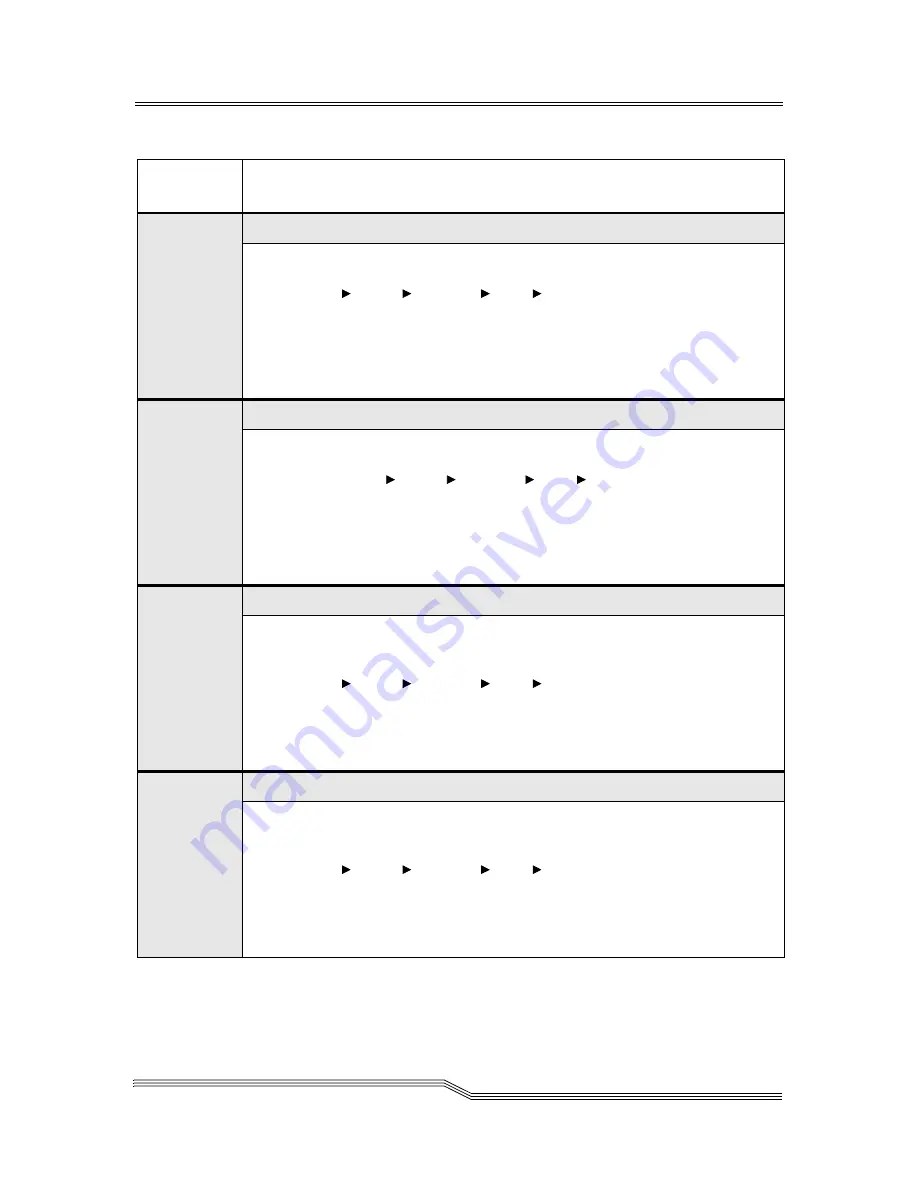
A fatal error is detected in SCSI Port 0.

Action 1
Verify that the library Port 0 is configured by using the Operator Panel. 
(

Main Menu

Setup

Library

SCSI

Ports)

. Verify that it is installed 

and that the correct type is shown.

Action 2
If the problem is not corrected or persists, contact ATAC. For contact 
information, refer to ADIC Technical Assistance Center  on page 1-5.

31

A fatal error is detected in SCSI Port 1.

Action 1
Verify the Library SCSI Port 1 is properly configured by using the Operator 
Panel. (

Main Menu

Setup

Library

SCSI

Ports)

. Verify that it is 

installed and that the correct type is shown.

Action 2
If the problem is not corrected or persists, contact ATAC. For contact 
information, refer to ADIC Technical Assistance Center  on page 1-5.

32

Wrong SCSI bus connection is detected.

Action 1
Verify that the Host SCSI bus is the same type (HVD, LVD, or SE) as the Library 
SCSI Adapter card in Port 0 by using the Operator Panel. 
(

Main Menu

Setup

Library

SCSI

Ports)

Action 2
If the problem is not corrected or persists, contact ATAC. For contact 
information, refer to ADIC Technical Assistance Center  on page 1-5.

33

Wrong SCSI bus connection is detected.

Action 1
Verify that the Host SCSI bus is the same type (HVD, LVD, or SE) as the library 
SCSI Adapter card in Port 1 by using the Operator Panel. 
(

Main Menu

Setup

Library

SCSI

Ports)

Action 2
If the problem is not corrected or persists, contact ATAC. For contact 
information, refer to ADIC Technical Assistance Center  on page 1-5.

Table 7-1

SAC Reporting  (Continued)

Reported

SAC

Perform these actions

Содержание Scalar 1000

Страница 1: ...Scalar 1000 Library Operator Guide...

Страница 2: ...ay appear in this document and retains the right to make changes to these specifications and descriptions at any time without notice This publication may describe designs for which patents are pending...

Страница 3: ...nts 1 4 Explanation of Symbols and Notes 1 4 ADIC Technical Assistance Center 1 5 Regulatory Notices 1 6 Federal Communication Commission Class A Notice 1 6 IC Notice Canada Only 1 7 EN 55022 Complian...

Страница 4: ...ge 2 8 Cartridge Accessor 2 12 Tape Cartridges 2 13 Insert Eject Station 2 14 Connectivity 2 14 SAN Connectivity 2 14 SCSI Connectivity 2 16 Scalar DLC Option 2 17 Remote Management Unit 2 18 3 Safety...

Страница 5: ...equisites 4 12 Setting up the RMU 4 13 Accessing the RMU 4 14 Logging into the RMU 4 14 Checking Status and General Information 4 14 Configuring Network Parameters 4 15 Configuring SNMP 4 16 Downloadi...

Страница 6: ...5 Mixed Media Support 5 15 Parity 5 17 LCD 5 18 Reservations Dialog 5 19 System Dialog 5 20 Element Dialog 5 22 Logs Submenu 5 26 Command Log Dialog 5 26 Error Log Dialog 5 28 Drive Error Log Dialog 5...

Страница 7: ...5 79 Switching Security From Off to On 5 79 Switching Security From On to Off 5 81 Changing the Password 5 82 Media Dialog 5 84 Emulate Dialog 5 86 RMU Submenu 5 87 Name Dialog 5 87 IP Dialog 5 88 Adv...

Страница 8: ...gger Dialog 5 131 Fiducial Test Dialog 5 132 Accessor Submenu 5 133 Move Dialog 5 134 Step Dialog 5 135 SelfTest Dialog 5 136 PowerSup Dialog 5 137 Teach Submenu 5 138 Teach New Dialog 5 138 Teach Cur...

Страница 9: ...6 18 Manual Clean without Library Cleaning Tapes 6 18 Manual Clean with Library Tapes 6 19 Immediate AutoClean 6 20 Library Delayed AutoClean 6 21 Host Controlled Cleaning 6 22 Enabling Library AutoC...

Страница 10: ...x Contents 6 00054 02 Rev A...

Страница 11: ...it Breaker Switch Locations Back View of CM EM 4 7 Figure 4 3 Main Screen 4 8 Figure 4 4 Reboot Message 4 9 Figure 5 1 Operator Panel Directory Structure 5 7 Figure 5 2 Main Menu 5 9 Figure 5 3 Mode D...

Страница 12: ...re 5 26 Response Dialog 5 27 Figure 5 27 Response Screen 5 27 Figure 5 28 Response Screen 5 27 Figure 5 29 Error Log Dialog 5 28 Figure 5 30 Response Dialog 5 29 Figure 5 31 Response Screen 5 29 Figur...

Страница 13: ...Figure 5 59 Warning Dialog 5 46 Figure 5 60 Warning Dialog 5 46 Figure 5 61 Warning Dialog 5 47 Figure 5 62 Warning Dialog 5 47 Figure 5 63 Insert Clean Tape Dialog 5 48 Figure 5 64 Insert Range Dialo...

Страница 14: ...1 Configuration Screen 5 66 Figure 5 92 Config Dialog 5 67 Figure 5 93 Continuation Screen 5 68 Figure 5 94 Advanced Dialog 5 69 Figure 5 95 Learn Dialog 5 69 Figure 5 96 Manipulate Get 5 70 Figure 5...

Страница 15: ...95 Figure 5 126 View Dialog 5 96 Figure 5 127 Utils Menu 5 97 Figure 5 128 Library Menu 5 97 Figure 5 129 Screen Dialog 5 98 Figure 5 130 Timeout Value Dialog 5 98 Figure 5 131 Password Dialog 5 99 Fi...

Страница 16: ...art Dialog with No Errors 5 115 Figure 5 159 Start Dialog with Errors 5 115 Figure 5 160 Diags Submenu 5 116 Figure 5 161 DI DO Submenu 5 117 Figure 5 162 Loopback Dialog 5 117 Figure 5 163 Sensors Su...

Страница 17: ...menu 5 138 Figure 5 192 Teach New Dialog 5 138 Figure 5 193 Keep Learned Offsets Dialog 5 139 Figure 5 194 Confirmation Screen 5 139 Figure 5 195 Progress Screen 5 140 Figure 5 196 Response Screen 5 1...

Страница 18: ...Label Application LTO example 6 14 Figure 6 2 Barcode Label Examples 6 15 Figure 6 3 Cleaning Submenu 6 23 Figure 6 4 AutoClean Dialog 6 23 Figure 6 5 Insert Clean Tape Dialog 6 25 Figure 6 6 Range D...

Страница 19: ...al Indexing for Firmware 3 0 or Later 2 10 Table 2 7 Library External Addressing for Firmware 3 0 or Later 2 11 Table 3 1 Hazard Alert Message 3 3 Table 4 1 Operator Panel Indicators 4 5 Table 4 2 Ope...

Страница 20: ...xx Tables 6 00054 02 Rev A...

Страница 21: ...4 Explanation of Symbols and Notes 1 4 ADIC Technical Assistance Center 1 5 Regulatory Notices 1 6 Federal Communication Commission Class A Notice 1 6 IC Notice Canada Only 1 7 EN 55022 Compliance Cze...

Страница 22: ...1 2 About this Guide 6 00054 02 Rev A...

Страница 23: ...hapters detailing the operation of the Scalar 1000 The chapters topics include Chapter 1 About this Guide Describes the intended audience organization associated documents explanation of symbols and n...

Страница 24: ...51 xx Scalar 1000 Maintenance Guide 6 00055 xx Scalar 1000 SCSI Reference Manual Explanation of Symbols and Notes The following symbols and highlighted passages note important information Detailed exp...

Страница 25: ...de the USA toll free 00 800 9999 3822 email support adic com Before contacting the ATAC make sure you have the Serial Number for your library To locate the Serial Number do one of the following Open t...

Страница 26: ...interference caused by improperly shielded or grounded cables and connectors or by unauthorized modifications or changes to the equipment Unauthorized modifications or changes could void the user s au...

Страница 27: ...ottom or the back panel of your library A statement in the form of IC Class A ICES 3 or IC Class B ICES 3 will be located on one of these labels Note that Industry Canada regulations provide that chan...

Страница 28: ...ic Compatibility directive of the European Community Such marking is indicative that this tape library meets or exceeds the following technical standards EN 55022 1998 Limits and Methods of Measuremen...

Страница 29: ...ency fields EN 61000 4 8 Power frequency magnetic field immunity test EN 61000 4 11 Voltage dips short interruptions and voltage variations immunity test EN 60950 1992 Safety of Information Technology...

Страница 30: ...in which case the user may be required to take corrective actions NOTE VCCI regulations provide that changes or modifications not expressly approved by the Dell Computer Corporation could void your a...

Страница 31: ...2 6 Expansion Module 2 6 Internal Components 2 7 Tape Drives 2 7 Cartridge Storage 2 8 Cartridge Accessor 2 12 Tape Cartridges 2 13 Insert Eject Station 2 14 Connectivity 2 14 SAN Connectivity 2 14 SC...

Страница 32: ...2 2 System Description 6 00054 02 Rev A...

Страница 33: ...ontrol hardware the Cartridge Accessor an Insert Eject Station I E Station an Operator Panel cartridge storage cells and tape drives The EM can contain tape drives and cartridge storage The Scalar 100...

Страница 34: ...apacity DLT SDLT LTO Tape Drives DLT SDLT Cartridge Capacity LTO Cartridge Capacity Control Module 1 2 3 4 158 118 2 12 237 1 6 7 12 158 118 200 152 Control Module and 1 Expansion Module 1 2 3 4 5 6 7...

Страница 35: ...ntrol Module CM and an Expansion Module EM The information in this section is organized as follows Control Module on page 2 6 Expansion Module on page 2 6 Figure 2 1 Control Module and Expansion Modul...

Страница 36: ...2 1 on page 2 5 Each drive bay has the space equivalent of 48 LTO 40 SDLT 44 3590 or 60 AIT cartridges Each drive bay accommodates One or two 3590 or High Profile DLT tape drives One to six DLT SDLT...

Страница 37: ...g tape drives 3490E type drive Plasmon Philips LMS TD 3610 NCTP type drive Plasmon Philips NCTP 3590 type drive IBM 3590 B1A EMASS 8590 3590 type drive IBM 3590 E1A DLT type high profile drive Quantum...

Страница 38: ...lowing coordinate system to locate different elements storage cell drive etc within the library See Table 2 4 The Element Type can be I for I E Station D for Drive and S for Storage The frame number c...

Страница 39: ...fields in the coordinate system To manipulate the media within the library the host must reference each movement with source and target designations Element indexing addressing specifies precisely whi...

Страница 40: ...Storage 0 787 0 1181 I E Station 788 799 1182 1199 Drives 800 847 1200 1247 Cartridge Accessor 848 1248 Table 2 6 Library Internal Indexing for Firmware 3 0 or Later Element Type Indexing Range 3590 D...

Страница 41: ...ternal Addressing Range 3590 DLT SDLT LTO AIT Cartridge Accessor 1 0x0001 1 0x0001 1 0x0001 I E Station 16 27 0x0010 0x001B 16 27 0x0010 0x001B 16 33 0x0010 0x0021 Drives 256 303 0x0100 0x012F 256 303...

Страница 42: ...Accessor The Cartridge Accessor identifies and moves cartridges between the storage cells tape drives and the Insert Eject Station See Figure 2 3 Figure 2 3 Cartridge Accessor Top X Rail Assembly Y Ax...

Страница 43: ...arcode number The external label contains a minimum of 5 characters and a maximum of 16 characters for the barcode depending on the operating modes The Scalar 1000 can operate in one of three modes De...

Страница 44: ...plications Flexible library connectivity delivers active support for loop and switched fabric Fibre Channel protocols along with SCSI SAN Connectivity The Scalar 1000 can be connected to a Fibre Chann...

Страница 45: ...Connectivity 2 15 22 June 2004 Figure 2 4 Indirect Fibre Channel Attachment...

Страница 46: ...al Both ends of each bus must be terminated and a terminator is shipped with each SCSI adapter card ordered The minimum configuration of a Scalar 1000 library requires one SCSI adapter Single Ended Hi...

Страница 47: ...provides the industry s most advanced combination of management and diagnostics The Scalar DLC attaches to the library SCSI bus The host continues to directly attach to the drives via a SCSI Interface...

Страница 48: ...following Update RMU firmware Update library firmware Access the library status Make configuration changes Access the library Operator Panel Access Scalar 1000 documentation Retrieve library command a...

Страница 49: ...3 Safety Overview 3 3 Intended Use 3 3 Hazard Alert Messages 3 3 Area of Application 3 5 Protective Devices 3 5 Library Access 3 5 Mechanical Lock 3 6 Main Circuit Breaker Power Switch 3 6...

Страница 50: ...3 2 Safety 6 00054 02 Rev A...

Страница 51: ...all risk and ADIC shall not be held liable for damage arising from unauthorized use of the library Hazard Alert Messages ADIC classifies hazards in several categories Table 3 1 shows the relationship...

Страница 52: ...s personnel with serious injury or death When used with the signal word Caution this symbol means that specific regulations rules notices and working procedures must be observed Ignoring this symbol c...

Страница 53: ...the library Main Circuit Breaker switch Library Access The Scalar 1000 is completely surrounded by an enclosure The library can only be accessed through monitored access doors The enclosure around the...

Страница 54: ...cept in emergencies stop the Scalar 1000 with the normal shutdown procedure before switching off the Main Circuit Breaker switch ADIC is not responsible for damage caused by improper use of the Main C...

Страница 55: ...12 Setting up the RMU 4 13 Accessing the RMU 4 14 Logging into the RMU 4 14 Checking Status and General Information 4 14 Configuring Network Parameters 4 15 Configuring SNMP 4 16 Downloading the SNMP...

Страница 56: ...4 2 Operation 6 00054 02 Rev A...

Страница 57: ...tor Panel is an interactive path between the operator and the Scalar 1000 See Figure 4 1 on page 4 4 Scalar 1000 operator can perform the following functions listed below Starting the Scalar 1000 Shut...

Страница 58: ...4 4 Operation 6 00054 02 Rev A Figure 4 1 Operator Panel 4X20 LCD Panel Speaker Vent...

Страница 59: ...While locked no media may be added or removed through the Insert Eject Station The Power On indicator illuminates when power is applied to the Scalar 1000 library The Ready indicator illuminates when...

Страница 60: ...ext required entry field when multiple field entries are being entered In this case the button cycles through all the entry locations until the Accept option is chosen with Y Use Escape to leave the c...

Страница 61: ...to properly reset Step 1 Make sure that all doors are closed and mechanically locked on the Control Module CM and any Expansion Modules EMs Step 2 Locate the Main Circuit Breaker switch in the lower...

Страница 62: ...to make sure there are no obstructions or personnel present Mechanical movement within the library can cause serious injury Power is applied to the Scalar 1000 The CM embedded software starts the boot...

Страница 63: ...ering up the library This allows the RMU to properly reset Step 1 If necessary use the button to return to the Main Menu The selector defaults to the Mode selection Step 2 Press the button Step 3 From...

Страница 64: ...on page 4 9 for more information Step 1 Locate the Main Circuit Breaker switch in the lower right corner at the back of the CM See Figure 4 2 on page 4 7 for the location of the Main Circuit Breaker...

Страница 65: ...f a dedicated server or separate software The RMU performs the following functions Provides remote operation of all library Operator Panel functions by means of a Web browser Allows you to check the s...

Страница 66: ...ng the Uniform Resource Locator URL The network address consists of an Internet Protocol IP address subnet mask and gateway IP address Refer to RMU Submenu on page 5 87 for information about setting t...

Страница 67: ...er this information into the RMU by means of the library Operator Panel To configure the RMU Step 1 From Operator Panel Main Menu select Setup Library RMU The RMU Submenu is shown Step 2 Select Name T...

Страница 68: ...rface appears Logging into the RMU Some of the features of the RMU require you to log in To log into the RMU When prompted enter your user name and password Note the user name and password are case se...

Страница 69: ...her the SNMP Alert notification feature is enabled or disabled Library Firmware Indicates the current level of library firmware RMU Firmware Indicates the current level of RMU firmware Configuring Net...

Страница 70: ...e SNMP Enabled drop down To enable or disable SNMP alerts select ON or OFF in the Alerts Enabled drop down SNMP must be enabled if you want SNMP alerts enabled In Manager enter the SNMP server address...

Страница 71: ...MIB and click Save Target As Step 3 Browse to your SNMP management server and click Save You will need to load the MIB file into the SNMP management application Configuring RMU Users You can add uniqu...

Страница 72: ...hange your RMU password If you are the administrator you can also change other users passwords To change a password Step 1 Click the Configuration tab Step 2 In the User Configuration area select Chan...

Страница 73: ...an NTP Server You can connect the RMU to a network time NTP server to automatically set the time To synchronize with an NTP server Step 1 Click the Configuration tab Step 2 In the Date and Time area...

Страница 74: ...was selected for a firmware update the RMU will reboot Viewing Diagnostic Files Library and RMU Logs From the RMU you can view the diagnostic information logs for the attached library and RMU This in...

Страница 75: ...library For more information on the Operator Panel see Using the Operator Panel on page 4 3 Viewing Logs You can view the most current entries in the library command log without downloading the entire...

Страница 76: ...ration 6 00054 02 Rev A Version Provides the current revision level of the RMU firmware To get help Click on the item in the left pane of the RMU interface The information appears in a separate browse...

Страница 77: ...brary Submenu 5 13 SCSI Submenu 5 13 Mode Parms Dialog 5 14 Element Address 5 15 Mixed Media Support 5 15 Parity 5 17 LCD 5 18 Reservations Dialog 5 19 System Dialog 5 20 Element Dialog 5 22 Logs Subm...

Страница 78: ...70 Manipulate Put 5 70 Setup Menu 5 71 Library Submenu 5 72 SCSI Submenu 5 73 Target ID Dialog 5 74 Parity Dialog 5 75 Ports Dialog 5 76 Host Dialog 5 77 Trace Dialog 5 78 Security Dialog 5 79 Switch...

Страница 79: ...118 Wrap Dialog 5 118 Real Time 5 120 Locks Dialog 5 121 Gripper Submenu 5 121 Get Put Storage Dialog 5 122 Get Put Drives Dialog 5 125 Step Dialog 5 128 Scanner Submenu 5 130 Adjust Dialog 5 130 Tri...

Страница 80: ...5 4 Menus and Commands 6 00054 02 Rev A...

Страница 81: ...All menus and their respective options are grouped according to function Accessing the Menu Proceed as follows to use the Operator Panel menu buttons to select menu options Step 1 Press the Up arrow b...

Страница 82: ...available for selection Press the button to select the option Press the button to view information about the option Press the or button to select between the previous or next options When this cursor...

Страница 83: ...Using the Operator Panel Menu 5 7 22 June 2004 Figure 5 1 Operator Panel Directory Structure...

Страница 84: ...election Step 2 Press the Up arrow button or the down arrow button to move between help continuation screens Step 3 Press the Escape button to return to the previous selection Each time you press the...

Страница 85: ...from the Main Menu See Figure 5 2 Figure 5 2 Main Menu Depending on your selection you have the following options Mode Dialog on page 5 10 Status Menu on page 5 12 Commands Menu on page 5 35 Database...

Страница 86: ...eady Accept Y to accept changes N to reject changes When toggling between the Ready and Not Ready states the following two screens refer to Figure 5 4 and Figure 5 5 appear When Shutdown is selected t...

Страница 87: ...perator commands are processed Most host commands are not processed Not Ready Online Aisle power is not present Host commands not involving the Accessor are processed Offline Aisle power is not presen...

Страница 88: ...n Menu Status Menu Use the Status Menu to access views of your library operating statistics See Figure 5 7 Figure 5 7 Status Menu Depending on your selection you have the following options Library Sub...

Страница 89: ...you have the following options SCSI Submenu System Dialog on page 5 20 Element Dialog on page 5 22 Logs Submenu on page 5 26 SCSI Submenu Path Main Menu Status Menu Library Submenu SCSI Submenu Use t...

Страница 90: ...refer to the Scalar 1000 SCSI Reference Manual for additional information about the Scalar 1000 Mode Parameters Figure 5 10 Mode Parms Dialog Parameter Value Mode Parms Element Address Mixed Media Par...

Страница 91: ...se Storage Cell address Base IE Current default or saved base Insert Eject station address Base DT Current default or saved base tape drive address Mixed Media Support Use Mixed Media Support to see b...

Страница 92: ...t applicable Ext RES Yes indicates that Extended Read Element Status is enabled to show element and media domains types No indicates that Extended Read Element Status is disabled Ext ASCQ Yes indicate...

Страница 93: ...essable by the SCSI host Parity Use Parity to view the current default or saved parity This view also displays the retries that are allowed in each selection See Figure 5 13 Figure 5 13 Parity Screen...

Страница 94: ...abled indicates that library security is currently disabled Enabled indicates that library security is currently enabled Line Indicates the currently displayed text line 1 4 Text Corresponding line of...

Страница 95: ...E command A reset or a power on of the library is performed Figure 5 15 Reservation Dialog Parameter Value Bus Displays the SCSI Bus ID number 0 1 Host ID Displays the Host ID number 0 7 Reservation I...

Страница 96: ...N to reject System Dialog Path Main Menu Status Menu Library Submenu System Dialog Use the System Dialog to view library operating statistics For example the number of installed cartridges number of f...

Страница 97: ...The total number of gets from elements 00000000 99999999 more More information on the Continuation Screen When more is selected the Continuation Screen appears See Figure 5 18 Figure 5 18 Continuation...

Страница 98: ...retries Total recovered barcode scan operations I E closes Total times the I E station has been closed Element Dialog Path Main Menu Status Menu Library Submenu Elements Dialog Use the Element Dialog...

Страница 99: ...tion A E drive port A B or IE station column The fifth field indicates the row of the column 01 12 for inch and SDLT DLT coordinates 01 14 for LTO coordinates 01 18 for AIT coordinates Element Display...

Страница 100: ...elements No indicates that the results shown are not based on an inventory of the elements more More information on the Continuation Screen When more is selected the Continuation Screen appears See F...

Страница 101: ...d Yes indicates the element is reserved by a SCSI host No indicates the element is not reserved When not reserved Reserve ID and Reserved by parameters are not applicable N A Reserve ID Indicates the...

Страница 102: ...ptions Command Log Dialog Error Log Dialog on page 5 28 Drive Error Log Dialog on page 5 30 Command Log Dialog Path Main Menu Status Menu Library Submenu Logs Submenu Command Log Dialog Use the Comman...

Страница 103: ...o a serial port If Y is selected for the Continue parameter value the two Response Screens appear See Figure 5 27 and Figure 5 28 Otherwise the changed parameter continues to display but no action is...

Страница 104: ...See Figure 5 29 Figure 5 29 Error Log Dialog Parameter Value Type Indicates the type of error Record the error type in Error Log Codes on page 7 28 Error Indicates the error identifier Record the erro...

Страница 105: ...serial port If Y is selected for the Continue parameter value the two Response Screens appear See Figure 5 31 and Figure 5 32 Otherwise the changed parameter continues to display but no action is tak...

Страница 106: ...Error Log Dialog Drives Submenu Path Main Menu Status Menu Library Submenu Drives Submenu Use the Drives Submenu to view drive media or firmware information See Figure 5 34 Figure 5 34 Drives Submenu...

Страница 107: ...IT SDLT DLT and LTO drives 01200 01215 for all inch drives State Information supplied by the library firmware Displays the condition of the drive LOADED UNLOADED LOADING UNLOADING EJECTED EMPTY DRIVE...

Страница 108: ...e 00 15 Media Info Dialog Path Main Menu Status Menu Library Submenu Drives Submenu Media Info Dialog Use the Media Info Dialog to display media information in loaded drive elements See Figure 5 37 Fi...

Страница 109: ...ch and SDLT DLT coordinates 01 14 for LTO coordinates 01 18 for AIT coordinates Element Displays the element number that corresponds to the coordinate parameter Accept Y to accept changes N to reject...

Страница 110: ...5Gb DLTIV 40Gb DLT IV SDLT I for LTO 100GB for LTO 1 200GB for LTO 2 for AIT UNKNOWN AIT WRITEABLE AIT PARTITIONED CLEAN TAPE AIT MIC Free Indicates the amount of free space in B KB or MB remaining on...

Страница 111: ...access commands that perform a motion within the library See Figure 5 39 Figure 5 39 Commands Menu Depending on your selection you have the following options Park on page 5 36 Move Submenu on page 5...

Страница 112: ...ve Submenu Path Main Menu Commands Menu Move Submenu Use the Move Submenu to position the gripper or scanner or to move media See Figure 5 42 Figure 5 42 Move Submenu Depending on your selection you h...

Страница 113: ...eld displays module numbers that can be modified if EMs are present 1 4 The third field indicates the storage cell section 1 4 drive bay 1 2 or IE station number The fourth field indicates the column...

Страница 114: ...ns appear See Figure 5 44 and Figure 5 45 Otherwise the changed parameters continue to display but no action is taken Figure 5 44 Response Screen The Accessor positions itself in front of the specific...

Страница 115: ...displays module numbers that can be modified if EMs are present 1 4 The third field indicates the storage cell section 1 4 drive bay 1 2 or IE station number The fourth field indicates the column of t...

Страница 116: ...ys module numbers that can be modified if EMs are present 1 4 The third field displays the storage cell section 1 4 drive bay 1 2 or IE station number The fourth field displays the column of the secti...

Страница 117: ...es the cartridge between the selected Source and Target elements Figure 5 49 Response Screen If a Move Media is attempted without an inventory the following screen appears See Figure 5 50 Figure 5 50...

Страница 118: ...he following screen appears See Figure 5 51 Figure 5 51 Warning Dialog Parameter Value Continue Y to continue N to return to the previous menu If Y is selected for the Continue parameter the Warning m...

Страница 119: ...t can be modified if EMs are present 1 4 The third field indicates the storage cell section 1 4 drive bay 1 2 or IE station number The fourth field indicates the column of the section A E drive port A...

Страница 120: ...to accept changes N to reject changes If Y is selected for the Accept parameter value the Response Screens appear See Figure 5 54 and Figure 5 55 Otherwise the changed parameters continue to display b...

Страница 121: ...ubmenu on page 5 55 Insert Screen Path Main Menu Commands Menu Insert Eject Insert Screen Use Insert Screen to move all cartridges found in the Insert Eject stations to the first available empty stora...

Страница 122: ...Y is selected for the Continue parameter the Warning message is removed If the Partitioned flag is set the following screen appears See Figure 5 60 Figure 5 60 Warning Dialog Parameter Value Continue...

Страница 123: ...een appears See Figure 5 61 Figure 5 61 Warning Dialog Parameter Value Continue Y to continue N to return to the previous menu If Y is selected for the Continue parameter the Warning message is remove...

Страница 124: ...d indicates the column of the section A E drive port A B or IE station column The fifth field indicates the row of the column 01 12 for inch and SDLT DLT coordinates 01 14 for LTO coordinates 01 18 fo...

Страница 125: ...ion is taken Figure 5 65 Target Dialog Parameter Value Coord The first field is the cell type I for I E Station D for Drive S for Storage cell The second field displays module numbers that can be modi...

Страница 126: ...Y is selected for the Accept parameter value the Usage Dialog appears See Figure 5 66 If N is selected the changed parameters continue to display but no action is taken Figure 5 66 Usage Dialog Parame...

Страница 127: ...ber of times the cleaning cartridge has been used 000 511 Maximum Usage The maximum number of allowable uses for the cleaning cartridge 000 511 Accept Y to accept changes N to reject changes If Y is s...

Страница 128: ...ttempted without an inventory the following screen appears See Figure 5 68 Figure 5 68 Warning Dialog Parameter Value Continue Y to continue N to return to the previous menu If Y is selected for the C...

Страница 129: ...present 1 4 The third field indicates the storage cell section 1 4 drive bay 1 2 or IE station number The fourth field indicates the column of the section A E drive port A B or IE station column The f...

Страница 130: ...herwise the changed actions continue to display but no action is taken Figure 5 71 Eject Screen The cartridge is ejected to the first available empty cell in the Insert Eject station The Response Scre...

Страница 131: ...g on page 5 60 Expired Tapes Path Main Menu Commands Menu Insert Eject Eject Clean Tape Submenu Expired Tapes Use the Expired Tapes to remove expired cleaning cartridges from the library without openi...

Страница 132: ...5 75 Warning Dialog Parameter Value Continue Y to continue N to return to the previous menu If Y is selected for the Continue parameter the Warning message is removed Figure 5 76 Expired Tapes Screen...

Страница 133: ...without an inventory the following screen appears See Figure 5 78 Figure 5 78 Warning Dialog Parameter Value Continue Y to continue N to return to the previous menu If Y is selected for the Continue p...

Страница 134: ...ified if EMs are present 1 4 The third field indicates the storage cell section 1 4 drive bay 1 2 or IE station number The fourth field indicates the column of the section A E drive port A B or IE sta...

Страница 135: ...continue to display but no action is taken See Figure 5 81 Figure 5 81 Eject Clean Tape By Coordinate Screen The cartridge is ejected to the first available empty cell in the Insert Eject station The...

Страница 136: ...Parameter Value BC This field displays the cleaning cartridge VOLSER This is the barcode label that is present on the cartridge Status Expired This cleaning cartridge has expired Valid The cleaning ca...

Страница 137: ...s media because the IE station is full no magazine of the correct media type is installed in the IE Station or a cleaning operation is in progress If Y is selected for the Accept parameter value the C...

Страница 138: ...nformation about the type of media elements or configuration of your library See Figure 5 86 Figure 5 86 Database Menu Depending on your selection you have the following options Media Dialog on page 5...

Страница 139: ...dia Dialog Figure 5 87 Media Dialog Parameter Value AAAAA Indicates the volume label A Z 0 9 Accept Y to accept changes N to reject changes Press the button to confirm the changes If Y is selected for...

Страница 140: ...to select specific element information from the database See Figure 5 89 Figure 5 89 Element Dialog Parameter Value Coord The first field indicates the type of cell I for I E Station D for Drive S fo...

Страница 141: ...og appears See Figure 5 90 Otherwise the changed actions continue to display but no action is taken Figure 5 90 Response Dialog Parameter Value Type Displays the element type 3480 IE SDLT DLT IE MIXED...

Страница 142: ...he Continuation Screen appears See Figure 5 91 Figure 5 91 Configuration Screen Parameter Value X position Indicates the horizontal coordinate in millimeters Y position Indicates the vertical coordina...

Страница 143: ...rames The number of frames 1 4 Cells The number of storage cells 1 788 for inch and SDLT DLT cells 1 950 for LTO cells 1 1181 for AIT cells Drives The number of drives 1 48 for inch SDLT DLT and LTO d...

Страница 144: ...n is a graphical representation of the configuration of the library Parameter Value ISSSS Insert Eject station I and 4 columns of Storage Cells S SSSSS 5 columns of Storage Cells S SSSSS 5 columns of...

Страница 145: ...u have the following options Learn Dialog Manipulate Get on page 5 70 Manipulate Put on page 5 70 Learn Dialog Path Main Menu Database Menu Advanced Dialog Learn Dialog The Learn Dialog is password pr...

Страница 146: ...sword Selects the password 0000 9999 Accept Y to accept the changes N to reject the changes Manipulate Put Path Main Menu Database Menu Advanced Dialog Manipulate Put The Manipulate Put is password pr...

Страница 147: ...to change the physical or logical operational characteristics of the Library See Figure 5 98 Figure 5 98 Setup Menu Depending on your selection you have the following options Library Submenu on page 5...

Страница 148: ...5 99 Figure 5 99 Library Submenu Depending on your selection you will have the following options SCSI Submenu on page 5 73 Host Dialog on page 5 77 Trace Dialog on page 5 78 Security Dialog on page 5...

Страница 149: ...e the SCSI Submenu to set the library SCSI ID and parity and to view the SCSI bus type See Figure 5 100 Figure 5 100 SCSI Submenu Depending on your selection you will have the following options Target...

Страница 150: ...cled 0 7 Bus 0 Now Now indicates the SCSI ID address that is currently in effect 0 7 for bus port 0 Bus 1 Next Next indicates the SCSI ID address that takes effect for bus port 1 after power is cycled...

Страница 151: ...SI parity Parity Now If parity is disabled the retries parameter is ignored Retries Next Sets the number of retries 000 255 allowed when a SCSI parity error is detected Retries Now Displays the curren...

Страница 152: ...rt is installed NO indicates the port is Not installed Bus 0 TYPE HVD indicates the bus is high voltage differential LVD indicates the bus is low voltage differential SE indicates the bus is single en...

Страница 153: ...mand sets or clears the flag It is displayed here for information only If set to Y the library will warn the operator that moving media within the library may corrupt host application defined partitio...

Страница 154: ...e serial port NONE RMU is the default to allow the port to be used for RMU communication VCONSOL is used for development only Accept Y to accept changes N to reject changes If Y is selected for the Ac...

Страница 155: ...See Figure 5 106 Figure 5 106 Security Dialog Switching Security From Off to On Parameter Value Security Enabled Y to enable LCD security N indicates that LCD security is not enabled Change password Y...

Страница 156: ...ers continue to display but no action is taken Figure 5 107 Password Dialog Parameter Value Password Indicates the password 0000 9999 Accept Y to accept changes N to reject changes Press the button to...

Страница 157: ...nd the security parameter is disabled the Password Dialog appears See Figure 5 109 If N is selected for the Accept parameter the changed parameters continue to display but no action is taken Figure 5...

Страница 158: ...is Accept Y to accept changes N to reject changes If Y is selected for the Accept parameter and the change password parameter is enabled the Change Password Dialog appears Otherwise the changed parame...

Страница 159: ...ure 5 112 If N is selected for the Accept parameter the changed parameters continue to display but no action is taken Figure 5 112 Password Changed If Y is selected for the Accept parameter value and...

Страница 160: ...d The library shall scan barcode media identifiers This mode requires the use of six character barcodes with one or two character media identifiers DEFAULT indicates that the library supports six char...

Страница 161: ...led through SCSI RES and RVEA For additional information see SCSI Element Addressing document 400122 Y mixed media is enabled and presents I E gaps N collapses I E gaps ASCQ Y use vendor ASC ASCQs N u...

Страница 162: ...effect until the library power is cycled See Figure 5 115 Figure 5 115 Emulate Dialog Parameter Value Library type NATIVE STK 9710 EXB 480 EMASS Accept Y to accept changes N to reject changes If Y is...

Страница 163: ...t port Use the RMU Submenu to set the initial values of the RMU network parameters for remote access See Figure 5 116 Figure 5 116 RMU Submenu Depending on your selection you have the following option...

Страница 164: ...eter Value IP Indicates the IP address four sets of numbers 0 255 Sub Indicates the Subnet address four sets of numbers 0 255 Gat Indicates the Gateway four sets of numbers 0 255 Accept Y to accept ch...

Страница 165: ...Any changes in the Operating Mode parameter value should be made by authorized Service Personnel The default is set to 02 Figure 5 119 Advanced Dialog Parameter Value Auto Teach Y to enable Auto Teach...

Страница 166: ...ridge is not ejected by the host 3 to activate options 1 and 2 4 to disable automatic cartridge recovery on PUT failures 5 to activate options 1 and 4 6 to activate options 2 and 4 7 to activate optio...

Страница 167: ...w and set the drive SCSI ID N to not change the drive SCSI ID Accept Y to accept changes N to reject changes If Enabled is selected or was previously selected for the Drive ID Override parameter and Y...

Страница 168: ...tes the SCSI ID address that takes effect after power is cycled 0 15 Now The SCSI ID address that is currently in effect 0 15 Accept Y to accept changes N to reject changes If Y is selected for the Ac...

Страница 169: ...Media Dialog on page 5 94 View Dialog on page 5 96 Drives Dialog Path Main Menu Setup Menu Cleaning Submenu Drives Dialog Use the Drives Dialog to select automatic or scheduled specifying a time clea...

Страница 170: ...is taken Media Dialog Path Main Menu Setup Menu Cleaning Submenu Media Dialog Use the Media Dialog to specify the barcode number to choose a cleaning tape of a specific media in the library See Figur...

Страница 171: ...for the Continue parameter value the Usage Dialog appears Refer to Figure 5 125 Otherwise the changed parameters continue to display but no action is taken Figure 5 125 Usage Dialog Parameter Value Ty...

Страница 172: ...menu View Dialog Use the View Dialog to see how much a specific cleaning tape has been used See Figure 5 126 Figure 5 126 View Dialog Parameter Value BC Indicates the cleaning tape barcode label Statu...

Страница 173: ...enu Use the Utils Menu to perform library utilities For example set screen controls or date and time See Figure 5 127 Figure 5 127 Utils Menu Depending on your selection you have one of the following...

Страница 174: ...gure 5 129 Screen Dialog Parameter Value Backlight Enable Y to enable LCD backlighting N to disable LCD backlighting Use Screen Saver Y to enable the screen saver N to disable the screen saver Accept...

Страница 175: ...5 131 Otherwise the screen returns to the Library Menu Refer to Figure 5 128 on page 5 97 Figure 5 131 Password Dialog Parameter Value Enter password Selects the password 0000 9999 Accept Y to accept...

Страница 176: ...io Dialog Path Main Menu Utils Menu Library Submenu Audio Dialog Use the Audio Dialog to enable or disable the audio alarm See Figure 5 134 Figure 5 134 Audio Dialog Parameter Value Audio Enabled Y to...

Страница 177: ...Library Submenu Time Dialog Use the Time Dialog to set the library 24 hour time format See Figure 5 136 The library does not automatically adjust for Daylight Savings Time Figure 5 136 Time Dialog Pa...

Страница 178: ...e Dialog to set the library date See Figure 5 137 Figure 5 137 Date Dialog Parameter Value Year Indicates the last two digits of the year 00 99 Month Indicates the two digits of the month 01 12 Day In...

Страница 179: ...e menu selection supports all drive models except for TD 3610 3590 B1A and 3590 E1A Figure 5 138 Drives Submenu Depending on your selection you have the following options Update Microcode Dialog on pa...

Страница 180: ...ng on whether the library has been inventoried If the library has been Inventoried the Update Microcode Dialog displays See Figure 5 140 on page 5 105 If the library needs to be Inventoried the Invent...

Страница 181: ...eld indicates the column of the section A E drive port A B or IE station column The fifth field indicates the row of the column 01 12 for inch and SDLT DLT coordinates 01 14 for LTO coordinates 01 18...

Страница 182: ...ld indicates the column of the section A E drive port A B or IE station column The fifth field indicates the row of the column 01 12 for inch and SDLT DLT coordinates 01 14 for LTO coordinates 01 18 f...

Страница 183: ...een appears See Figure 5 143 Otherwise the changed actions continue to display but no action is taken Figure 5 143 Response Screen Parameter Value Status Running indicates that the current command is...

Страница 184: ...ning is complete the library returns the cleaning tape to the library storage slot All other operations are prohibited while drive cleaning is in progress Figure 5 144 Clean Drives Dialog Parameter Va...

Страница 185: ...s to the coordinate parameter Accept Y to accept changes N to reject changes If Y is selected for the Accept parameter value the Progress Screen appears see Figure 5 145 followed by the Response Scree...

Страница 186: ...displays module numbers that can be modified if EMs are present 1 4 The third field indicates the storage cell section 1 4 drive bay 1 2 or IE station number The fourth field indicates the column of...

Страница 187: ...ure 5 148 Progress Screen Figure 5 149 Response Screen Initialize Submenu Path Main Menu Utils Menu Drives Submenu Initialize Submenu Use the Initialize Submenu to initiate communication with all driv...

Страница 188: ...drive models except TD 3610 3590 B1A and 3590 E1A See Figure 5 151 and Figure 5 152 Figure 5 151 Progress Screen Figure 5 152 Response Screen SCSI Path Main Menu Utils Menu Drives Submenu Initialize...

Страница 189: ...service representatives or administrators See Figure 5 155 Figure 5 155 Service Menu Depending on your selection you have the following options Start Dialog on page 5 114 Diags Submenu on page 5 116...

Страница 190: ...ter Value PM Due Date preventative maintenance is due X Remain Distance remaining on the X direction until PM Y Remain Distance remaining on the Y distance until PM Reset PM values Y to reset PM value...

Страница 191: ...ontinues with either the Start Dialog with No Errors display Figure 5 158 on page 5 115 or the Start Dialog with Errors display Figure 5 159 on page 5 115 This second option provides information for a...

Страница 192: ...re 5 160 Diags Submenu Depending on your selection you have the following options DI DO Submenu on page 5 117 Gripper Submenu on page 5 121 Scanner Submenu on page 5 130 Accessor Submenu on page 5 133...

Страница 193: ...page 5 121 Loopback Dialog Path Main Menu Service Menu Diags Submenu DI DO Submenu Loopback Dialog Use the Loopback Dialog to send test signals from the main control card to other system cards and re...

Страница 194: ...nu Path Main Menu Service Menu Diags Submenu DI DO Submenu Sensors Use the Sensors Submenu to test the sensors in real time See Figure 5 164 Figure 5 163 Sensors Submenu Depending on your selection yo...

Страница 195: ...ch IE_Lock Y_Home X_Home Touch_Tip Gripper_Open Retract_Complete IE_Open Results Blank indicates no test has been run Passed indicates that the previous test executed successfully Failed indicates tha...

Страница 196: ...ON state 1 indicates an OFF state TouchTip 0 indicates not touching 1 indicates touching GripOpen 0 indicates closed 1 indicates open X indicates not implemented RetrComp 0 indicates not retracted 1...

Страница 197: ...lue State Locked indicates that the Insert Eject station is locked Unlocked indicates that the Insert Eject station is unlocked Gripper Submenu Path Main Menu Service Menu Diags Submenu Gripper Submen...

Страница 198: ...ameter Value Cycles to run Indicates the number of cycles to run 1 999 more More selections on the Continuation Menu When more is selected the Continuation Screen appears See Figure 5 169 Figure 5 169...

Страница 199: ...dinates Element Displays the element number that corresponds to the coordinate parameter Accept Y to accept changes N to reject changes If Y is selected for the Accept parameter value the Number of El...

Страница 200: ...og Parameter Value Cycle The number of completed test cycles of the requested cycles Status Shows the status of the indicated cycle Running Completed Error Canceled Cancel Y to cancel the test N to co...

Страница 201: ...log Parameter Value Cycles to run Indicates the number of cycles to run 1 999 more More selections on the Continuation Menu When more is selected the Continuation Dialog appears See Figure 5 173 on pa...

Страница 202: ...Displays the element number that corresponds to the coordinate parameter Accept Y to accept changes N to reject changes If Y is selected for the Accept parameter value the Number of Drives Dialog appe...

Страница 203: ...Value Cycle The number of completed test cycles of the requested cycles Status Shows the status of the indicated cycle Running Completed Error Canceled Cancel Y to cancel the test N to continue runni...

Страница 204: ...e test If Y is selected for the Continue parameter value the Response Screen appears See Figure 5 177 Figure 5 177 Continuation Dialog Parameter Value Media LTO limits open close range for an LTO tape...

Страница 205: ...pe cartridge 3590 limits open close range for a half inch tape cartridge 3490 limits open close range for a half inch tape cartridge 3480 limits open close range for a half inch tape cartridge Grip Op...

Страница 206: ...g Path Main Menu Service Menu Diags Submenu Scanner Submenu Adjust Dialog Use the Adjust Dialog to position the barcode scanner beam over a specific location to adjust the beam This function should be...

Страница 207: ...alog Use the Trigger Dialog to trigger the barcode scanner to read decode and display whichever barcode label is within the range of the beam See Figure 5 180 Figure 5 180 Trigger Dialog Parameter Val...

Страница 208: ...g Parameter Value Loops Displays how often the test has been run Test 1 will read the first storage fiducial and display the found edge coordinates 2 will read the Insert Eject Station fiducial and di...

Страница 209: ...Menu Diags Submenu Accessor Submenu Use the Accessor Submenu to move the Accessor in a selected pattern See Figure 5 182 Figure 5 182 Accessor Submenu Depending on your selection you have the followin...

Страница 210: ...ialog appears Refer to Figure 5 184 Otherwise the changed parameters continue to display but no action is taken Figure 5 184 Response Dialog Parameter Value Cycle Displays the number of completed test...

Страница 211: ...t N to cancel the test If Y is selected for the Continue parameter value the Movement Dialog appears See Figure 5 186 Figure 5 186 Movement Dialog Parameter Value X axis Displays X axis location Y axi...

Страница 212: ...appears See Figure 5 188 Otherwise the changed parameters continue to display but no action is taken Figure 5 188 Response Dialog Parameter Value Cycle The number of completed test cycles of the reque...

Страница 213: ...upplies See Figure 5 189 This screen shows installed DC power supply status with respect to AC input and DC output indicating whether the power supplies are functioning properly If dual power supplies...

Страница 214: ...libration information Before a the teach operation begins you are presented with the option to save all learned offsets in the database If a teach is performed and is successful all previous informati...

Страница 215: ...ponse Screen Figure 5 196 on page 5 140 or the error screen Figure 5 197 on page 5 140 Figure 5 194 Confirmation Screen Keeping learned offsets could damage your library Only trained service personnel...

Страница 216: ...calibrate the library coordinate information All previous configuration and inventory information is retained See Figure 5 198 Figure 5 198 Teach Current Dialog Parameter Value Continue Y to continue...

Страница 217: ...er value the Conformation Screen Figure 5 200 on page 5 141 appears If N is selected the Progress Screen Figure 5 201 on page 5 142 appears Figure 5 200 Confirmation Screen Parameter Value Confirm Y t...

Страница 218: ...ch Current operation 1 4 depending on the number of EMs Accept Y to accept changes N to reject changes If Y is selected for the Accept parameter value the Progress Screen refer to Figure 5 202 on page...

Страница 219: ...dges from storage element to storage element but not to the tape drives You must enter the correct password to use this dialog See Figure 5 205 and Figure 5 206 Figure 5 205 Password Dialog Figure 5 2...

Страница 220: ...es Accept Y to accept the changes N to reject the changes If Y is selected for the Accept parameter value the Response Dialog appears See Figure 5 208 Otherwise the changed parameters continue to disp...

Страница 221: ...is selected for the Continue parameter the Warning message is removed If the Partitioned flag is set the following screen appears See Figure 5 210 Figure 5 210 Warning Dialog Parameter Value Continue...

Страница 222: ...options on the Advanced Dialog are used by product engineering services and they are password protected See Figure 5 211 Figure 5 211 Advanced Dialog After making a selection the password dialog appe...

Страница 223: ...or NCTP media and all libraries that use the MEDIA ID mode For libraries that contain AIT DLT and LTO media the Increase GDR setting can be set to Y ADIC recommends setting the Increase GDR to Y if y...

Страница 224: ...tes to reflect the changes Otherwise the changed parameters continue to display but no action is taken About Screen Path Main Menu About Screen The About Screen displays your library and RMU firmware...

Страница 225: ...ion 6 8 Manually Removing Cartridges 6 9 Understanding Barcodes 6 10 Barcode Labels 6 12 Applying Barcode Labels 6 13 Barcode Label Restrictions 6 14 Cleaning Drives 6 18 Manual Clean without Library...

Страница 226: ...6 2 Processing Media 6 00054 02 Rev A...

Страница 227: ...cations for tape cartridge life To reduce the chance of problems with your tape cartridges or damage to your tape drive follow these guidelines Inspecting Tape Cartridges below Handling Tape Cartridge...

Страница 228: ...ader Do not expose cartridges to moisture or direct sunlight Do not expose cartridges to magnetic fields Do not open the cartridge door unnecessarily because this can expose the cartridge to contamina...

Страница 229: ...ny condensation in or on the tape cartridge Make sure that the environmental temperature and humidity is within levels specified per the tape drive specifications Transporting Tape Cartridges The foll...

Страница 230: ...he I E Station slides out Step 2 Remove the cartridge magazine Step 3 Insert the cartridge into the storage cell in the cartridge magazine Step 4 Place the cartridge magazine into the I E Station Step...

Страница 231: ...enabled all locks must be disabled before the procedure will succeed Step 1 If the password option is enabled enter the password Step 2 Use the Operator Panel to place the library into the NOT READY s...

Страница 232: ...ollow this procedure Step 1 Issue a SCSI MOVE MEDIUM command from the host with the source storage cell and the destination I E Station cell or Execute the Eject command from the Operator Panel Refer...

Страница 233: ...cessfully work Step 1 If the password option is enabled enter the password Step 2 Use the Operator Panel to place the library into the NOT READY state Refer to Mode Dialog on page 5 10 The Accessor co...

Страница 234: ...have no special meaning DEFAULT Labels may have six characters or six characters plus one or two media identifier characters MEDIA ID Labels must have six characters and one or two media identifier ch...

Страница 235: ...e Systems Inc or Tri Optic Engineered Data Products 3490E 1 2 6 E 0 E 3590 1 2 6 J 0 J 3590DLc 1 2 6 K 0 K NCTP 1 2 6 M 0 M CompactTape III 6 C 1 C Engineered Data Products 1703 0C CompactTape IV 6 D...

Страница 236: ...zones a minimum of 5 mm No black marks can be present in the intermediate spaces or rest zones No white areas may be present on the bars A nine digit barcode must not match the serial number of the ex...

Страница 237: ...tion on the front of the cartridge See Figure 6 1 on page 14 for more information on applying a barcode label Do not place a barcode label on top of a cartridge Placing a barcode label on top of a car...

Страница 238: ...alar 1000 supports a range of media labels With media ID enabled some additional restrictions apply The label types supported in media ID enabled and media ID disabled are illustrated in Figure 6 2 Do...

Страница 239: ...ch label type identifies the restriction associated with the label 1 This is a six character Tri Optic forward printed label for a half inch cartridge This label can be used only when media ID is disa...

Страница 240: ...DLT cartridge This label can be used only when media ID is disabled 5 This is a six character Code 39 forward printed label for a DLT cartridge This label can be used only when media ID is disabled 6...

Страница 241: ...ntifier is required The seventh or eighth character media identifier may be separate from the barcode label as in the case of inch media or may be embedded in the barcode label as in the case of SDLT...

Страница 242: ...anual Clean with Library Tapes on page 19 Immediate AutoClean on page 20 Library Delayed AutoClean on page 21 Host Controlled Cleaning on page 22 Manual Clean without Library Cleaning Tapes Use this m...

Страница 243: ...Cleaning Cartridge on page 27 Use this procedure if all of the following are true Host application does not perform drive cleaning Host timeout for moves from the drives is too short to include clean...

Страница 244: ...is procedure For further information refer to Inserting a Cleaning Cartridge on page 25 or Declaring a Cleaning Cartridge on page 27 During a move from a drive to a storage location a drive reports to...

Страница 245: ...the library before beginning this procedure For further information refer to Inserting a Cleaning Cartridge on page 25 or Declaring a Cleaning Cartridge on page 27 Use this procedure to clean your dr...

Страница 246: ...apes Library AutoClean must be disabled The host must not share the library controlled cleaning tapes because the library does not track host directed cleaning and consequently does not increment the...

Страница 247: ...the path and the Cleaning Submenu appears See Figure 6 3 Figure 6 3 Cleaning Submenu Step 2 Select Drives and the AutoClean dialog appears See Figure 6 4 Figure 6 4 AutoClean Dialog Step 3 Select Aut...

Страница 248: ...period normally associated with waiting for a dismount response Delayed sets the cleaning process time by setting the Hours and Min option values Note Use the Delayed option for routine or normal down...

Страница 249: ...ean Tape Dialog For further information refer to Insert Clean Tape Dialog on page 5 47 Proceed as follows to move cleaning tapes into the library Step 1 Follow the path and the Insert Clean Tape Dialo...

Страница 250: ...many times the cleaning tape can be used before it must be ejected Accept If several cleaning tapes are inserted all get the same usage setup When the insert operation completes the Command Complete...

Страница 251: ...is menu to inform the library that this tape is a Cleaning Tape For further information refer to Media Dialog on page 5 94 Path Setup Menu Cleaning Submenu Media Dialog Step 1 Follow the path and the...

Страница 252: ...us of your cleaning tapes For further information refer to View Dialog on page 5 96 Path Setup Menu Cleaning Submenu View Dialog Step 1 Follow the path and the View Dialog appears to show you the BC n...

Страница 253: ...7 Error Messages Overview 7 3 Service Action Codes 7 3 Operator Intervention Messages 7 23 Error Log Codes 7 28...

Страница 254: ...7 2 Error Messages 6 00054 02 Rev A...

Страница 255: ...SACs are generated and posted to the Operator Panel When operator intervention is required a message is generated at the Operator Panel This chapter is organized as follows Service Action Codes Opera...

Страница 256: ...nd restart the library by using the Operator Panel Main Menu Mode Dialog or the Main Circuit Breaker switch on the AC Power Compartment in the lower right corner at the back of the CM For more informa...

Страница 257: ...C Refer to ADIC Technical Assistance Center on page 1 5 for ATAC contact information 03 Type 3 library software errors including microcode and operating system errors Action 1 To recover from the erro...

Страница 258: ...eve logs Action 3 Contact ATAC Refer to ADIC Technical Assistance Center on page 1 5 for ATAC contact information 05 A permanent library software error occurred Action 1 To recover from the error shut...

Страница 259: ...ction 1 Contact ATAC For contact information refer to ADIC Technical Assistance Center on page 1 5 12 Barcode scanner communication is OK barcode scanner reports that data is bad Action 1 Contact ATAC...

Страница 260: ...5 15 The Barcode scanner is not capable of fully supporting all different labels in a Mixed Media Library Action 1 Contact ATAC For contact information refer to ADIC Technical Assistance Center on pag...

Страница 261: ...ists contact ATAC For contact information refer to ADIC Technical Assistance Center on page 1 5 32 Wrong SCSI bus connection is detected Action 1 Verify that the Host SCSI bus is the same type HVD LVD...

Страница 262: ...ed or persists contact ATAC For contact information refer to ADIC Technical Assistance Center on page 1 5 40 The Library Aisle power cannot be enabled Action 1 Check that all front doors are closed an...

Страница 263: ...ation the calculated X position exceeded the allowable limits Action 1 Contact ATAC For contact information refer to ADIC Technical Assistance Center on page 1 5 46 During a Get or Put operation the c...

Страница 264: ...Assistance Center on page 1 5 70 Failures detected in the Gripper Assembly Finger Open operation Action 1 Perform a Teach Current operation Main Menu Service Teach Teach Current Action 2 If the probl...

Страница 265: ...Touch Tip operation Action 1 Perform a Teach Current operation Main Menu Service Teach Teach Current Action 2 If the problem is not corrected or persists contact ATAC For contact information refer to...

Страница 266: ...on 1 Perform a Teach Current operation Main Menu Service Teach Teach Current Action 2 If the problem is not corrected or persists contact ATAC For contact information refer to ADIC Technical Assistanc...

Страница 267: ...a SDLT DLT tape drive Action 1 Check the SDLT DLT tape drive to ensure that it is powered on and working properly Refer to the SDLT DLT Maintenance Guide for any SDLT DLT drive problem Action 2 Perfo...

Страница 268: ...erform a Teach Current operation Main Menu Service Teach Teach Current Action 3 If the problem is not corrected or persists contact ATAC For contact information refer to ADIC Technical Assistance Cent...

Страница 269: ...81 Failures detected in the Y Axis Servo system Action 1 Contact ATAC For contact information refer to ADIC Technical Assistance Center on page 1 5 82 An unexpected Motors Control condition was recei...

Страница 270: ...tact information refer to ADIC Technical Assistance Center on page 1 5 90 An LSC1 card was detected by the Library firmware when an LSC2 card is required for this Library configuration to operate Acti...

Страница 271: ...stance Center on page 1 5 97 Firmware detected that the LGR card installed in the Library can not be used with this level of firmware One of the following conditions exist A new level of firmware is i...

Страница 272: ...nostic loop test from the LSC card to the LMC card Action 1 Contact ATAC For contact information refer to ADIC Technical Assistance Center on page 1 5 F1 Failures were detected while running the diagn...

Страница 273: ...tact information refer to ADIC Technical Assistance Center on page 1 5 F7 Failures detected in the LSC card during Power On Self Test POST Action 1 Contact ATAC For contact information refer to ADIC T...

Страница 274: ...Preventive Maintenance is required Action 1 Contact ATAC to schedule Preventive Maintenance For contact information refer to ADIC Technical Assistance Center on page 1 5 Table 7 1 SAC Reporting Conti...

Страница 275: ...ntion Messages Message Lines Variables Alert not found Press Enter None WARNING The accessor could not be parked OK None WARNING Moving tapes may corrupt partitions Continue X X Y to continue ERROR In...

Страница 276: ...e open and close the I E station door again None INTERVENTION NEEDED Unexpected door open detected Check all doors for closure None INTERVENTION NEEDED Single ended device detected on diff SCSI bus po...

Страница 277: ...ber B row number INTERVENTION NEEDED Remove cartridge from cell Cell X Y Z A B X index number Y frame number Z section letter A column number B row number CELL IS OBSTRUCTED Please check to see if cel...

Страница 278: ...er Z section letter A column number B row number TAPE PUSH FAILED Please remove tape from drive Drive X Y Z A B X index number Y frame number Z section letter A column number B row number CLEAN TAPE M...

Страница 279: ...lt Converter Number POWER SUPPLY ERROR Check AC box and AC connection to primary second DC supplies None INVALID LABEL Please check cart for valid label X Y Z A B C X type ID Y index number Z frame nu...

Страница 280: ...02 Rev A Error Log Codes If an error occurs record the error information from the Error Log screen for future reference Refer to Error Log Dialog on page 5 28 Table 7 3 Error Log Reporting Type Error...

Страница 281: ...arcode number 2 13 book organization 1 3 C cartridge accessor 2 12 storage 2 8 circuit breaker 4 7 4 10 clean drives dialog 5 108 cleaning drives 6 18 with cleaning tapes 6 19 without cleaning tapes 6...

Страница 282: ...perator panel 4 5 power on 4 5 initialize submenu 5 111 insert clean tape dialog 5 47 insert media Insert Eject station 6 6 insert screen 5 45 Insert Eject Magazines 2 3 Insert Eject station 2 14 6 6...

Страница 283: ...ialog 5 86 rmu submenu IP dialog 5 88 SCSI dialog target ID dialog 5 74 SCSI submenu 5 73 security dialog 5 79 trace dialog 5 78 status 5 12 status menu 5 11 library submenu element dialog 5 22 logs s...

Страница 284: ...MIB file 4 17 support log 4 20 supported browsers 4 12 updating RMU firmware 4 20 using the operator panel 4 21 viewing diagnostic files logs 4 20 rmu submenu 5 87 S SAC 7 3 SAC dialog 5 143 SACs com...

Отзывы: