background image


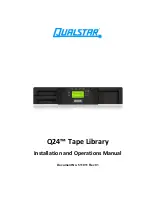
Q24™


Tape


Library


Installation


and


Operations


Manual


Document No. 511011 Rev 01 


Содержание Q24

Страница 1: ...Q24 Tape Library Installation and Operations Manual Document No 511011 Rev 01...

Страница 2: ...netic optical manual or otherwise without the express written permission of QUALSTAR Trademark Notices QUALSTAR makes no representation or guarantees with respect to the contents of this document and...

Страница 3: ...s identified in this manual are specified as field replaceable These include the power supply tape drives library controller and magazines User replacement of such complete components with correspondi...

Страница 4: ...t the full weight of the rack rests on the leveling jacks Install stabilizing feet on the rack Extend only one rack component at a time CAUTION Static sensitive Risk of damage to devices A discharge o...

Страница 5: ...y controller 13 2 11 Installing a power supply 14 2 12 Connecting the cables 15 2 12 1 Connecting the power cord 15 2 12 2 Connecting a Fibre Channel cable 15 2 12 3 Connecting a SAS cable 16 2 12 4 C...

Страница 6: ...eral diagnostic 64 4 6 1 System test 64 4 6 2 Slot to Slot test 64 4 6 3 Library verify test 64 4 7 Error codes 65 4 7 1 Error messaging 65 4 7 2 Error Message format 66 4 7 3 OCP error reporting 66 4...

Страница 7: ...ecifications 88 7 1 Hardware specifications 88 7 2 Operating environment 88 7 3 Maximum storage capacity and data transfer rate 89 8 Agency certifications 90 8 1 Recycling and disposal 90 8 2 Device s...

Страница 8: ...l a power supply 14 Figure 18 Connect the FC cable 16 Figure 19 Proper barcode label placement 19 Figure 20 Write protecting a tape cartridge 20 Figure 21 Main menu 24 Figure 22 Information menu 1 of...

Страница 9: ...1 Front panel magazine removal 63 Figure 62 OCP Error display 66 Figure 63 RMU Error display 66 Figure 64 Remove a tape drive 81 Figure 65 Remove the library controller 82 Figure 66 Remove the power s...

Страница 10: ...ional half height tape drive may be field installed in a library equipped with a single drive Technology upgrade tape drive technologies can be upgraded in the field i e LTO5 to LTO6 Service friendly...

Страница 11: ...dditional cleaning is not necessary 5 LED ATTENTION amber is illuminated when the library has detected a condition that requires attention by the operator 6 LED ERROR amber is illuminated when an unre...

Страница 12: ...is on the left side tape drives are in the middle and the library controller is on the right side of the library Ref Description Ref Description 1 Power supply A Storage location for shipping lock 2 T...

Страница 13: ...rations Ref Description 1 Magazine release holes 2 Fan vent 3 FC connectors 4 Tape drive LED Figure 5 FC half height tape drive 1 3 3 Library controller Ref Description 1 Ethernet port RMU connection...

Страница 14: ...e Back Minimum of 15 4 cm 6 inches Front Minimum of 30 8 cm 12 inches for mail slot Minimum of 60 cm to remove magazines 24 inches Sides Minimum of 5 08 cm 2 inches Table 1 Location requirements For f...

Страница 15: ...HBA channel Once a tape drive has been plugged in it should remain on the same channel to retain the association between the HBA channel and WWID 2 3 Fibre Channel Requirements Fibre Channel FC allow...

Страница 16: ...t bus adapter HBA or through a storage area network SAN NOTE Use an appropriate HBA for your tape drive due to performance considerations A lower throughput HBA might result in performance degradation...

Страница 17: ...serve local health and safety requirements and guidelines for manual material handling Remove all tape cartridges to reduce the weight Obtain adequate assistance to lift and stabilize the library duri...

Страница 18: ...e shipping materials from the top of the library 4 Remove the accessory package and set aside if included 5 Remove the two rack rails and set aside if included 6 Lift the library out of the carton and...

Страница 19: ...vided on the rear panel Important The lock is required if the library is to be returned or transported to a new location at some future time 4 Replace the yellow label on the top of the library Figure...

Страница 20: ...Secure one rail to each side of the rack in your chosen rack location with a 3 Phillips screwdriver Insure the rails are mounted level and at the same rack height on each side 5 Secure both the front...

Страница 21: ...has one tape drive installed an additional tape drive may be added now or after installation of the library is complete Required tool 2 Phillips screwdriver To install tape drives 1 The Q24 has one f...

Страница 22: ...into the drive bay until the tape drive seats itself against the back of the library Push the tab for the product ID label back into the library 7 Tighten the blue captive screws with your fingers to...

Страница 23: ...ews with your fingers to secure the library controller 2 11 Installing a power supply The power supply is installed from the rear of the library If the library does not have a power supply installed i...

Страница 24: ...brary Ensure that the power cord meets individual country specific safety standards Use a sufficient conductor current capacity amps to avoid overheating the cord The manufacturer disclaims all liabil...

Страница 25: ...e connector on the HBA If you are using a cable with a single connector on each end plug the other end into the connector on the tape drive If you are using a SAS fan out cable plug one mini SAS conne...

Страница 26: ...you begin using the library an understanding of the media type use maintenance and how to properly label and write protect your tape cartridges will help you to prolong the life of your tapes as well...

Страница 27: ...your model of the library Clean the tape drive when the Clean Drive LED is illuminated Be sure to use only Ultrium universal cleaning cartridges Do not drop an LTO data cartridge Excessive shock can d...

Страница 28: ...r attaching the adhesive backed bar code label Only apply labels as shown in Figure 19 Figure 19 Proper barcode label placement NOTE The bar code label should only be applied with the alpha numeric po...

Страница 29: ...ed whenever a magazine is removed from the library The magazines can be unlocked via the Operator Control Panel OCP or the Remote Management Unit RMU OCP see Figure 24 RMU see Section 3 2 8 3 Releasin...

Страница 30: ...de is restricted to the information and login menu screens until a login with correct PIN is entered 3 1 2 OCP Rules OCP commands obey the following basic rules 1 Any operational conflict between comm...

Страница 31: ...rned off and the error LED will be illuminated The OCP will also display a specific error code to help identify the failure The following are additional operational details regarding the LED s The Rea...

Страница 32: ...uttons After pressing the ENTER button to select the displayed value the cursor moves to the next editable digit Each digit can be changed in the same way After pressing the ENTER button at the last d...

Страница 33: ...Q24 Tape Library Installation and Operations Manual Copyright QUALSTAR 2014 24 3 1 7 Menu flow charts OCP Figure 21 Main menu...

Страница 34: ...Q24 Tape Library Installation and Operations Manual Copyright QUALSTAR 2014 25 Figure 22 Information menu 1 of 2...

Страница 35: ...Q24 Tape Library Installation and Operations Manual Copyright QUALSTAR 2014 26 Figure 23 Information menu 2 of 2...

Страница 36: ...Q24 Tape Library Installation and Operations Manual Copyright QUALSTAR 2014 27 Figure 24 Commands menu...

Страница 37: ...Q24 Tape Library Installation and Operations Manual Copyright QUALSTAR 2014 28 Figure 25 Configuration menu...

Страница 38: ...Q24 Tape Library Installation and Operations Manual Copyright QUALSTAR 2014 29 Figure 26 Service menu 1 of 2...

Страница 39: ...Q24 Tape Library Installation and Operations Manual Copyright QUALSTAR 2014 30 Figure 27 Service menu 2 of 2...

Страница 40: ...e library To allow access from the RMU you must first set the desired static IP address at the OCP or configure to use DHCP 3 2 2 Operations through the RMU The following operations are available thro...

Страница 41: ...ons of the RMU take the library offline This inactive mode can interfere with host based application software causing data loss Make sure the library is idle before attempting to perform any remote op...

Страница 42: ...n the selected action and object At the right side of every screen a summary of the system status is displayed and continually updated Figure 30 System Status summary The status icons that may be disp...

Страница 43: ...Clean Option is configured the status will be displayed here 3 2 5 Identity 3 2 5 1 Viewing the static library identity This page provides access to the static information about the system No changes...

Страница 44: ...manufacturer Product ID Model identification of the drive Serial Number Serial number of the drive Firmware Revision Operating firmware level of the drive World Wide ID Unique unit identifier of the...

Страница 45: ...is displayed 1 Network information MAC Address Full Qualified Domain Name IPv4 Addressing Enabled Disabled IPv4 DNS Server 1 IP address of domain name server 1 IPv4 DNS Server 2 IP address of domain...

Страница 46: ...status Status Indicates whether library is ready to accept commands Cartridge in Transport Indicates whether the media changer contains a cartridge Number Of Moves Odometer Indicates total number of m...

Страница 47: ...nformation will be shown by selecting it from the pull down menu Figure 35 Drive status The following information is displayed 1 Drive status Status Indicates whether drive is ready for use Cartridge...

Страница 48: ...ovides detailed information about the tape inventory in the library A summary of each magazine is shown To get detailed information click on the button This will expand the display for the specified m...

Страница 49: ...of operation Sequential In sequential mode the library automatically loads and unloads tapes from the tape drive The sequential mode is used when the backup software is not media changer aware or was...

Страница 50: ...s English Possible alternate language selections are German Italian Spanish and French In order for the selection to take affect the desired language must be selected in the drop down menu and the app...

Страница 51: ...rrent configuration of all tape drives in the library and allows modification to the configuration The user is also able to select the Power On check box through this page to activate the drive Figure...

Страница 52: ...by editing the name and submitting the changes The Domain Name may be up to 39 chars long Allowed characters are A Z a z 0 9 hyphen and period Disallowed characters are hyphen as the first character b...

Страница 53: ...server DNS server A DNS server allows the library to communicate with other network clients via their host name If you have a DNS Server on your network enter the IP address in this field o IPv6 DNS S...

Страница 54: ...MP Target Addresses o IPv4 Target 1 o IPv4 Target 2 o IPv4 Target 3 IPv6 SNMP Target Addresses o IPv6 Target 1 o IPv6 Target 2 o IPv6 Target 3 Community name Security User Name SNMP Trap Notification...

Страница 55: ...ain OCP Access PIN Enabled Select this item if you would like the Operator Control Panel display to be password protected OCP Access PIN Code The password for accessing the OCP when the OCP Access PIN...

Страница 56: ...IP address of the network SNTP time server the address may be a maximum of 40 characters o UTC Time Zone Offset This drop down menu allows the administrator to select the appropriate time zone offset...

Страница 57: ...ilter 3 2 7 10 Configuring event parameters for Email Notification This page allows the user to modify the event notification parameters Figure 47 Event parameters for Email Notification Changes that...

Страница 58: ...ngs of the unit after a restore to factory defaults Save Restore Configuration Save Configuration to File The Save button will save the current library settings to a file which can later be uploaded b...

Страница 59: ...ape cartridges within the library Figure 49 Move media Select the source and destination and then click the Move button to move a tape cartridge 3 2 8 2 Determining current media Inventory This page a...

Страница 60: ...ine manually see Section 4 4 This manual process should only be used if the magazine cannot be released using the OCP or the RMU 3 2 9 Service 3 2 9 1 Performing General library Diagnostics This page...

Страница 61: ...n be made are Advance Diagnostic Select Drive and Select the Drive Test to be performed Drive Support Ticket Select Drive and choose last current unload Save Drive Dump Select Drive once defined 3 2 9...

Страница 62: ...reboot the RMU s connection to the library may be lost depending on the timing of the reboot This is because the RMU web page refreshes itself at intervals defined by a default time delay If the rebo...

Страница 63: ...mp log creates the log and Save Service Dump allows the direct viewing or saving of the file 3 2 9 6 Cleaning tape drive s This page allows the user to initiate the tape drive cleaning process if requ...

Страница 64: ...Q24 Tape Library Installation and Operations Manual Copyright QUALSTAR 2014 55 3 2 9 7 Cartridge Memory Provides details of up to 24 tapes stored in the library Figure 58 Cartridge Memory...

Страница 65: ...6 or 256 257 Magazines 1 and 2 Dual partition configuration Partition 1 Tape drives half height drive 1 default element address 256 Magazines 1 Partition 2 Tape drives half height drive 2 default elem...

Страница 66: ...DHCP Disabled Mail slot configuration Disabled Configure reserved slots Reserved slots 0 SCSI master drive The lowest physical drive is initially the LUN master drive OCP contrast setting 10 Library...

Страница 67: ...ay need to be checked If spare cables are available this can be achieved by replacing one cable at a time and assessing whether the problem is cured as a result Note that power may be left on while ex...

Страница 68: ...network consider comparing to a local only backup Make sure the backup server has enough memory to handle the bandwidth of the backup or restore Clean the tape drive using OCP see Section 3 1 7 RMU se...

Страница 69: ...sed to harsh environmental or electrical conditions and is not physically damaged in any way Many backup applications do not read or write to tapes that were created using a different backup applicati...

Страница 70: ...of being defective Export the tape and load a known good tape In some cases a tape can be worn out have a defective tape memory or have been formatted as a Firmware Upgrade Cartridge Any tape that is...

Страница 71: ...cartridges before moving the library To remove a stuck tape cartridge follow these steps 1 Unlock the magazine using the OCP see Section 3 1 7 RMU see Section 3 2 8 3 Emergency release if you are not...

Страница 72: ...1 Access hole for the right magazine 2 Access hole for the left magazine Figure 60 Rear panel access holes 4 Push the end of a small metal pin or straightened paper clip into the magazine access hole...

Страница 73: ...un the system test navigate with the RMU or OCP to the appropriate screen RMU screen Service General Diagnostic System Test OCP screen Main Menu Service Service Library Run Tests System Test 4 6 2 Slo...

Страница 74: ...n of the test skipping step 7 7 The library loads the scratch tape into the first tape drive then unloads it and returns it to the mail slot If the user selected to test both the tape drives if presen...

Страница 75: ...essage appears on the OCP The information is shown in 3 different message displays as shown in the following example 1 General Error display Select the Hint button to show the Hint display 2 Hint disp...

Страница 76: ...act technical support Media changer probably defective Media changer hardware not working cables distribution boards media changer controller 84 Setting of gripper motor parameters failed Reset the un...

Страница 77: ...connected or defect Elevator motor voltage to low Media changer controller or distribution boards defect Check elevator mechanism according stiffness in movement 8C Rotation blocked Run Library Verify...

Страница 78: ...technical support Media changer probably defective Elevator distribution board defect Cabling incorrect Check gripper gears 94 Slider outside range Slider has reached a position beyond the expected ra...

Страница 79: ...Test after several occurrences contact technical support Media changer probably defective Gripper motor not connected or defect Media changer controller or distribution boards defect Check gripper mec...

Страница 80: ...d Media changer controller or distribution boards defect Check top sled mechanism gears sheet guide locking according stiffness in movement A4 Cannot find sled 2 block within the expected range Note o...

Страница 81: ...ntroller communication failed Reset the unit and retry operation After several occurrences contact technical support Media changer probably defective No communication from library controller to media...

Страница 82: ...technical support Library controller probably defective Probably a hardware problem check library controller C8 Cannot Upgrade from FTP Retry of Firmware upgrade if not successful contact technical su...

Страница 83: ...y operation after several occurrences contact technical support Library controller probably defective Probably a hardware problem check library controller D9 No SCSI IC detected Retry operation after...

Страница 84: ...ve probably defective F1 Drive Communication Error Library controller has lost communication to drive The sub code indicates which drive is affected Example Sub code 01 drive 1 Retry operation if not...

Страница 85: ...robably defective Drive leader bent Drive initialize repeatedly Drive defect no function F8 Invalid drive command Retry operation if not successful contact technical support Drive probably defective F...

Страница 86: ...tory scan 21 Error during gripper close 22 Error slider home movement 23 Error during move gripper to scan pos 24 Error reading barcode label 25 Error during move sled to scan position 26 Error during...

Страница 87: ...il slot failed 81 Error during movement to mail slot open position 82 Error during moving back sensor was found 90 Movement to home position failed 91 Elevator movement to home position failed 92 Erro...

Страница 88: ...88 Error accessing slot status 90 Media changer load not reached tape present sensor 91 No activity after Load command 92 Timeout while loading tape 93 No activity after Load command 94 Timeout drive...

Страница 89: ...itive devices This type of damage may reduce the life expectancy of the device To prevent electrostatic damage observe the following precautions Transport products in static safe containers such as co...

Страница 90: ...el 3 Loosen the blue thumbscrews located on the rear of the tape drive with your fingers 4 Slightly pull out and push down the tab containing the product ID label so it does not interfere with the tap...

Страница 91: ...of the library 4 Loosen the blue thumbscrews located on the library controller with your fingers 5 Pull the library controller straight out of the library as shown below Figure 65 Remove the library c...

Страница 92: ...ackage it in the original or replacement device packaging materials 5 8 Replacing the power supply Use this procedure to replace the power supply with another power supply 1 Remove the power supply fr...

Страница 93: ...chassis Remove all tape cartridges to reduce the weight see Section 4 3 Remove the magazines from the library with OCP see Section 3 1 7 RMU see Section 3 2 8 3 2 If the OCP or RMU does not work remov...

Страница 94: ...installing Shipping Lock 4 To store or ship the removed base chassis repackage it in its original packaging materials see Section 6 5 11 Replacing the base chassis 1 Remove the base chassis from the...

Страница 95: ...lize the library during packaging NOTE Before transporting the library the shipping lock and the yellow label must be replaced into the slot on the top cover of the library from its storage slot on th...

Страница 96: ...ape Library Installation and Operations Manual Copyright QUALSTAR 2014 87 Figure 69 Packaging the library Step Description 1 Packaging box 2 Bottom shell 3 Library 4 Top shell Table 8 Packaging the li...

Страница 97: ...34 lb 15 6 kg Weight with media 2 HH drive unit 46 lb 21 1 kg Table 9 Hardware specifications 7 2 Operating environment Operating Temperature 10 C to 35 C Max temperature rise 10 C hour Humidity 15 RH...

Страница 98: ...ximum storage capacity 24 data cartridges Native 60 TB Compressed 150 TB assuming 2 5 1 compression Maximum data transfer rate single drive Native 210 MB sec 756 GB hour Compressed 525 MB sec 1 9 TB h...

Страница 99: ...ackaging indicates that this product must not be disposed of with your other household waste Instead it is your responsibility to dispose of your equipment by handling it over to a designated collecti...

Страница 100: ...950 USA Canada FCC ETL according to UL 60950 Germany GS Figure 71 Device standards 8 3 CE mark The CE mark is a mandatory conformity mark on many products placed on the single market in the European E...

Страница 101: ...ned to provide reasonable protection against radio and television interference in a residential installation Although the equipment has been tested and found to comply with the allowed RF emission lim...

Страница 102: ...system that can run at very high speeds over inexpensive twisted pair copper cables OCP Operator Control Panel Includes display buttons and LED s and enables the user to operate the unit from the fro...

Страница 103: ...tecting 19 Tape drive 12 Unpacking the library 9 USB device 16 Operating 21 OCP 21 Operating modes 21 Philosophy 21 Partitioning 56 RMU 31 Date time 47 Factory defaults 49 Library identity dynamic 37...

Отзывы: