Step 1
Factory Hardware Requirement:
This product is designed to fit over your original factory soft top hardware, Door Surrounds, Windshield header and fac tory soft
upper metal door frames (if applicable).your vehicle.
Remove Existing Soft Top Fabric
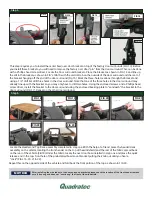
Put on safety glasses. After verifying that you have the correct hardware, remove the existing soft top from the vehicle. This will in-
clude removing the existing soft top fabric from the front windshield header. This will require the use of a Phillips head screw driver.
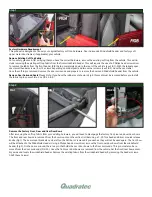
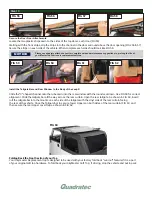
To remove the fabric from the front header, fold the top completely down to the rear of the vehicle (see FIG1). With the tailgate open,
unscrew all header screws (8 or 14 screws depending on model year) and two corner screws (see FIG2). Save these screws!
Once the soft top is removed, Remove the door surrounds and prepare to remove the bows and Windshield header from the vehicle.
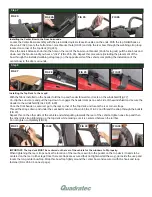
Remove Door Surround Seals
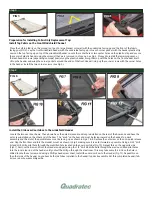
Please Note: If you have the rubber seal shown in Fig A this seal must be removed before you install
the fabric top to your vehicle. See FIG’s A & B.
Step 2
Remove the Factory Front, Rear and Over Door Bows
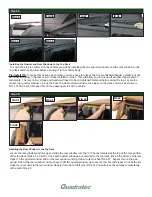
After removing the soft top fabric from your existing hardware, you will need to disengage the factory front, rear and over door bows.
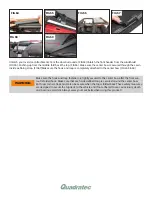
The front and rear bows are removed from the bow mounts on the vertical roll bar using a T-30 Torx head and driver or quick release
knobs (Fig1). The bow mount brackets can be left on the Roll bar or removed if you wish as they will not be used again. The front bow
will be attached to the Windshield Header. Using a Philips head screw driver, remove the front over door bows from the windshield
header (Fig 2). On the door surround, there is a pin that holds the over door bows to the Door surrounds. This pin must also be re
-
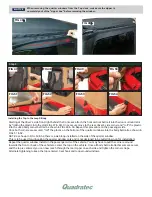
moved from the door surrounds (FIG 2A). Once the front over door bows are removed from the vehicle, Set the front/rear bow assem-
bly aside and locate the windshield header. Remove the existing fabric from the windshield header by removing the header screws.
SAVE these Screws!
FIG 1
FIG 2
FIG 2A

