Qomo QIT600 Скачать руководство пользователя страница 50

PAGE

48

PAGE

47

Software

Q1. What operating system can be supported so far? 
A1. IDTI 21.5” In-Cell multi touch screen supports Windows 7, Vista, and XP.  
Windows 7 is recommended for best touch-screen performance.

Q2. Is Mac OS supported? 
A2. Mac OS is not yet supported.  However, this will be planned out in the near 
future.

Q3. Does this product work as a professional tablet? 
A3. IDTI IS215P provides all graphic design software.  It does not yet support 
pressure sensitivity.

Q4. Does it support any graphic software?  ex: Microsoft Paint, Adobe 
Photoshop
A4. IDTI IS215P provides all graphic design software.  It does not yet support 
pressure sensitivity.

Accessories

Q1. What type of battery is used for the stylus?
A1. Lithium battery is used for the stylus.

Q2. How do I charge the stylus?
A2. Connect the stylus with the micro USB charger to the USB port on the 
computer.

Q3. How long is the battery life of the stylus?
A3. Under normal condition, it takes about 2 hours to fully charge the stylus.  
The fully charged stylus can be used for more than 3 days without the need for 
charging, and it can stand by for 1,000 hours.

Q4. Can I use 2 styluses at the same time?
A4. IDTI 21.5” In-Cell multi touch screen supports multi-touch function.  Please 
install Windows 7 Home Premium or higher, and select multi-touch applications 
for best user experience.

Last Updated: July 9,2010

Q5. Can I use other optical styluses?
A5. Please use the IDTI official stylus or any IDTI certified accessories only on 
IDTI 21.5” In-Cell multi touch screen.

Q6. Would the optical styluses make any scratches after a long period of use?
A6. Scratches will not be made on the screen if the stylus is properly used.

Q7. Do the optical styluses support pressure sensitivity?
A7. IDTI stylus does not support pressure sensitivity.

Others

Q1. Can I disassemble the back mount, and use the monitor on another mount?
A1. The back mount design is based on the standard VESA flat panel 
100*100mm.  Any mount with standard VESA flat panel 100*100mm will work.

Q2. Is PChome the only sales channel?
A2. You are welcome to call customer services at 0800-001-218 for the nearest 
store.

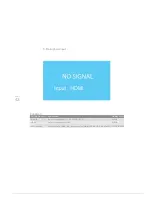
Q3. What should I do when the display is abnormal?
A3. Reset the monitor by the OSD buttons.
        

1. “Menu”    “Down”    “Reset”    “Menu”

        2. “Menu”    “Color”    “Menu”
        3. “DOWN”   “AUTO COLOR”   “MENU”   “AUTO”   Exit OSD screen.

Q4. What should I do when the touch screen does not operate normally?
A4. Un-plug the USB wire from the computer, make sure the screen is 
connected and displaying correctly.  Plug in the USB wire back to the computer.  
The screen should be able to function normally after the above steps are 
followed.

Содержание QIT600

Страница 1: ......

Страница 2: ...g S a f e t y W a l l I n s t a l l a t i o n P a c k a g e C o n t e n t s M o n i t o r A p p e a r a n c e O v e r v i e w S y s t e m I n s t a l l a t i o n S t e p s S u p p l e m e n t a r y K...

Страница 3: ...PAGE 01 Product Features...

Страница 4: ...perience Adjustable tilt angle Wall mountable and meets VESA standard mounting hole Security lock slot lock sold separately in connected lines Plug and Play computer system support required Power savi...

Страница 5: ...PAGE 01 PAGE 03 LCD Monitor Special Considerations...

Страница 6: ...may exist to be slightly uneven Pixel LCD screen is effective or over 99 99 However it will have 0 01 or less of the pixels missing or with a degree of lost brightness As the LCD screen runs with the...

Страница 7: ...PAGE 05 Precautions...

Страница 8: ...and instructions marked on the product Warning Do not use of this product near the water Do not use this product on an unstable desktop pedestal or the ground or push cart This product may receive ser...

Страница 9: ...o be placed near devices with spinning motions such as transferring devices like hard drives CD drives or even a lithium exposure risk group Do not place product with any risk of the vibration environ...

Страница 10: ...alled near the outlet and should be easy to plug it in position To monitor the power supply interruption please hold the plug and pull from the wall socket the plug Do not pull the power cord to inter...

Страница 11: ...or in daylight or other light source that shines directly on it Monitor the location of the surface Please ensure that the monitor placed directly in the eye is slightly lower as the level of positio...

Страница 12: ...he screen for repair or shipment please use the original carton and packaging materials Wall Installation The screen on the back of four perforations are VESA flat panel The display interface standard...

Страница 13: ...PAGE 11 Package Contents...

Страница 14: ...When you open the carton check the carton to ensure it includes the following LCD Monitor AC power cord D Sub signal cable USB cable 2 Stylus Pen 1Charging cable for stylus CD includes setup operatio...

Страница 15: ...PAGE 13 Monitor Appearnce Overview...

Страница 16: ...l retractable stands 5 Angle adjustments switch 6 Back rack 7 8 Frontal retractable stands adjustments switch 9 OSD controls 10 Clamps to secure chords 11 Anti theft security keyhole Monitor Appearanc...

Страница 17: ...PAGE 15 Side View Screen Tilt Adjustment...

Страница 18: ...PAGE 16 Systems Installation Steps...

Страница 19: ...UCHPACK program is executed look in the system toolbar for the IDTI_TOUCHPACK icon Click with the left mouse button and the following menu choices will appear For right handed stylus users select the...

Страница 20: ...are the following features 1 Shortcut Key 1 There is usually a list of running applications so use this button to quickly use the stylus to click to choose Windows 7 or Windows Vista Aero effect in t...

Страница 21: ...llowing screen 2 Shortcut Key 2 The emergence of the virtual keyboard makes it possible for the stylus to operate the virtual keyboard for input In Windows 7 below is the following picture In Windows...

Страница 22: ...rming the mode pressing the button again will leave Move Mode Move Mode allows the traditional stylus to simulate a simple mouse movement as a target function similar to hovering This is useful for so...

Страница 23: ...e middle are the power switch of the stylus Use one hand to hold the silver metal rings and use the other to rotate around the black part of the stylus Power switch operates by twisting the stylus Twi...

Страница 24: ...5 Function LCD is used to switch Used to display the menu in order to modify the display settings Used to select options and increased up to adjust the amount Used to down select the option and adjus...

Страница 25: ...button to enter the selection operation 2 Press the button to select the items you want to adjust 3 Press MENU button to enter the options operational 4 Press the button to adjust the settings of the...

Страница 26: ...PAGE 24 Contrast...

Страница 27: ...PAGE 25 Brightness...

Страница 28: ...PAGE 26 Color Adjustment...

Страница 29: ...PAGE 27 Color Temperature...

Страница 30: ...r and then button to adjust your favorite color screen Press the key to select a different color temperature 9300 K 6500 K 5800 K USER Adjustments Contrast Brightness Standard Color Spaces Color Tempe...

Страница 31: ...Press the button to select the items you want to adjust 3 Press MENU button to enter the options operational 4 Press the button to adjust the settings of the project 5 Then click the AUTO button will...

Страница 32: ...PAGE 30 1 Clock...

Страница 33: ...PAGE 31 2 Phase...

Страница 34: ...PAGE 32 3 Sharpness...

Страница 35: ...PAGE 33 4 Horizontal Position...

Страница 36: ...Press the button to get a clearer picture or more soft By keys to adjust the position of the screen left and right Press the button to adjust the screen s upper and lower position Adjustments Clock P...

Страница 37: ...ress the button to select the items you want to adjust 3 Press MENU button to enter the options operational 4 Press the button to adjust the settings of the project 5 Then click the AUTO button will b...

Страница 38: ...PAGE 36 1 Horizontal Position...

Страница 39: ...PAGE 37 2 Vertical Position...

Страница 40: ...PAGE 38 3 OSD Timer...

Страница 41: ...SD screen up and down position Press the button to adjust the length of time for the menu to appear 0 30 seconds Press key to select the language English English Adjustments Horizontal position Vertic...

Страница 42: ...button to select the desired input signal 3 Press MENU button to confirm selection 4 Screen darkens first and then re appears where the upper right corner would show the contents of the input signal 5...

Страница 43: ...PAGE 41 1 Input Signal Selection...

Страница 44: ...PAGE 42 2 D SUB VGA...

Страница 45: ...nput signal for the D SUB VGA Select input signal HDMI Automatically select the input signal exists when both D SUB priority Adjustable Items D SUB HDMI Auto Search Starting Mode D SUB D SUB D SUB HDM...

Страница 46: ...PAGE 44 Reset 1 Press the button to select Reset and then MENU button to enter the options operational 2 Resets all the settings back to factory default...

Страница 47: ...Vista Windows XP Only in Windows 7 Home Premium and above editions can support multi touch The entire machine for 3 years the panel only for 1 year Natural disasters such as floods or earthquakes and...

Страница 48: ...u use the virtual keyboard A3 Users can download at the Siemens website to Windows XP login screen using the virtual keyboard OSKGina http support automation siemens com WW llisapi dll 22402193 func l...

Страница 49: ...all graphic design software It does not yet support pressure sensitivity Accessories Q1 What type of battery is used for the stylus A1 Lithium battery is used for the stylus Q2 How do I charge the sty...

Страница 50: ...nt A1 The back mount design is based on the standard VESA flat panel 100 100mm Any mount with standard VESA flat panel 100 100mm will work Q2 Is PChome the only sales channel A2 You are welcome to cal...

Страница 51: ......

Отзывы: