


PAGE
22
PAGE
21
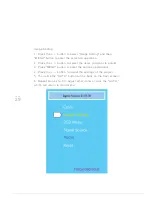
OSD Control Buttons
Button 1 Power
Button 2 Menu/Enter
Button 3 Up
Button 4 Down
Button 5 Auto
Stylus
■
Charging
Attach either two stylus, which contain lithium
batteries, by connecting the USB charging cable to
the end of the stylus. The tail will be bright green
when charging. Once fully charged, the light will
automatically go out.
■
Twisting the Stylus
The stylus’ silver metal rings in the middle are the
power switch of the stylus. Use one hand to hold
the silver metal rings, and use the other to rotate
around the black part of the stylus. Power switch
operates by twisting the stylus. Twisting to the
opposite direction will power off the stylus.
■
Actual Use
In accordance to the earlier 2 steps by turning on
the stylus power switch, you can begin using the
stylus when it is on. As long as the pressure of the
stylus is on the screen, it will light and can be used
to operate the computer.
Button
POWER
MENU/ENTER
+
-
AUTO
Number
Button 1
Button 2
Button 3
Button 4
Button 5
Function
LCD is used to switch
Used to display the menu in order to modify the display settings
Used to select options and increased up to adjust the amount
Used to down select the option and adjust the volume reduction
Used to automatically adjust the LCD screen to the best
(Only D-SUB input valid)
Used as an adjustment in the menu to leave or return to the previous menu level
Содержание QIT600
Страница 1: ......
Страница 3: ...PAGE 01 Product Features...
Страница 5: ...PAGE 01 PAGE 03 LCD Monitor Special Considerations...
Страница 7: ...PAGE 05 Precautions...
Страница 13: ...PAGE 11 Package Contents...
Страница 15: ...PAGE 13 Monitor Appearnce Overview...
Страница 17: ...PAGE 15 Side View Screen Tilt Adjustment...
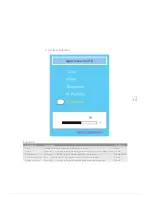
Страница 18: ...PAGE 16 Systems Installation Steps...
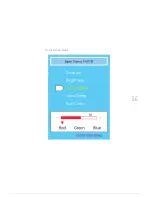
Страница 26: ...PAGE 24 Contrast...
Страница 27: ...PAGE 25 Brightness...
Страница 28: ...PAGE 26 Color Adjustment...
Страница 29: ...PAGE 27 Color Temperature...
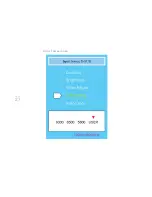
Страница 32: ...PAGE 30 1 Clock...
Страница 33: ...PAGE 31 2 Phase...
Страница 34: ...PAGE 32 3 Sharpness...
Страница 35: ...PAGE 33 4 Horizontal Position...
Страница 38: ...PAGE 36 1 Horizontal Position...
Страница 39: ...PAGE 37 2 Vertical Position...
Страница 40: ...PAGE 38 3 OSD Timer...
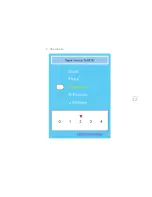
Страница 43: ...PAGE 41 1 Input Signal Selection...
Страница 44: ...PAGE 42 2 D SUB VGA...
Страница 51: ......