


Single In-Line
Memory
Modules
6-35
Printer Options
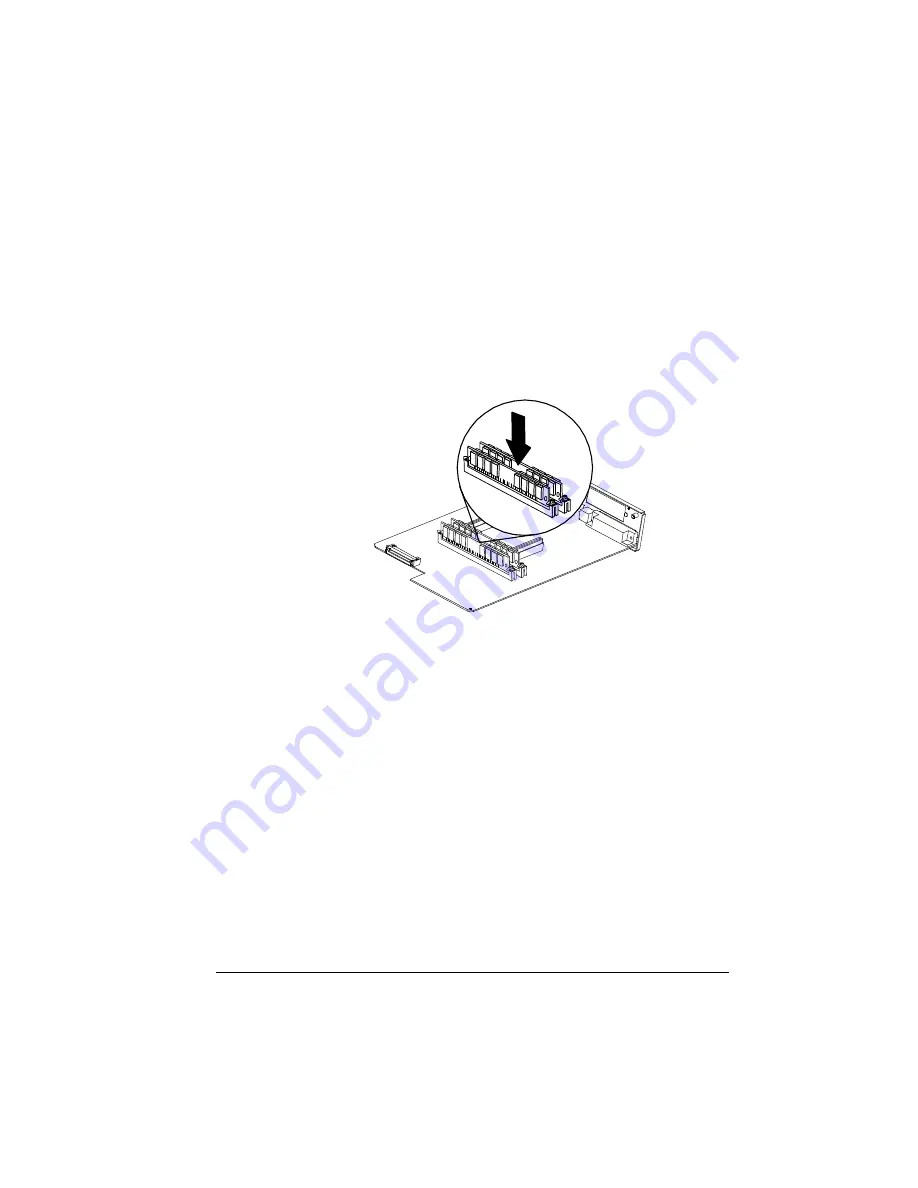
5
Tilt the SIMM up to a 90° angle until you feel it snap into
place.
When seated, the SIMM stands upright, firmly in place. If you
cannot snap the SIMM into place, do not force it. Reposition it,
making sure that the bottom of the SIMM is seated completely in
the connector.
6
Repeat steps 3-5 for each additional SIMM being installing.
7
Insert the controller board in the printer.
Use the instructions in the “Inserting Controller Board” section of
this chapter.
Removing a SIMM
If both of the SIMM connectors are filled and you want to install more
memory (for example, if you want to replace a 4 MB SIMM with an 8
MB SIMM), one SIMM must be removed before a larger SIMM can be
installed. Then refer to the previous section, “Installing a SIMM,” for
installation instructions. A SIMM can be removed from and installed in
either SIMM connector as long as DRAM0, the SIMM connector closest
to you, is occupied. Also, you must make sure that there is a total of at
least 8 MB of RAM installed.
90
°
Содержание 1060
Страница 1: ...QMS 1060 Print System Reference 1800338 001B...
Страница 13: ...1 Introduction In This Chapter n About this manual n Typographic conventions...
Страница 17: ...2 Print Media In This Chapter n Media sizes imageable areas and margins n Media storage...
Страница 34: ......
Страница 130: ......
Страница 229: ...A QMS Customer Support In This Chapter n Sources of customer support n QMS world wide offices...
Страница 252: ......
Страница 253: ...C Document Option Commands In This Chapter n Supported Document Option Commands n Updated Document Option Commands...
Страница 274: ......
Страница 279: ...E Configuration Menu In This Chapter n Configuration menu charts...
Страница 284: ......