background image


15 

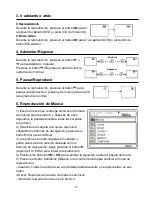
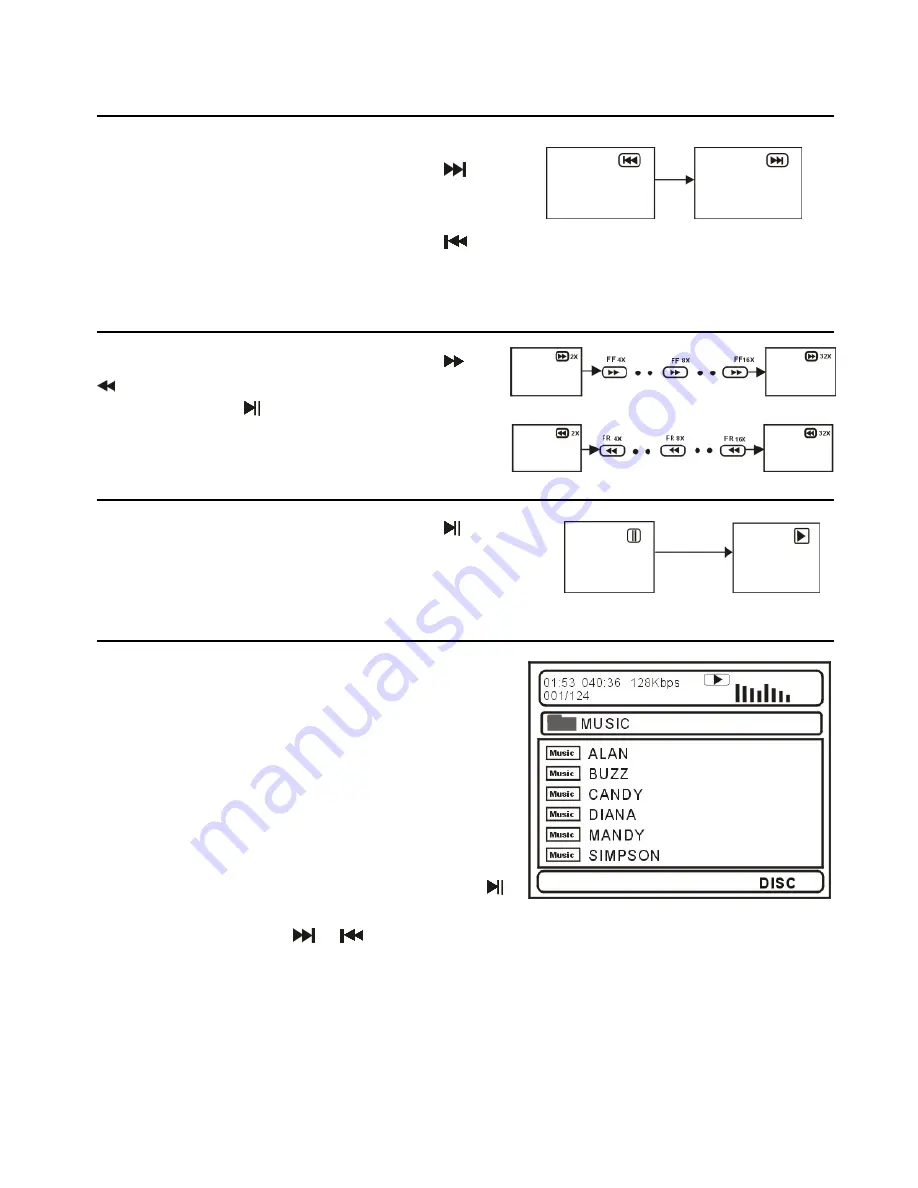
3. Ir adelante o atr

á


Ir Hacia Adelante 

Durante la reproducci

ó

n, presione el bot

ó

  para ir 

al siguiente cap

í

tulo (DVD) o pista (CD de Video/CD). 

Ir Hacia Atr

á

Durante la reproducci

ó

n, presione el bot

ó

  para ir al cap

í

tulo (DVD) o pista (CD de 

Video/CD) anterior. 
 

4. Adelantar/Regresar 


Durante la reproducci

ó

n, presione el bot

ó

  o 

  para adelantar o regresar. 

Presione el bot

ó

  (Reproducir) para resumir la 

reproducci

ó

n normal. 


5. Pausar/Reproducir 


Durante la reproducci

ó

n, presione el bot

ó

  para 

pausar la reproducci

ó

n, presione de nuevo para resumir 

la reproducci

ó

n normal. 


6. Reproducci

ó

n de M

ú

sica 


1) Inserte el disco que contenga archivos en formato 
de m

ú

sica para reproducir, y despu

é

s de unos 

segundos, la pantalla mostrar

á

 todas las carpetas 

en el disco, 
2) Seleccione la carpeta que quiere reproducir 
utilizando los botones de navegaci

ó

n y presione el 

bot

ó

n Entrar para confirmar. 

3) Los archivos en esta carpeta se mostrar

á

n y 

podr

á

 seleccionar la canci

ó

n deseada con los 

botones de navegaci

ó

n, luego presione el bot

ó


(reproducir) o Entrar para iniciar la reproducci

ó

n. 

4) Presione los botones 

  o 

  para cambiar la siguiente o anterior p

á

gina del men

ú


5) Presione el bot

ó

n Subt

í

tulos (Repetir) en el control remoto para cambiar el modo de 

reproducci

ó

n. 

- Aleatorio: Todos los archivos se acomodar

á

n aleatoriamente y se reproducir

á

n en ese 

orden. 
-Al azar: Reproducci

ó

n al azar de todos los archivos. 

- Individual: reproducci

ó

n de un solo archivo. 

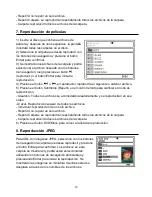
Adelanta

Regresar


Содержание TV-LED1912D

Страница 1: ...18 5 Full Color LED TV with Multimedia Player MODEL NO TV LED1912D INSTRUCTION MANUAL BEFORE USING THIS PRODUCT READ UNDERSTAND AND FOLLOW THESE INSTRUCTIONS Save this booklet for future reference ...

Страница 2: ...UNLESS THE BLADES CAN BE FULLY INSERTED TO PREVENT BLADE EXPOSURE TO PREVENT FIRE OR SHOCK HAZARD DO NOT EXPOSE THIS APPLIANCE TO RAIN OR MOISTURE CAUTION LASER RADIATION WHEN OPEN DO NOT STARE INTO BEAM VENTILATION WARNING THE NORMAL VENTILATION OF THE PRODUCT SHALL NOT BE IMPEDED FOR INTENDED USE The lightning flash and arrow head within the triangle is a warning sign alerting you of dangerous v...

Страница 3: ...bjects such as speakers at a distance from the player LASER SAFETY This set employs an optical laser beam system in the CD mechanism designed with built in safeguards Do not attempt to disassemble Exposure to this invisible laser light beam may be harmful to the human eye This is a Class 1 laser product Use of controls adjustments or procedures other than those specified herein may result in hazar...

Страница 4: ... the outside which will not cause distortion If you wipe the discs using a circular motion circular scratches are likely to occur which will cause distortion If the disc is brought from a cold to a warm environment moisture may form on the disc Wipe this moisture off with a soft dry lint free cloth before using the disc Improper disc storage You can damage discs if you store them in the following ...

Страница 5: ...res in this instruction manual are just for your reference specification should refer to actual accessories ACCESSORIES Instruction manual 1 Remote control with battery 1 Car cord 1 Desktop AC adaptor and power cord 1 ...

Страница 6: ...RTS 7 REMOTE CONTROL 8 9 REMOTE CONTROL PREPARATION 10 BASIC CONNECTION 11 13 OPERATIONS BASIC OPERATIONS 14 26 Compatible DVD with playback control 14 21 TV 22 26 MAIN MENU 27 37 TV MODE 27 36 PC MODE 36 37 FOR REFERENCE MAINTENANCE 38 SPECIFICATIONS 38 TROUBLESHOOTING 39 40 REGION CODE SETTING 40 ...

Страница 7: ... PROGRAM GUIDE SUPPORT USB MULTIMEDIA PLAYBACK NOTE Both of TV and DVD modes can support USB multimedia playback SUPPORT MULTI LANGUAGES ON SCREEN DISPLAY SUPPORT FULL FUNCTION REMOTE CONTROL SUPPORT PC AUDIO ANT VGA VIDEO AUDIO R L HDMI AND YPBPR INPUT WITH HEADPHONES AND COAXIAL OUTPUT JACK WITH EXTERNAL ANTENNA JACK WITH BUILT IN SPEAKERS WITH WEAK SIGNAL ENHANCEMENT FUNCTION WITH NOISE REDUCTI...

Страница 8: ...evel or move left 10 VOL button To increase the volume level or move right 11 POWER button Toswitch ON OFF theTV 12 Disk slot To insert a disk according to the silk screen on the left of this slot 13 To open or close the disc compartment 14 To play or pause playing 15 USB1 slot For multimedia playback in TV mode 16 Y Pb Pr input jack 17 COAX OUT jack 18 USB2 slot For multimedia playback in DVD mod...

Страница 9: ...ogram guide information 8 PICTURE To switch the picture mode 9 CC REPEAT To set CC function On or Off in TV mode to repeat playing chapter or title for DVD or track for VCD CD 10 Navigation buttons Press buttons to move up down left right 11 MENU To display the main menu Press it again to return to previous menu page 12 SLEEP To select desired Sleep Timer 13 MTS AUDIO LANGUAGE To select desired so...

Страница 10: ...6 SOURCE To switch the input source 27 SOUND MEDIA To switch the sound mode in TV mode to switch the unit between DISC USB in DVD mode 28 ENTER To confirm a selection 29 EXIT To exit menu page 30 AUTO To adjust the screen automatically in PC mode 31 ASPECT To select desired displaying mode 32 FREEZE To hold the picture during normal playing 33 FAV SUBTITLE To label current program as a favorite on...

Страница 11: ... impact the remote control This may damage the parts or lead to malfunction If the remote control is not going to be used for a long time remove the batteries REMOTE CONTROL OPERATION Point the remote control from no more than about 6m from the remote control sensor and within about 60 of the front of the player Fig2 NOTES The operating distance may vary according to the brightness of the room Do ...

Страница 12: ...tions before connecting other equipments CONNECTING TO AC POWER SOURCE CONNECT EXTERNAL ANTENNA TO UNIT Install external antenna into antenna jack for best picture BASIC CONNECTION Main unit To DC 12V jack AC adaptor To power outlet Outdoor antenna amplifier Indoor antenna amplifier Power plug of antenna amplifier 75 OHM antenna plug Antenna ...

Страница 13: ...s Optional AV cable Optional Back of PC VGA cable Optional Audio cable Optional Use VGA cable and Audio cable to connect the unit with TV or PC and use this product as a monitor Use coaxial cable to connect the unit with amplifier or other audio decoding devices for coaxial audio signal output ...

Страница 14: ...MI cable Optional Use HDMI cable to connect the unit with other devices to receive high definition multimedia signal For software updating and movie music photo playback for DVD mode only For software updating and music photo playback for TV mode only Back of DVD VCR YPbPr cable Optional ...

Страница 15: ...r you can press button on remote control or the left side of this unit to enter the disc into the disc compartment 2 Once the disc is in the disc compartment the player starts to read the disc immediately 3 When a menu screen appears on the unit move the navigation buttons or press the number buttons to select preferred track number then press ENTER button to confirm 4 To stop playing and return t...

Страница 16: ...avigation buttons then press the PLAY or ENTER button to start playback 4 Press or button to turn the current menu page to the next or previous menu page 5 Press CC REPEAT button on remote control to change play mode SHUFFLE all the files will be randomly sorted and played by the order RANDOM randomly select any file to play SINGLE play one file only REPEAT ONE repeat one file REPEAT FOLDER all th...

Страница 17: ... navigation buttons and press ENTER button to confirm The files in this folder are displayed and select your pictures by using the up down navigation buttons and press ENTER button to start playback Thumbnail of picture will be displayed while you scrolling across the file name Once a folder and file is selected the picture is loaded onto the screen NOTE The time to load and display picture depend...

Страница 18: ... to rotate the picture clockwise Press LEFT navigation button to rotate the picture counterclockwise Flipping pictures Press UP navigation button to flip the picture vertically Press DOWN navigation button to flip the picture horizontally Picture Shrink Zoom Press ZOOM button repeatedly to enlarge or shrink picture to 50 75 100 125 150 and 200 If the picture is enlarged you may press navigation bu...

Страница 19: ...ND MEDIA button to switch the unit to USB mode 3 After several seconds all the folders in the USB will display on monitor screen 4 Select a folder you want to play using the navigation buttons and press the ENTER button to confirm 5 The files in this folder are displayed and select the desired file by navigation buttons then press the ENTER button to start to play 6 Press or button to turn the cur...

Страница 20: ...ween points A and B starts 3 Press BLUE A B button once again to return to normal play 13 GOTO Press GREEN GOTO button continuously to select the item you want to set and enter a time number chapter number track number etc Accordingly the disc will be played from the selected point 14 Change subtitle language Compatible with DVD only It is possible to change the subtitle language to a different la...

Страница 21: ...d the language heard is the one selected at the initial settings 17 Initial settings Once the initial programming is entered it is retained in memory until changed the player can always be operated under the same conditions Common procedure for initial settings Press SETUP button on remote control Use the navigation buttons to select preferred item and press ENTER button each screen for setting th...

Страница 22: ...ure of changing password is described as followings Enter old password in the OLD PASSWORD row Enter new password in the NEW PASSWORD row Enter the new password again in the CONFIRM PWD row Press ENTER button on the screen to return to the Password Setup Page then the Password has been changed NOTE The original password is 136900 you can change it but you should write it down and keep it safe If y...

Страница 23: ... directly VOLUME CONTROL Press VOL or VOL to adjust the level of current volume Available range 0 100 MUTE CONTROL Press MUTE button to mute the sound press it again to turn on the sound NOTE When the unit is in MUTE mode press VOL button will turn on the sound and turn it up press VOL button will keep the unit silence SOURCE SETTING Press SOURCE button on remote control to display the sources lis...

Страница 24: ... Mono Stereo SAP Not available in all channels Or press MTS AUDIO button on remote control to display Digital Sound language Not available in all channels INFORMATION DISPLAY Press INFO button on remote control to display information of current program EPG ELECTRONIC PROGRAM GUIDE Press EPG button on remote control to enter into Electronic Program Guide menu page Not available in all channels Pres...

Страница 25: ...n unit top or remote control to set the unit in Media mode 1 Press LEFT or RIGHT navigation button to select Music item 2 Press ENTER button to enter it then use navigation buttons to select the music file that want to play 3 Use navigation buttons to select which song to play then repeat the second step to play desired song 4 Press EXIT button to return to previous menu PHOTO PLAYBACK 1 Press LEF...

Страница 26: ...ious or next page Press ENTER button and a yellow frame will appear on the first photo then press navigation buttons to select which photo to play 3 3 Slideshow Select this item then press ENTER button to play the photos in slide show mode Media Setting Press LEFT or RIGHT navigation button to select Media Setting item 1 Slideshow Interval Available options 1s 5s 10s 2 Slideshow Effect Available o...

Страница 27: ...26 NowPlaying Press LEFT or RIGHT navigation button to select NowPlaying item Press ENTER button to enter below menu page Press LEFT or RIGHT navigation button to select wanted option ...

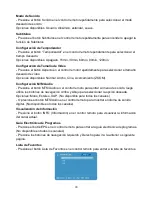
Страница 28: ...want to adjust Press LEFT or RIGHT navigation button to adjust selected option to desired value Then press ENTER button to confirm the selection Press MENU button to return to previous menu page Press EXIT button to exit menu page TV MODE Press SOURCE button on unit top or remote control to set the unit in TV mode Then the screen will display below menu page if first time using Menu Language Press...

Страница 29: ...ted from 0 100 1 15 Tint The value of Tint can be adjusted from 50 to 50 Only available for certain TV system 1 16 Sharpness The value of Sharpness can be adjusted from 0 100 NOTE If the value of Brightness Contrast Color Tint and Sharpness is adjustable only when the Picture Mode is set as User 1 2 Screen Size Available options Normal Wide Cinema Zoom 1 3 PC Settings NOTE This item is available o...

Страница 30: ... High 1 52 Film Mode This item is used to set the Film Mode function On or Off 1 53 Noise Reduction Available options Off Low Medium High 1 54 MPEG Noise Reduction Available options Off Low Medium High 2 SOUND 2 1 Sound Settings 2 11 Sound Mode Available options User Dynamic Standard Soft ...

Страница 31: ...is set as User 2 2 Surround Mode Press ENTER button to enable or disable this item 2 3 AVL Press ENTER button to enable or disable this item 2 4 Analog Sound Available options Mono Stereo SAP 2 5 Digital Sound Available options English French Spanish 2 6 Digital Audio Output Available options Off PCM Raw 2 7 Equalizer Settings Available modes User Off Rock Pop Jazz The value of each column is adju...

Страница 32: ...r FAVORITE LIST menu page Press navigation buttons to select desired channel Press ENTER button to confirm selection 3 3 Channel Settings Press navigation buttons to move the cursor on a certain item Press ENTER button to confirm selection 3 4 Signal Type Available options Air Cable 3 5 Auto Channel Search Press UP or DOWN navigation button to select this item Press ENTER button to start automatic...

Страница 33: ...ss UP or DOWN navigation button to select wanted item Press ENTER or RIGHT navigation button to enter submenu page Press ENTER button to lock or unlock selected rating 4 12 Canada Program Control Press UP or DOWN navigation button to select wanted item Press ENTER or RIGHT navigation button to enter submenu page Press ENTER button to lock or unlock selected rating ...

Страница 34: ...item NOTES Once an item has been finished the cursor will turn to next item automatically When all of Old PIN New PIN and Confirm have been input the unit will save the new password automatically and return to previous menu page 4 3 Keypad Lock Press ENTER button to enable or disable this item 4 4 Source Lock Press UP or DOWN navigation button to select the input source that want to lock Press ENT...

Страница 35: ...4 TEXT1 TEXT2 TEXT3 TEXT4 5 13 Digital Caption Type Available options Service1 Service2 Service3 Service4 Service5 Service6 5 14 Digital CC Preset Available options Default Custom 5 15 Digital CC Style This item is available only when the Digital CC Preset item is selected Custom CC Size Available options Default Small Standard Large ...

Страница 36: ...agenta Cyan 5 2 Menu Language Available options English French Spanish 5 3 Clock 5 31 Time Zone Press LEFT or RIGHT navigation button to select wanted option 5 32 Auto Clock Press ENTER button to enable or disable this item 5 33 Setup Time Press UP or Down navigation button to select this item Press ENTER button repeatedly to move the cursor on Year Month Day Hour Minute Second Press LEFT or RIGHT...

Страница 37: ...6 5 Audio Only Press ENTER button to set the unit with audio on only NOTE Once this function is executed hold on the POWER button on unit top or remote control for about 3 seconds to resume normal playing AV YPbPr HDMI MEDIA DVD MODE Press SOURCE button on unit top or remote control to select desired input source For PICTURE SOUND SETUP and OTHERS menus please refer to the menu operations in TV mo...

Страница 38: ...n to adjust the screen automatically 2 Horizontal Position Available range 15 to 15 3 Vertical Position Available range 15 to 15 4 Clock Available range 30 to 30 5 Phase Available range 0 63 6 Reset Press ENTER button to reset above items Except Analog Sound and Digital Sound menus are invalid the SOUND menu is the same with that of TV mode The SETUP and OTHERS menus are the same with those of TV ...

Страница 39: ... 0 3 V mm Pixel Pitch 1366 768 Luminance 16 7M Contrast Ratio 1000 1 Aspect Ratio 250 cd m2 Response Time 5 5 ms Viewing Angle 170 H 160 V Visible Range 409 8 H 230 4 V Lamp Life 50 000 Hrs Music MP3 compatible MULTIMEDIA PLAYBACK FORMAT TV MODE Photo JPG compatible Movie MPEG1 MPEG2 MPEG4 compatible Music MP3 compatible MULTIMEDIA PLAYBACK FORMAT DVD MODE Photo JPEG compatible Supported discs DVD...

Страница 40: ...nect the power adaptor and then reconnect it The player may not be operating properly due to lightning static electricity or some other factors Symptom TV Remedy No or poor picture Adjust antenna or use an external antenna Relocate the unit near a window if inside a building Move units away from this product that causes interference Do Auto Tuning again Try another channel No sound or poor sound C...

Страница 41: ...eo CD Remedy No menu play This function works only for Video CDs with playback control Symptom USB Remedy My player does not recognize my USB key or my external hard disk when plugged to the DVD player s USB slot Would you please refer first to the instructions describing how to use USB devices with this machine If the problem still occurs This machine has been tested with the majority of the mark...

Страница 42: ...tamente a Color de 18 5 Con Reproductor Multimedia Modelo TV LED1912D Manual de instrucciones ANTES DE UTILIZAR ESTE PRODUCTO LEA COMPRENDA Y SIGA LAS INTRUCCIONES EN ESTE MANUAL Guarde este manual para futuras referencias ...

Страница 43: ...siones para conectar este equipo receptáculos u otros a menos que las navajas puedan insertarse completamente para prevenir la exposición de navajas Para prevenir incendios o descargas no exponga este equipo a lluvia o humedad CUIDADO Hay radiación láser al abrir este equipo no mire fijamente el rayo ADVERTENCIA DE VENTILACIÓN la ventilación normal del producto no debe impedirse para el uso correc...

Страница 44: ...ncia del reproductor PRECAUCIONES DEL LÁSER Este equipo utiliza un sistema de rayo láser óptico en el mecanismo de CD diseñado con un protector integrado No intente desarmar La exposición a esta luz láser invisible puede ser dañina para el ojo humano Este es un producto de láser clase 1 El uso de controles ajustes y procedimientos distintos a los especificados aquí podrían resultar en exposiciones...

Страница 45: ...ren distorsiones Si limpia el disco haciendo un movimiento circular podrían ocurrir raspones circulares lo cual generaría distorsión Si cambia el disco de un ambiente frío a uno caliente podría ocasionar humedad en éste Limpie la humedad con un paño suave seco y sin hilos antes de utilizarlo Almacenamiento inapropiado de discos Los discos pueden dañarse si los guarda en los siguientes lugares Área...

Страница 46: ...l de instrucciones son únicamente para referencia las especificaciones se refieren a los accesorios ACCESORIOS Manual de Instrucciones 1 Control Remoto con Batería 1 Cable para Auto 1 Adaptador AC de escritorio y cable de alimentación 1 ...

Страница 47: ...8 9 Preparación del Control Remoto 10 Conexión Básica 11 13 OPERACIONES Operación Básica 14 27 DVD compatible con control de reproducción 14 22 Televisión 23 27 Menú Principal 28 39 Modo TV 28 38 Modo PC 38 39 REFERENCIAS Mantenimiento 40 Especificaciones 40 Resolución de Problemas 41 42 Establecimiento de Códigos de Región 42 ...

Страница 48: ... programas Soporta reproducción multimedia de USB NOTA ambos modos televisión y DVD soportan la reproducción multimedia de USB Soporta múltiples idiomas en pantalla Soporta completamente las funciones del control remoto Soporta entradas de Audio PC ANT VGA Video Audio L R HDMI y YPbPR Con entrada para Audífonos y Salida Coaxial Con entrada para antena externa Con bocinas integradas Función de mejo...

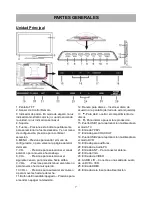
Страница 49: ...ione para disminuir el volumen o para moverse hacia la izquierda 10 VOL Presione para aumentar el volumen o para moverse hacia la derecha 11 Botón de Encendido Apagado Presione para encender o apagar la televisión 12 Ranura para discos Inserte el disco de acuerdo a la pantalla del lado de esta izquierda 13 Para abrir o cerrar el compartimiento de discos 14 Para iniciar o pausar la reproducción 15 ...

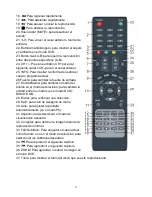
Страница 50: ...tulos Repetir para encender o apagar la función de subtítulos en el modo de televisión para repetir la reproducción del capítulo o título para DVD o pista para VCD CD 10 Botones de Navegación Presione los botones para mover hacia arriba abajo izquierda derecha 11 Menú para mostrar el menú principal Presione de nuevo para volver a la página anterior del menú 12 Temporizador para establecer el tempo...

Страница 51: ...a fuente de entrada 27 Sonido Media para cambiar el modo del sonido en el modo de televisión para cambiar la unidad entre los modos en el modo DVD DISCO USB 28 Entrar para confirmar una selección 29 Salir para salir de la página de menú 30 Auto para ajustar la pantalla automáticamente en el modo PC 31 Aspecto para seleccionar el modo de visualización deseado 32 Congelar para detener la imagen dura...

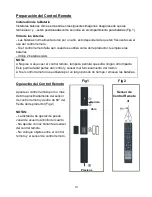
Страница 52: ...NOTA No pise ni deje caer el control remoto tampoco permita que sufra ningún otro impacto Esto podría dañar partes del control y causar mal funcionamiento del mismo Si el control remoto no se utilizará por un largo periodo de tiempo remueva las baterías Operación del Control Remoto Apunte el control remoto por no más de 6m aproximadamente del sensor de control remoto y dentro de 60 del frente del ...

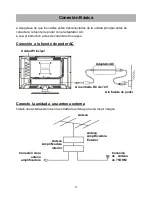
Страница 53: ...o equipo Conexión a la fuente de poder AC Conecte la unidad a una antena externa Instale una antena externa en la entrada de antena para una mejor imagen Conexión Básica Unidad Principal A la entrada DC de 12V Adaptador AC A la fuente de poder Antena Amplificadora Exterior Antena Amplificadora interior Conexión de la antena amplificadora Conexión de Antena de 75OHM Antena ...

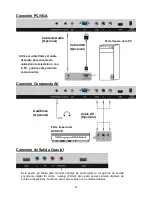
Страница 54: ... conectar la unidad con la televisión o con la PC y utilice este producto como monitor Parte trasera del DVD VCR Audífonos Opcional Cable AV Opcional Este puerto se utiliza para mandar señales de audio digital a receptores de sonido envolvente digital El cable naranja COAX sirve para enviar señales digitales de sonido a dispositivos teatro en casa que cuenten con entrada Coaxial ...

Страница 55: ...le HDMI para conectar la unidad con otros equipos para recibir señal multimedia de alta definición Para actualización y reproducción de películas música imágenes Únicamente para el modo DVD Cable YPbPr Opcional Parte trasera del DVD VCR Para actualización de software y reproducción de música fotos Únicamente en el modo de television ...

Страница 56: ... legible espejo con la cara hacia usted Luego el disco entrará automáticamente en el compartimiento o puede presionar el botón en el control remoto o del lado izquierdo de la unidad para introducir el disco en el compartimiento Una vez que el disco esté en el compartimiento el reproductor comenzará a leer el disco inmediatamente Cuando aparezca una pantalla de menú en la unidad utilice los botones...

Страница 57: ... archivos en formato de música para reproducir y después de unos segundos la pantalla mostrará todas las carpetas en el disco 2 Seleccione la carpeta que quiere reproducir utilizando los botones de navegación y presione el botón Entrar para confirmar 3 Los archivos en esta carpeta se mostrarán y podrá seleccionar la canción deseada con los botones de navegación luego presione el botón reproducir o...

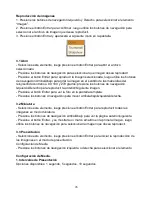
Страница 58: ...otón Subtítulos Repetir en el control remoto para cambiar el modo de reproducción Aleatorio Todos los archivos se acomodarán aleatoriamente y se reproducirán en ese orden Al azar Reproducción al azar de todos los archivos Individual reproducción de un solo archivo Repetir Uno repetir un solo archivo Repetir Carpeta se reproducirán repetidamente todos los archivos de la carpeta Carpeta reproducir t...

Страница 59: ...ivo Repetir Uno repetir un solo archivo Repetir Carpeta se reproducirán repetidamente todos los archivos de la carpeta Carpeta reproducir todos los archivos de la carpeta Ir a siguiente anterior imagen Presione el botón para ir a la siguiente imagen o el botón para ir a la imagen anterior Si no presiona ningún botón en 5 segundos cambiará a la siguiente imagen automáticamente Rotación de Imágenes ...

Страница 60: ...uméricos para seleccionar la pista correspondiente Ejemplo Pista 9 presione 0 y 9 unos segundos después automáticamente cambiará a la canción 9 Pista 15 presione 1 y 5 unos segundos después automáticamente cambiará a la canción 15 4 Presione el botón para ir a la siguiente pista o el botón para ir a la pista anterior 10 Compatible con Reproducción de USB 1 Inserte la USB que contenga archivos con ...

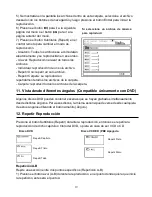
Страница 61: ...rpeta Carpeta reproducir todos los archivos de la carpeta 11 Vista desde diferentes ángulos Compatible únicamente con DVD Algunos discos DVD pueden contener escenas que se hayan grabado simultáneamente desde distintos ángulos Para esos discos la misma escena puede verse desde cualquiera de estos ángulos utilizando el botón amarillo Ángulo 12 Repetir Reproducción Presione el botón Subtítulos Repeti...

Страница 62: ... subtítulos 1 Presione el botón FAV Subtítulos durante la reproducción la pantalla mostrará el idioma actual 2 Presione de nuevo e botón FAV Subtítulos para cambiar el idioma o apagar los subtítulos NOTA Cuando no hay subtítulos grabados este botón no tendrá ninguna función 15 Reproducción con Acercamiento Esta función le permitirá disfrutar imágenes con movimiento Presione el botón ZOOM durante l...

Страница 63: ...n Izquierdo o Derecho para cambiar a configuraciones de otros elementos Luego presione el botón de navegación Derecho o el botón Entrar para entrar al submenú presione el botón de navegación Izquierdo para volver a la página anterior de menú 1 CONFIGURACIÓN GENERAL 1 1 Visualización en Televisión Sirve para seleccionar el modo de salida de televisión Opciones Normal PS Modo panorámico y exploració...

Страница 64: ...onfirmación de Contraseña Presione el botón Entrar en la pantalla para volver a la configuración de contraseña entonces se habrá cambiado la contraseña NOTA La contraseña original es 136900 usted puede cambiarla pero deberá escribirla y mantenerla segura Si usted olvida su contraseña por favor utilice la contraseña original 136900 3 2 CONTROL PROGRAMADO Esta configuración permite a ciertas persona...

Страница 65: ...onfirmar directamente Control de volumen Presione VOL o VOL para ajustar el nivel del volumen El rango disponible es de 0 a 100 Control de Silencio Presione el botón Silenciador MUTE para desactivar el sonido presione de nuevo para reactivarlo NOTA cuando la unidad este en modo silenciado también puede presionar el botón VOL para encender el volumen e incrementarlo si presiona el botón VOL la unid...

Страница 66: ...OM Configuración MTS Audio Presione el botón MTS Audio en el control remoto para entrar al menú de sonido luego utilice los botones de navegación Arriba y Abajo para seleccionar la opción deseada Opciones Mono Estéreo SAP No disponible para todos los canales O presione el botón MTS Audio en el control remoto para mostrar el idioma de sonido digital No disponible en todos los canales Visualización ...

Страница 67: ...tón Congelar en el control remoto para detener la imagen presione de nuevo para resumir la reproducción normal Reproducción de Música Antes de seguir cualquier operación inserte un dispositivo USB Presione el botón Fuente en la parte superior de la unidad o en el control remoto para establecer la unidad en el modo de Media 1 Presione los botones de navegación Izquierdo o Derecho para seleccionar e...

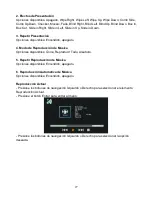
Страница 68: ...nes de navegación Izquierdo Derecho para reproducir la anterior Siguiente imagen Presione el botón Entrar para ver la foto en la pantalla completa Presione los botones d navegación para mover arriba abajo izquierda derecha 3 2 Miniatura Seleccione este elemento luego presione el botón Entrar para reproducir todas las imágenes en modo miniatura Presione los botones de navegación Arriba Abajo para v...

Страница 69: ...ido apagado 4 Modo de Reproducción de Música Opciones disponibles Única Reproducir Todo Aleatorio 5 Repetir Reproducción de Música Opciones disponibles Encendido apagado 6 Reproducción Automática de Música Opciones disponibles Encendido apagado Reproducción Actual Presione los botones de navegación Izquierdo o Derecho para seleccionar el elemento Reproducción Actual Presione el botón Entrar para e...

Страница 70: ...esione los botones de navegación Arriba Abajo para seleccionar la opción que desea ajustar Presione los botones de navegación Izquierdo o Derecho para ajustar la opción seleccionada al valor deseado Luego presione el botón Entrar para confirmar la selección Presione el botón Menú para volver a la página anterior del menú Presione el botón Salir para salir del menú Modo TV Presione el botón Fuente ...

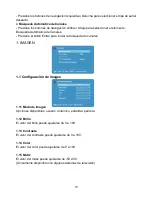
Страница 71: ...otón Entrar para iniciar la búsqueda de canales 1 IMAGEN 1 1 Configuración de Imagen 1 11 Modo de Imagen Opciones disponibles usuario dinámico estándar película 1 12 Brillo El valor del brillo puede ajustarse de 0 a 100 1 13 Contraste El valor del contraste puede ajustarse de 0 a 100 1 14 Color El valor del color puede ajustarse de 0 a 100 1 15 Matiz El valor del matiz puede ajustarse de 50 a 50 Ú...

Страница 72: ...uración de PC NOTA Este sistema está disponible únicamente en el modo PC 1 4 Temperatura del Color Opciones disponibles Normal Cálido Fresco 1 5 Configuración Avanzada de Imágenes 1 51 Contraste Dinámico Opciones disponibles Apagado bajo medio alto 1 52 Modo de Filmación Este elemento es utilizado para encender o apagar el modo de filmación 1 53 Reducción de Ruido Opciones disponibles apagado bajo...

Страница 73: ...de 25 a 25 NOTA los valores de bajos agudos y balance solo pueden ajustarse cuando el modo de Sonido está establecido como Usuario 2 2 Modo Envolvente Presione el botón Entrar para activar o desactivar este elemento 2 3 AVL Presione el botón Entrar para activar o desactivar este elemento 2 4 Sonido Análogo Opciones disponibles Mono Estéreo SAP 2 5 Sonido Digital Opciones disponibles Inglés Francés...

Страница 74: ...e los botones de navegación para seleccionar el canal deseado Presione el botón Entrar para confirmar la selección 3 2 Lista de Favoritos Presione el botón Entrar para entrar al menú de Lista de Favoritos Presione los botones de navegación para seleccionar el canal deseado Presione el botón Entrar para confirmar la selección 3 3 Configuración de Canales Presione los botones de navegación para move...

Страница 75: ... Control de Programación introduzca la contraseña para entrar al menú de Control de Programación NOTA la contraseña de fábrica es 0000 4 1 Control de Programación 4 11 Control de Programación EUA Presione los botones de navegación Arriba o Abajo para seleccionar el elemento deseado Presione los botones de navegación Izquierdo o Derecho para entrar al submenú Presione el botón Entrar para bloquear ...

Страница 76: ...orrar Datos Descargables Este elemento se utiliza para borrar las nuevas clasificaciones descargables NOTA Los elementos Clasificaciones descargables y Borrar Datos Descargables están disponibles únicamente cuando hay nuevas clasificaciones disponibles 4 2 Cambiar Contraseña Presione los botones numéricos en el control remoto para introducir una contraseña de 4 dígitos para cada elemento NOTA Una ...

Страница 77: ...uente de entrada que se ha bloqueado el siguiente mensaje aparecerá en la pantalla NOTA Luego presione el botón Entrar para entrar al menú de Desbloqueo Temporal e introduzca la contraseña presionando los botones numéricos en el control remoto para desbloquear dicha fuente 5 CONFIGURACIÓN 5 1 Subtítulos 5 11 Visualización de Subtítulos Opciones Disponibles Encendido Apagado ...

Страница 78: ...los Opciones disponibles Predeterminado pequeño estándar grande Fuente de Subtítulos Opciones disponibles Predeterminado Estilo1 Estilo2 Estilo3 Estilo4 Estilo5 Estilo6 Estilo7 Opacidad de Subtítulos Opciones disponibles Predeterminada sólida intermitente translucida transparente Color de texto Opciones disponibles predeterminado negro blanco rojo verde azul amarillo magenta cian Opacidad de fondo...

Страница 79: ...mover el cursor en Año Mes Día Hora Minuto Segundo Presione los botones de navegación izquierdo o derecho para ajustar el elemento 5 34 Día de la Semana Este elemento no es ajustable por el usuario 5 35 Horario de Ahorro de Energía Este elemento está disponible únicamente cuando el Reloj Automático está activado Presione el botón Entrar para activar o desactivar este elemento 6 OTROS 6 1 Fondo Azu...

Страница 80: ...ad o en el control remoto por aproximadamente 3 segundos para volver a la reproducción normal Modo AV YPbPr HDMI MEDIA DVD Presione el botón Fuente en la parte superior de la unidad o en el control remoto para seleccionar la fuente deseada Para menús de Imágenes Sonido Configuración y otros por favor refiérase a la operación de menús en el modo de televisión Modo PC Presione el botón Fuente en la ...

Страница 81: ...ponible 15 a 15 3 Posición Vertical Rango disponible 15 a 15 4 Reloj Rango disponible 30 a 30 5 Fase Rango disponible 0 63 6 Restablecer Presione el botón Entrar para restablecer los elementos mencionados arriba Excepto por Sonido Análogo y Sonido Digital que son menús inválidos e menú de Sonido será el mismo que en el modo de televisión Los menús de Configuración y otros son iguales que en el mod...

Страница 82: ... H 0 3 V mm Pixeles 1366 768 Iluminación 16 7M Proporción de Contraste 1000 1 Proporción de Aspecto 250 cd m2 Tiempo de respuesta 5 5 ms Ángulo de Vista 170 H 160 V Rango Visible 409 8 H 230 4 V Vida de Lámpara 50 000 Hrs Música Compatible con MP3 Formato de Reproducción Multimedia MODO TV Fotos Compatible con JPEG Películas Compatible con MPEG1 MPEG2 MPEG4 Música Compatible con MP3 Formato de Rep...

Страница 83: ...PERACIONES NI CON EL CONTROL REMOTO NI DIRECTAMENTE EN LA UNIDAD Desconecte el adaptador de energía y reconéctelo El reproductor podría no funcionar correctamente debido a rayos estática electricidad u otros factores PROBLEMAS CON LA TELEVISIÓN NO HAY IMAGEN HAY IMAGEN PERO MUY DÉBIL Ajuste la antena o utilice una antena externa Reubique la unidad en un área cercana a una ventana si está dentro de...

Страница 84: ... el menú del DVD si está disponible PROBLEMAS CON CD DE VIDEO NO HAY MENÚ Esta función únicamente trabaja con CDs de video con control de reproducción PROBLEMAS CON USB EL REPRODUCTOR NO RECONOCE LA MEMORIA USB NI DISCOS DUROS Refiérase a las instrucciones que describen como utilizar dispositivos USB con este equipo Si el problema persiste Esta máquina ha sido probada con la mayoría de las marcas ...

Отзывы: