


59
28 aprile 2021
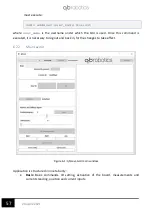
6.2.3
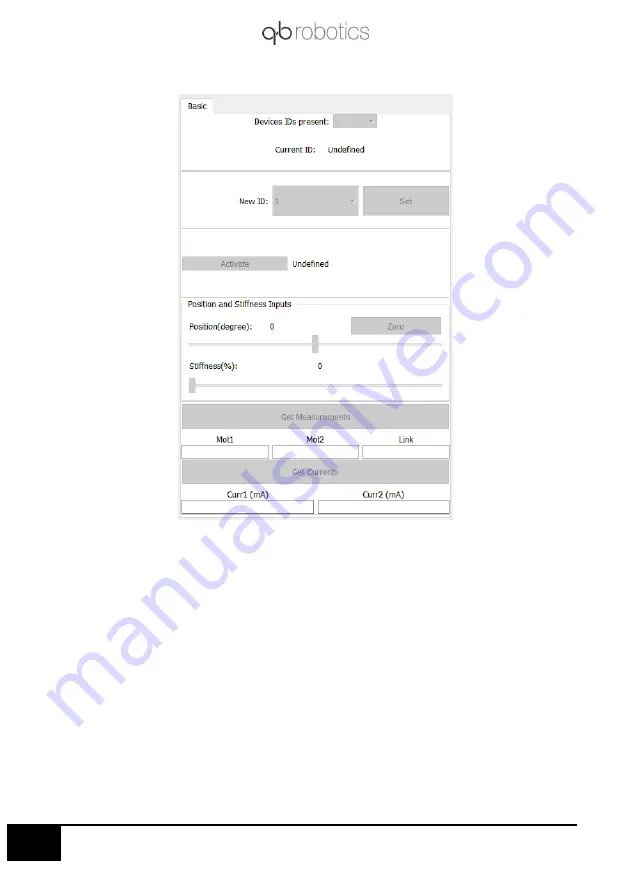
Basic Tab
•
Devices IDs present:
Once the device, or devices (if connected in a chain), are
connected clicking on
“Connect”
, a list of their IDs is going to be showed here. Selecting
the desired ID from drop-down menu will make the application connect to that device
and is then possible to use that specific device only;
•
New ID:
Default ID of the board is 1. Clicking on drop-down menu will show a list of
available IDs (1 to 127). Clicking on
“
Set”
button will set ID equal to the New ID
selected;
•
Activation:
To use qbmove you first have to activate qbmove
’s
drivers. You can do this
by clicking on
“Activate”
. The string next to the button will show boar state of
activation.
•
Measurements and Currents:
Clicking on
“Get Measurements”
and
“Get Currents”
will
show encoder measurements for the first one and current measurements, for the
second one. Encoder measurements are shown in encoder ticks, Currents in mA;
Figure 6-3: qbmove GUI Basic tab
Содержание qbmove Advanced Kit
Страница 1: ...Please read these instructions before use Do not discard keep for future reference User manual KIT ...
Страница 2: ...www qbrobotics com ...
Страница 14: ...11 28 aprile 2021 Dimensions of the flanges Figure 3 5 C Flange dimensions Figure 3 6 Base flange dimensions ...
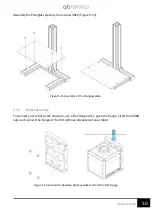
Страница 15: ...12 28 aprile 2021 Figure 3 7 Snap on mechanism Figure 3 8 Examples of connection ...
Страница 40: ...37 28 aprile 2021 ...
Страница 63: ...60 28 aprile 2021 IMPORTANT Remember to power the qbmove or the chain before using it ...
Страница 97: ...94 28 aprile 2021 This page was intentionally left blank ...


