Changing the world one Vehicle at a Time
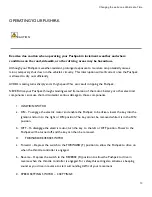
VII. INSTRUMENT DISPLAY
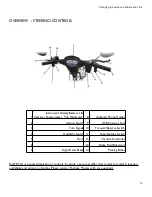
a. Speedometer – Displays your current speed.
Note: Travel speed is impacted by the speed setting you select. Refer to section III—speed
Setting Switch for more information.
b. Battery Life Indicator – Displays the current battery life in bars and voltage.
c. Trip Odometer – Displays the mileage per trip/ignition.
VIII. HEADLIGHT
The headlight can be used whenever low visibility in natural light compromises the safe operation
of your Pushpak.
a. To turn the headlight on, move the switch to the ON position.
b. To turn the headlight off, move the switch to the OFF position.
NOTE: On some models, the brightness of the headlight can also be adjusted.
IX. PARKING/PARKING BRAKE
When your Pushpak is not in use, engage the parking brake to ensure no movement.
a. Once the Pushpak is brought to a full stop, turn the key in the OFF position's ignition.
b. Engage the parking brake to ensure the brakes are locked:
a. Squeeze the left-hand brake thoroughly, ag, and it holds in place.
b. Push down the pin past the bottom of the handle.
c. Swing the lock tab over the pin to secure the hand brake in the braking position.
c. Remove the key from the ignition.
d. To disengage the parking brake:
a. Swing the lock tab away from the pin and hold.
b. Push the pin down disengage, and the pin will pop up. This will release the hand brake from
the braking position.
16


