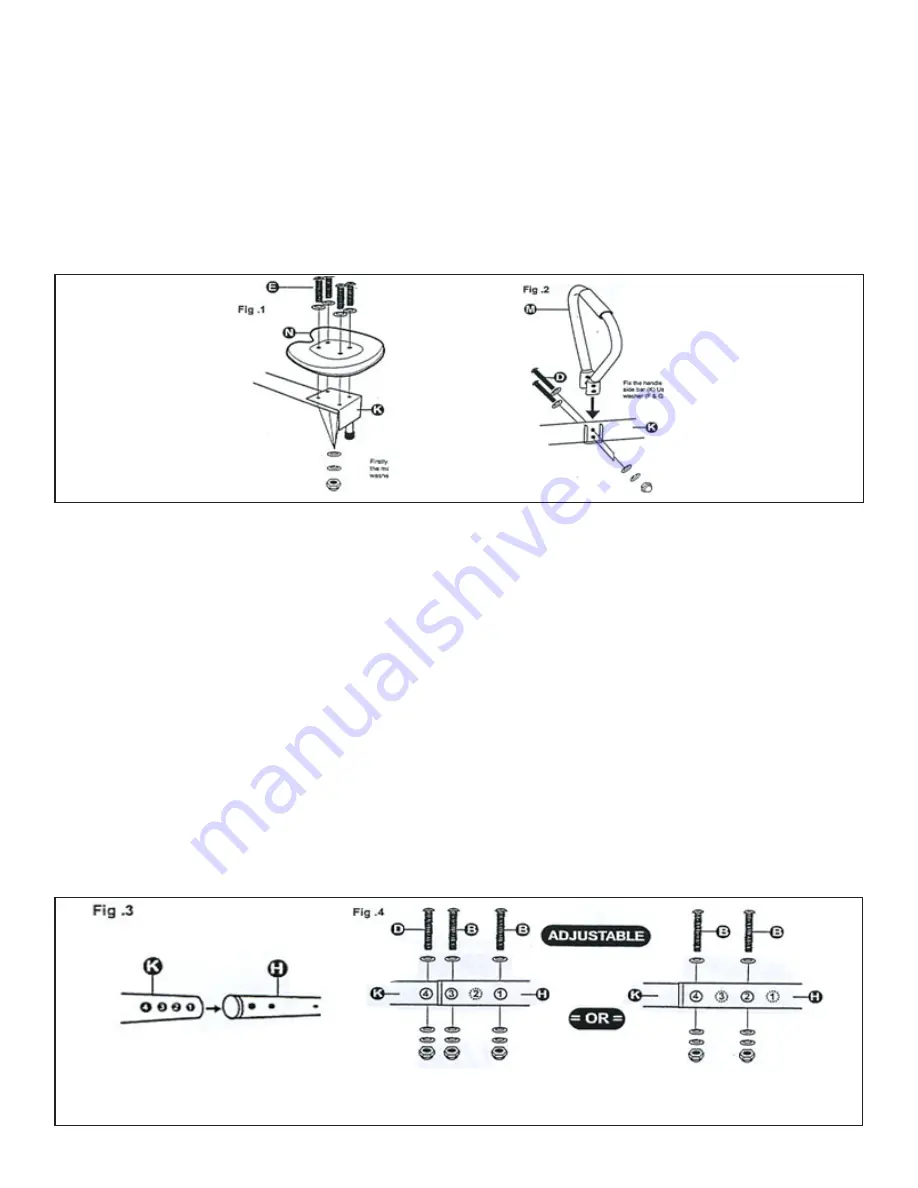
STEP 1: Seat and Handlebar Assembly
A. Attach the Seats:
Secure a plastic seat (N) onto each end of the Side Bars (K) using 4x M6 25mm Bolts (E), 8x M6 Washers
(F), 4x Lock Washers (G), and 4x Nuts (P), as shown in Figure 1. Make sure that the Lock Washer is resting
against each Nut.
B. Attach the Handlebars:
Affix the a Handlebar (M) to each of the Side Bars (K) using 2x M6 45mm Bolts, 4x M6 Washers (F), 2x Lock
Washers (G), and 2x Nuts (P) as shown in Figure 2. Make sure that the Lock Washer is resting against each
Nut.
STEP 2: Main Bar Assembly
A. Attach the Side Bars to the Main Bar:
First slide a Small Plastic Tube (V) onto the end of each Side Bar (K) you assembled.
Next, slide the bars
into the Main Center Bar (H) as shown in Figure 3.
B. Select Side Bar Bolt Formation:
Formation 1:
Secure with 2x M6 60mm Bolts (B) 4x M6 Washers (F), 2x Lock washers (G), using the lower
right diagram in Figure 4.
Formation 2:
Secure with 2x M6 60mm Bolts (B) 4x M6 Washers (F), 2x Lock washers (G) 1x M6 50mm Bolt
(D1), 2x M6 Washers (F), and 1x Lock Washer (G) using the left diagram in Figure 4.
It is recommended that you start off with the bars at equal lengths, and adjust only if necessary due to a signifi-
cant difference in height or weight of the children using this seesaw. If you do not use the D1 bolts, be certain
that you keep these bolts in a safe place in case they are needed in the future.
D1


