


Replacing a Card in an 4-port, 8-port or 16-Port MPS1000
39
Installing a CPC358
Follow these steps to insert a CPC358 card into a MPS1000:
See
Figure 5-2, “Card Installation Details,”
1. Inspect the CPC358. If it is new, it may come with protective plastic covers on the latches’ captive
screws. These will need to be removed before the card can be installed.
2. Ensure that the card’s latches are open. The latches have a locking mechanism that will need to be
pressed in order to open the latches.
Note: It is important to remember if you are updating a 4-port version to an 8-port version,
updating an 8-port version to a 16-port version, adding a different card, or removing a card,
that the DIP switch SW1 is set properly for the running conditions of the MPS1000. Further
information on setting SW1 can be found on
“DIP Switch Settings,” on page 45
.
3. Holding the card by its latches, align the card in the MPS1000’s card guides.
4. Slide the card gently straight into the slot, keeping the card level. Do not apply too much pressure,
particularly if you feel resistance. You should feel the pin connectors on the rear of the card meet the
backplane.
5. Continue to slide the card into the slot until the latches touch the extrusions on either side of the slot.
6. Press down on the latches to guide the card the rest of the way into the slot and lock it into place. You
will hear a click as the latches are closed and the card is set into place.
7. After insertion, tighten the captive screws on the latches.
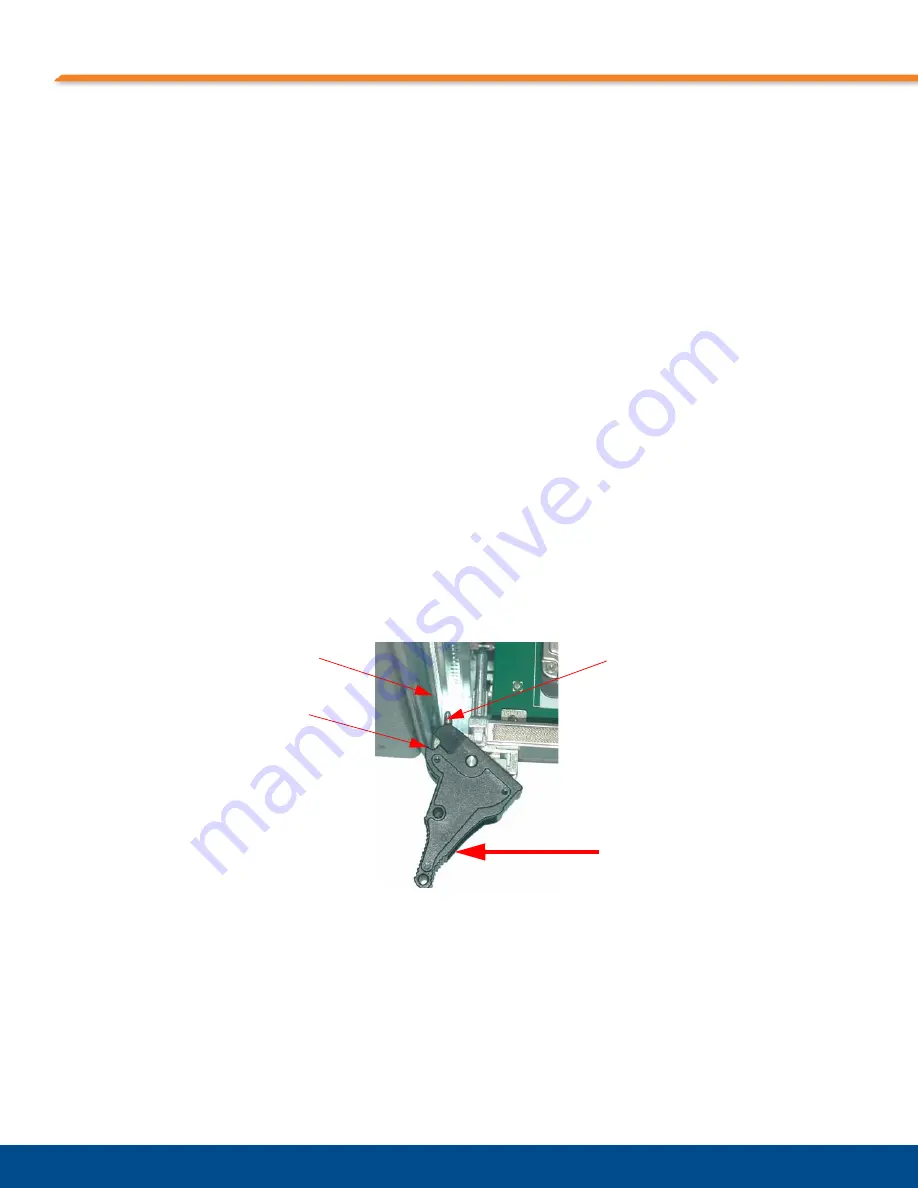
Figure 5-2:
Card Installation Details
Captive
Screw
Extrusion
The notch in the latch
will butt up against the
extrusion when the card
is fully seated.
Once the card is fully seated,
press down on the latches to
guide the card the rest of the
way into the slot. You will
hear a click when installed
properly.
StockCheck.com
Содержание MPS1000
Страница 4: ...4 S t o c k C h e c k c o m...
Страница 8: ...Contents 8 S t o c k C h e c k c o m...
Страница 10: ...Tables 10 S t o c k C h e c k c o m...
Страница 12: ...Figures 12 S t o c k C h e c k c o m...
Страница 16: ...Chapter 1 About This Guide 16 S t o c k C h e c k c o m...
Страница 22: ...Chapter 2 Introduction 22 S t o c k C h e c k c o m...
Страница 32: ...Chapter 3 Technical Information 32 S t o c k C h e c k c o m...
Страница 50: ...50 S t o c k C h e c k c o m...


