48
•
EN
7
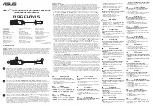
Product Overview Microphone
7.1 Operating elements
No
Element
Function
1
Microphone head
Interchangeable; available with dynamic and condenser cartridge.
2
Infrared interface
For synchronization with the receiver.
3
Control buttons
●
: To enter the setting menu and confirm.
▲ and ▼: To navigate and set values in the setting menu.
4
Battery compartment
To insert batteries, unscrew the cover and insert two 1.5 V AA
batteries as indicated in the compartment. Replace the cover.
Note: If the microphone is not used for a longer period, remove the
batteries to prevent damage in case of battery leakage.
5
Display
Indicates the transmission frequency, gain level and the battery
capacity:
After a few seconds without pressing a button, the user name and
user color are displayed.
6
On/off and mute button
▪
Press for 2 seconds to switch on/off.
▪
Short-press to activate muting (insertion MUTE); short-press
again to deactivate it
7
Color indicator
Shows the user color for easy distinction.
7.2 Menu
iSync
Indication
Function
GROUP
Adjusts the group (A to J or A to E)
CHANNEL
Adjusts the transmission channel (1 to 10 or 1 to 9)
FREQ
Adjusts the transmission frequency manually (25 kHz steps)
LOCK
Enables/disables the lock mode
GAIN
Adjusts the gain level (+4 dB to -32 dB)
RF POWER
Adjusts the transmission power (Low/Mid/High = 10/30/50 mW)
COLOR
Adjusts a user color (8 colors available)
BACK
Exits the menu
Press the
●
button to enter the setting menu. Use the
⊳
and buttons to browse the menu items and
select the desired function with the
●
button. Make your settings with the
⊳
and buttons.
Any settings changed will be instantly accepted by the receiver as long as the devices are synchronized
and a radio connection exists. Otherwise, the devices must be synchronized for the changes to take
effect.
All settings marked with a check mark can be configured from the receiver and transferred to the
transmitter via the iSync wireless connection.
Use the
●
button to jump to the next higher menu level. Exit the setting mode via menu item BACK.
Then the standard display will be indicated. If no button has been pressed for a few seconds, the setting
mode will be exited automatically.
IR
1
2 3 4
5
6
7


