


32
Psiber Data Systems Revision 2.01
PingerPro User Guide
The
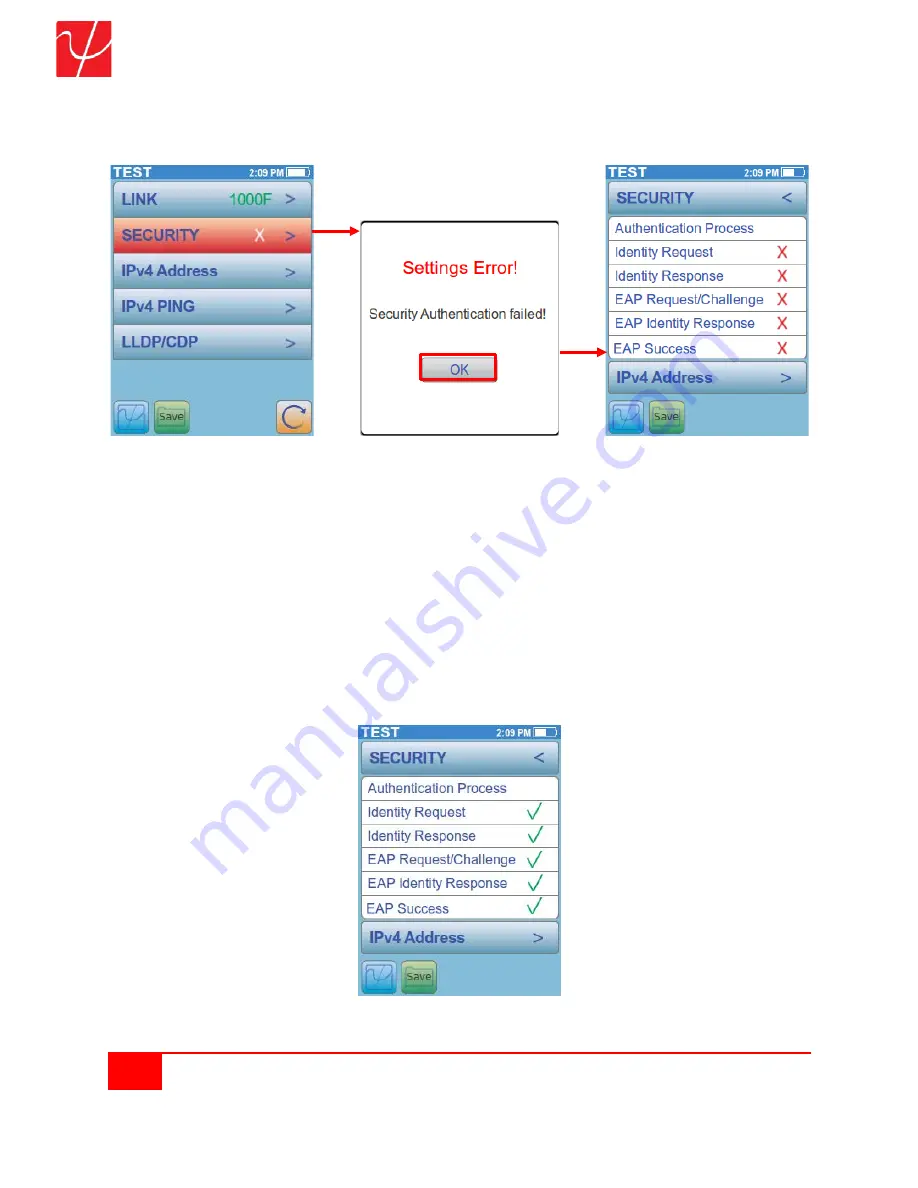
Security
Results Screen shows the Authentication Process the PingerPro goes through to connect to
a network using 802.1X through the EAP-MD5 protocol. The PingerPro will display green check marks for
passed steps and red X's for failed steps. This will help determine where potential problems are located
within the 802.1X Secure network authentication process.
Main Auto Test Failed Screen Security Warning Message
Security Screen with Failures
The PingerPro goes through the following steps to authorize a connection to an 802.1X secure network:
1.
The authenticator sends an "
EAP Request/Identity
" packet to the PingerPro as soon as it detects
that the link is active.
2.
The PingerPro sends an "
EAP Response/Identity
" packet
containing a unique User ID for the
PingerPro
to the authenticator, which is then passed on to the authentication (RADIUS) server.
3.
The authentication server sends back an “
EAP Response/challenge
” to the authenticator, such
as with a token password system. The authenticator unpacks this from IP and repackages it into
EAPOL and sends it to the PingerPro.
4.
The PingerPro responds with an “
EAP Identity Response
” packet which includes the correct
password to the challenge via the authenticator and passes the response on to the authentication
server.
5.
If the PingerPro provides proper identity, the authentication server responds with an “
EAP
Success
” packet, which is then passed onto the PingerPro. The authenticator now allows access
to the LAN network.
Passed Security Screen


