


Installing the Printer and the intelligent Paper Stacker
1-21
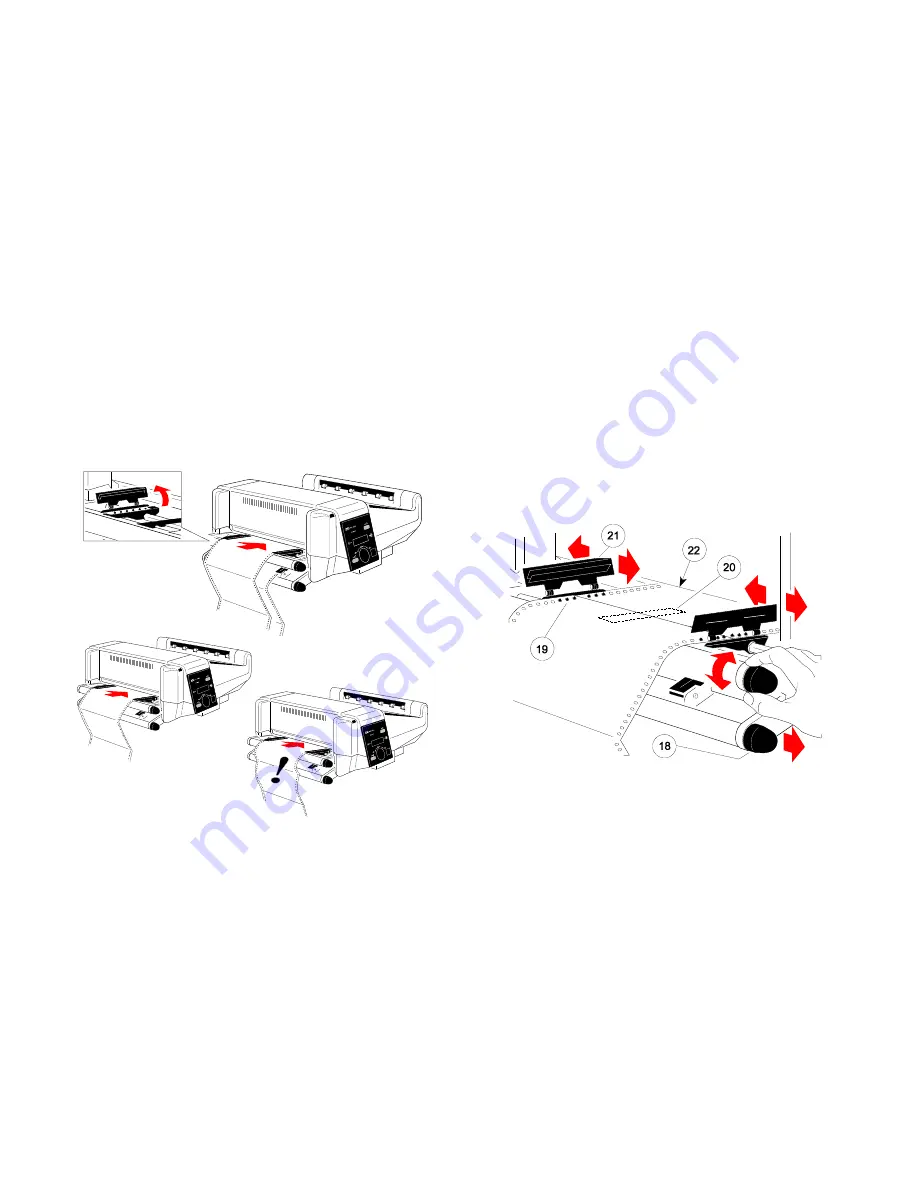
1.9
Inserting Fanfold Paper
Insert the paper as shown in the illustration; the top edge of the paper must be
close to the paper guide. (About
three transport punches
behind the last
transport pin of the tractor.)
Check that the fold points outwards behind the first page (default setting for
SELECT FOLD = POSITIVE
). If not tear off one page or change the setting for
SELECT FOLD
to
NEGATIVE
(see chapter
4 Explanation of Individual Menu
Items
).
Fold =
POSITIVE
Fold =
NEGATIVE
Note:
Paper must only be inserted while the printer is powered on!
Installing the Printer and the intelligent Paper Stacker
1-22
Inserting paper for the first time or changing to another paper width:
1. Pull out and turn the knob (18) to the right (small paper) or left (wide paper)
to adjust the tractors to the paper width, and center the paper support (20)
between the tractors.
2. Open the tractor covers (21), insert the paper, and close one tractor cover
again.
3. Turn the knob (18) for final adjustment of the paper. The pins (19) of the
tractor must be centered in the transport punches of the paper. Close the
other tractor cover.
4
Turn the tractor until the top edge of the paper digs into the paper
guide (22). (or put the paper already into the paper guide (22) during
inserting).
Note:
The top edge of the paper must be close to the paper guide (22). (About
three transport punches
behind the last transport pin of the tractor.)
The pins (19) of the tractor must be centered in the transport punches of
the paper.


