33
UNIT (measuring unit)
By pushing the arrows, you will select the measuring unit that you wish to use (Fahrenheit or Celsius). Thereafter,
temperatures will be displayed according to your selection. After two minutes of inactivity on the keyboard, the
display will shut itself off. The UNIT selection has no impact on the operation of the furnace. It is simply a
preference chosen by the technician or the user of the product..
FAN (blower speed)
Using the arrows, increase or decrease the blower speed. You can choose from six preselected speeds. This
selection is very important for the modes COOL, MANU, or CIRC. There is a choice of 6 different speeds. Under
the COOL mode, the speed selected is the speed at which the distribution blower will work when a cooling demand
will be sent by the thermostat. Under the MANU mode, it is the speed at which the distribution blower will work
when a heating demand will be sent by the thermostat and that the hot air plenum will have reached its kick-in
temperature (KIP). Under the CIRC mode, it is the speed at which the distribution blower will run to circulate the air
inside the house during summer. The CIRC mode will also be used by the technician to manually select speed #4 in
order to balance the system upon installation of the furnace.
Note: The FAN selection is not necessary under the HEAT mode because it is the PC board that automatically
chooses the speed at which the distribution blower runs in order to maintain the BEP inside the hot air plenum.
4.6 LIGHTING
1. Open the furnace door
Note: If there is already a bed of coals in the firebox, go to pre-heating.
2. Place one or two dry kindlings at the front of the furnace.
3. Place newspaper strips on top of the kindlings.
4. Cover the newspaper with more kindlings and small pieces of dry wood.
5. Add newspaper strips, then light the fire a low as possible and leave the door 1/2" (13 mm) opened. If you fail
lighting the fire, you might experience a back draft through the air inlets.
4.7 PREHEATING
1. Once the kindling is well ignited or the coals revived, put 2 or 3 fire logs in such a way that the flames can
interlace between the logs. Then, close the door. It is important to respect these loading sequences so that the
wood will burn from the front to the back of the furnace.
2. Wait 15 to 20 minutes, then proceed with loading the furnace.
4.8 HEATING
1. When loading the furnace, lower the kindled pieces of wood and place them at the center of the combustion
chamber before adding new logs.
2. Do not overload. Air must circulate freely in the upper part of the combustion chamber in order to obtain an
efficient operation of the appliance (secondary burn). Please note that a small hot fire will produce much less
residues than a large ,smouldering one.
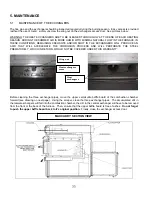
IMPORTANT: DURING THE HEATING PROCESS, REMOVE THE ASHES AND WOOD THAT COULD
OBSTRUCT THE 1/4" (6.4 mm) HOLE (PILOT) LOCATED BELOW THE DOOR, INSIDE THE
FURNACE’S COMBUSTION CHAMBER.
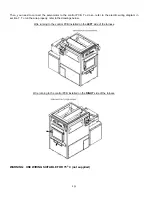
PROCEDURE TO OPEN THE LOADING DOOR
TO MINIMIZE THE RISK OF SMOKE SPILLAGE, OPEN THE DOOR 1”
AND WAIT ABOUT 10 SECONDS BEFORE OPENING IT COMPLETELY.
THE PURPOSE IS TO STABILIZE THE PRESSURE INSIDE THE FURNACE.
Содержание MAX CADDY PF01101
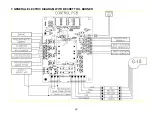
Страница 38: ...38 7 GENERAL ELECTRIC DIAGRAM WITH BECKETT OIL BURNER ...
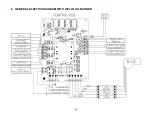
Страница 39: ...39 8 GENERAL ELECTRIC DIAGRAM WITH RIELLO OIL BURNER ...
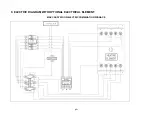
Страница 40: ...40 9 ELECTRIC DIAGRAM WITH OPTIONAL ELECTRICAL ELEMENT MAX CADDY WOOD ELECTRIC COMBINATION FURNACE ...
Страница 42: ...42 ...
Страница 45: ......
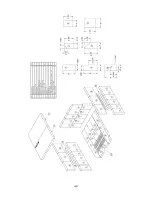
Страница 54: ...54 EXPLODED DIAGRAM AND PARTS LIST ...

