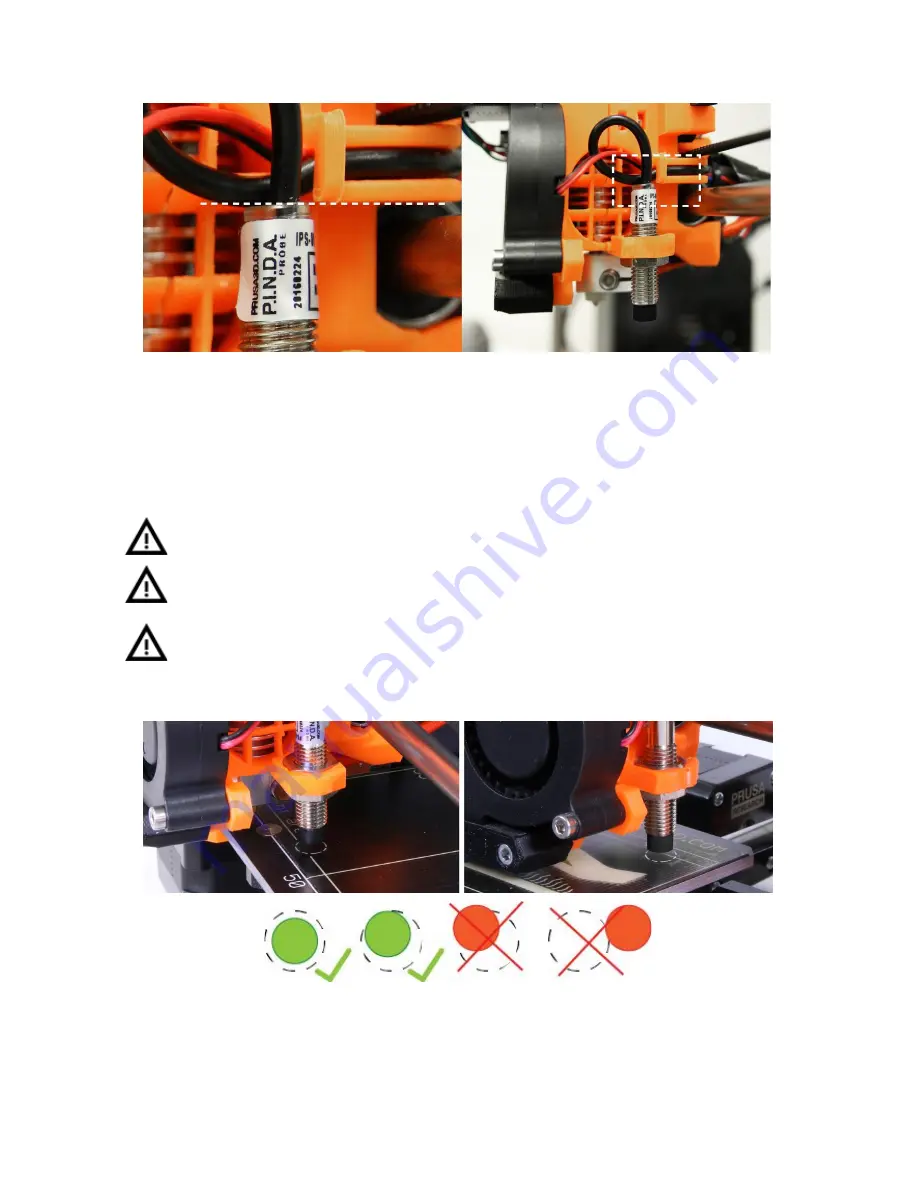
Pic. 6 The top of the probe should be aligned with the bottom of a printed part
When you run the
Calibrate Z
feature from the
Settings
menu on the LCD panel, the printer
will run the calibration routine. Closely watch how the probe approaches the 9 calibration
points. 1st and the last points are marked with white dashed circles for easy recognition. The
probe must be inside those circles to successfully calibrate.
The nozzle must not touch the print surface during this cold
calibration.
If it bends the print surface OR the probe is not
inside the circles, it is wrong and you have to readjust the
P.I.N.D.A probe!
Only then you should continue with the calibration
process. If you’re having trouble, feel free to ask us for help. If the
problem is not taken care of during the cold calibration, the nozzle
will
permanently damage
the print surface when hot.
Pic. 7 The probe must be inside the circles to successfully calibrate
.
If the probe is misaligned, you can easily adjust the position of the Y axis inside the frame by
loosening the
M10 nuts
on the Y axis and securing them at the newly adjusted position.
15


