Building your MINI+
14
Original Prusa MINI+ semi-assembled
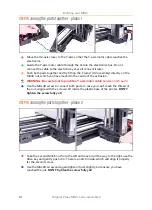
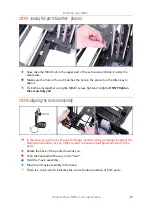
STEP 15
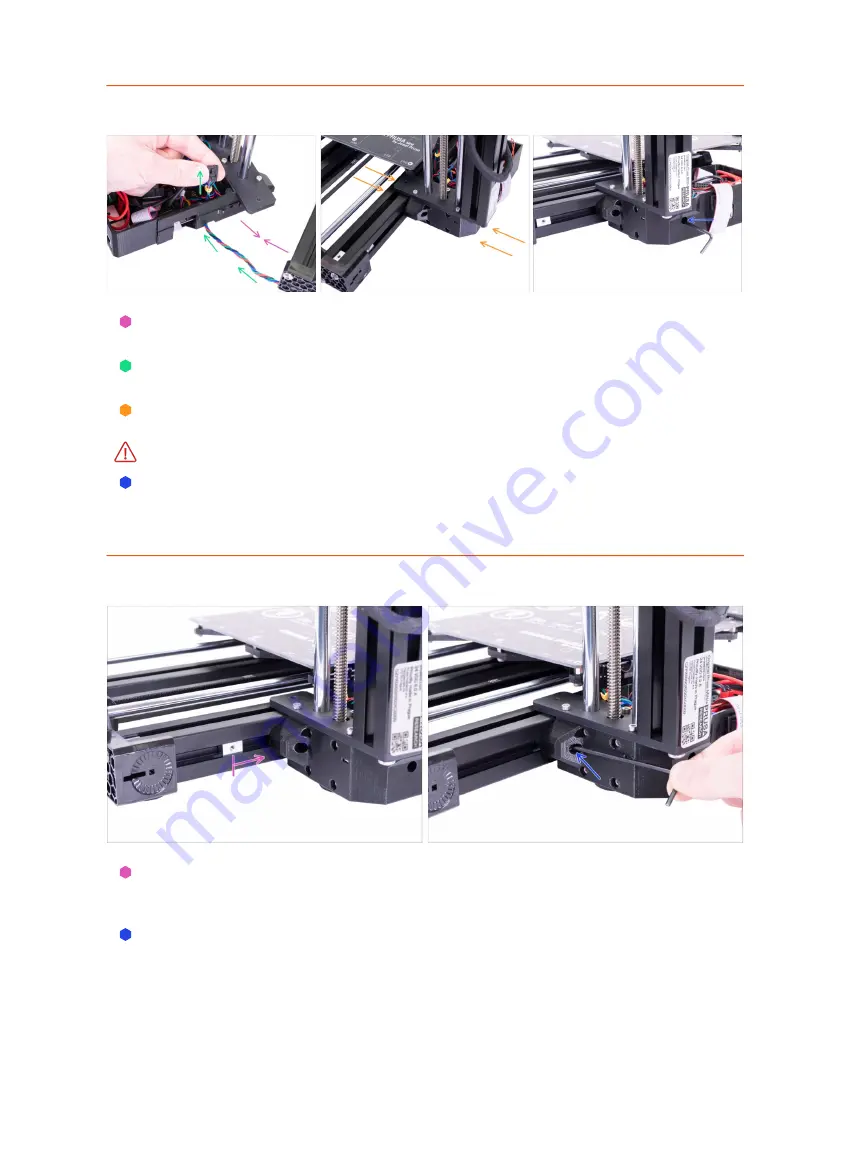
Joining the parts together - phase 1
Move the XZ-axis closer to the Y-axis so that the Y-axis motor cable reaches the
electronics.
Guide the Y-axis motor cable through the hole in the electronics box. Do not
connect the cable to the electronics yet, we'll connect it later.
Push both parts together and try fitting the "clamp" (XZ assembly) directly on the
M3nE nut, which you have moved to the centre of the extrusion.
WARNING: Be careful
not to pinch the Y-axis motor cable
between both parts!
Use the M3x40 screw to connect both parts. In case you can't reach the thread of
the nut, wiggle with the screw a bit inside the plastic base of the printer.
DON'T
tighten the screw fully yet!
STEP 16
Joining the parts together - phase 2
Take the second M3nE nut from the left and move it all the way to the right, use the
Allen key and gently push it in. There is a notch inside, which will align it properly
for the second screw.
Use the M3x20 screw and again tighten it just slightly, but ensure you have
reached the nut.
DON'T tighten the screw fully yet!
Содержание MINI+
Страница 2: ...2 ...
Страница 3: ...Original Prusa MINI semi assembled 3 Manual changelog MINI semi assembly ...
Страница 5: ...Original Prusa MINI semi assembled 5 Building your MINI ...
Страница 27: ...27 Notes ...
Страница 28: ...28 ...
Страница 29: ...29 Notes ...
Страница 30: ...30 ...
Страница 31: ...31 Notes ...
Страница 32: ...32 ...


