


Building your MINI+
12
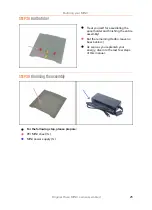
Original Prusa MINI+ semi-assembled
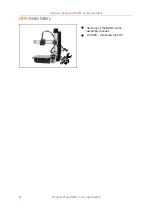
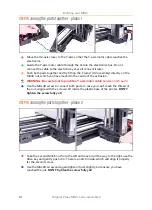
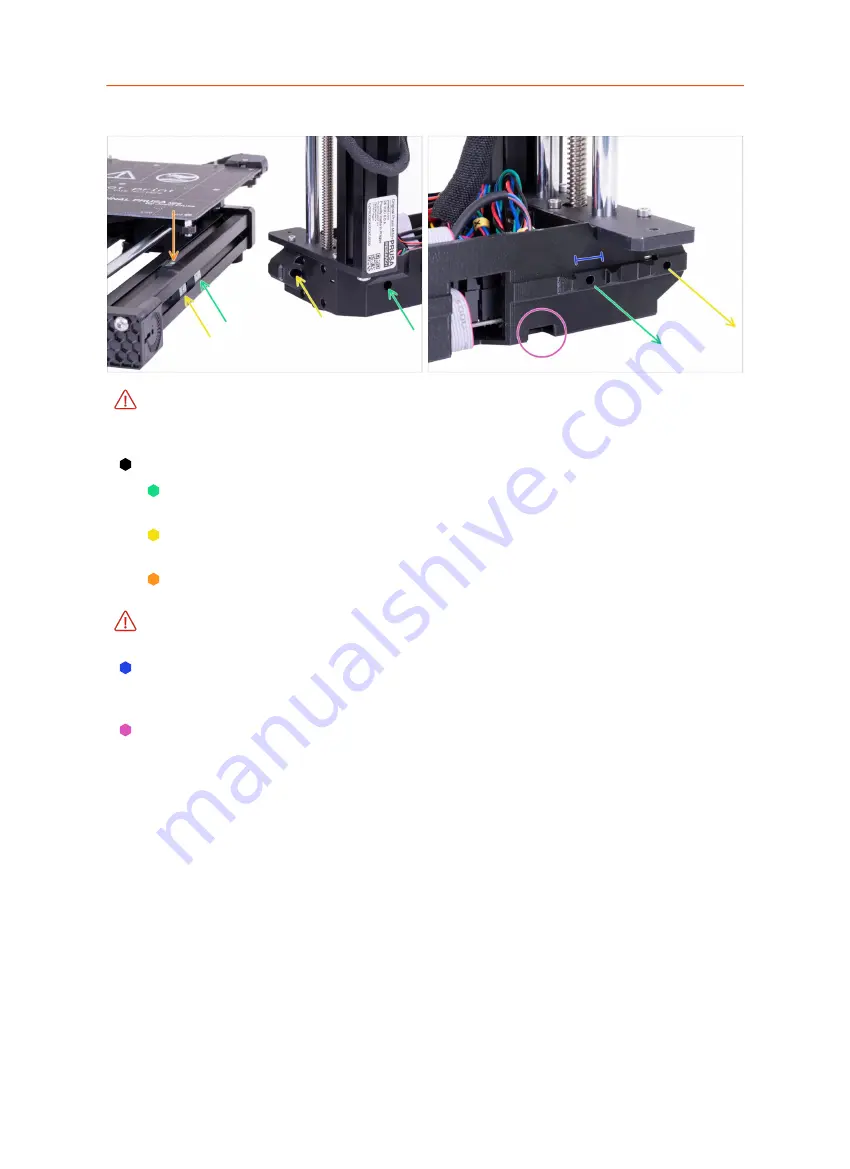
STEP 12
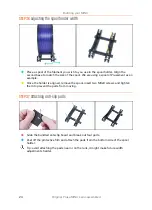
Connecting the Y and XZ-axis assembly
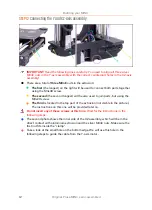
IMPORTANT
: Read the following lines carefully. You need to align all three silver
M3nE nuts in the Y-axis assembly with the correct counterpart holes in the XZ-axis
assembly!
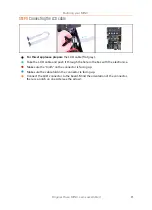
There are a total of
three M3nE
nuts in the extrusion:
The first
(the longest) on the right will be used to connect both parts together
using the M3x40 screw.
The second
(the second longest) will be also used to join parts, but using the
M3x20 screw.
The third
is located in the top part of the extrusion (not visible in the picture).
The instructions on this one will be provided later on.
Do not insert any of these screws at this time.
Wait for the instructions in the
following steps.
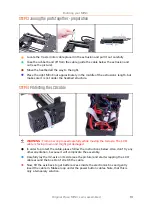
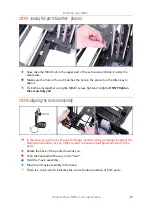
The second photo shows the inner side of the XZ assembly, which will be in the
direct contact with aluminium extrusion and the silver M3nE nuts. Make sure the
first nut fits inside the "clamp".
Take a look at the small hole on the bottom edge. We will use this hole in the
following steps to guide the cable from the Y-axis motor.
Содержание MINI+
Страница 2: ...2 ...
Страница 3: ...Original Prusa MINI semi assembled 3 Manual changelog MINI semi assembly ...
Страница 5: ...Original Prusa MINI semi assembled 5 Building your MINI ...
Страница 27: ...27 Notes ...
Страница 28: ...28 ...
Страница 29: ...29 Notes ...
Страница 30: ...30 ...
Страница 31: ...31 Notes ...
Страница 32: ...32 ...


