2. Upper Frame Fixings
Note: Refer to the Z-axis Z-axis-top parts section of the Prusa installation
guide for guidance on the installation and re-installation of the default
fixings, noting guidance on over tightening.
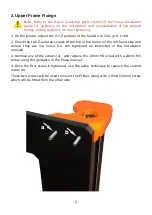
1. On the printer, adjust the X,Y,Z position of the head to x=150, y=0, z=60
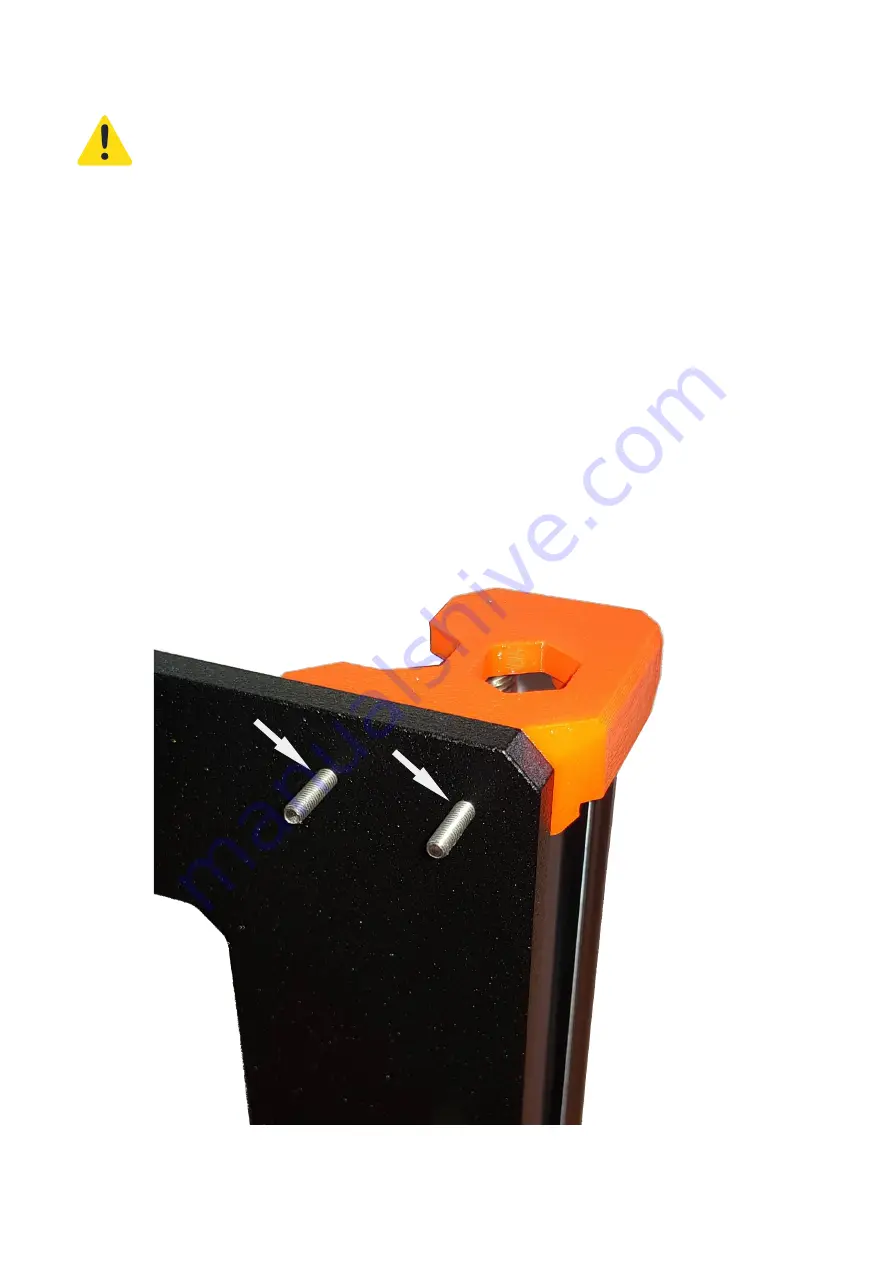
2. Check the two Z-axis-top screws at the top of the frame on the left hand side and
ensure they are not loose (i.e. still tightened as instructed in the installation
manual)
3. Remove one of the screws (a) , and replace the 10mm M3 screw with a 20mm M3
screw using the guidance in the Prusa manual.
4. Once the first screw is tightened, use the same technique to replace the second
screw (b).
These two screws will be used to mount the Pi Box, along with a third (14mm) screw
which will be fitted from the other side.
- 5 -
b
a


