background image

- 7 -

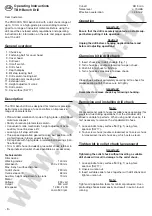
Set spindle speed

Caution!

Unplug drill before performing this operation! Never ope-
rate drill without protective cover.

Note:

Optimal performance results from uniform, correct speed
and not from excessive pressure.

Belt position “A” (Fig. 2)

= 1,080 rpm.

Belt position “B”

= 2,400 rpm.

Belt position “C”

= 4,500 rpm.

Note:

Once the belt is properly tensioned (between motor axle
and drill spindle), you should be able to easily re-position 
it by hand. When changing speed, it is not necessary to 
re-tension the belt.

1. Unscrew knurled bolt (Fig. 1) and remove cover 

hood 3.

2. Rotate belt pulley while pressing belt in direction of

smaller diameter until belt has been released.

3. Position belt onto smaller diameter for desired speed.
4. Rotate other belt pulley, while pulling belt onto large dia-

meter until seated properly for smooth function.

5. Install cover hood. Tighten knurled bolt 2.

Adjusting belt tension

Caution!

Unplug drill before performing this operation!

Note:

When changing drill speed, it is not necessary to re-tension
the belt.
Tension belt no tighter than necessary, i.e., tighten until
there is no more slack. An over-tensioned belt distends
over longer periods of inactivity and reduces motor output.

1. Unscrew knurled bolt (Fig. 1) and remove cover 

hood 3.

2. Loosen both bolts (Fig. 3) by one rotation.
3. Using a screwdriver, lever out the motor to the rear 

(Fig. 3) until the desired belt tension has been attained.

4. Tighten both bolts.
5. Install cover hood. Tighten knurled bolt (Fig. 1).

Adjusting distance between bit and 
workpiece

In addition to using the centre sleeve lift (drill lift), you can
set the TBH bench drill to the desired height via a quick-
adjustment crank mechanism (70 mm). Adjusting the drill
height does not displace the drill spindle centre mark
above the bench surface. In addition, the complete unit
can be moved to any position along the drill column.

Crank mechanism height adjustment:
1. Loosen knurled bolts 10 (Fig. 1).
2. Adjust extension arm to desired height using crank 12.
3. Tighten knurled bolts.

Note:

Tighten knurled bolts to eliminate unnecessary stress on
mechanism when drilling

Re-positioning complete extension arm

Important!

Secure extension arm against falling.

1. Release knurled bolts 10 (Fig. 1) and knurled bolt 9.
2. Move complete extension arm to desired position.
3. Re-tighten knurled bolts.

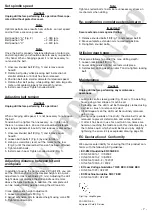
Utilising depth stop

Proceed as follows to adjust the max. drilling depth:
1. Loosen locking bolt (Fig. 1).
2. Lower drill spindle until bit contacts workpiece.
3. Set desired drilling depth on dial and re-tighten locking

bolt.

Maintenance

Caution!

Unplug drill before performing any maintenance 
operations.

• Lubricate centre sleeve guide (Fig. 3) every 10 operating

hours using a few drops of machine oil.

• Following use, the drill must be thoroughly cleaned using

a whisk or brush to remove all swarf.

• All dirt deposits on the drill must be routinely removed

using a rag.

• During longer periods of inactivity, the drive belt must be

removed to prevent deformation and erratic function.

• If, after it has been in use for a certain time, noises are

heard on touching the tailstock quill, this indicates play in
the tailstock quill, which should be taken up by slightly
tightening the screw, 84 (see exploded drawing, page 30).

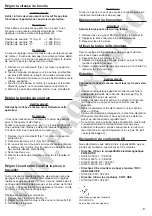
EC Declaration of Conformity

We assume sole liability for ensuring that this product con-
forms with the following EC guidelines:

• EC-EMC Guideline 89/336/EEC
• 
DIN EN 55014-1 / 09.2002
• DIN EN 55014-2 / 08.2002
• DIN EN 61000-3-2 / 12.2001
• DIN EN 61000-3-3 / 2002

• EC Low Voltage Guideline 73/23 EEC; 93/68 EEC
• 
DIN EN 61029 / 02.2001

• EC Machine Guideline 98/37 EEC
• 
DIN EN 61029 / 02.2001

Dipl.-Ing. Jörg Wagner

PROXXON S.A.
Equipment Safety Division

WWW.PROXXON.RO

Содержание TBH Bench Drill

Страница 1: ... nicht verändert Zusätzlich läßt sich die gesamte Einheit beliebig auf der Bohrsäule verschieben und schwenken Höhenverstellung über Kurbeltrieb 1 Knebelschrauben 10 Fig 1 lösen 2 Ausleger über Kurbel 12 in gewünschte Höhe verstellen 3 Knebelschrauben festziehen Hinweis Werden die Knebelschrauben nicht angezogen wird die Mechanik beim Bohren unnötig belastet Verschieben des gesamten Auslegers Acht...

Страница 2: ...ht adjustment via crank 70 mm Motor Voltage 230 volt Output 300 watt Idle speed 1 080 2 400 and 4 500 rpm Cut off KB 5 min Noise level 70 dBA Effective acceleration 2 5 m s2 Operation Important Ensure that the drill is securely mounted on a stable sup port before putting it into operation Caution Unplug the drill before changing application tools and before all adjusting operations Clamping bit in...

Страница 3: ...indle centre mark above the bench surface In addition the complete unit can be moved to any position along the drill column Crank mechanism height adjustment 1 Loosen knurled bolts 10 Fig 1 2 Adjust extension arm to desired height using crank 12 3 Tighten knurled bolts Note Tighten knurled bolts to eliminate unnecessary stress on mechanism when drilling Re positioning complete extension arm Import...

Страница 4: ...ire par manivelle 70 mm Moteur Tension 230 Volt Puissance 300 Watt Régime de ralenti 1 080 2 400 et 4 500 tr min Service de coupure KB 5 min Niveau sonore 70 dBA Accélération effective 2 5 m sec2 Commande Attention Avant la mise en service fixer fermement la machine sur un support stable Avertissement Débrancher la fiche de réseau avant de procéder au chan gement d outils et pour tous les travaux ...

Страница 5: ...sur la surface de l établi En outre il est possible de faire déplacer et tourner l unité complète sur la colonne de perçage Réglage de hauteur par manivelle 1 Dévisser les vis à garret 10 Fig 1 2 Régler à la hauteur voulue le bras avec la manivelle 12 3 Serrer les vis à garret Remarque Si les vis à garret ne sont pas serrées la mécanique sera inutilement sollicitée lors du perçage Déplacement du b...

Страница 6: ...zionamento a vuoto 1 080 2 400 e 4 500 giri min Funzionamento di interruzione KB 5 min Livello del rumore 70 dBA Accelerazione eff 2 5 m s2 Maneggio della macchina Attenzione Prima della messa in funzione fissare le macchina sopra un supporto stabile Avvertimento Prima di cambiare gli utensili e prima di eseguire qualsiasi lavoro di regolazione sulla macchina si deve staccare la spina della rete S...

Страница 7: ...rtapunta sulla superficie del tavolo non viene modificato Inoltre si può spostare ed orientare a piacere l intera unità sulla colonna del trapano Regolazione in altezza tramite manovellismo 1 Allentare le viti ad alette 10 Fig 1 2 Regolare il braccio di sostegno tramite manovella 12 all altezza desiderata 3 Serrare le viti ad alette Nota Se non si serrano le viti ad alette forando la meccanica vie...

Страница 8: ...ación adicional de la altura mediante manivela 70 mm Motor Tensión 230 voltios Potencia 300 vatios Régimen de revol de marcha en vacío 1 080 2 400 y 4 500 r p m Servicio de desconexión KB 5 min Nivel de ruido 70 dBA Aceleración ef 2 5 m s2 Manejo Atención Antes de la puesta en marcha fijar la máquina sobre una base más estable Aviso Extraer el enchufe de contacto a la red antes de cambiar el útil ...

Страница 9: ...onjunto de la unidad puede desplazarse y girarse arbitrariamente sobre la columna de la taladradora Regulación de la altura a través del mecanismo de manive la 1 Aflojar los tornillos de muletilla 10 Fig 1 2 Ajustar el brazo saliente a la altura deseada por medio de la manivela 12 3 Apretar bien los tornillos de muletilla Nota Si no se aprietan los tornillos de muletilla se cargará inne cesariamen...

Страница 10: ...ing 230 volt Vermogen 300 watt Nullasttoerental 1 080 2 400 en 4 500 omw min Uitschakelen KB 5 min Geluidsniveau 70 dBA eff versnelling 2 5 m s2 Gebruik Attentie Machine voor gebruik op een stevige ondergrond plaatsen Pas op Stekker uit het stopcontact halen voordat u van gereed schap wisselt en voordat u afstelwerkzaamheden aan de machine verricht Boor in boorhouder plaatsen 1 Boorhoudersleutel i...

Страница 11: ...ak verandert daardoor niet Bovendien kan de hele eenheid naar believen op de boorstelling worden verschoven en worden gedraaid Hoogteverstelling via krukaandrijving 1 Duimschroeven 10 Fig 1 losmaken 2 Dwarsarm via kruk 12 in gewenste hoogte brengen 3 Duimschroeven vastdraaien Aanwijzing Als de duimschroeven niet worden aangedraaid wordt de mechanica bij het boren onnodig belast De hele dwarsarm ve...

Страница 12: ... via krumtap 70 mm Motor Spænding 230 volt Effekt 300 watt Tomgangshastighed 1 080 2 400 og 4 500 o min Frakoblingsdrift KB 5 min Støjniveau 70 dBA Effektiv acceleration 2 5 m s2 Betjening Pas på Inden maskinen tages i brug bør den fastgøres på et stabilt underlag Advarsel Inden værktøj skiftes eller indstilles bør netstikket til maskinen trækkes ud Opspænding af boret i borepatronen 1 Sæt borepat...

Страница 13: ... ændres ikke der ved Hele enheden kan desuden forskydes og drejes vilkår ligt på boresøjlen Højdeindstilling via krumtapdrevet 1 Løsn spændepindsskruerne 10 Fig 1 2 Indstil overarmen til den ønskede højde via krumtappen 12 3 Stram spændepindsskruerne Bemærk Hvis spændepindsskruerne ikke tilspændes belastes mekanikken unødvendigt ved boringen Forskydning af hele overarmen Pas på Beskyt overarmen mo...

Страница 14: ...ning med vev 70 mm Motor Spänning 230 volt Effekt 300 watt Tomgångsvarvtal 1 080 2 400 och 4 500 v min Urkopplingsfunktion KB 5 min Ljudnivå 70 dBA eff acceleration 2 5 m s2 Bruksanvisning Se upp Sätt fast maskinen på ett stadigt underlag innan den tas i bruk Varning Dra alltid ur nätanslutningen före verktygsbyte eller inställningsarbeten på maskinen Spänna fast ett borr i borrchucken 1 Stick in ...

Страница 15: ...r bordsytan förändras inte därigenom Man kan också förskjuta och svänga hela enheten på borrpelaren Höjdinställning med vev 1 Lossa ställskruvarna 10 Fig 1 2 Ställ in svängarmen på önskad höjd med veven 12 3 Dra fast ställskruvarna Anvisning Om inte ställskruvarna dras fast belastas de mekaniska delarna onödigt vid borrning Förskjuta hela svängarmen Se upp Säkra svängarmen så att den inte faller n...

Страница 16: ... hluku 70 dBA Ef zrychlení 2 5 m sec2 Obsluha Pozor Před uvedením stroje do provozu nutno stroj náležitě upevnit na pevnou a stabilní pracovní plochu Pozor Před výměnou nářadí a seřizováním stroje vždy vytáh nout zástrčku přívodního el kabelu ze sítě Upnutí vrtáku do upínací hlavy 1 Do upínací hlavy 6 Fig 1 zasunout upínací klíč 2 Upínací klíč točit směrem doleva otevření sklíčidla 3 Vrták nasunou...

Страница 17: ...í výšky klikovým pohonem 1 Uvolnit šrouby s kolíkovou rukojetí 10 Fig 1 2 Otočné rameno nastavit do požadované výšky pomocí kliky 12 3 Šrouby s kolíkovou rukojetí dotáhnout Upozornění Nedotáhnou li se dostatečně šrouby s kolíkovou rukojetí dochází při vrtání k nadměrnému přetížení mechaniky stroje Posunutí kompletního otočného ramene Pozor Otočné rameno zajistit proti sesunutí 1 Šrouby s kolíkovou...

Страница 18: ...m Çevirme kolu ile ilave yükseklik ayar 70 mm Motor Gerilim 230 Volt Güç 300 Watt Yüksüz devir say s 1 080 2 400 ve 4 500 d dak Kapanma çal flmas KB 5 min Gürültü seviyesi 70 dBA efektif ivme 2 5 m sec2 Kullan m Dikkat Makinay çal flt rmadan önce sa lam dengeli bir altl k üzerine oturtun ve tespit edin kaz Tak m de ifltirmeden ve makinan n ayarlar ndan önce flebeke prizini ç kart n Matkab n mandrene b...

Страница 19: ...e mesi bundan dolay de iflmez laveten tüm kafa bir miktar Matkap sütunu üzerinde kayabilir ve dönebilir Çevirme kolu ile yükseklik ayar 1 S kma kolunu 10 Fig 1 sökün 2 Konsolu çevirme kolu ile 12 istenen yüksekli e getirin 3 S kma c vatas n s k n Aç klama S kma kolu s k lmazsa delme esnas nda mekanizma lüzum suz olarak zorlan r Tüm konsolun kayd r lmas Dikkat Konsolu afla ya düflmemesi için emniyete ...

Страница 20: ... 24 Notizen W W W P R O X X O N R O ...

Отзывы: