by a professional service workshop.
5. Remove plug from the mains before performing
any work on the electric tool.
6. Only insert plug in the mains socket when the electric
tool is switched off by the mains switch.
7. When working outdoors, use exclusively the extension
cords and cable connectors attested for outdoor use.
8. Damaged power supply cords must be replaced
immediately by a specialist.
9. Unauthorized use of this product anyway may lead
to a personal injury.
10. Turn or exchange blunt blades in good time, the danger
of kickback is otherwise increased. When replacing the
cutting heads or blades, the working steps described
in the appropriate section of this Operating Manual
must be followed exactly.
11. Secure work in a safe position with enough support for
a workpiece and the electric tool.
12. The electric cable must be able to move freely in the
whole working area and make trouble-free work possible.
13. Whenever possible, the electric tool should be connected
to the mains via a fault current circuit breaker (Fl) or
a PRCD safety device.
14. The electric tool may only be started after placing it on
the workpiece in initial position.
15. Keep hands away from the chip discharge channel.
If the channel is blocked, first the electric tool must be
switched off and allowed to come to a complete
standstill. After that, the chips may be removed.
16. After the work is finished, only put the electric tool
aside after the cutting head has come to a complete
standstill.
17. Repairs shall be carried out by the qualified
personnel only.
18. Use only the original spare parts.
19. Use safety glasses and ear protection.
Remaining risks
Even when the electric tool is used properly and all the
relevant safety measures are followed, the following
remaining risks can still occur due to the design of the
electric tool required for the intended working operations:
– Contact with the working tool in the cutting area
– Injury by the sharp cutting edges during replacement
of cutting heads
– Clothing can be caught by the rotating parts
– Hazards invited by the flexible supply cord.
Operating the electric tool for
a first time
For 230 V:
This electric tool is to be connected to AC mains supply.
Check if the actual mains voltage is correct.
Fusing for 230 V: 16 A slow-action fuse or equivalent
automatic circuit breaker.
The notcher is equipped with the overload cut-out.
The overload cut-out protects the motor against damage
from excessive long-time overloading.
Use only extension cords with a cross section of 3 x 2,5 mm
2
,
max. 50 m length. When the electric tool is used outdoors,
use only extension cords intended for outdoor use and so
marked.
Connection to a standby unit or generator: minimum
power 5 kVA
/
230 V, 50 Hz.
For 400V:
The hand-held notchers are designed in accordance with
requirements on Protection Class IP44 and they are
equipped with earthing connection.
Check if the actual mains voltage is correct
(see the nameplate).
Check the sense of rotation
(see the arrow on the outer pendulum guard).
Important
First familiarize yourself with the operating controls and
adjusting means of the electric tool.
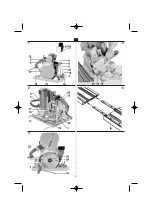
The milling unit is hinged to the guide plate (3) with
the hinges (1
/
2) on both sides and may be tilted up to
60° against the guide plate.
The electric tool is guided by the two favourably shaped
handles (4
/
5).
To switch the electric tool on, the interlock which prevents
unintentional starting must be released first. To do this,
press the lock-off button (28) and the switch actuator (6)
on the handle at the same time.
Both safety guards of the cutting tool are movable, with
a pendulum travel; they cover the cutting tool outside
the cutting area during work and retract automatically in
their rest positions after the working operation is finished.
The internal pendulum guard (7) may be opened my beans
of the swiveling handle (8).
The chip deflector (9) is adjustable to allow the best
possible control over chip discharge for every possible
setting of the notcher. In addition, the chip deflector can
hold the external pendulum guard (10) at open position
during replacement of cutting tools.
Adjustment of cutting depth and bevel angle is provided
by the sliding ruler (11) and the hand wheel (12).
11
GB
Содержание NRP 90
Страница 1: ...NRP 90 230 V NRP 90 400 V...
Страница 2: ...D 4 GB 10 F 15 E 21 P 27 I 33 NL 39 CZ 45 N 50 DK 55 S 60 FIN 65 GR 70 RUS 75 SK 82 PL 87 RO 93...
Страница 3: ...1 2 5 3 3 4...
Страница 73: ...12 15 14 22 13 19 8 400 V 1 3 16 23 24 25 73 GR 1 3 4...
Страница 76: ...1 2 3 4 5 6 7 8 9 10 11 12 13 Fl PRCD 14 15 16 17 18 19 230 230 16 76 RUS...
Страница 78: ...3 13 19 11 30 20 21 30 50 12 15 14 30 0 3 13 19 11 Abplatten 12 15 14 22 13 19 78 RUS 1 2 4 1 2...
Страница 79: ...79 8 400 1 3 16 23 24 25 0 Silbergleit RUS 1 3...
Страница 80: ...80 230 26 27 400 5 C 5 C N 50144 230 96 A 109 A 2 7 2 400 86 A 99 A 2 5 2 RUS...
Страница 81: ...81 N 50144 1 N 55014 1 N 55014 2 N 61000 3 2 N 61000 3 3 89 336 C 98 37 C Manfred Kirchner RUS...
Страница 99: ......
Страница 100: ......

