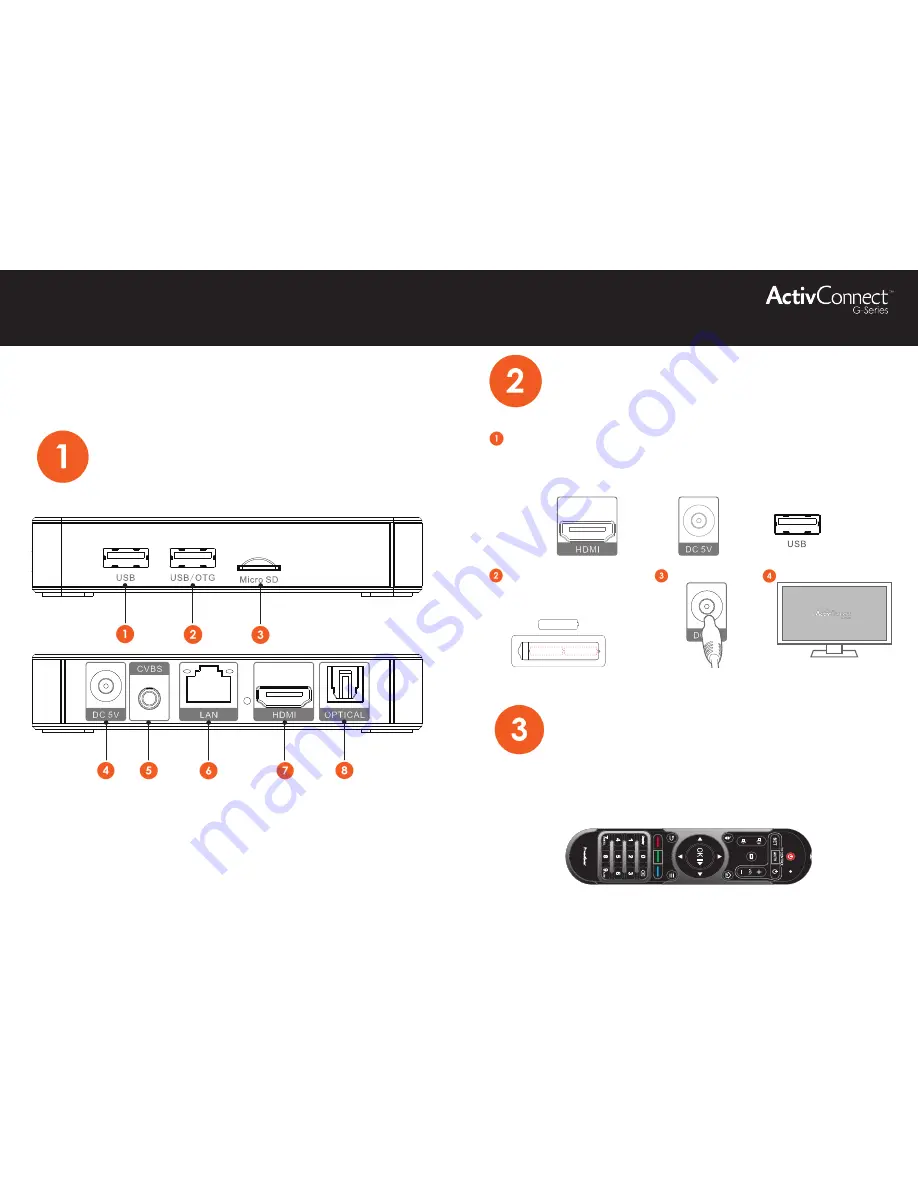
1. USB: Connect USB cable from ActivPanel for touch to this port only.
2. USB/OTG: Connect other USB device (ie pen drive) to this port.
3. Micro SD: Slot to insert Micro SD card
4. DC 5V: AC power adapter connection.
5. CVBS: Connect ActivPanel with AV cable.
6. RJ45 LAN: Network Device connection.
7. HDMI: High Definition cable connection.
8. Optical: Digital audio connection
Note: Above interfaces are for reference only. Check device for actual connections
Interface
Safety
Prepare
Remote Control
You do not normally need the remote control as many of the functions are integrated into your panel.
However if you have mounted the ActivConnect-G where it is visible you may use the remote to switch/on
and off the ActivConnect-G
Before installing/using the ActivConnect-G make sure that you have read the safety instructions in the online
User Guide.
Use the HDMI cable to connect your ActivConnect-G device to your panel or projection device.
Connect a USB from the device to the panels USB touch port. Please see your panel's user guide to
determine the appropriate port to attach to for interactivity.
The ActivConnect-G has two USB ports. Please attach to the port labeled USB for correct touch/pen
functionality The port labeled USB/OTG is not to be used for touch connectivity. You may only use that
port for other USB devices such as pen drives, cameras or a mouse/keyboard.
Turn on the panel.
Connect the power
Insert the batteries into the remote
control.
Note: If the remote control is not
used for an extended period,
remove batteries.
Quick Start Guide


