Hurricane 9200/S ADSL Ethernet Router User’s Guide
110
%""
*
Follow these instructions to add an IP route to the routing table.
1. From the IP Route Table page, click
.
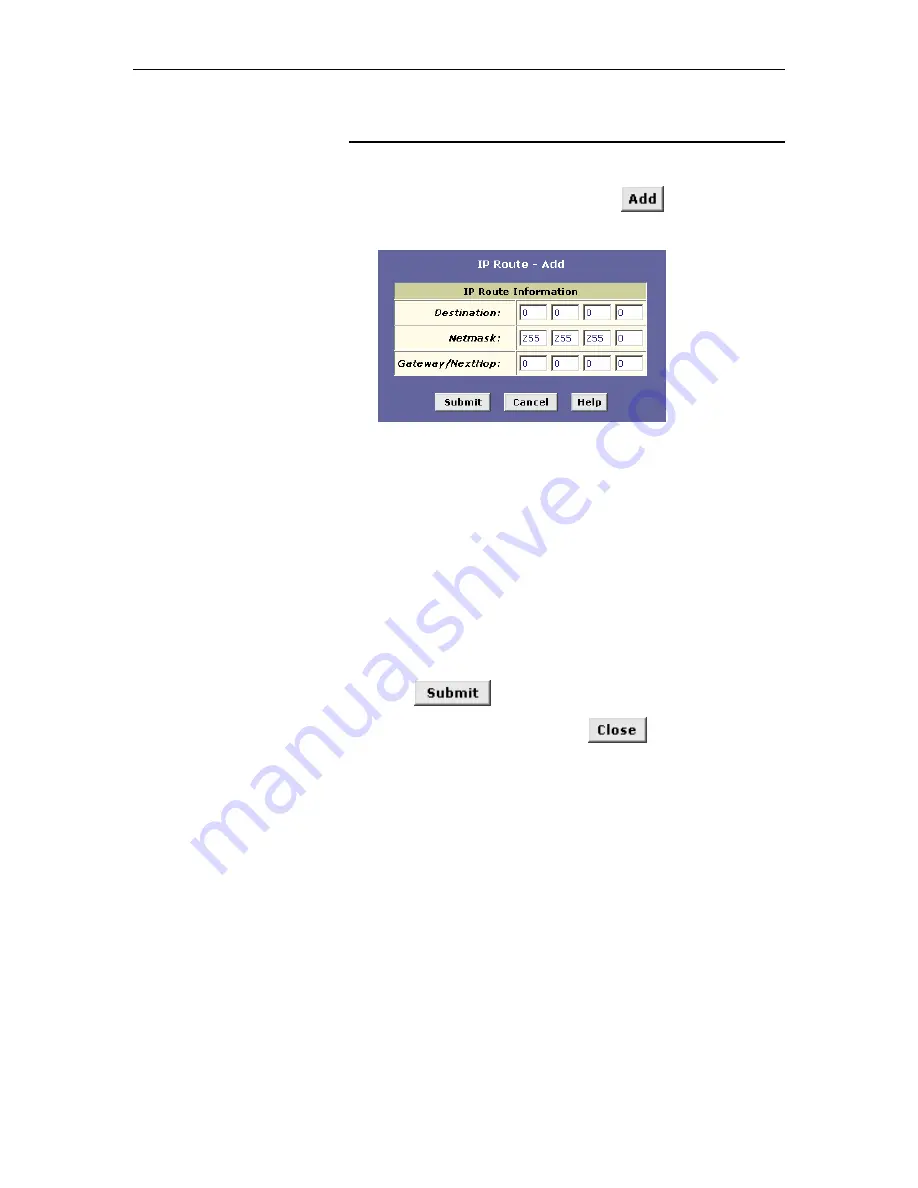
The IP Route – Add page displays:
Figure 42. IP Route – Add Page
2. Specify the destination, network mask, and gateway or next
hop for this route.
For a description of these fields, refer to the table on page 109.
To create a route that defines the default gateway for your LAN,
enter 0.0.0.0 in both the Destination and Netmask fields. Enter
your ISP’s IP address in the Gateway/NextHop field.
Note that you cannot specify the interface name, route type or
route origin. These parameters are used only for routes that are
identified automatically as the device communicates with other
routing devices. For routes you create, the routing table
displays system default values in these fields.
3. Click
.
4. On the confirmation page, click
to return to the IP
Route table.
The IP Routing Table will now display the new route.
5. If you want the changes to be permanent, follow the
instructions on page 45 to commit them.
Содержание Hurricane 9200/S
Страница 1: ...ADSL Ethernet Router User s Guide Revision 1 0 ...
Страница 9: ...Table of Contents 9 C Glossary 191 Index 199 ...
Страница 10: ......
Страница 13: ...13 Part 1 Getting Started ...
Страница 47: ...47 Part 2 Interfaces and Operating Modes ...
Страница 88: ......
Страница 89: ...89 Part 3 Routing and IP Related Features ...
Страница 102: ......
Страница 115: ...115 Part 4 Security Features ...
Страница 159: ...159 Part 5 Administrative Tasks and System Monitoring ...
Страница 173: ...Chapter 16 Monitoring System Status and Performing Diagnostics 173 Figure 79 DSL Interval Statistics Page ...
Страница 198: ......


