PROLIGHTS - Astra
Wash7PixIP
32
3
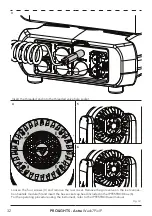
Insert the threaded end into the threaded valve hole socket.
4
5
6
Loosen the four screws (4) and remove the rear cover. Remove the gore valve on the rear connec
-
tion heatsilk module (5) and insert the hex socket cap head included in the IPTESTBOX box (6).
For the operating procedure using the instrument, refer to the IPTESTBOX user manual.
Fig. 12
Содержание Astra Wash7PixIP
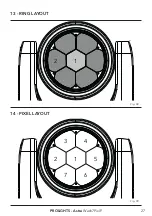
Страница 29: ...13 RING LAYOUT 1 2 Fig 08 14 PIXEL LAYOUT 1 2 5 3 4 7 6 Fig 09 PROLIGHTS Astra Wash7PixIP 27 ...
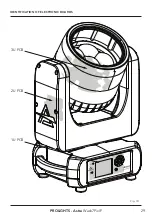
Страница 31: ...IDENTIFICATION OF ELECTRONIC BOARDS 1U PCB 3U PCB 2U PCB Fig 10 PROLIGHTS Astra Wash7PixIP 29 ...
Страница 37: ...Note ...
Страница 38: ...Note ...
Страница 39: ......


