


14
Item
Exit
To do
Return Main Menu
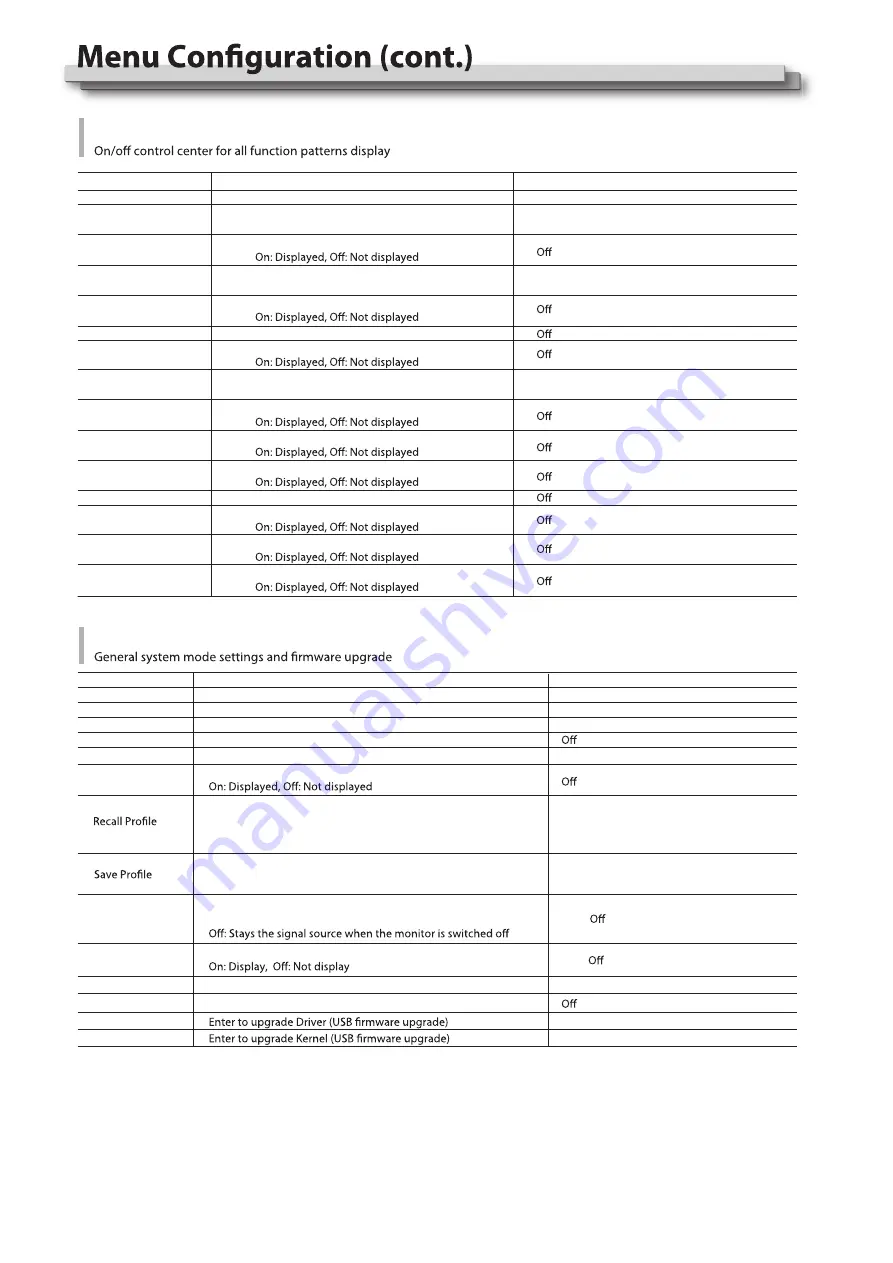
Display setting
Display setting
Focus Assist setting
Display setting
Display setting
Display setting
Display setting
R/G/B/Mono setting
Display setting
Display setting
Display setting
Item
Exit
Aspect Ratio
Scan Mode
Zoom Mode
Green Mode*3
Idle Duration
Update Driver*4
Update Kernel*5
To do
Return Main Menu
Aspect Ratio setting
Scan Mode setting
Zoom Mode setting
Display setting
Loading Factory settings and User presets
Default: Recover all settings to factory setting
User 1/2/3: Load the User settings 1/2/3
Save current User settings
User 1/2/3: Save the current settings to User 1/2/3
Settings for auto-scan input signals when switch on the monitor
On: Automatically scan
Settings to display Switch on logo or not
Display settings when in Energy Save mode
Set an idle time to enter Energy Save mode
Setting value
16:9
、
4:3
Normal
Factory
、
User1
、
User2
、
User3
、
OverScan
、
Native
、
Zoom1
、
Zoom2
Display
Waveform
Audio Bar
Vector
Zebra
Focus Assist
Time Code
Histogram
False Color
AFD
H/V Delay
R/G/B/Mono
Color Bar
Marker
UMD
、
On
、
On
、
On
、
On
、
On
、
On
、
On
、
On
、
On
、
Blue
、
Red
、
Blue Only
、
Red Only
、
Green Only
、
Mono
Setting value
System
Freeze Frame
Source Scan*1
Logo*2
、
On
User1
、
User2
、
User3
On
、
On
、
、
30Sec
、
2Hours
、
4Hours
No
、
Yes
No
、
Yes
*1 Source Scan
When set to “Yes”, next time switch on the monitor, the monitor will automatically scan the available signal source with the sequence
of “SDI1
→
SDI2
→
HDMI
→
YPbPr
→
VGA
→
CVBS”.
*2 Logo
When powered on, the screen will display ProHD logo.
*3 Green Mode
When no recognized signal is detected and opreation time reaches the time selected in “Idle Duration”, the monitor will turn to green
energy saving mode: “Green mode”.
Under standby, Gray Backlight, Blacklight mode, press any button on the front panel, the monitor will be back to normal status.
Black Backlight
、
Standby
、
Gray Backlight
Содержание DT-N17H
Страница 22: ...22 MEMO...