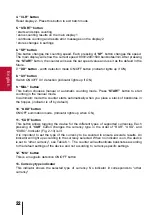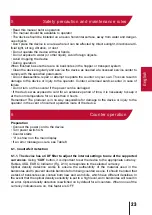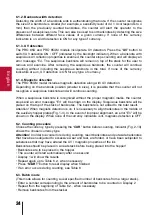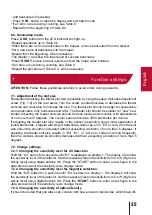
25
English
• Add banknotes if necessary
• Press “
CLR
” button to reset the display and exit batch mode
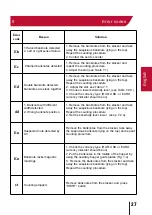
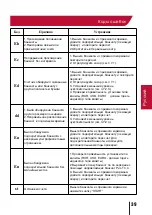
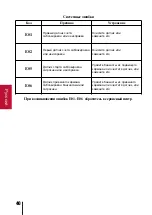
• If an error occurs during counting, see Table 8
• Repeat from the beginning of Table 6.2.
6.4. Summation mode
Press “
ADD
” button and the LED indicator will light up.
•Repeat operations up to Table 6.2.
•When there are no more banknotes in the hopper, remove banknotes from the stacker
•Put a new stack of banknotes into the hopper
•Repeat from the beginning, when necessary
•The display 1 will show the total result of counted banknotes
•Press “
START
” button to reset results and exit the mode when finished
•If an error occurs during counting, see Table 8
•Repeat the procedure of Table 6.4., when necessary
7
Function settings
ATTENTION
! Follow these guidelines carefully to avoid errors during operation.
7.1. Adjustment of the slot size
Remember! Adjusting the feeder slot size is possible by using the paper thickness adjustment
screw (Fig. 1-5) on the rear panel. Turn the screw counterclockwise to decrease the feeder
slot size and clockwise to increase the size. The feeder slot should be larger for excessively
worn banknotes, dirty banknotes and USD. The feeder slot should be smaller for “new” ban-
knotes. Adjusting the feeder slot size should be done slowly and smoothly, with adjustments
of no more than 5 degrees. The counter speed should be 1200 banknotes per minute.
If adjusting the feeder slot size results in the sensor responding slowly, slow separation of
joined banknotes, irregular stacking of banknotes, and/or an error “Eh” occurs, then the slot
size should be smoothly increased without exceeding a rotation of more than 5 degrees. If
adjusting the feeder slot size results in “Ed”, “Ec”, or “dd” error codes occurring frequently,
then the slot size should be smoothly decreased without exceeding a rotation of more than 5
degrees.
7.2. Change settings
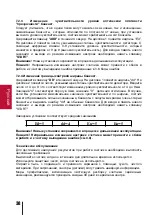
7.2.1. Changing the sensitivity level for UV detection
Hold the “UV” button for 4 seconds until “Eu” is displayed on display 1. The display 2 will show
the sensitivity level of the detector. Set the necessary level of sensitivity from 0 to 9 (high sen-
sitivity level) using digital buttons 0-9. Press the “START” button to enter a new figure in the
data store and exit the sensitivity level change mode.
7.2.2. Changing the sensitivity level for magnetic detection.
Hold the “MG” button for 4 seconds until “En” is shown on display 1. The display 2 will show
the sensitivity level of the detector. Set the necessary level of sensitivity from 0 to 9 (high sen-
sitivity level) using digital buttons 0-9. Press the “
START
” button to enter a new figure in the
data store and exit the sensitivity level change mode.
7.2.3. Changing the sensitivity of optical density
It should be noted that one stack can contain both new and worn banknotes, which have dif-
Содержание PRO 85
Страница 5: ...5 Deutsch 2 Bedienungselemente Au enansicht Abbildung 1...
Страница 7: ...7 Deutsch Abbildung 2...
Страница 17: ...17 Deutsch...
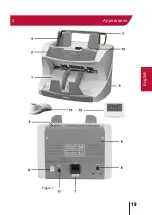
Страница 19: ...19 English 2 Appearance Figure 1...
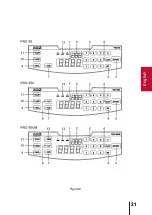
Страница 21: ...21 English Figure 2...
Страница 31: ...31 3 1...
Страница 32: ...32 2 1 2 3 4 5 6 7 8 9 10 11 12 13 4 1 MG 2 1 3 2 0 9 4 CLR 2 5 START 1 2 6 SP SP 1...
Страница 33: ...33 2...
Страница 34: ...34 900 1200 1500 START 7 DD 8 UV 9 MUL START STOP 10 ADD ADD 11 CUR CUR RUR USD EURO 13 6 1 12 MG 13 5...
Страница 35: ...35 4 12 6 1 0 1 8 6 1 6 1 1 CDF EURO CUR 13 6 1 2 4 dd 4 1 1000 10 1000 4 10 1 6 1 3 PRO 85U PRO 85UM UV Eu 1...
Страница 36: ...36 6 1 4 PRO 85UM 2 PRO 85UM 5 10 EURO En 1 4 En 6 2 CUR 13 1 1 6 2 1 START 8 6 3 3 2 6 2 2 CLR 8 6 2 6 4 ADD...
Страница 38: ...38 7 2 3 ADD 4 1 Ed 2 0 9 0 9 START 8 7 2 4 DD 4 1 dd 2 4 9 4 9 4 4 0 dd START c 8 30 Ed 5 dd 4 Eu 5 En 5...
Страница 40: ...40 E01 E06 E01 E02 E05 E06...
Страница 41: ...41 9...
Страница 43: ...43 Fran ais Fig 1...
Страница 45: ...45 Fran ais Fig 2...
Страница 55: ...55 Polski 3 Wygl d Rys 1...
Страница 57: ...57 Polski Rys 2...
Страница 65: ...65 1 3...
Страница 67: ...67 2 10 ADD 11 CUR CUR 2 13 6 1 12 MG 13...
Страница 68: ...68 5 4 6 1 7 0 1 8 6 1 6 1 1 CDF CUR 2 13 6 1 2 dd 4 4mm 1 1 1000 10 10 1000 10 4...
Страница 71: ...71 8 30 8 E01 E07 E01 E02 E05 E06...
Страница 72: ...72 Eh 1 2 1 2 Ec 1 2 7 1 Ed 1 2 7 1 3 7 2 3 4 dd 1 2 1 2 7 2 4 Eu En 1 2 1 4 3 st START...
Страница 73: ...73 9...
Страница 74: ...74...
Страница 75: ...75...
Страница 76: ...PRO INTELLECT TECHNOLOGY www pro intell com...


