28 Create a Print File
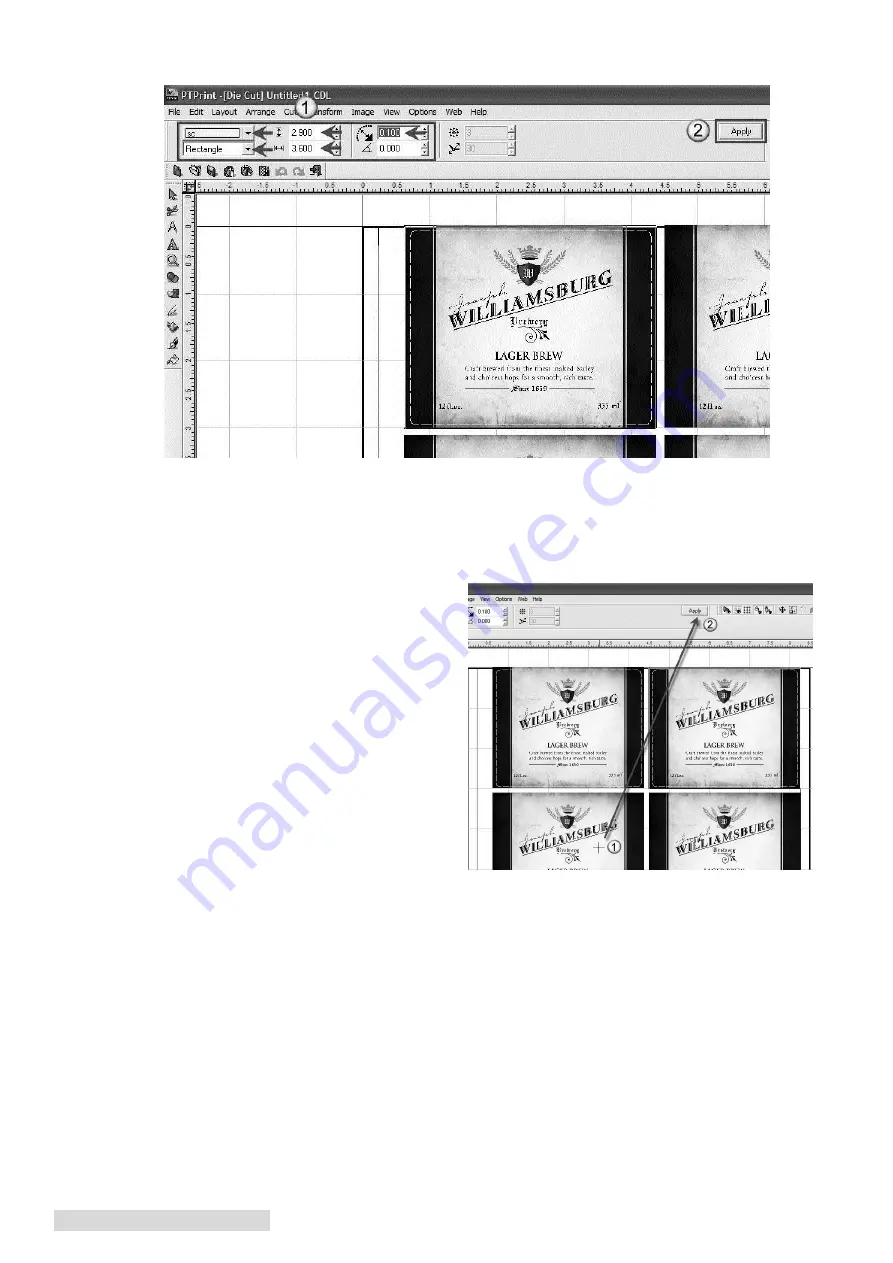
4. Now you can set the various settings that determine where the cut will be.
•
Set the color of the cut. This is just for viewing purposes.
•
Set the shape.
•
Set the size to correspond to the size of the label that you input in the layout wizard. You
can make the size slightly smaller if your label includes a bleed like the example below.
•
Set the corner radius if you want round edges.
5. Click Apply to apply it to the object.
6. Once you have set the die cut for the first
object you need to apply it to each of the
objects on the page. To accomplish this
simply select each object and then click
Apply.
7. Save the cut file as a .plt file on a thumb
drive or any location that the FX1200e
touch screen computer is setup to access.
Go to the File menu and then choose Cut.
Содержание Digital Color Label Press CX1200e
Страница 4: ...iv CX1200e Color Label Press...
Страница 5: ...v CX1200e Color Label Press...
Страница 63: ......
Страница 64: ......
Страница 65: ...P N 511222 093011...


