


Creating Disc 47
are not fully clear after a few cleaning prints, it may be
necessary to remove the cartridge and actually clean the print
head by gently wiping the nozzles with a moist cloth or paper
towel and replace it in the Bravo. If this fails, the cartridge
may be empty and in need of replacement.
Change Cartridge
If you need to change cartridges, it is a good idea to use the
Change Cartridge
button in the Configuration Utility. This
ensures the most accurate tracking of ink levels. To change a
cartridge, click the
Change Cartridge
button. The cartridge
holder will move to the center of the Bravo to make it easier
to install the cartridges. Lift the top cover and install the
cartridges and described in section 2-C of this manual. You
will be prompted to let the system know whether or not you
are installing a new or used color or monochrome cartridge.
Once installed, click the
OK
button and the system will update
your cartridge levels.
Note:
It is recommended that you perform and
Alignment Calibration
after installing a new cartridge.
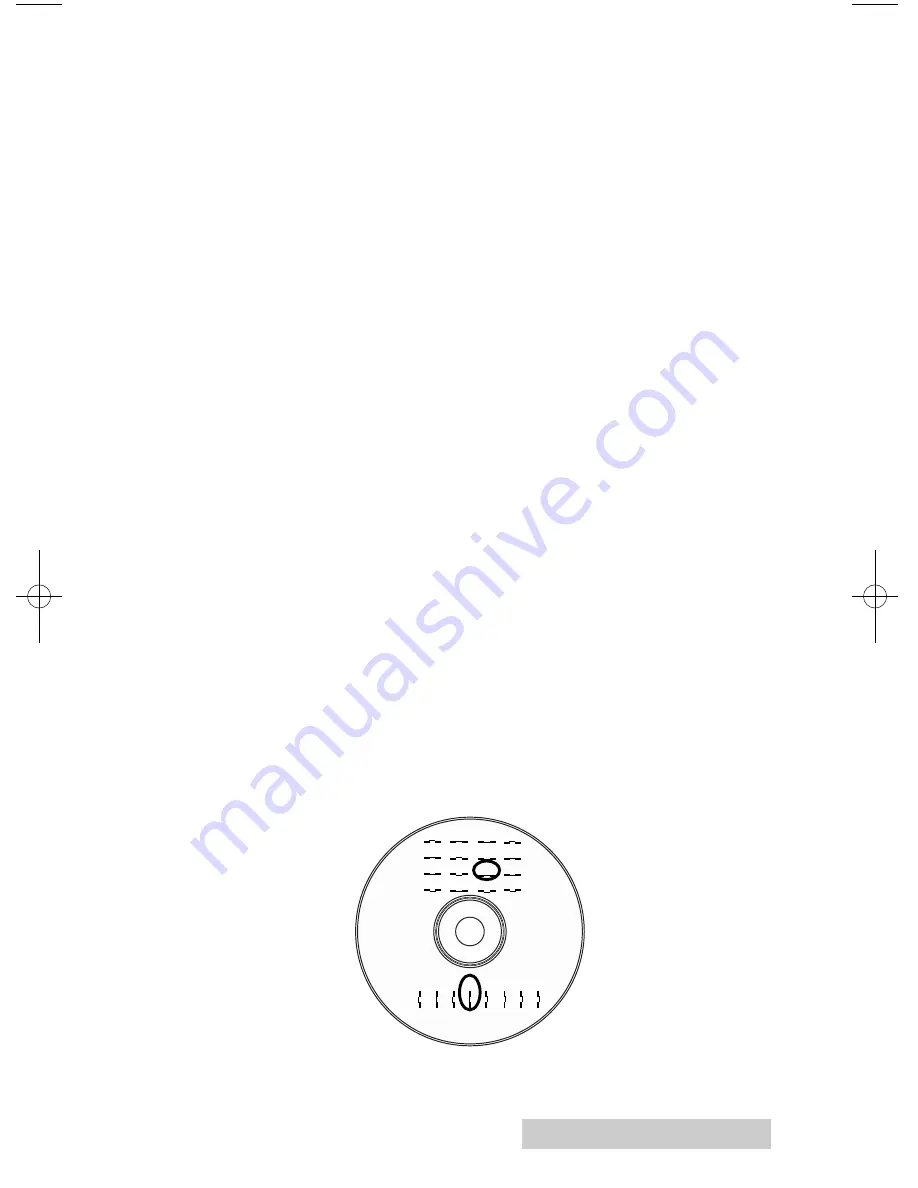
Alignment Calibration Print
Clicking this button will print a test disc that will provide a
scale by which to calibrate the Color Ink Cartridge to the
Monochrome Ink Cartridge. This is crucial when selecting the
Black and Color
Ink Cartridge setting in the Printer Driver as
described in Section 4-E of this manual. Make certain you have
discs and ink installed in your Bravo prior to pressing this
button. Once pressed, the Bravo will load a disc and print
the following pattern:
B
4
6
0
2
12 14
8 10
A
5
4
6
7
1
0
2
3
13
12
14
15
9
8
10
11
510873_xx.qxd 11/24/2009 5:33 AM Page 47


