background image

7

ESPAÑOL

Puesta en marcha

Consideraciones para el uso de la batería

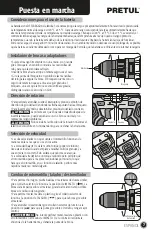
• Sujete el mango firmemente con una mano y con la otra, 

gire el broquero en sentido contrario a las manecillas del 

reloj, para que las mordazas aflojen.

• Inserte la broca hasta el tope o retírela según sea el caso. 

• Gire la punta del broquero en sentido de las manecillas 

del reloj para asegurar la broca. El broquero cuenta con un 

seguro de retención que se activa al seguir girando el 

broquero, una vez que la broca se encuentré asegurada; 

distinguirá cuando se escuche un CLIK.

Instalación de brocas o adaptadores

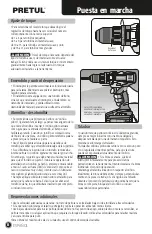
• Para perforar y atornillar, suelte el interruptor y presione el botón de 

dirección de giro del lado en donde las flechas apuntan hacia el broquero.

• Para invertir el sentido y desatornillar, presiónelo del lado contrario.

                             La primera vez que encienda el taladro después de 

invertir la rotación, puede escucharse un clic. Esto es normal y no 

representa ningún problema.

                             Nunca invierta la dirección de la rotación mientras el 

taladro se encuentre en funcionamiento, para no dañar la herramienta. 

Dirección de rotación

ATENCIÓN

ATENCIÓN

Adelante

Reversa

Broquero

Mordazas

• Las dos velocidades con que cuenta el rotomartillo funcionan de 

manera similar a las que se usa en los autos.

• La velocidad baja (

1

) le dará mucho torque (poder de torsión). 

Use esta velocidad cuando empiece a taladrar orificios grandes, ya 

sea en metal o concreto. Esto evitará que la broca se atasque.

• La velocidad alta (

2

) tiene un torque reducido pero permite que 

el rotomartillo opere a mayores revoluciones por minuto, lo que 

hará que el rotomartillo, en su función de taladro, perfore más 

rápido la madera o metal delgado.

Selección de velocidad

• Para perforar hormigón, piedra baldosa o materiales de dureza similar, 

gire el collarín selector de función a la posición de IMPACTO (        ). La 

broca dará impactos sobre el material, girando al mismo tiempo. Utilice 

brocas de carburo de tungsteno.

• Para perforar metal, madera o plástico, gire el collarín selector de 

función a la posición de TALADRO (        ), para que la broca gire sobre 

el material. 

• Para atornillar / desatornillar gire el collarín selector de función a la 

posición de (      ) para que la punta gire sobre el tornillo y tenga mayor 

control.

                                 • No intente perforar metal, madera o plástico con 

el rotomartillo en el modo de IMPACTO. De lo contrario reduciría la 

eficiencia de la herramienta, y dañaría la punta de la broca.

Cambio de rotomartillo / taladro / destornillador

ADVERTENCIA

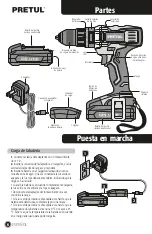
La batería viene DESCARGADA de fábrica. Será necesario que la cargue por aproximadamente 6 horas antes de poder usarla.

La temperatura normal de carga es de 0 °C a 45 °C  Fuera de este rango se suspende la carga automáticamente hasta que 

alcance la temperatura correcta. La temperatura normal de descarga / trabajo es de 0 °C a 75 °C. Si los 75 °C se exceden, el 

control electrónico apaga la energía de la herramienta hasta que la temperatura alcance de nuevo el rango óptimo de 

temperatura. Cuando la batería está debajo de la tensión normal durante el trabajo, la herramienta deja de funcionar.

Entre cada carga, dé al cargador 15 minutos de descanso. En un ambiente cálido o después de uso prolongado, es posible 

que la batería se caliente demasiado como para ser recargada. Permita que la batería se enfríe antes de intentar recargarla.

Collarín selector

de función

Содержание 27082

Страница 1: ... 20P Este instructivo es para 27082 ATENCIÓN Lea este Instructivo por completo antes de usar la herramienta ESPAÑOL ENGLISH Instructivo de Broquero 20 V 13 mm 1 2 ROTI 20P Rotomartillo taladro destornillador inalámbrico ...

Страница 2: ...o y evitar riesgos o lesiones graves es fundamental leer este Instructivo por completo antes de usar la herramienta ATENCIÓN Especificaciones técnicas Requerimientos eléctricos Advertencias generales de seguridad para herramientas eléctricas Advertencias de Seguridad para uso de rotomartillos taladros destornilladores Partes Puesta en marcha Solución de problemas Mantenimiento Protección ambiental...

Страница 3: ...iento del motor La siguiente tabla muestra el tamaño correcto que debe usarse dependiendo de la longitud del cable y de la capacidad de amperes indicada en la placa de datos de la herramienta Si tiene dudas use el siguiente calibre más alto ADVERTENCIA ADVERTENCIA 27082 Posición 1 0 400 r min y 0 6 400 golpes por minuto Posición 2 0 1500 r min y 0 24 000 golpes por minuto Rotomartillo taladro dest...

Страница 4: ...accidentes Retire cualquier llave o herramienta de ajuste antes de arrancar la herramienta eléctrica Las llaves o herramientas que quedan en las partes rotativas de la herramienta pueden causar un daño personal No sobrepase su campo de acción Mantenga ambos pies bien asentados sobre el suelo y conserve el equilibrio en todo momento Esto permite un mejor control de la herramienta en situaciones ine...

Страница 5: ...tente retirar las brocas atoradas encendiendo y apagando la herramienta No ejerza demasiada presión a la herramienta con tal de acelerar la perforación De lo contrario la broca se dañaría y la eficiencia de la herramienta disminuiría al igual que su vida útil En cuanto más grande sea el diámetro de la broca la fuerza reactiva es mayor lo que puede provocar una pérdida del control de la herramienta...

Страница 6: ...dor y la luz verde del indicador de carga se encenderá 3 Inserte la batería en el cargador deslizando como se muestra en la imagen Una vez conectada la luz verde se apagará y la luz roja deberá encenderse indicando que la carga se ha iniciado Cuando la batería se encuentre completamente cargada la luz verde se encenderá y la roja se apagará Desconecte el adaptador del tomacorriente una vez conclui...

Страница 7: ...r minuto lo que hará que el rotomartillo en su función de taladro perfore más rápido la madera o metal delgado Selección de velocidad Para perforar hormigón piedra baldosa o materiales de dureza similar gire el collarín selector de función a la posición de IMPACTO La broca dará impactos sobre el material girando al mismo tiempo Utilice brocas de carburo de tungsteno Para perforar metal madera o pl...

Страница 8: ...adro extráigalo y repita la operación aplicando menos fuerza Use bajas velocidades para iniciar perforaciones donde no hay punto de apoyo sobre plástico o metal al atornillar al perforar cerámica o cualquier aplicación que requiera de torque elevado Utilice altas velocidades para taladrar madera y al usar artículos para pulir Para obtener el máximo de vida de su taladro use el control de velocidad...

Страница 9: ...Pruebe con el siguiente nivel de torque Limpie de inmediato con agua y jabón el líquido de la piel o ropa Reemplace la batería de inmediato Inserte correctamente la conexión del cargador a la batería Revise que la clavija del cargador se encuentre bien conectada al tomacorriente Permita que el taladro se enfríe por espacio de 5 minutos Detenga el taladro por espacio de 5 minutos para que la baterí...

Страница 10: ...10 ESPAÑOL Notas ...

Страница 11: ...DE C V LIBERTAD ORIENTE 304 LOCAL 30 INTERIOR DE PASAJE ROBLEDO COL CENTRO C P 43600 TULANCINGO HGO TEL 775 753 6615 775 753 6616 SUCURSAL GUADALAJARA AV ADOLFO B HORN 6800 COL SANTA CRUZ DEL VALLE C P 45655 TLAJOMULCO DE ZUÑIGA JAL TEL 33 3606 5285 AL 90 FIX FERRETERÍAS AV PASEO DE LA REPÚBLICA 3140 A COL EX HACIENDA DE LA HUERTA C P 58050 MORELIA MICH TEL 443 334 6858 FIX FERRETERÍAS CAPITÁN ANZ...

Страница 12: ...rado o reparado por personal no autorizado por Para hacer válida la garantía o adquirir piezas y componentes deberá presentar el producto y su comprobante de compra en Av San Isidro 110 Col Industrial San Antonio Alc Azcapotzalco C P 02760 CDMX Méx o en el establecimiento donde lo compró o en algún Centro de Servicio de los enlistados en el anexo de la póliza de garantía y o en www truper com Los ...

Страница 13: ...Model Code ROTI 20P Applies for 27082 Manual Chuck 20 V 1 2 ROTI 20P ENGLISH ESPAÑOL CAUTION Read the user s manual thoroughly before operating this tool Cordless hammer drill drill driver ...

Страница 14: ...rolong the duty life make the Warranty valid if necessary and to avoid hazards of fatal injuries please read and understand this manual before using the tool 3 3 4 5 6 6 9 9 9 10 11 12 Technical Data Power Requirements Safety Warnings for Power Tools Safety Warnings for hammer drills drills drivers Parts Start Up Trouble shooting Maintenance Environmental Protection Notes Authorized Service Center...

Страница 15: ...rounded extension cable labeled For Outdoors Use These extensions are especially designed for operating outdoors and reduce the risk of electric shock ENGLISH Technical Data 16 AWG 14 AWG 12 AWG 6 AWG Output 21 V 0 5 A 27082 Position 1 0 400 RPM and 0 6 400 strokes per minute Position 2 0 1500 RPM and 0 24 000 strokes per minute Cordless hammer drill drill driver Concrete 0 5 Wood 0 6 Metal 0 2 Fo...

Страница 16: ...moving parts Loose clothes or long hair may get caught in moving parts If you have dust extraction and recollection devices connected onto the tool inspect their connections and use them correctly Using these devices reduce dust related risks Power Tools Use and Care Do not force the tool Use the adequate tool for your application The correct tool delivers a better and safer job at the rate for wh...

Страница 17: ...ction as well as setting up or replacing a bit Before operating the tool Hold the tool by it s isolated surfaces designed for that purpose especially when making jobs where the bit might contact hidden wiring Contact with a power cable makes the metallic parts of the tool will be energized as well and produce a short circuit to the operator Do not submit the tool to excessive loads If the bit gets...

Страница 18: ...light will lit 3 Insert the battery in the charger sliding it as shown in the image Once connected the green light will turn off and the red light will turn on showing that the charge has started Insert the charger connection into the battery orifice The red light shall turn on indicating it starts charging Disconnect the adapter from the power outlet once the charge finishes If the green light st...

Страница 19: ...perate with higher revolutions per minute that make the tool when in the drill function to bore faster lean metal or wood Speed selection To bore concrete tiled floor or materials similarly hard turn the function selection collar into the IMPACT position The bit will strike and rotate at the same time onto the material To bore metal or plastic turn the function selection collar into the DRILL posi...

Страница 20: ...slightly longer or wider orifice However keep in mind there should be enough material to fasten the screw If you reinitiate the screwing operation in an already made orifice start threading it by hand If still difficult to thread the screw as with noble woods try using lubricants like soap Liquid soap is more useful Always apply enough pressure on the drill to prevent the screw head to slide It is...

Страница 21: ... allows the job Try with the next torque level Immediately clean the liquid from skin or clothing using water and soap Replace the battery immediately Insert correctly the battery to the charger Double check the battery is correctly connected into the power outlet Allow the hammer drill to cool off for 5 minutes Stop the drill around 5 minutes to allow the battery to cool off Problem Solution Low ...

Страница 22: ...10 ENGLISH Notes ...

Страница 23: ...ENTE 304 LOCAL 30 INTERIOR DE PASAJE ROBLEDO COL CENTRO C P 43600 TULANCINGO HGO TEL 775 753 6615 775 753 6616 SUCURSAL GUADALAJARA AV ADOLFO B HORN 6800 COL SANTA CRUZ DEL VALLE C P 45655 TLAJOMULCO DE ZUÑIGA JAL TEL 33 3606 5285 AL 90 FIX FERRETERÍAS AV PASEO DE LA REPÚBLICA 3140 A COL EX HACIENDA DE LA HUERTA C P 58050 MORELIA MICH TEL 443 334 6858 FIX FERRETERÍAS CAPITÁN ANZURES 95 ESQ JOSÉ PE...

Страница 24: ...d by In order to make the warranty valid or to purchase components and spare parts you must present the product and its proof of purchase at Av San Isidro 110 Col Industrial San Antonio ALC Azcapotzalco C P 02760 CDMX Mex or at the store where you bought it or at a service center listed in the attached warranty policy and or at www truper com Transportation costs resulting from compliance of this ...

Отзывы: