


Turning the unit on and off
To turn the unit on, press the Power button [9] briefly. You will hear an ascending beep and the power
LED lights for the first minute, after which it is extinguished if using the battery, to save power. If the
unit is powered either from the USB cable or the auxiliary power socket, the power LED will remain lit.
In most cases there is no need to ever turn the unit off since it automatically goes into power saving
mode after a short period of inactivity and automatically awakens when any button or switch is
pressed. However if you are transporting the unit, for example, you may wish to manually turn off the
power, in which case press and hold the Power button until a falling beep is heard. The unit is then
powered down until such time as the power button is pressed again. No other switch or button will
awaken the unit.
Whilst powered down, the main switch is connected directly to the default device (socket number 1).
You may continue to charge the battery while the unit is powered down.
Using FREEDOM with one Switch
Pressing the main switch for a period less than the scan time described above will result in the
selected device ‘seeing’ a press of the same duration. Pressing the main switch for a period exceeding
the selected extended press time will result in the device seeing no press and instead the unit will scan
to the next device. For example, if the unit is currently connected to device number 2 and there is an
extended press of the main switch, it will scan to device 3.
Selecting the Scan Time (for one Switch use)
If you are using a second switch to scan from device to device, there is nothing more to do- the first time
you press the second switch the unit will recognise that’s what you intend and will adapt accordingly.
Alternatively, if you intend to use the main switch to scan from device to device, you need to select the
duration for which the switch must be pressed before scanning to the next device. This may be 1, 2, 3
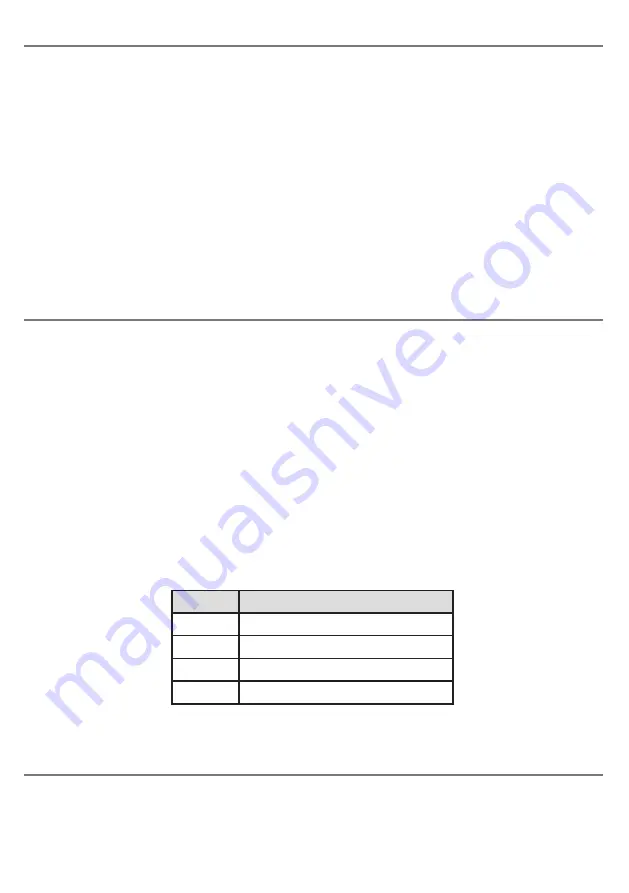
or 4 seconds and is selected using the Mode button [12]. Press this button and it will show the current
setting, according to Table 1. If you need to change the setting, press the Mode button repeatedly and
observe which LED lights. When you see the setting you require, wait a few seconds and the LEDs are
extinguished, the setting saved and the unit is ready to use with your new settings*.
*Note that the LEDs blink to help distinguish between this and normal operation.
In choosing the scan time, carefully consider the way in which your devices work. If some require an
extended press, make sure that the time you select here is longer than the device’s extended press
time to ensure they do not conflict.
LED lit
Extended press time
1
1 second
2
2 seconds
3
3 seconds
4
4 seconds
Table 1: Scan Time settings


