128-9302
18 of 28
18
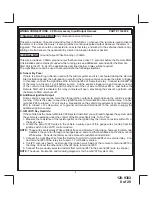
2) TACH RATE SETTING:
1. Turn the ignition key to the On position.
2. Press and release the valet/program push button switch 3 times.
3. Immediately turn the ignition key Off.
4. Press and hold the valet/program push button switch, then start the vehicle using the key.
5. When the unit senses the tach signal, the parking lights will begin to flash.
6. Release the valet/program pushbutton switch. The parking lights will turn on for three seconds to
indicate that the learned tach signal is stored and the unit is out of the tach learn mode.
NOTE:
If the unit fails to learn tach rate due to an improper tachometer connection or a poor tach source,
the parking lights will not flash. To correct this situation, locate and connect the Green/Orange wire to
the proper tach signal, and then repeat the tach learn routine.
3) DBI TACH SETTING:
Selecting this setting in the option menu indicates that you have a DBI module and have determined that
a tach signal is available for the vehicle you are connecting to. The unit will look at the DBI data port for
the tach signal. If the vehicle fails to start, or the unit flashes 7 times, recheck the DBI manual to insure
that tach is available for your vehicle. If not the tach connection wire, Green/Orange must be used.
4) HYBRID SETTING:
Selecting this setting in the option menu allows for Hybrid vehicles. Also feature #14 of Bank 3 must be
set for preset time or the Hybrid feature will not operate indicated by the parking lights flashing 7 times.
CRANK AVERAGING:
When Feature 14 Bank 3 is set for crank averaging, the remote start unit constantly monitors and learns
the cranking patterns of the vehicle each time the car is started with the key. The vehicle must be started
at least 4 times with the key for the crank averaging circuit to begin it's monitoring the vehicle's engine.
DIAGNOSTICS:
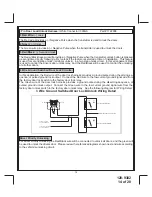
Enter Bank 3 and turn on selectable feature # 10 as described on the front pages of this manual.
NOTE:
Diagnostic mode is a temporary mode. Once you have accessed the diagnostic mode, the unit
will pause for two seconds then begin to flash the last stored shut down code. This code will be displayed
three times in succession, then the unit will automatically exit the diagnostic on mode.
The parking lights will flash a number of times indicating the reason for the last remote start shutdown.
The light flash indications are as follows:
1 Flash
Run timer expired
2 Flashes
Low or no tach signal (RPM)
3 Flashes
Positive inhibit wire activation
4 Flashes
NA
5 Flashes
RF shutdown, Remote signal received, or manual start trigger wire reactivated.
6 Flashes
High tach signal (RPM)
7 Flashes
Tach signal has not been learned
8 Flashes
Negative inhibit wire
TESTING YOUR INSTALLATION:
WARNING:
The following procedure must be performed after the installation of any Remote Start Device.
It is the responsibility of the installing technician to complete these tests. Failure to test the unit in the
following manner may result in personal injury, property damage, or both.
Содержание APS-687E
Страница 27: ...128 9302 27 of 28 27 NOTES...


