


85
85
Owner’s Manual
Quick S
tar
t:
Lev
el
Setting
Ov
er
view
Hook
up
Con
trols
Connec
ting
to
a
Comput
er
Tut
orials
Technic
al
Inf
orma
tion
Trouble
-
shooting
and W
arr
an
ty
Sc
enes
, P
resets
, S
yst
em Menu
,
and MIDI C
on
trol
Software: Universal Control, SL Remote, Capture, and Studio One Artist 7
Sof
tw
ar
e: Univ
ersal C
on
trol
,
SL Remot
e, C
aptur
e,
and S
tudio O
ne A
rtist
Virtual StudioLive 7.2
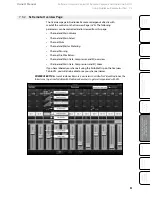
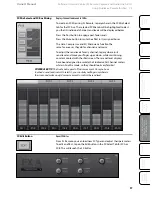
The Auxiliary Inputs Router also allows you to designate a specific
bus to the S/PDIF output as well as to select which stereo pair will
be recorded on the Auxiliary Stereo Track in Capture. When the
StudioLive is not connected to a computer, the S/PDIF output is
routable through the System Menu (see Section 5.4). However, when
your StudioLive is synced to your computer, you can route any of the
14 routable buses to the S/PDIF output by routing them to FireWire
sends 31 and 32. In addition to being available for recording via Aux
In 31 and Aux In 32, these sends are normalled to the S/PDIF output.
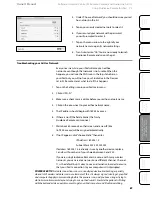
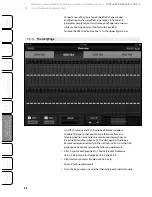
Scene Recalling Menu
As discussed in Section 5.1, your StudioLive allows you to decide which
group of parameters you would like to recall with a Scene. The Scene
Recalling Menu on the Setup tab corresponds directly with the Scene
Recalling Menu on your StudioLive.
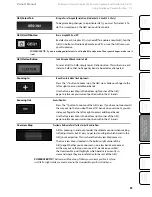
7.2.7
Enabling Lockout Mode
Your StudioLive features a Lockout mode that allows you to
temporarily disable nearly every feature on the StudioLive,
although analog features (e.g., input-trim knobs, faders, and
cue, tape-input, and monitor levels) can still be adjusted.
Because of this, after unlocking your StudioLive and before
resuming mixing, you should take a quick glance at your
input trims and output levels. If you have locked your fader
position, you will be able to recall your pre-lockout fader
positions using the Locate button in the meter section.
Until you connect your StudioLive to a computer, the mixer cannot
be locked, so don’t worry about accidentally locking yourself out.
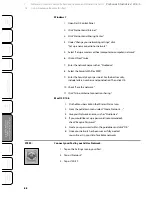
1. With your StudioLive connected and synced to your computer, launch
VSL and click on the Setup tab.
2. Click on the Lock Out button.
3. To set your custom password, click on the box next to “Device is
Lockable.” At this point, a cursor will appear in the password box. Enter a
5-digit code, using any number between 1 and 9, and click the Set
button. Your password will no longer be displayed. Should you need to
change your password, simply click on the box next to “Device is
Lockable.” Your old password will be deleted, and you will be able to
enter a new password. Once you have set your password, the
StudioLive can be locked with or without being synced to a computer.