14
11
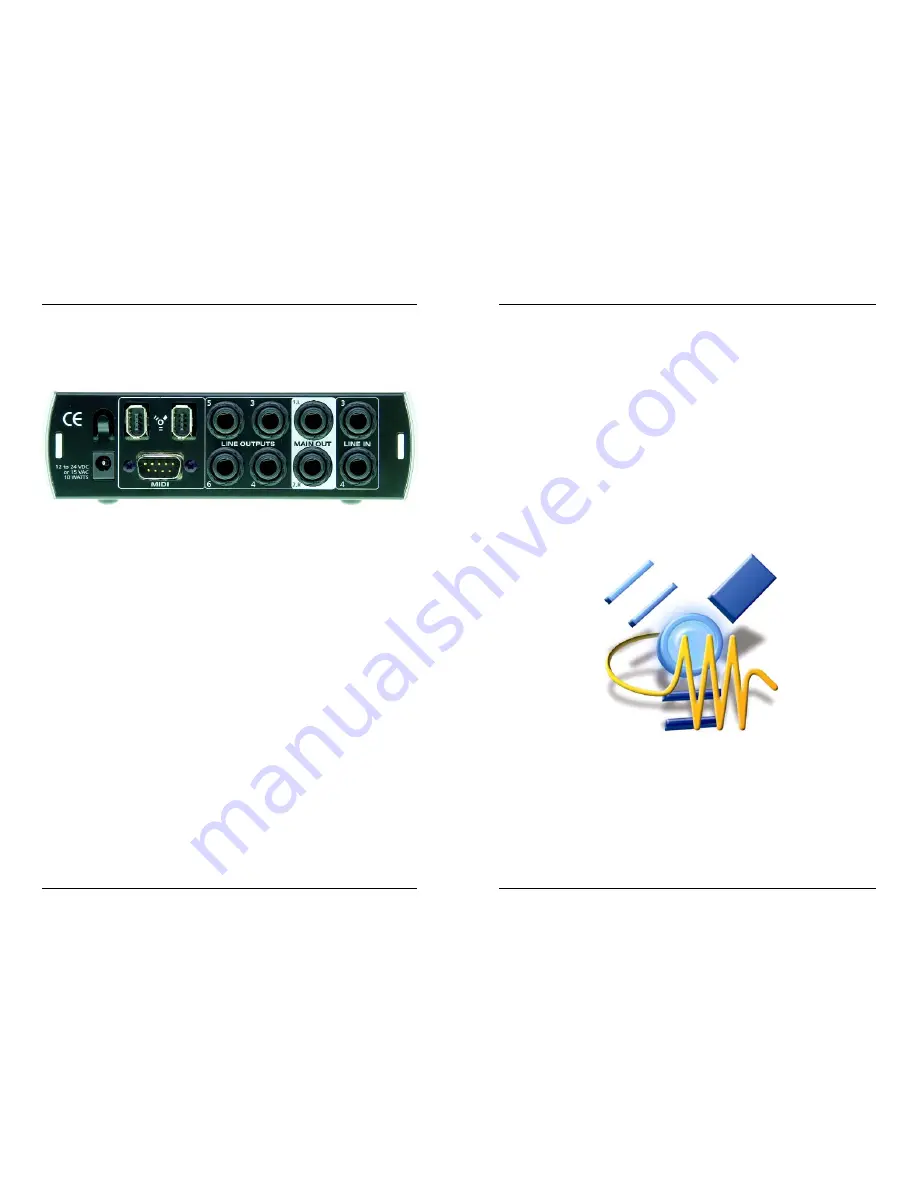
3.2 BACK PANEL LAYOUT AND DESCRIPTION
12VDC Power Adaptor Input
.
This is where you plug the provided power supply into the EASERA GATEWAY. Please
check the power supply to ensure that it is the correct voltage and plug type for your coun-
try. Note that you can also power your EASERA GATEWAY with a six-pin FireWire port
from your computer instead of using the external power supply.
FireWire Ports.
There are two firewire ports on the back of the EASERA GATEWAY. Both FireWire ports
are standard 6 pin firewire jacks. If your computer has a six-pin FireWire port you can
power your EASERA GATEWAY from the FireWire connector. If your computer has a 4 pin
connector, then you will need to get a 4 to 6 pin connector to connect your EASERA
GATEWAY to your computer, and use the external power supply. Either port can be used
to connect the EASERA GATEWAY to a FireWire port on your computer.
MIDI IN and OUT.
MIDI I/O can be connected to the Gateway using the DB-9 connector breakout cable
(included with the Gateway).
MIDI stands for “Musical Instrument Digital Interface”. However, the MIDI standard goes
well beyond just instrumentation and sequencing. The MIDI inputs and outputs allow con-
nection and/or communication with external MIDI equipment. One function of this port is
MIDI programming. This port can also be used for MMC (MIDI Machine Control) and MTC
(MIDI Time Control). Please consult the manual of the software manufacturer to learn
setup and usage of different MIDI applications
2.4 EASERA GATEWAY MIXER
WINDOWS XP
Once you have successfully installed your audio drivers, the EASERA GATEWAY Mixer will
be available in your program files. You can launch the Mixer by clicking: Start -> Program
files -> RH_Presonus...->EASERAGATEWAY_MIXER.
(For details on the EASERA GATEWAY Mixer see chapter 4).
Macintosh
The included CD-ROM disk contains Macintosh software for the EASERA GATEWAY
Mixer.
To install the EASERA GATEWAY Mixer, drag and drop the following file to your hard drive:
EASERA GATEWAY Mixer
Once this file is saved to your hard drive, double click on it to launch the Mixer.
((For details on the EASERA GATEWAY Mixer see chapter 4)
4 MIXER
4 MIXER
3 CONTROLS AND CONNECTIONS
2 INSTALLATION AND SETUP


