8
3
Network Setup
3.5
AVB Network Setup
AVB-D 16
Owner’s Manual
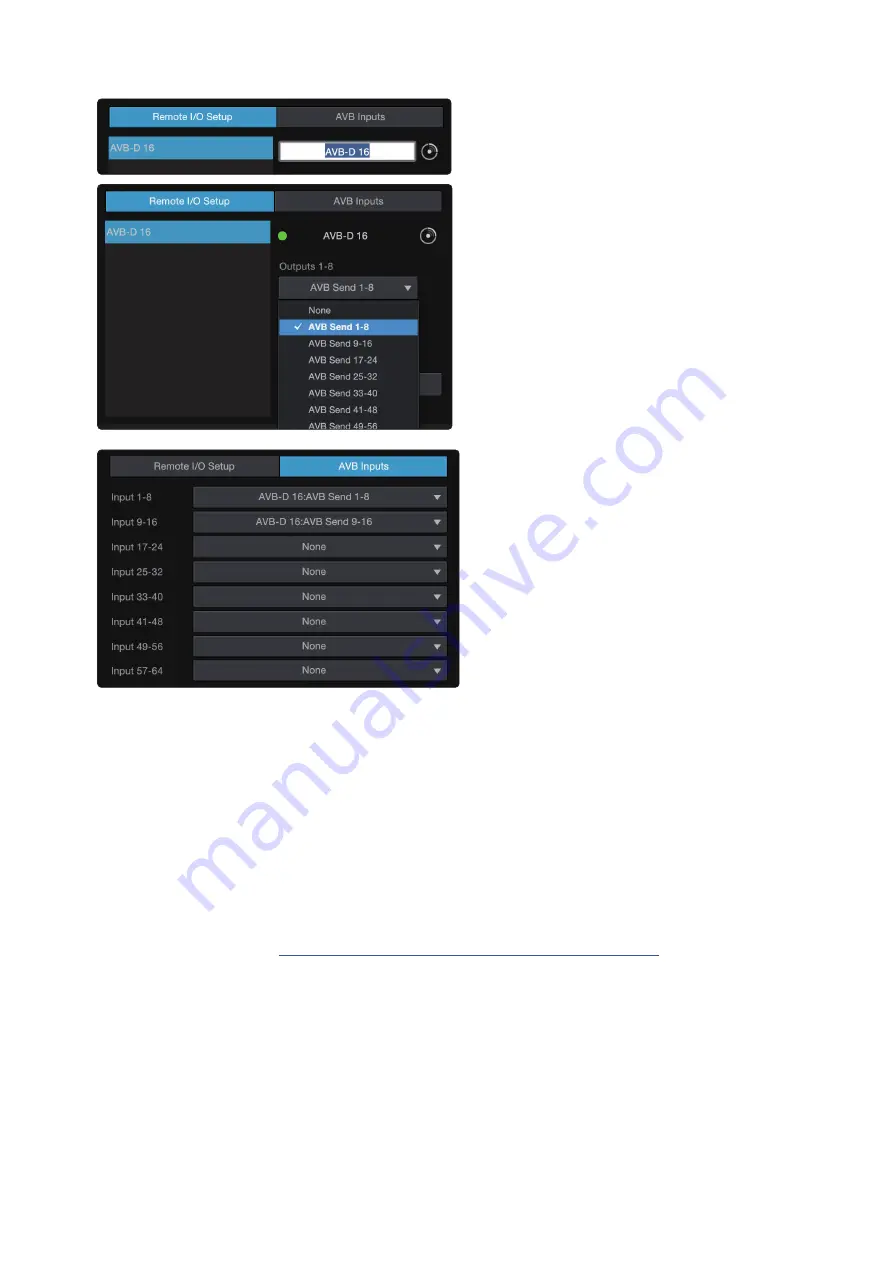
5. Select the name to give the AVB-D 16 a
unique name. This will be the name of the
unit on the AVB side of the network. This
name will not show on the Dante network.
6. Select the drop down menu for Outputs 1-8
(stream 1) to choose an AVB stream to send
to the AVB-D 16. Note that you must have a
stream connected here to ensure the AVB-D 16
D is receiving a proper media clock. Repeat for
channels 9-16 (stream 2).
7. Select the AVB Inputs tab at the top of this area to
route audio from the AVB-D 16 to the StudioLive
Series III mixer. On the AVB Inputs screen select
an incoming stream from the list of the left hand
side of the screen. Choose an available AVB
stream from the list on the right to route that
stream to the input currently selected on the left.
If you don’t see the stream on the right you may
need to scroll further down the list.
Your AVB-D 16 is now set up and ready to use with
your StudioLive Series III ecosystem!
Dante Network Setup
When connected to a Dante network, the AVB-D 16 will function just like any
other Dante device. In order to set it up and route audio to and from your
AVB-D 16, you’ll need to use the Dante Software Controller application. Be
sure your computer running the Dante Software Controller is connected to
the same network as the Dante side of the AVB-D 16. As previously mentioned,
Dante setup can not be done from the AVB connections of the AVB-D 16.
For details on how to setup your Dante network
please
refer to the Audinate documentation.


