10. If the difference between the two measurements are greater than 1/16 inch, continue with
step 11. If the difference is less than 1/16 inch, skip to “eddy current magnet adjustment”.
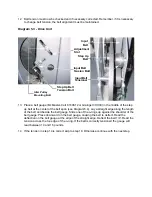
11. You will be adjusting one half of the difference between the two measurements with each of
the step up pulley adjustment nuts.
12. One the side with the smaller measurement, turn the adjustment nut slowly clockwise so
that it moves 1/2 of the difference between the two measurements.
13. One the side with the larger measurement, turn the adjustment nut slowly counter-clockwise
so that it moves the remaining 1/2 of the difference between the two measurements.
14. Return to step 9 and repeat any necessary steps.
Eddy Current Magnet Adjustment
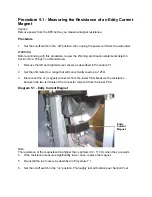
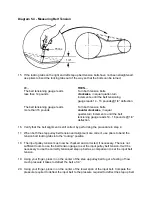
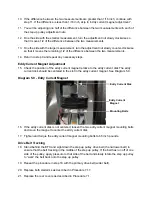
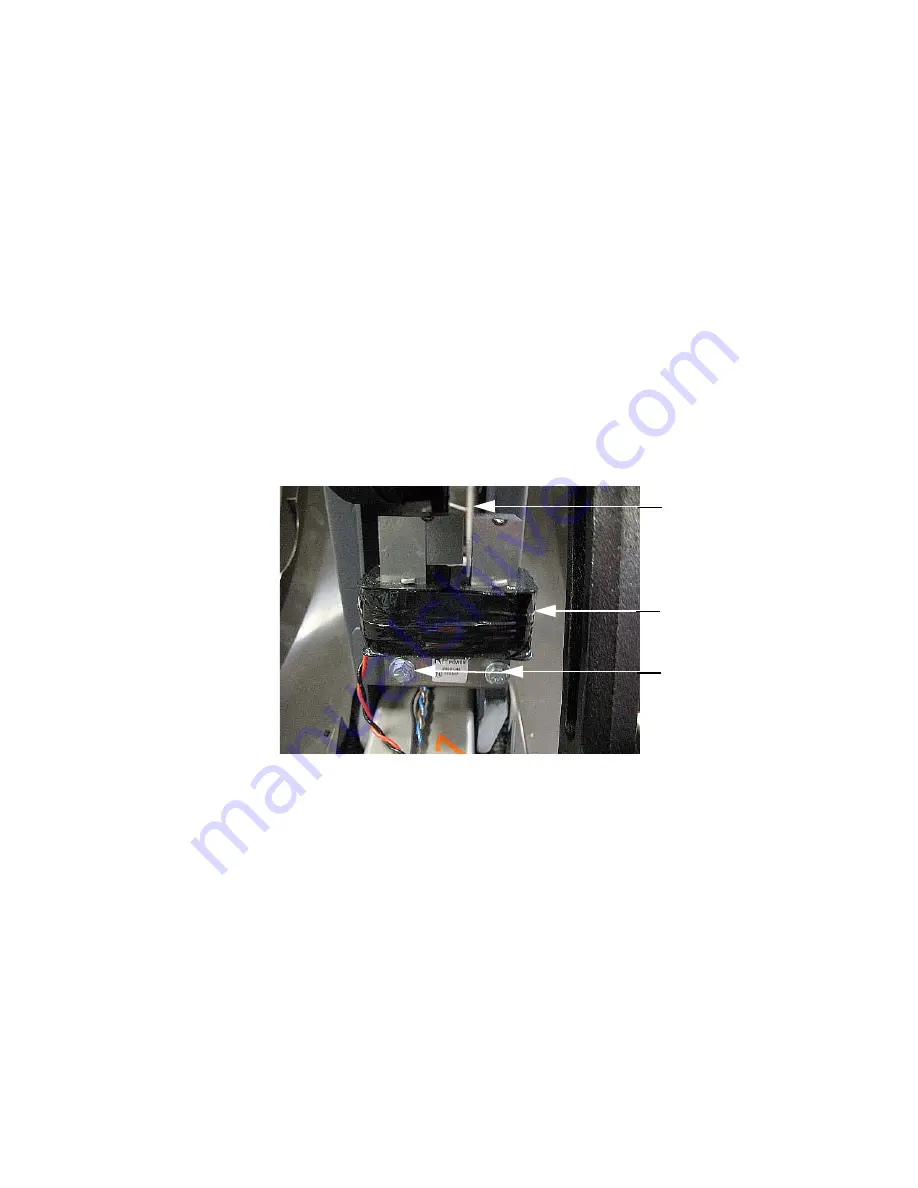
15. Check the position of the eddy current magnet relative to the eddy current disk The eddy
current disk should be centered in the slot in the eddy current magnet. See Diagram 5.9.
Diagram 5.9 - Eddy Current Magnet
16. If the eddy current disk is not centered, loosen the two eddy current magnet mounting bolts
and move the magnet to center the eddy current disk.
17. Tighten and torque the eddy current magnet mounting bolts to 66 inch pounds.
Drive Belt Tracking
18. Stand behind the EFX and sight down the step up pulley drive belt (the narrower belt) to
ensure that the belt tracking in the middle of the step up pulley. If the belt has run off of one
side of the pulley, apply pressure to that side of the belt and slowly rotate the step up pulley
to “walk” the belt back onto the step up pulley.
19. Repeat the procedure in step 18 with the primary drive belt (wider belt).
20. Replace both stairarms as described in Procedure 7.17.
21. Replace the rear covers as described in Procedure 7.1.
Eddy Current Disk
Eddy Current
Magnet
Mounting Bolts
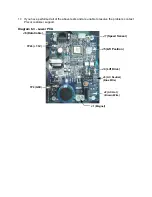
Содержание EFX EFX 5.23
Страница 79: ...Block Diagram 8 2 5 23 5 25...

