C554i Self Powered Elliptical Fitness Crosstrainer
Page 32
Replacing a Crank Arm Assembly
5.
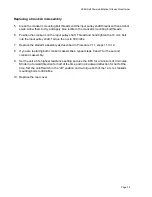
Clean the crankarm mounting bolt threads and the input pulley shaft threads with an alcohol
swab. Allow them to dry and apply blue loctite to the crankarm mounting bolt threads.
6.
Position the crankarm on the input pulley shaft. Thread and hand tighten the 14 mm. bolt
into the input pulley shaft. Torque the nut to 300 in/lbs.
7.
Replace the stairarm assembly as described in Procedure 7.11, steps 11 to 12.
8.
If you are replacing both crankarm assemblies, repeat steps 6 and 7 for the second
crankarm assembly.
9.
Set the unit at it’s highest resistance setting and use the EFX for a minimum of 3 minutes.
Stride in a forward direction for half of the time and in a backward direction for half of the
time. Set the on/off switch in the “off” position and re-torque both of the 14 mm. crankarm
mounting bolts to 300in/lbs.
10. Replace the rear cover.


