background image

8843534 

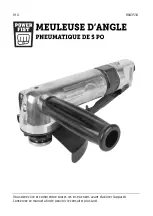
5 in. Air Angle Grinder 

V1.0 

For technical questions call 1-800-665-8685 

5. 

Non-skid footwear is recommended to maintain footing and balance in the 
work environment. 

6.  Wear steel toe footwear or steel toe caps to prevent a foot injury from 

falling objects. 

7. 

Wear the appropriate rated dust mask or respirator. 

8.  This tool can cause hearing damage. Wear hearing protection gear with an 

appropriate Noise Reduction Rating to withstand the decibel levels. 

9.  The tool may contain high pressure. Use safety glasses and gloves for 

protection during operation. Keep hands clear of the exposed rubber 
portions of the hose. 

PERSONAL PRECAUTIONS 

Control the tool, personal movement and the work environment to avoid 
personal injury or damage to tool. 
1. 

Do not operate any tool when tired or under the influence of drugs, 
alcohol or medications. 

2.  Avoid wearing clothes or jewelry that can become entangled with the 

moving parts of a tool. Keep long hair covered or bound. 

3. 

Do not overreach when operating a tool. Proper footing and balance 
enables better control in unexpected situations. 

4. 

Support the workpiece or clamp it to a stable platform. Holding the 
workpiece by hand or against your body may lead to personal injury. 

5. 

Keep your fingers away from the trigger/switch while carrying the tool, 
attaching an air hose or an accessory. Lock the trigger/switch safety if 
available.  

6.  Avoid unintentional starts. Be sure that the regulator/throttle switch is in 

the neutral or OFF position when not in use and before connecting it to 
any air source. 

7. 

Serious injury or death may occur from inhaling compressed air. The air 
stream may contain carbon monoxide, toxic vapors or solid particles. 
Never inhale compressed air directly from the pump or air tool. 

SPECIFIC SAFETY PRECAUTIONS 

WARNING! DO NOT let comfort or familiarity with product (gained from 
repeated use) replace strict adherence to the tool safety rules. If you use this 
tool unsafely or incorrectly, you can suffer serious personal injury. 


Содержание 8843534

Страница 1: ...V1 0 8843534 Please read and understand all instructions before use Retain this manual for future reference ...

Страница 2: ...injury or death if certain instructions are not followed DANGER This notice indicates an immediate and specific hazard that will result in severe personal injury or death if the proper precautions are not taken WARNING This notice indicates a specific hazard or unsafe practice that could result in severe personal injury or death if the proper precautions are not taken CAUTION This notice indicates...

Страница 3: ... area 3 Store unused tools properly in a safe and dry location to prevent rust or damage Lock tools away and keep out of the reach of children 4 Do not install or use in the presence of flammable gases dust or liquids PERSONAL SAFETY WARNING Wear personal protective equipment approved by the Canadian Standards Association CSA or American National Standards Institute ANSI PERSONAL PROTECTIVE EQUIPM...

Страница 4: ...angled with the moving parts of a tool Keep long hair covered or bound 3 Do not overreach when operating a tool Proper footing and balance enables better control in unexpected situations 4 Support the workpiece or clamp it to a stable platform Holding the workpiece by hand or against your body may lead to personal injury 5 Keep your fingers away from the trigger switch while carrying the tool atta...

Страница 5: ...when operating the angle grinder complete the process and switch off the tool before looking up 8 Use metal and voltage detectors to locate hidden electric water or gas lines Avoid touching live components or conductors 9 Only use 5 in grinder wheels or discs with this tool Never use this tool with blades designed for a circular saw AIR TOOL PRECAUTIONS 1 Use only clean and dry compressed air as a...

Страница 6: ...empting maintenance or attaching air tools Release pressure slowly from the system AIR HOSE PRECAUTIONS 1 Inspect the tool s air hose for cracks fraying or other faults before each use Discontinue use if the air hose is damaged or hissing is heard from the air hose or couplers Replace the defective air hose 2 Do not allow people mobile equipment or vehicles to pass over the unprotected air hose Po...

Страница 7: ...ral term that refers to drill bit saw or cutting blades grinding wheel etc as appropriate for the tool 1 Do not use any power tool with a malfunctioning power switch or control A power tool that fails to respond to the controls is dangerous and can cause an injury A qualified technician must repair and verify the power tool is operating correctly before it can be used 2 Do not cover the air vents ...

Страница 8: ...ediately if there is any vibration or wobbling that could indicate poor installation or a poorly balanced grinding wheel Check the tool to determine the cause 7 Do not allow the motor to overload or overheat Take breaks to rest the tool 8 Do not subject the grinding wheel to any lateral pressure as it may damage the tool or cause it to kickback 9 A large amount of sparks will be created when worki...

Страница 9: ...terial These workpieces have a tendency to snag the grinding accessory 5 Only use grinding accessories designed for the tool 6 Support large panels to minimize the risk of pinching the grinding accessory Large panels may sag under their own weight VIBRATION PRECAUTIONS 1 This tool vibrates during use Repeated or long term exposure to vibration may cause temporary or permanent physical injury Take ...

Страница 10: ...erences in parenthesis A refer to the included Identification Key INSTALL AIR PLUG Prepare a standard 1 4 in NPT male air plug sold separately for use with your tool 1 Wrap the external threads of the male plug with sealant tape a Wrap tape in a clockwise direction so it will not unravel b Do not tape all the threads Leave several leading threads unwrapped for easier alignment 2 Screw the plug int...

Страница 11: ...en grinding Remove all cap screws 18 and spacers 17 with a hex wrench and re position the guard Put the spacers on the screws and re secure 3 Install the grinding wheel See Assembly Installation The type of grinding wheel installed will depend on the material and task 4 Connect the tool to the air source 5 Set the compressor to the correct air pressure and flow see Specifications Start the compres...

Страница 12: ...rial removal of non ferrous metals steel and aluminum Grinding Wheel Material removal of stone concrete tile or metal Available in different grits CARE MAINTENANCE 1 Maintain the tool with care A tool in good condition is efficient easier to control and will have fewer problems 2 Inspect the tool fittings alignment hoses and power supply cord periodically Have damaged or worn components repaired o...

Страница 13: ...ure power loss and eventual tool failure A qualified technician will need to take the tool apart and clean out the excess oil 4 Apply a generous amount of air tool oil to the tool before storing it for an extended period of time overnight weekend etc Run the tool for approximately 30 seconds to ensure the oil is evenly distributed throughout the tool Store it in a clean and dry location GREASE THE...

Страница 14: ...If tool still jammed clean tool and lubricate per lubrication instructions Tool runs slowly Air flows slightly from exhaust Air regulator in closed position Open the air regulator to desired airflow Tools will not run Air flows freely from exhaust Damage or excessive wearing of internal parts 1 Have a qualified technician service the tool 2 Replace tool or parts Tool will not shut off 1 Throttle v...

Страница 15: ...TION QTY 1 Main housing 1 2 Screw 2 3 Muffler 1 4 Screw 1 5 Handle 1 6 Dust cover 1 7 Bearing 1 8 E clip 1 9 Spacer 1 10 Gear 1 11 Bearing 1 12 Woodruff key 1 13 Spindle 1 14 Gasket 1 15 Rear flange nut 1 16 Wheel guard 1 17 Spacer 4 18 Cap screw 4 19 Front flange nut 1 20 Gear 1 21 Bearing 1 22 Bearing 2 23 Front plate 1 ...

Страница 16: ...r 1 25 Bolt 1 26 Rotor 1 27 Rotor blade 4 28 Rear plate 1 29 Fixing ring 1 30 Connecting nut 1 31 Rear housing 1 32 Brass bushing 1 33 Trigger 1 34 Lever block 1 35 Spring 1 36 Bolt 1 37 Trigger bolt 1 38 Valve stem 1 39 O ring 1 40 Spring 1 41 O ring 1 42 Screw cap 1 43 Air inlet 1 44 Pin wrench 1 45 Wrench 1 ...

Страница 17: ...V1 0 5 in Air Angle Grinder 8843534 Visit www princessauto com for more information 17 ...

Страница 18: ...8843534 5 in Air Angle Grinder V1 0 18 For technical questions call 1 800 665 8685 ...

Страница 19: ...V1 0 8843534 Vous devez lire et comprendre toutes les instructions avant d utiliser l appareil Conservez ce manuel afin de pouvoir le consulter plus tard ...

Страница 20: ...ou de décès si on ne respecte pas certaines instructions DANGER Cet avis indique un risque immédiat et particulier qui entraînera des blessures corporelles graves ou même la mort si on omet de prendre les précautions nécessaires AVERTISSEMENT Cet avis indique un risque particulier ou une pratique non sécuritaire qui pourrait entraîner des blessures corporelles graves ou même la mort si on omet de ...

Страница 21: ...ée et exempte de toute distraction Placez les lampes de façon à ne pas travailler dans l ombre 2 Assurez vous que les personnes qui ne portent pas l équipement de sécurité approprié ne se trouvent pas à proximité de l aire de travail 3 Rangez les outils correctement dans un lieu sécurisé et sec Gardez les outils hors de la portée des enfants 4 N installez pas et n utilisez pas d outils électriques...

Страница 22: ...tion Gardez les mains à l écart des parties de caoutchouc exposées du tuyau PRÉCAUTIONS PERSONNELLES Gardez le contrôle de l outil de vos mouvements et de l environnement de travail pour éviter les blessures ou le bris de l outil 1 N utilisez pas l outil si vous êtes fatigué ou sous l effet de drogues d alcool ou de médicaments 2 Évitez de porter des vêtements ou des bijoux pouvant se prendre dans...

Страница 23: ... ne s arrêtera pas immédiatement Ne posez pas l outil sur une surface ou ne le laissez pas sans surveillance avant qu il ne s immobilise Une pièce mobile pourrait faire sauter l outil ou s agripper à une surface et vous pourriez perdre la maîtrise de l outil 4 Assurez vous toujours que la surface de travail est dépourvue de clous ou autres objets étrangers 5 Après avoir changé les accessoires ou e...

Страница 24: ...u il soit réparé 5 Avant de relier l alimentation en air fixez correctement tous les accessoires sur l outil Un accessoire mal attaché pourrait se détacher et se briser durant l utilisation 6 N utilisez jamais d oxygène de gaz combustible ou tout autre gaz embouteillé en tant que source d énergie Une source d énergie autre qu un compresseur d air pourrait causer une explosion entraînant ainsi des ...

Страница 25: ...s le tuyau d air autour de l outil car les arêtes vives risquent de percer ou de fissurer le tuyau d air Enroulez délicatement le tuyau et suspendez le à un crochet ou attachez le sur un support pour qu il reste enroulé pendant son rangement 4 Un conduite d air endommagée ou débranchée sous pression peut se comporter à la façon d un fouet et infliger des blessures corporelles ou endommager l aire ...

Страница 26: ... des dommages au niveau de la pièce à travailler ou causant des blessures corporelles graves Si votre outil fonctionne correctement lorsqu il n y a aucune charge mais qu il présente un fonctionnement difficile sous charge cela signifie qu une pression excessive est exercée 5 Gardez vos mains et vos doigts éloignés de l aire de travail Le contact de toute partie du corps avec l outil peut causer de...

Страница 27: ... à une pression latérale car cela endommagerait l outil ou provoquerait un effet de rebond 9 Quand on se sert d une meuleuse d angle le travail produit beaucoup d étincelles Tenez l outil de manière à ce que les étincelles s envolent loin des personnes et des matériaux inflammables Tenez vous informé au sujet des instructions de sécurité en matière de prévention des incendies pour être prêt dans u...

Страница 28: ...ins les bords coupants ou des matériaux flexibles Ces pièces à travailler ont tendance à faire accrocher l accessoire de meulage 5 Utilisez seulement des accessoires de meulage conçus pour l outil 6 Soutenez les grands panneaux afin de minimiser les risques de pincement de l accessoire de meulage Les grands panneaux ont tendance à s affaisser sous leur propre poids PRÉCAUTIONS RELATIVES AUX VIBRAT...

Страница 29: ...ir ASSEMBLAGE ET INSTALLATION Les numéros de référence entre parenthèses no 1 se rapportent à la liste de pièces comprise Les lettres de référence entre parenthèses A se rapportent à la clé d identification comprise POSE DU RACCORD PNEUMATIQUE Préparez un raccord pneumatique standard NPT mâle de 1 4 po vendu séparément convenant à votre outil 1 Enveloppez les filets externes du raccord mâle de rub...

Страница 30: ...ngle 5 Vissez l écrou à bride sur la tige Serrez à l aide de la clé et de la clé à ergots en tournant dans le sens horaire UTILISATION 1 Enlevez toute trace de graisse d emballage de la meuleuse d angle avant la première utilisation Graissez également les engrenages de la tige Consultez la section Lubrification d outils pneumatiques pour voir les instructions 2 Faites pivoter le protège meule vers...

Страница 31: ...ignez le compresseur une fois que la tâche est terminée Appuyez sur la détente pour relâcher l air comprimé résiduel du tuyau et de l outil Déconnectez l outil DISQUES ET ACCESSOIRES Les disques et accessoires de meuleuse d angle sont conçus pour polir et travailler la forme des surfaces Certains disques peuvent être utilisés avec n importe quel matériau tandis que d autres ont été spécialement co...

Страница 32: ...ile accumulées 8 Nettoyez l outil après chaque utilisation AVERTISSEMENT Seul un personnel d entretien qualifié doit effectuer la réparation de l outil Un outil mal réparé peut présenter un risque pour l utilisateur et ou pour les autres LUBRIFICATION D OUTILS PNEUMATIQUES AVIS Utilisez uniquement une huile pour outil pneumatique pour lubrifier l outil Les autres lubrifiants ne conviennent pas pui...

Страница 33: ...e utile de l outil Retirez la vis n 4 située sur le devant Insérez la buse du pistolet graisseur dans l ouverture et déversez plusieurs gouttes de graisse dans la tête Réinstallez la vis et faites fonctionner l outil pendant plusieurs secondes pour bien répartir la graisse ENTREPOSAGE Si l outil n est pas utilisé pendant une période prolongée appliquez une mince couche de lubrifiant sur les pièces...

Страница 34: ...échappement Régulateur d air en position fermée Ouvrez le régulateur d air au débit d air souhaité L outil ne fonctionne pas De l air sort librement de l échappement Dommages ou usure excessive des pièces internes 1 Demandez à un technicien qualifié de réparer l outil 2 Remplacez l outil ou les pièces Il est impossible d arrêter l outil 1 La soupape d accélérateur à joints toriques est sortie de l...

Страница 35: ...QTÉ 1 Boîtier principal 1 2 Vis 2 3 Silencieux 1 4 Vis 1 5 Poignée 1 6 Couvercle antipoussière 1 7 Roulement 1 8 Pince en E 1 9 Entretoise 1 10 Engrenage 1 11 Roulement 1 12 Clavette disque 1 13 Broche 1 14 Joint d étanchéité 1 15 Écrou à bride arrière 1 16 Protège meule 1 17 Entretoise 4 18 Vis à capuchon 4 19 Écrou à bride avant 1 20 Engrenage 1 21 Roulement 1 ...

Страница 36: ...e 1 25 Boulon 1 26 Rotor 1 27 Pale de rotor 4 28 plaque arrière 1 29 Anneau de fixation 1 30 Écrou de connexion 1 31 Boîtier arrière 1 32 Bague de laiton 1 33 Gâchette 1 34 Bloc de levier 1 35 Ressort 1 36 Boulon 1 37 Boulon de détente 1 38 tige de soupape 1 39 Joint torique 1 40 Ressort 1 41 Joint torique 1 42 Chapeau de vis 1 43 Entrée d air 1 44 Clé à ergots 1 45 Clé 1 ...

Отзывы: