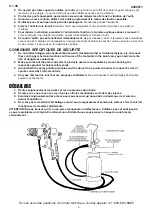
0450071
INSTALLATION
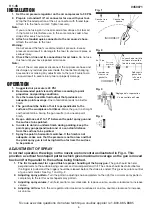
1. Set the air pressure regulator on the air compressor to 90 PSI.
2. Prepare a standard 1/4" air connector for use with your tool.
Wrap the threaded portion of the air connector with thread tape.
Attach it to the tool's air inlet. Tighten securely.
Note :
If you are not using an in-line oiler, add a few drops of air tool oil
in the tool's air inlet before use. In the same manner, add a few
drops after every hour of use.
3. Attach a standard quick connector to the air source's hose.
Attach the air hose to the tool.
Warning:
Do not exceed the tool's recommended air pressure. Excess
pressure could result in damage to the tool, to your work piece or
serious injury.
4. Check the air line and its connections for air leaks.
Do not use
this tool until you have repaired all air leaks.
Note:
Turn off the air compressor, disconnect the air pressure hose and
discharge any residual pressure inside the tool before changing
accessories or making any adjustments to the tool. Failure to do
so could result in severe injury, tool or property damage.
OPERATION
1. Suggested air pressure is 43 PSI
2. Recommended paint viscosity differs according to paint
properties and painting conditions.
3. Use the lowest possible fluid output that produces an
adequate paint coverage.
Finer atomization leads to a better
finish.
4. The gun should be held so that it is perpendicular to the
surface of the workpiece at all times.
Move the gun in a straight
and horizontal line. Arcing the gun results in an uneven paint
finish.
5. Keep a distance of 6" to 12" between the paint spray gun and
the surface to be painted.
6. In order to obtain a uniform finish during painting, keep the
paint spray gun perpendicular and at a constant distance
from the surface to be painted.
7. Spray the paint in horizontal swatches. If the finish is not
adequate, make sure that the pressure is not too low and that
the paint spray gun is not being held too far from the surface
to be painted.
Si vous avez des questions de nature technique, veuillez appeler le 1-800-665-8685
6
V 1.45
Fig. 3
Fig. 4
Fig. 2
CORRECT
Relâchez la
gâchette à
la fin de la
passe.
6 à 12 po
Commencez
à tirer sur la
gâchette.
La couche devrait être
uniforme et mouillée
lors de la vaporisation.
Parcours
du pistolet
Fig. 1
Couche trop
épaisse
INCORRECT
Couche trop
mince
ADJUSTMENT OF SPRAY
In normal operation the wings on the nozzle are horizontal as illustrated in Fig. 4. This
provides a vertical fan shaped pattern which gives maximum coverage as the gun is moved
back and forth parallel to the surface being finished.
1. The first requirement for a good finish is proper handling of the Spray gun.
The gun should be held
perpendicular to the surface being covered, and moved parallel with it. The stroke should be started before
the trigger is pulled and the trigger should be released before the stroke is ended. This gives accurate control
of gun and material. See Fig. 1 and Fig. 2.
2. Adjusting spray pattern.
Turn the pattern adjusting knob completely to the right for a circular spray pattern,
completely to the left for oval shaped spray pattern
3. Adjusting spray volume.
Turn fluid control screw clockwise to reduce volume, counter-clockwise to increase
volume.
4. Adjusting air flow.
Turn the air regulator dial clockwise to reduce air volume, counter-clockwise to increase
air volume.
Réglage de la vaporisation
Vis de contrôle du fluide


