


7
No.
Name
Description
output a specific video source in single view
(specified by Telnet API or Web UI); continue to
short press the button, the HDMI OUT 2 will cycle
through the hardware video sources (VGA > HDMI
1 > HDMI 2 > USB-C > VGA >… ) for output.
LED Status:
Follow LED: Lights up when Follow mode is
selected.
Matrix LED: Lights up when Matrix mode is
selected.
5
USB
Connect to a U-disk for firmware upgrade.
Connect to the USB Dongle for pairing up with each
other.
6
Reset
Hold press this button for five or more seconds and then
release, it will automatically reboot and restore to its factory
defaults.
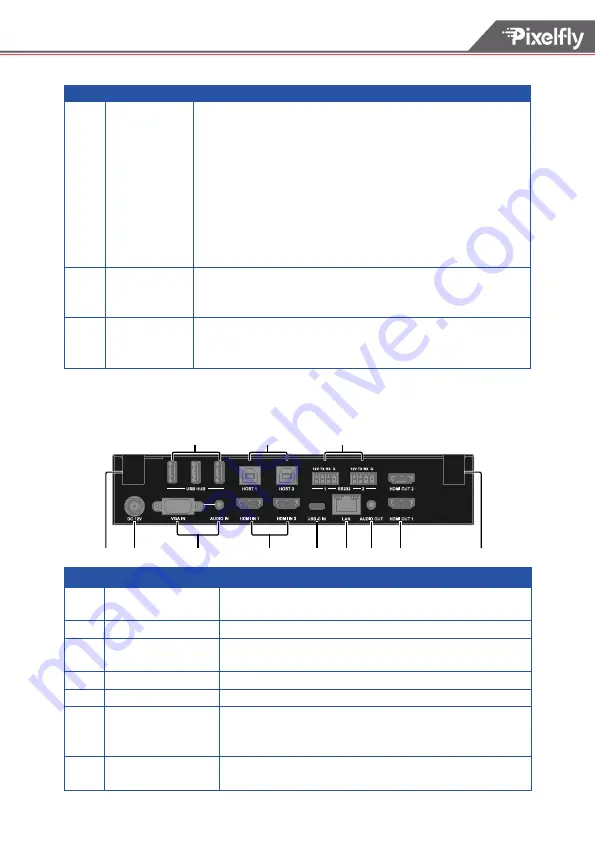
Rear Panel
8
7
6
11
10
9
5
2
4
3
1
1
No.
Name
Description
1
Antenna
Connect to the antenna pair provided for the access to
Miracast and soft AP function.
2
DC 12V
Connect to the power adapter provided.
3
VGA In
Connect to a VGA source for video input as well as
analog audio input.
4
HDMI In 1-2
Connect to an HDMI source device.
5
USB-C In
Connect to a USB-C video source.
6
USB Hub
Connect to the
USB device (e.g. mouse, keyboard, USB
audio) for USB extension between USB device and
USB host.
7
USB Host
Connect to USB host device for USB extension between
USB device and USB host.


