3. Connect to the outside world
Follow the relevant section below for the connection method you‘ve chosen:
4a. LAN (network) connection
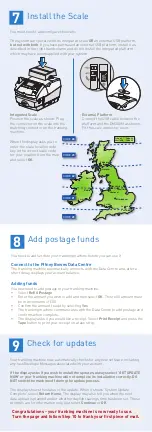
Connect the franking machine to your network as shown below:
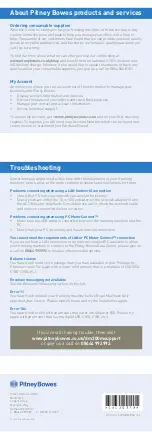
Plug the power cord into a convenient outlet and into the machine. Turn the power
switch ON.
When power is turned on, you should see either the 10 or 100 indicator on
the network adapter light and the ACT indicator may also flash. If none of the
indicators light, check your router/network socket is working correctly before
proceeding with
step 5
.
4b. PCMC Connection (Internet connection via your PC)
Before you connect your franking machine to your PC, you need to install our FREE
PC Meter Connect
™
software. To do this, you must have administrator rights on
your PC which may require you to contact your IT department. Please note that the
software is not Mac compatible.
To install, visit www.europe.pb.com/PCMeterConnect/setup.exe and choose the
‘Run’ option. Select ‘English (United Kingdom)’ as your installation language and
follow the on-screen instructions. This process installs the software and tests your
franking machine connection.
When complete, return to
step 5
of this guide to complete the franking machine
installation.
3. Prepare Your Machine
4
3
WARNING:
Always plug the equipment into a properly grounded wall
outlet. The socket outlet should be near the equipment and should be easily
accessible. Use the mains lead supplied with your equipment.
Network connection
on router or network
wall socket
Network
Cable
Network Adapter
USB
connection
Power connector
Power switch
Rear of machine
1
2
1
1
1
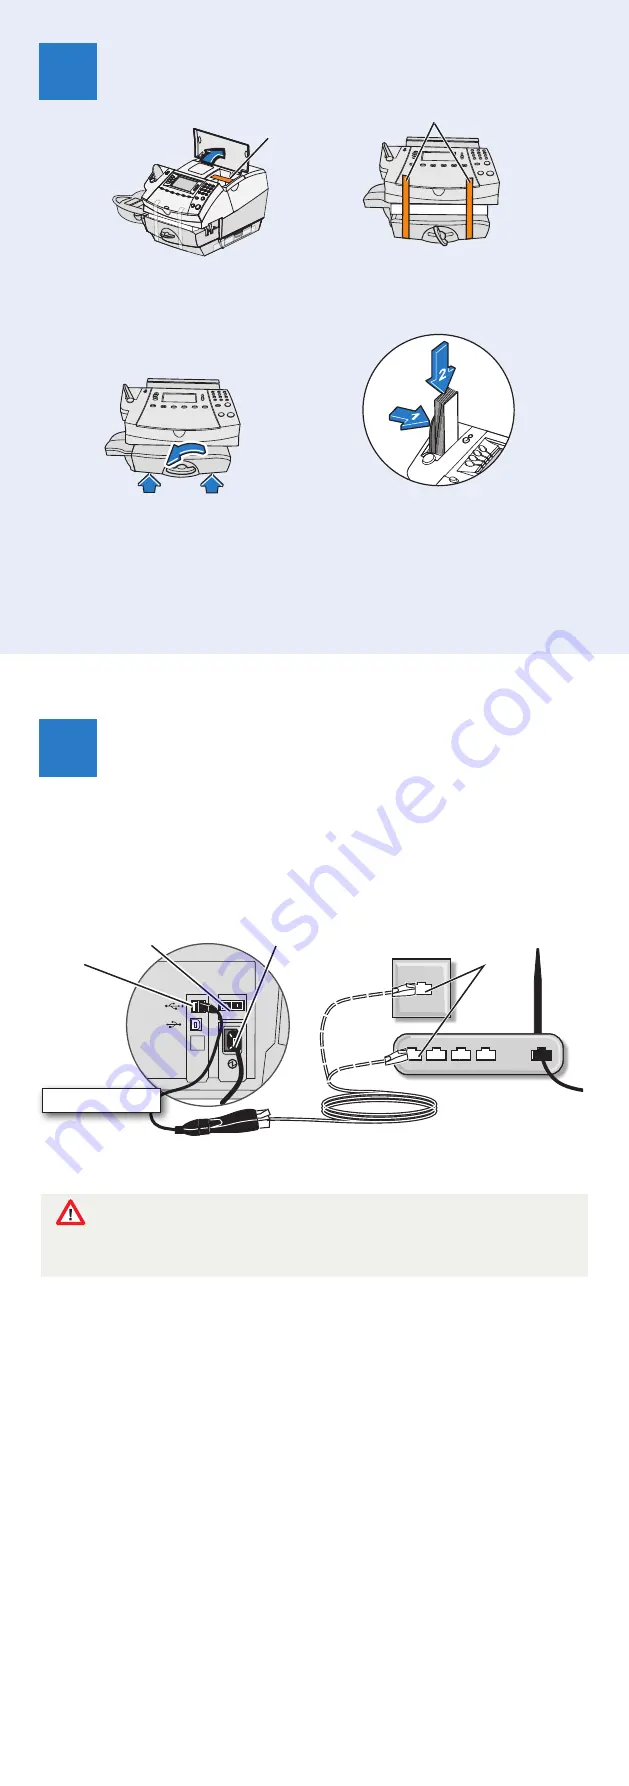
3.3 Close feed
deck by lifting
it and rotating
clearance lever
anticlockwise.
3.4 Push the tape lever
to the right and drop
tapes into the slot.
The printable side of
the tape should be
facing towards the
right.
3.1 Open ink access
cover and remove
tape and shipping
material.
Tape
3.2 Remove shipping
foam and tapes.
Tape


