DA80F/DA95F AddressRight™ Printers Service Manual (SV61962 Rev. A)
A-33
Printer Control Panel Menus and Utilities • Appendix A
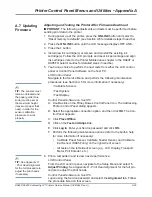
Adjusting and Testing the Printer After Firmware Download
IMPORTANT
: The following adjustments and tests must be performed before
sending print data to the printer.
1. During power up of the printer, press the
ON LINE
button and select to
“Reset memory to defaults” (see Section A.6 for detailed steps if need be).
2. Press the
ON LINE
button until the LCD message displays OFF LINE.
3. Press the
+
button.
4. Install new ink cartridge(s) or remove and reinstall the existing ink
cartridge(s). Follow the LCD prompts and reset ink percentage and align
ink cartridges (refer to the
Printer Maintenance
chapter in the DA80F or
DA95F Operator Guides for detailed steps if need be).
5. You have a choice to perform the next tests from either the LCD control
panel or Control Panel Software on the host PC.
LCD Control Panel
Navigate to the Service Menu and perform the following maintenance
procedures (see Section A.5 for more information if necessary):
• Calibrate Sensors
• Test System
• Test Display
Control Panel Software on Host PC
A. Double-click on the Pitney Bowes Control Panel icon. The Addressing
Printer Control Panel dialog appears.
B. Select the appropriate connection option, and then click
OK
. The Con-
trol Panel appears.
C. Click
Place Offline
.
D. Click on the
Test and Adjust
tab.
E. Click
Log In
. Enter your Service password and click
OK.
F. Perform the following maintenance options (refer to the built-in help
for more information if necessary):
• Calibrate Paper Sensor, Calibrate Feeder Sensor, and Calibrate
Exit Sensor (DA95F only) on the right side of screen
• All tests on the left side of screen (e.g., LCD Display, Transport
Motor, Poll Encoder, etc.)
6. Print a test pattern and review nozzle performance.
LCD Control Panel
From the LCD control panel, navigate to the Setup Menu and select
1.
Adjust Printing
. See
Appendix D - Print Head Alignment
for the full pro-
cedure to adjust the print heads.
Control Panel Software on Host PC
Logon using the Service password and select the
Alignment
tab. Follow
the procedure listed on that screen.
A.7 Updating
Firmware
✍
TIP:
The sensors
must
remain unblocked and
the paper guide (blue
knob)
must
be set at
the maximum height
(maximum paper thick-
ness) in order for the
sensor calibration
procedure to work
properly.
✍
TIP:
See
Appendix D
- Print Head Alignment
for the full procedure to
adjust the print heads
if necessary.
Содержание DA80F
Страница 1: ...Service Manual DA80F and DA95F AddressRight Fixed Head Printers DA80F WF81 DA95F WF96 ...
Страница 26: ...3 6 DA80F DA95F AddressRight Printers Service Manual SV61962 Rev A 3 Theory ...
Страница 50: ...4 24 DA80F DA95F AddressRight Printers Service Manual SV61962 Rev A 4 Troubleshooting Diagnostics ...
Страница 134: ...6 8 DA80F DA95F AddressRight Printers Service Manual SV61962 Rev A 6 Adjustments ...
Страница 178: ...B 8 DA80F DA95F AddressRight Printers Service Manual SV61962 Rev A Appendix B Printer Communications ...
Страница 181: ...DA80F DA95F AddressRight Printers Service Manual SV61962 Rev A C 3 Schematics Appendix C Block Diagram for DA80F WF81 ...
Страница 182: ...C 4 DA80F DA95F AddressRight Printers Service Manual SV61962 Rev A Appendix C Schematics Block Diagram for DA95F WF96 ...
Страница 192: ...E 4 DA80F DA95F AddressRight Printers Service Manual SV61962 Rev A Appendix E Printing Standards ...


