114
XDV-P9
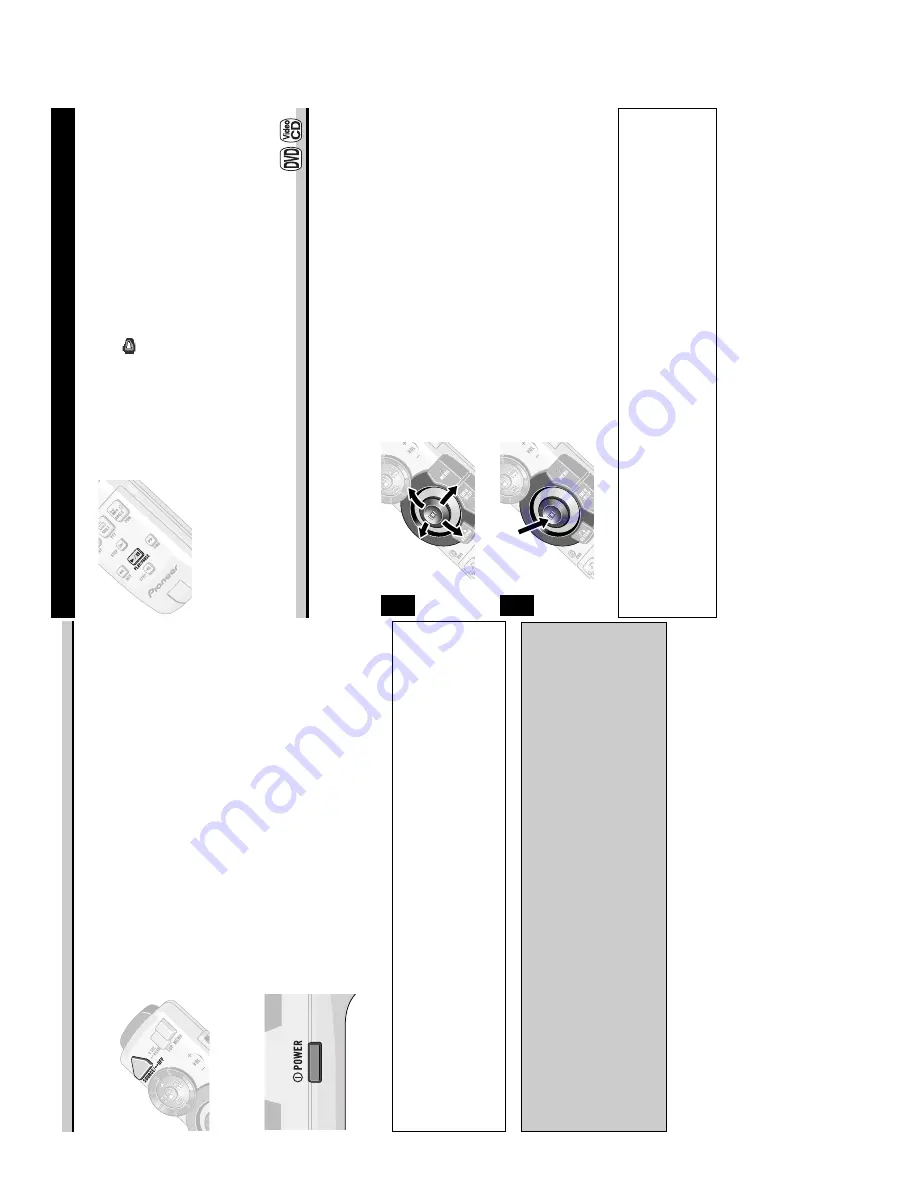
Switching Power OFF
When Using the IP-BUS Mode
Pr
ess the SOURCE button for 1 second.
Power to the Multi-Channel AV Master Unit switches OFF.
When Using the STAND ALONE Mode
Pr
ess the POWER button on the side of the
remote contr
ol.
Power to this product switches OFF. The remote sensor indicator
goes out.
When using a rear display in the IP-BUS Mode
•
Even if the source selected with the head unit is not DVD, if you switch power to this
product ON with the POWER button, you can watch the DVD picture from this product
on the rear display.
•
Regardless of whether the head unit is switched ON/OFF, you can switch power to this
product ON/OFF.
Precautions concerning the IP-BUS Mode
•
When you have switched power to this product ON by pressing the POWER button, be
sure not to forget to switch power to this product OFF. If you switch power to this
product OFF after switching to DVD video display, the display shows that power to this
product has been switched OFF.
•
When you eject a source disc (CD or MD) selected with the head unit, power to the head
unit switches OFF. Depending on the connection method, the picture on the rear display
may disappear.
Disc (DVD/V
ideo CD/CD) Playback
Pr
ess the PLA
Y/P
AUSE (
6
) button.
The playback mark (
) is displayed for 4 seconds and the disc
starts playing.
Note:
•
Pressing the PLAY/PAUSE (
6
) button when a disc is playing, pauses playback.
•
If the last disc played was a DVD, playback starts from the point on that disc where you
stopped play previously. With some discs, a menu may be displayed and playback may not be
possible from where you left off previously. (See the next item.)
W
orking with the Menu Screen
When DVDs offering menu or Video CDs featuring the PBC (Playback Control) function
start playing, a menu is displayed.
With DVDs
Use the joystick to select the desir
ed
MENU option.
Pr
ess the ENTER button.
Playback starts from the selected menu option.
7
To Display the Menu
You can display the menu by pressing the MENU button or TOP MENU button while a
disc is playing. Pressing either of these buttons again lets you start playback from the
location selected from the menu. For details, refer to the instructions provided with the
disc.
Note:
•
The way to display the menu differs depending on the disc.
2
1
Содержание XDV-P9
Страница 6: ...XDV P9 2 2 EXTERIOR 6 ...
Страница 9: ...9 XDV P9 2 3 DVD MECHANISM ...
Страница 25: ...25 XDV P9 IC1201 pin 45 200mV div 10µs div Composite signal output ch1 GND ...
Страница 29: ...29 XDV P9 5V PD6335A 5 6 7 8 A B C D 5 6 7 8 E a E b 2 2 E a 4 5 6 7 8 9 10 ...
Страница 38: ...38 XDV P9 A 1 2 3 4 B C D 1 2 3 4 CLOSE SENSE EJECT RESET G KEYBOARD UNIT G F CN3891 3 5 KEYBOARD UNIT ...
Страница 39: ...39 XDV P9 ...
Страница 41: ...XDV P9 1 2 3 4 A B C D 1 2 3 4 41 B EREF EPVO E MAG SIDE A SIDE B PCB UNIT B B PCB UNIT B B ...
Страница 42: ...42 XDV P9 A 1 2 3 4 B C D 1 2 3 4 C Q851 2 1 9 1 4 1 M M1 CARRIAGE D A E C PCB A ...
Страница 43: ...XDV P9 1 2 3 4 A B C D 1 2 3 4 43 D 1 2 M M2 TRAY C D PCB B ...
Страница 44: ...44 XDV P9 A 1 2 3 4 B C D 1 2 3 4 E E MAIN UNIT E E E E E 4 2 MAIN UNIT ...
Страница 45: ...E E E E E E E 8 14 1 7 45 XDV P9 5 6 7 8 A B C D 5 6 7 8 E SIDE A ...
Страница 46: ...46 XDV P9 A 1 2 3 4 B C D 1 2 3 4 E E DSPCLK IC Q ADJ TC1000 E MAIN UNIT M4 SPDL MOTOR F CN3701 F CN3991 ...
Страница 50: ...50 XDV P9 E E E E E E A 1 2 3 4 B C D 1 2 3 4 F EXTENSION UNIT F ...
Страница 51: ...51 XDV P9 E E E E E E E E E E E E E 5 6 7 8 A B C D 5 6 7 8 F SIDE B ...
Страница 52: ...52 XDV P9 A 1 2 3 4 B C D 1 2 3 4 G CLOSE SENSE EJECT RESET KEYBOARD UNIT G SIDE A 4 4 KEYBOARD UNIT ...
Страница 53: ...53 XDV P9 1 2 3 4 A B C D 1 2 3 4 F CN3891 KEYBOARD UNIT G G SIDE B ...


