Other connections
08
46
En
Chapter 8:
Other connections
Caution
• Make sure the power is switched off before making or
changing the connections.
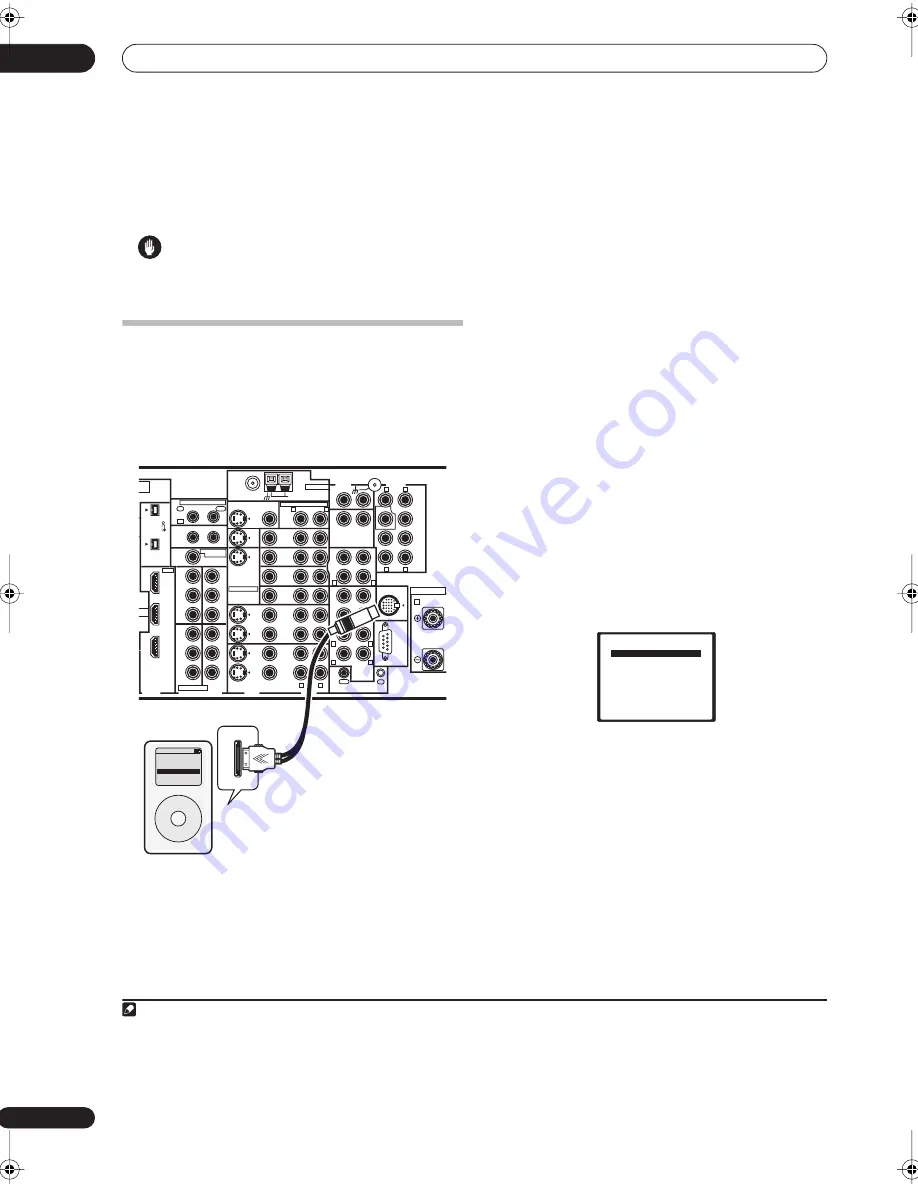
Connecting an iPod
This receiver has a dedicated iPod terminal that will allow
you to control playback of your iPod using the controls of
this receiver.
1
Connecting your iPod to the receiver
1
Use a dedicated iPod audio control cable (JCA-IP115)
to connect your iPod to the iPod jack on the rear of the
receiver.
Make sure to switch off the receiver before making this
connection.
2
Use the iPod input source button to switch the
receiver to the iPod.
The front panel display shows
Loading
while the receiver
verifies the connection and retrieves data from the iPod.
3
Use the TOP MENU button to display iPod Top
menu.
When the display shows
Top Menu
you’re ready to play
music from the iPod.
2
• If after pressing
iPod
the display shows
No
Connection
, try switching off the receiver and
reconnecting the iPod to the receiver.
Playing music from your iPod
To navigate the music on your iPod it’s easiest if you have
your TV switched on to take advantage of the OSDs.
3
You
can, however, use just the receiver’s front panel display
to do everything if you prefer.
Finding what you want to play
When connected to this receiver, you can browse the
music stored on your iPod by playlist, artist, album name,
song name, genres or composers, similar to using the
iPod directly.
1
Use the
/
buttons to select a category then press
ENTER
to browse that category.
• To return to the previous level any time, press
RETURN
.
2
Use the
/
buttons to browse the selected
category (e.g., albums).
• Use
/
to move to previous/next levels.
3
Continue browsing until you arrive at what you
want to play, then press
to start playback.
4
Navigation through categories on your iPod looks like
this:
Playlist
Song
Artist
Album
Song
Album
Song
Song
Note
1 This system is compatible with an iPod, iPod mini and iPod Photo portable device (third generation and above), however, compatibility may vary depend-
ing on the software version of your iPod. This receiver does not support software versions prior to iPod update 2004-10-20. For supported versions, consult
your local Pioneer dealer.
VSX-AX4AVi
S400
(AUDIO)
S400
ROOM
CE
L
3(ZONE3)
1
–
2
1
–
3
1
–
4
IN
2
IN
1
(DVD/LD)
IN
2
(TV)
IN
1
IN
1
IN
2
IN
3
IN
3
OUT
MULTI-ROOM
& SOURCE
MULTI-ROOM & SOURCE
MONITOR
OUT
12 V TRIGGER
ROOM2(ZONE2)
ROOM2(ZONE2)
FM UNBAL 75
Ω
AM LOOP
MONITOR
OUT
OUT
CD
CD-R/
TAPE
DVD/
LD
TV
SAT
VIDEO1/
GAME1
OUT
DVR/
VCR 1
DVR/
VCR 2
OUT
IN
IN
IN
VIDEO
VIDEO
AUDIO
S - VIDEO
IN
IN
IN
FR
FL
SUB W.
CENTER
MULTI CH
IN
SPEAKERS
RS-232C
SUR-
ROUND
SURROUND
BACK
CONTROL
iPod
SUB W.
FRONT
CENTER
SUR-
ROUND
FRO
R
(Single)
SUR-
ROUND
BACK
OUT
PHONO
IN
IN
IN
IN
ROOM2
(ZONE2)
IN
(DC OUT 12V TOTAL 50mA MAX)
1
2
IN1
IN2
OUT
Y
P
B
P
R
Y
P
B
P
R
Y
P
B
P
R
Y
P
B
P
R
DIGITAL
COMPONENT VIDEO
ASSIGNABLE
GNA-
1
–
2
ASSIGNABLE
OUT
IN
OUT
ANTENNA
AUDIO
PRE OUT
MULTI-ROOM & SOURCE
IR
HDMI
R
L
R
R
L
A
R
L
L
R
L
R
L
R
L
iPod
MENU
iPod
Music >
Extras >
Settings >
Shuffle Songs
Backlight
2 • The controls of your iPod will be inoperable when connected to this receiver (
Pioneer
shows in the iPod display). Features such as the equalizer cannot
be controlled using this receiver, and we recommend switching the equalizer off before connecting.
3 Note that non-roman characters in playlists will be displayed as
#
.
4 If you’re in the song category, you can also press
ENTER
to start playback.
iPod Top
[
Playlists
]
[ Artists
]
[ Albums
]
[ Songs
]
[ Genres
]
[ Composers
]
[ Shuffle Songs
]
10_Other_connections.fm 46 ページ 2005年7月12日 火曜日 午後12時48分


