background image


Controlling the rest of your system

11


52


En


• The remote controls should be 2 cm to 5 

cm apart.


5

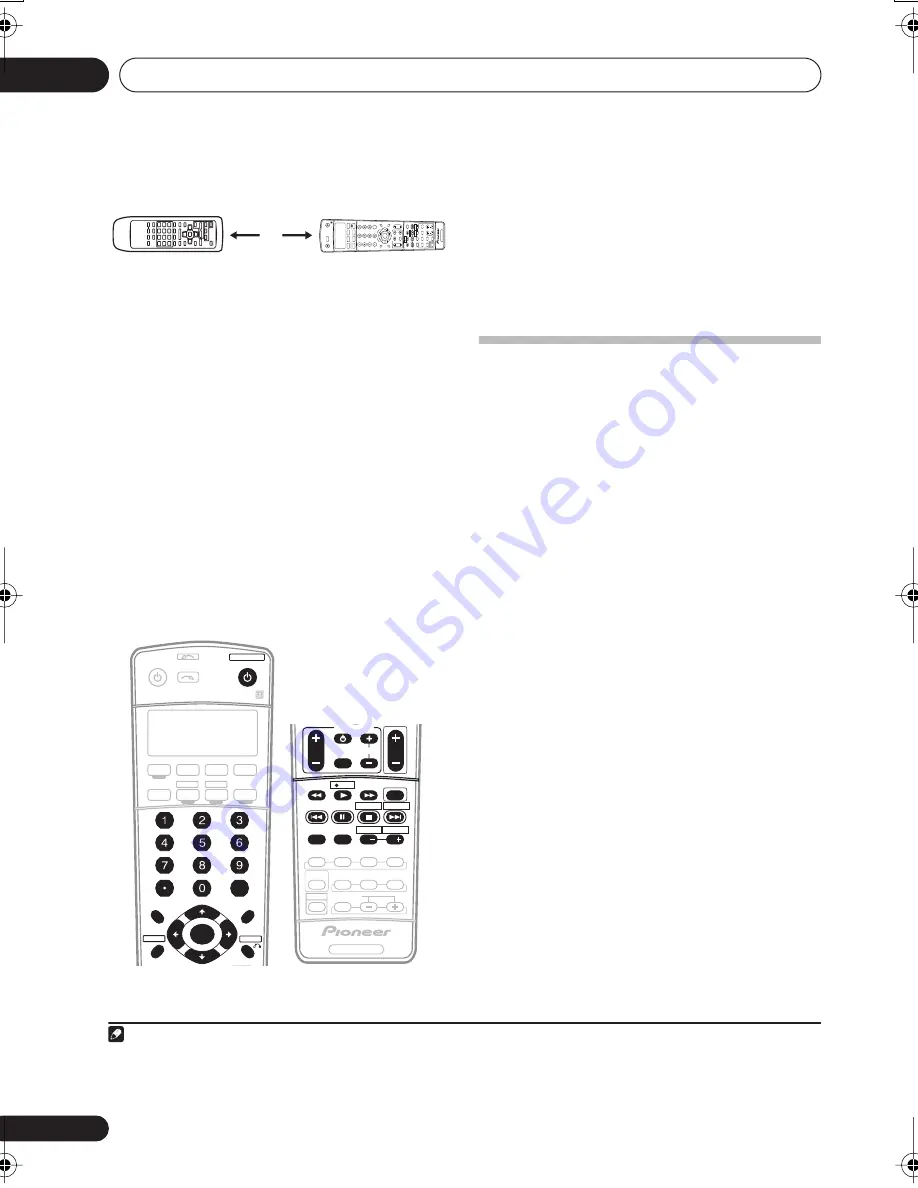
Press the corresponding button on the 

other remote control that is sending 
(teaching) the signal to this receiver’s remote 
control.


For example, if you want to learn the playback 
control signal, press and hold 


 for a couple of 

seconds. The LCD display will show 


OK


 if the 

operation has been learned.

If for some reasons the operation hasn’t been 
learned the LCD will display 


ERROR


 briefly and 

then display 


PRES KEY


 again. If this happens, 

keep pressing the (teaching) button as you vary 
the distance between the two remotes, until 

the LCD display shows 


OK


.


1


Certain buttons represent operations that 
cannot be learned from other remote controls. 
The buttons available are shown below:


6

To program additional signals for the 

current component repeat steps 4 and 5.


To program signals for another component, 
exit and repeat steps 1 through 5.


7

Press and hold the RECEIVER button for 

two seconds to exit and store the 
operation(s).


Erasing one of the remote 
control button settings 


This erases a control assigned to one of the 
buttons and restores it to the factory default.


1

While pressing the RECEIVER button, 

press the 


SETUP


 button.


The remote LCD display shows 


SETUP


2

Use 


/


 to select 


ERASE


 then press 


ENTER


.


The LCD on the remote displays the 
component.


3

Press the MULTI CONTROL button 

corresponding to the button setting to be 
erased then press 


ENTER


.


The remote LCD display flashes 


PRES KEY


4

Press and hold the button to be erased for 

two seconds.


The LCD display shows 


OK


 or 


NO CODE


 to 

confirm the button has been erased.


5

Repeat step 4 to erase other buttons.

6

Press and hold the RECEIVER button for 

two seconds when you’re done.

Note


1 • Some commands from other remote controls cannot be learned, but in most cases the remotes just need to be moved closer 
together or farther apart.

• If the remote LCD shows 


ERROR


, it may also mean the memory is full. See 


Programming signals from other remote controls


below to erase a programmed button you’re not using to free up more memory.

2 cm to 5 cm

+

10

INPUT A

TT

FL

 D

IM

M

E

R

S

R

DISC

RECEIVER

MUL

T

I C

O

NTROL

SOURCE

INPUT SELECT

SETUP

ENTER

TV

 C

O

N

T

R

O

L

RECEIVER C

ONTROL

SHIFT

VO

L

DV

D

/L

D

T

V

/SA

T

D

V

R

/V

C

R

T

V

 C

O

N

T

CD

TUNE

TUNE

ST

ST

ST

ANDR

A

D

LEVEL

EFFECT

TEST T

O

NE

CH SELECT

AD

V.

 SURR

STEREO

SLEEP

INPUT SELECT

TV

 C

H

DT

V ON/OFF

TUNER DISPL

AY

MPX AUDIO

CH RETURN SUB

TITLE

MIDNIGHT/ LO

UDNESS

DT

V INFO

REC

M

U

T

E

TV

 V

O

L

CD-R/T

APE

TUNER

RECEIVER

ENTER

REC ST

OP

HDD

CH

CH

DV

D

D.

A

C

C

E

S

S

TO

P

 MENU

DT

V MENU

CL

ASS

MENU

BAND

RETURN

GUIDE

T.

E

D

IT

MC

A

C

C

SETUP

RECEIVER

ANALOG

ATT

MIDNIGHT/

   LOUDNESS

SB ch

DIMMER

SLEEP

SR+

+10

D.ACCESS

DIALOG  E

CLASS

DISC

RECEIVER

SOURCE

SYSTEM  OFF

INPUT

SELECT

ENTER

TUNE

TUNE

ST

ST

ENTER

TOP MENU

PTY SEARCH

T.EDIT

MENU

RETURN

GUIDE

SETUP

TV

DVR

TV CTRL

CD

RECEIVER

AM

FM

DVD

CD-R/TAPE

USB

AV  PRE-PROGRAMMED  AND  LEARNING

REMOTE CONTROL UNIT

TV CONTROL

SHIFT

VOL

AUTO  SURR

STANDARD ADV.SURR

S.RETRIEVER

SIGNAL  SEL

STEREO

INPUT

SELECT

TV CH

MPX

A

B

C

D

E

EON

AUDIO

DISP

SUBTITLE

MULTI  OPE

EFFECT/CH SEL

ACOUSTIC  EQ

REC

MUTE

TV  VOL

REC  STOP JUKEBOX

HDD

CH

CH

DVD

GUIDE

RECEIVER

VSX_916.book.fm 52 ページ 2005年12月22日 木曜日 午後4時21分

Содержание VSX-916-K

Страница 1: ...uzioni per l uso Discover the benefits of registering your product online at www pioneer co uk www pioneer eur com VSX 916 S K AUDIO VIDEO MULTI CHANNEL RECEIVER Registra il tuo prodotto su www pioneer it o www pioneer eur com e scopri subito quali vantaggi puoi ottenere ...

Страница 2: ...hese operating instructions so you will know how to operate your model properly After you have finished reading the instructions put them away in a safe place for future reference The exclamation point within an equilateral triangle is intended to alert the user to the presence of important operating and maintenance servicing instructions in the literature accompanying the appliance The lightning ...

Страница 3: ...overheat explode or catch fire It can also reduce the life or performance of batteries D3 4 2 3 3_En VENTILATION CAUTION When installing this unit make sure to leave space around the unit for ventilation to improve heat radiation at least 60 cm at top 10 cm at rear and 30 cm at each side WARNING Slots and openings in the cabinet are provided for ventilation to ensure reliable operation of the prod...

Страница 4: ...m Auto playback 28 Listening in surround sound 28 Using the Advanced surround effects 29 Setting the effect options 29 Listening in stereo 30 Listening with Acoustic Calibration EQ 30 Using surround back channel processing 31 Using Virtual Surround Back VSB 31 Using Midnight and Loudness 32 Using the Sound Retriever 32 Enhancing dialog 32 Using the tone controls 32 Playing other sources 33 Choosin...

Страница 5: ...System off 55 Controls for TVs 55 Controls for other components 57 12 Other connections Second Zone speaker B setup 59 Switching the speaker system 59 Bi amping your front speakers 60 Bi wiring your speakers 60 Connecting additional amplifiers 61 Using this receiver with a Pioneer plasma display 61 Using the SR mode with a Pioneer plasma display 62 13 Other Settings The Input Assign menu 63 The Ot...

Страница 6: ...tch fire It can also reduce the life or performance of batteries Installing the receiver When installing this unit make sure to put it on a level and stable surface Don t install it on the following places on a color TV the screen may distort near a cassette deck or close to a device that gives off a magnetic field This may interfere with the sound in direct sunlight in damp or wet areas in extrem...

Страница 7: ...nd See Connecting the speakers on page 19 Where you place the speakers will have a big effect on the sound Place your speakers as shown below for the best surround sound effect Also see Hints on speaker placement on page 20 for more on this 3 Plug in and switch on the receiver followed by your DVD player subwoofer and TV Make sure you ve set the video input on your TV to this receiver Check the ma...

Страница 8: ...he table below to find the speaker setup that corresponds with your system 4 Press ENTER 5 Use the MULTI JOG dial to choose your room size Depending on the distance of your speakers from the listening position choose between small medium or large S M or L M being an average sized room 6 Press ENTER 7 Use the MULTI JOG dial to choose your listening position You can cycle between the following choic...

Страница 9: ... it s about ear level at your normal listening position Otherwise place the microphone at ear level using a table or a chair Make sure there are no obstacles between the speakers and the microphone 3 Press RECEIVER on the remote control then press the SETUP button An on screen display OSD appears on your TV Use and ENTER on the remote control to navigate through the screens and select menu items P...

Страница 10: ...receiver settings for speaker setting channel level speaker distance and Acoustic Calibration EQ Again try to be as quiet as possible while this is happening It may take 3 to 8 minutes 10 The Auto MCACC Setup has finished Select SKIP to go back to the System Setup menu The MCACC indicator on the front panel will light to show the setup is complete The settings made in the Auto MCACC Setup should g...

Страница 11: ...ress RETURN after you have finished checking each screen When you re finished select SKIP to go back to the System Setup menu Other problems when using the Auto MCACC Setup If the room environment is not optimal for the Auto MCACC Setup too much background noise echo off the walls obstacles blocking the speakers from the microphone the final settings may be incorrect Check for household appliances...

Страница 12: ...are the most common type of video connection and are used to connect to the composite video terminals The yellow plugs distinguish them from cables for audio S video cables S video cables give you a clearer picture reproduction than standard RCA video cables by sending separate signals for the luminance and color Component video cables Use component video cables to get the best possible color repr...

Страница 13: ...d RCA video cable to connect to the composite video jack 4 Note 1 If your DVD player only has an optical digital output you can connect it to the optical input on this receiver using an optical cable When you set up the receiver you ll need to tell the receiver which input you connected the player to see The Input Assign menu on page 63 2 This connection will allow you to make analog recordings fr...

Страница 14: ...T PREOUT REC ANTENNA CONTROL DVD 5 1CH INPUT D V D 5 1CH INPUT AUDIO R L IN AUX OUT IN DIGITAL OUT CENTER OUTPUT SUB WOOFER OUTPUT VIDEO OUTPUT SURROUND OUTPUT FRONT OUTPUT R L R L This receiver DVD multi channel decoder with multi channel analog output jacks 2 If you ve already connected your TV to the TV SAT inputs simply choose another input However to receive a signal you ll need to press the ...

Страница 15: ...n to the CD R TAPE MD analog output jack using a stereo RCA phono cable 4 If your recorder has a digital input connect it to the digital output on the receiver as shown Use an optical cable to make this connection About the WMA9 Pro decoder This unit has an on board Windows Media Audio 9 Professional WMA9 Pro decoder so it is possible to playback WMA9 Pro encoded audio using a coaxial or optical d...

Страница 16: ...ble for the connection 3 4 If your video component has a digital input connect it to the digital output on the receiver as shown Use an optical cable to make this connection Note 1 For better quality you can also connect with S video using the S VIDEO DVR VCR IN jack If your video component also has a component video output you can connect this too See Using the component video jacks on page 17 fo...

Страница 17: ...ry assign the component video inputs to the input source you ve connected This only needs to be done if you didn t connect according to the following defaults COMPONENT 1 DVD COMPONENT 2 TV COMPONENT 3 DVR See Assigning the component video inputs on page 63 for more on this 3 Connect the COMPONENT VIDEO MONITOR OUT jacks on this receiver to the component video inputs on your TV or monitor Use a th...

Страница 18: ...ing the loop to the stand Make sure the reception is clear 4 Place the AM antenna on a flat surface and in a direction giving the best reception 5 Connect the FM wire antenna in the same way as the AM loop antenna For best results extend the FM antenna fully and fix to a wall or door frame Don t drape loosely or leave coiled up Using external antennas To improve FM reception Use a PAL connector to...

Страница 19: ...together and inserted fully into the speaker terminal Use good quality speaker wire to connect the speakers to the receiver Note 1 If you re not using a subwoofer change the front speaker setting see Speaker Setting on page 42 to LARGE 2 If you are using only one surround back speaker connect it to the surround back left L terminal ASSIGNABLE MONITOR OUT Y PB COMPONENT VIDEO COAX OPT OPT CD ASSIGN...

Страница 20: ...possible interference such as discoloration of the picture when the TV is switched on If you do not have magnetically shielded speakers and notice discoloration of the TV picture move the speakers farther away from the TV If you re using a center speaker place the front speakers at a wider angle If not place them at a narrower angle Place the center speaker above or below the TV so that the sound ...

Страница 21: ...r orientation The first diagram fig A shows orientation with one surround back speaker or none connected The second fig B shows orientation with two surround back speakers connected 3 D view of 7 1 channel speaker setup Surround left Surround right Listening position Front left Front right Center Subwoofer Surround back Surround back Single surround back speaker left right 90 to 120 fig A fig B LS...

Страница 22: ...e surround modes page 29 ST DIRECT AUTO SURR Selects stereo direct playback page 30 Also selects Auto Surround Auto playback on page 28 UP DOWN MULTI JOG MASTER VOLUME ENTER AUDIO VIDEO MULTI CHANNEL RECEIVER VSX 916 STANDBY ON PHONES DVD LD TV SAT DVR VCR VIDEO CD CD R TAPE MD FM AM STANDARD MIDNIGHT LOUDNESS ADVANCED SURR ST DIRECT AUTO SURR LISTENING MODE QUICK SETUP SETUP RETURN TUNING STATION...

Страница 23: ...the impedance setting page 68 18 TUNING STATION Selects the frequency page 45 and station presets page 46 when using the tuner 19 TUNER EDIT Press to memorize and name a station for recall page 46 20 TONE Press this button to access the bass and treble controls which you can then adjust with the MULTI JOG dial page 32 21 QUICK SETUP See Using the Quick Setup on page 8 22 System Setup menu controls...

Страница 24: ... Auto Surround see Auto playback on page 28 is on 8 ATT Lights when ANALOG ATT is used to attenuate reduce the level of the analog input signal 9 SLEEP Lights when the sleep mode is active see Remote control below 10 Tuner indicators Lights when the mono mode is set using the MPX button Lights when a stereo FM broadcast is being received in auto stereo mode Lights when a broadcast is being receive...

Страница 25: ...once SB ch Selects the surround back channel mode page 31 or virtual surround back mode page 31 ANALOG ATT Attenuates lowers the level of an analog input signal to prevent distortion SR Switches the SR mode on off page 62 DIMMER Dims or brightens the display MIDNIGHT LOUDNESS Use Midnight when listening to movie soundtracks at low volume Use Loudness to boost the bass and treble at low volume page...

Страница 26: ...r TV VOL Use to adjust the TV volume INPUT SELECT Use to select the TV input signal TV CH Use to select channels 7 Component control buttons The main buttons etc are used to control a component after you have selected it using the MULTI CONTROL buttons The controls above these buttons can be accessed after you have selected the corresponding MULTI CONTROL button for example DVD or DVR MPX Switches...

Страница 27: ...ols on page 51 MULTI OP See Multi Operation and System Off on page 53 SYS OFF See Multi Operation and System Off on page 53 DIRECT F See Direct function on page 53 ERASE See Programming signals from other remote controls on page 51 RESET See Erasing all of the remote control presets on page 53 READ ID See Confirming preset codes on page 53 14 RECEIVER Switches the remote to control the receiver us...

Страница 28: ...de If the source is Dolby Digital DTS or Dolby Surround encoded the proper decoding format will automatically be selected and shows in the display With two channel sources you can select from 2 Pro Logic IIx MOVIE Up to 7 1 channel sound especially suited to movie sources 2 Pro Logic IIx MUSIC Up to 7 1 channel sound especially suited to music sources 2 Pro Logic IIx GAME Up to 7 1 channel sound e...

Страница 29: ...tain options may not appear Check the table below for notes on this 2 Use the buttons to set it as necessary See the table below for the options available for each setting The defaults if not stated are listed in bold 3 Press EFFECT CH SEL again to adjust other settings Note 1 If you press ADVANCED SURROUND when the headphones are connected the PHONES SURROUND mode will automat ically be selected ...

Страница 30: ...ese pages for more on Acoustic Calibration Equalization While listening to a source press ACOUSTIC EQ Press repeatedly to select between ALL CH No special weighting is given to any one channel F ALIGN All speakers are heard in accordance with the front speaker settings CUSTOM 1 2 Custom settings EQ OFF Switches Acoustic Calibration EQ off The MCACC indicator on the front panel lights when Acoustic...

Страница 31: ...nds better in the format for example 5 1 for which it was originally encoded you can have the receiver only apply this effect to 6 1 encoded sources like Dolby Digital EX or DTS ES 2 The table indicates when you will hear the virtual surround back channel Sound plays through surround speakers Press SB ch SB ch PROCESSING to select a virtual surround back channel option Each press cycles through th...

Страница 32: ... on or off Enhancing dialog Default setting OFF The Dialog Enhancement feature localizes dialog in the center channel to make it stand out from other background sounds in a TV or movie soundtrack Press DIALOG E to switch dialog enhancement on or off Using the tone controls Depending on what you are listening to you may want to adjust the bass or treble using the front panel tone control 1 Press TO...

Страница 33: ...layback source to the proper output setting For example you might need to set your DVD player to output multichannel analog audio 2 Press DVD 3 Press SIGNAL SEL SIGNAL SELECT to select the multichannel analog inputs DVD 5 1ch shows in the display and the ANALOG indicator lights Note 1 If your source is the TV s built in tuner switch to the channel you want to watch otherwise make sure that the TV ...

Страница 34: ...with copy protection or restricted playback 2 Compatible USB devices include external magnetic hard drives portable flash memory particularly keydrives and digital audio players MP3 players of format FAT16 32 It is not possible to connect this unit to a personal computer for USB playback Pioneer cannot guarantee compatibility operation and or bus power with all USB mass storage devices and assumes...

Страница 35: ...al Rights Management protection compatible Yes DRM protected audio files will not play in this receiver About MPEG 4 AAC Advanced Audio Coding AAC is at the core of the MPEG 4 AAC standard which incorporates MPEG 2 AAC forming the basis of the MPEG 4 audio compression technology The file format and extension used depend on the application used to encode the AAC file This unit plays back AAC files ...

Страница 36: ... and customize the Acoustic Calibration EQ see Manual MCACC speaker setup below Manual SP Setup Specify the size number distance and overall balance of the speakers you ve connected see Manual speaker setup on page 41 Input Assign Specify what you ve connected to the digital and component video inputs see The Input Assign menu on page 63 Other Setup Make customized settings to reflect how you are ...

Страница 37: ...anual MCACC from the System Setup menu See Making receiver settings from the System Setup menu above if you re not already at this screen 2 Select the setting you want to adjust If you re doing this for the first time you might want to make these settings in order Fine Ch Level Make fine adjustments to the overall balance of your speaker system see Fine Channel Level below Fine SP Distance Make pr...

Страница 38: ...epth and separation with your system it is necessary to add a slight bit of delay to some speakers so that all sounds will arrive at the listening position at the same time The following setting can help you make detailed adjustments that you may not achieve using the Manual speaker setup below 1 Select Fine SP Distance from the Manual MCACC setup menu The volume increases to the reference level 2...

Страница 39: ...at suits your tastes Setting the Acoustic Calibration EQ automatically If you have already completed Automatically setting up for surround sound MCACC on page 9 ALL CH ADJUST and FRONT ALIGN below should already be set Therefore if you want to adjust your settings manually you can skip to Setting the Acoustic Calibration EQ manually below 1 Select EQ AUTO Setting from the Manual MCACC setup menu M...

Страница 40: ...up above or from Automatically setting up for surround sound MCACC on page 9 to one of the custom settings Instead of just a flat EQ curve this will give you a reference point from which to start see Copying your Acoustic Calibration EQ settings above for how to do this 1 Select EQ CUSTOM1 Adjust or EQ CUSTOM2 Adjust from the Manual MCACC setup menu 2 Select which method you would like to use to a...

Страница 41: ...setup menu 2 Select the setting you want to check It is useful to do this while a source is playing so you can compare the different settings 3 Select the channels you want pressing ENTER when you re finished checking each one 4 When you re finished press RETURN You return to the Manual MCACC setup menu Manual speaker setup This receiver allows you to make detailed settings to optimize the surroun...

Страница 42: ...effectively or if you didn t connect a subwoofer Select SMALL to send the bass frequencies to the subwoofer 1 Center Select LARGE if your center speaker reproduces bass frequencies effectively or select SMALL to send bass frequencies to the other speakers or subwoofer If you didn t connect a center speaker choose NO the center channel is sent to the front speakers Surr Select LARGE if your surroun...

Страница 43: ...ponse with it set to PLUS and YES or the front speakers set to LARGE and SMALL alternatively and let your ears judge which sounds best If you re having problems the easiest option is to route all the bass sounds to the subwoofer by selecting SMALL for the front speakers Crossover Network Default setting 100Hz This setting decides the cutoff between bass sounds playing back from the speakers select...

Страница 44: ...he receiver can then add the proper delay needed for effective surround sound 1 Select Speaker Distance from the Manual SP Setup menu 2 Adjust the distance of each speaker using You can adjust the distance of each speaker in 0 1 meter increments 3 When you re finished press RETURN You return to the Manual SP Setup menu Tip For best surround sound make sure the surround back speakers are the same d...

Страница 45: ... Improving FM stereo sound If the tuned or stereo indicators don t light when tuning to an FM station because the signal is weak press the MPX button to switch the receiver into mono reception mode This should improve the sound quality and allow you to enjoy the broadcast Tuning directly to a station Sometimes you ll already know the frequency of the station you want to listen to In this case you ...

Страница 46: ...our station presets 1 Choose the station preset you want to name See Listening to station presets below for how to do this 2 Press T EDIT TUNER EDIT The display shows ST NAME then a blinking cursor at the first character position 3 Input the name you want Choose a name up to four characters long Use the MULTI JOG dial front panel or the ST buttons remote to select characters Press ENTER to confirm...

Страница 47: ...onds If you don t press ENTER searching resumes News News Affairs Current Affairs Info General Information Sport Sport Educate Educational Drama Radio plays etc Culture National or regional culture theater etc Science Science and technology Varied Usually talk based material such as quiz shows or interviews Pop M Pop music Rock M Rock music Easy M Easy listening Light M Light classical music Class...

Страница 48: ... Sets the tuner to pick up traffic information when it is broadcast EON NEWS Sets the tuner to pick up news when it is broadcast OFF Switches off the EON feature When set to TA or NEWS the EON indicator in the display lights it flashes when receiving an EON broadcast 3 The indicator in the display lights when the current station carries the EON service 4 Note 1 RDS searches station presets only If...

Страница 49: ...ignal corresponding to the source component see page 33 for more on this 3 Prepare the source you want to record Tune to the radio station load the CD video DVD etc 4 Prepare the recorder Insert a blank tape MD video etc into the recording device and set the recording levels Refer to the instructions that came with the recorder if you are unsure how to do this Most video recorders set the audio re...

Страница 50: ...ng the proper preset code or the codes for the manufacturer in the remote control will not work for the model that you are using 2 Note You can cancel or exit any of the steps by press and hold RECEIVER for two seconds To go back a step press RETURN After one minute of inactivity the remote automatically exits the operation Note 1 If you want to control all your components using this receiver s re...

Страница 51: ...te controls If the preset code for your component is not available or the available preset codes do not operate correctly you can program signals from the remote control of another component This can also be used to program additional operations buttons not covered in the presets after assigning a preset code 1 While pressing the RECEIVER button press the SETUP button The remote LCD display shows ...

Страница 52: ...D display flashes PRES KEY 4 Press and hold the button to be erased for two seconds The LCD display shows OK or NO CODE to confirm the button has been erased 5 Repeat step 4 to erase other buttons 6 Press and hold the RECEIVER button for two seconds when you re done Note 1 Some commands from other remote controls cannot be learned but in most cases the remotes just need to be moved closer together...

Страница 53: ...to control then press ENTER The LCD on the remote displays the component you want to control 4 Use to switch direct function ON or OFF then press ENTER The LCD shows OK to confirm the setting Confirming preset codes Use this feature to check which preset code is assigned to a MULTI CONTROL button 1 While pressing the RECEIVER button press the SETUP button The remote LCD display shows SETUP 2 Use t...

Страница 54: ...eceiver to switch on or off This is done automatically With Pioneer components you don t need to program the power to switch off in a shutdown sequence except DVD recorders program the power to switch on if it s the source component selected in step 3 program a Pioneer TV or monitor to switch on if the input function selected in step 2 has video input terminals These take priority in multi operati...

Страница 55: ...ol are dedicated to control the TV assigned to the TV CTRL button If you have two TVs assign the main TV to the TV CTRL button SHIFT AUTO SURR STANDARD ADV SURR S RETRIEVER SIGNAL SEL STEREO MULTI OPE EFFECT CHSEL ACOUSTIC EQ RECEIVER Note 1 In order to avoid accidently switching off a DVD recorder that is currently recording no DVD recorder power off codes are sent RECEIVER SOURCE SYSTEM OFF INPU...

Страница 56: ...vigating Cable TV Satellite TV TV Switches TEXT OFF for TVs TV RETURN Use to select RETURN or EXIT Satellite TV TV Number buttons Use to select a specific TV channel Cable TV Satellite TV TV 10 button Use to add a decimal point when selecting a specific TV channel Cable TV Satellite TV TV ENTER DISC Use to enter a channel Cable TV Satellite TV TV MENU Select the menu screen Cable TV Satellite TV T...

Страница 57: ... forward channels channel VCR Pause playback or recording CD MD CD R VCR DVD LD DVR player Cassette deck Start playback CD MD CD R VCR DVD LD DVR player Cassette deck Hold down for fast forward playback CD MD CD R VCR DVD LD DVR player Cassette deck Hold down for fast reverse playback CD MD CD R VCR DVD LD DVR player Cassette deck Stops playback on some models pressing this when the disc is alread...

Страница 58: ...ps the tape Cassette deck ENTER Starts playback Cassette deck Fast rewinds fast forwards the tape Cassette deck ENTER Navigates DVD menu options DVD DVR Player GUIDE Press to access the DVD player setup screen DVD DVR Player CH Selects channels VCR DVD DVR Player Selects tracks CD MD CD R Cassette deck AUDIO Changes the audio language or channel DVD DVR Player SUBTITLE Displays changes the subtitl...

Страница 59: ...ng the speakers in another room 2 Select Second Zone from the Surr Back System menu See Surround back speaker setting on page 36 to do this Switching the speaker system If you selected Second Zone in Surround back speaker setting on page 36 three speaker system settings are possible using the SPEAKERS button If you selected Normal SB or Front Bi Amp the speaker system is fixed as SP A or SP AB res...

Страница 60: ...ker Make sure that the connections are properly inserted 2 Select the Front Bi Amp setting from the Surr Back System menu See Surround back speaker setting on page 36 to specify how you re using the surround back speaker terminals Caution Most speakers with both Hi and Low terminals have two metal plates that connect the Hi to the Low terminals These must be removed when you are bi amping the spea...

Страница 61: ...is case plug the amplifier into the left L Single terminal only The sound you hear from the surround back terminals depends on the Surround back speaker setting on page 36 To hear sound only from the pre outs simply disconnect any speakers that are connected directly to the receiver If you re not using a subwoofer change the front speaker setting see Speaker Setting on page 42 to large DVD LD IN C...

Страница 62: ...r OFF Note 1 The 3 ringed SR cable from Pioneer is commercially available under the part number ADE7095 Contact the Pioneer Cus tomer Support division for more information on obtaining an SR cable you can also use a commercially available 3 ringed mini phone plug for the connection If you connect to a Pioneer plasma display using an SR cable you will need to point the remote control at the plasma ...

Страница 63: ... the digital component The numbers correspond with the numbers beside the inputs on the back of the receiver 3 Select the component that corresponds with the one you connected to that input Select between DVD TV CD CD R DVR or OFF Use and ENTER to do this If you assign a digital input to a certain function for example DVD LD then any digital inputs previously assigned to that function will automat...

Страница 64: ...e settings in order DRC Setup Specify the amount of dynamic range adjustment to Dolby Digital soundtracks see Dynamic Range Control Setup below Dual Mono Setup Isolate one channel when listening to discs with dual mono encoding see Dual Mono Setup below LFE ATT Setup Choose the attenuator level for the LFE channel LFE Attenuator Setup on page 65 SR Setup Specify how you want to control your Pionee...

Страница 65: ...y on page 61 1 Select SR Setup from the Other Setup menu 2 Select the PDP Volume Control setting you want OFF The receiver does not control the volume of the plasma display ON When the receiver is switched to one of the inputs that use the plasma display DVD LD or another function below the volume on the plasma display is muted so only sound from the receiver is heard 3 Assign any input source con...

Страница 66: ...ized independent service company No sound is output when a function is selected Make sure the component is connected correctly refer to Connecting up on page 12 Press MUTE on the remote control to turn muting off Press SPEAKERS to select the proper speaker set see Switching the speaker system on page 59 Press SIGNAL SELECT to select the proper input signal see Choosing the input signal on page 33 ...

Страница 67: ...he DVD player No sound is output or a noise is output when software with DTS is played back Set the digital volume level of the player to full or to the neutral position Make sure the player s settings are correct and or the DTS signal out is on Refer to the instruction manual supplied with the DVD player Set the input signal type to DIGITAL see Choosing the input signal on page 33 During a playba...

Страница 68: ...new setting PAL or NTSC The SR cable is connected but the connected components can t be operated with the remote Reinsert the SR cable making sure it s connected to the right jack see Using this receiver with a Pioneer plasma display on page 61 Make sure an analog connection has been made between the units This feature only works with Pioneer products The display is dark or off Press DIMMER on the...

Страница 69: ...Ω Output Level Impedance DVR VCR MONITOR OUT 1 Vp p 75 Ω Frequency response DVR VCR DVD LD TV SAT MONITOR 5 Hz to 7 MHz dB Signal to Noise Ratio 55 dB Crosstalk 50 dB Component video section Input Sensitivity DVD LD TV SAT DVR VCR 1 Vp p 75 Ω Output Level Impedance MONITOR OUT 1 Vp p 75 Ω Frequency response DVD LD TV SAT DVR VCR MONITOR 5 Hz to 40 MHz dB Signal to Noise Ratio 60 dB FM Tuner Sectio...

Страница 70: ...er cord or pinch the cord Never make a knot in the cord or tie it with other cords The power cords should be routed such that they are not likely to be stepped on A damaged power cord can cause a fire or give you an electrical shock Check the power cord once in a while When you find it damaged ask your nearest Pioneer authorized service center or your dealer for a replacement Cleaning the unit Use...

Страница 71: ...Additional information 14 71 En English Français Deutsch Nederlands Italiano Español ...

Страница 72: ...regione a regione Verificare che la tensione di rete della zona in cui si intende utilizzare l apparecchio sia quella corretta come indicato sul pannello posteriore dell apparecchio stesso ad es 230 V o 120 V D3 4 2 1 4_A_It Prima di collegare per la prima volta l apparecchio alla sezione che segue sorgente di alimentazione leggere attentamente la ATTENZIONE Per evitare il pericolo di incendi non ...

Страница 73: ...utilizzare l apparecchio per un relativamente lungo periodo di tempo ad esempio durante una vacanza staccare la spina del cavo di alimentazione dalla presa di corrente alternata di rete D3 4 2 2 1a_A_It Questo prodotto è destinato esclusivamente all uso domestico Eventuali disfunzioni dovute ad usi diversi quali uso prolungato a scopi commerciali in ristoranti o uso in auto o su navi e che richied...

Страница 74: ...gli effetti surround Advanced 29 Impostazione delle opzioni relative agli effetti 29 Ascolto stereo 30 Ascolto con la funzione Acoustic Calibration EQ 30 Uso dell elaborazione del canale posteriore surround 31 Uso della modalità Virtual Surround Back VSB 31 Uso delle modalità Midnight e Loudness 32 Uso della funzione Sound Retriever 32 Enfatizzazione dei dialoghi 32 Uso dei controlli del tono 32 R...

Страница 75: ...a funzione System off 55 Controlli per TV 55 Come manovrare altri componenti 57 12 Altri collegamenti Impostazione dell altoparlante B Second Zone 59 Commutazione del sistema degli altoparlanti 59 Bi amping degli altoparlanti anteriori 60 Bi wiring degli altoparlanti 60 Collegamento di altri amplificatori 61 Utilizzo di questo ricevitore con un display plasma della Pioneer 61 Uso della modalità SR...

Страница 76: ...ultare ridotte Installazione del ricevitore All installazione di quest unità assicurarsi di posizionarla su una superficie piana e stabile Evitare di installare l apparecchio nei seguenti luoghi sopra un televisore possibile distorsione dello schermo vicino ad una piastra a cassette o vicino ad un dispositivo che genera campi magnetici Questo può interferire con il suono nella luce diretta del sol...

Страница 77: ...urround ottimale Vedi a Collegamento degli altoparlanti a pagina 19 Il luogo d installazione degli altoparlanti influisce molto sul suono Per ottenere un effetto sonoro ottimale posizionare gli altoparlanti come indicato di seguito Per maggiori dettagli consultare inoltre Suggerimenti per l ubicazione degli altoparlanti a pagina 20 3 Collegare e accendere il ricevitore accendere poi nell ordine le...

Страница 78: ... sono disponibili le seguenti scelte 2 1ch 3 1ch 4 1ch 5 1ch 6 1ch 7 1ch Se un subwoofer non è stato rilevato nella fase 2 si possono scorrere le seguenti scelte 2 0ch 3 0ch 4 0ch 5 0ch 6 0ch 7 0ch Controllare la tabella seguente per trovare la configurazione degli altoparlanti che corrisponde al sistema 4 Premere ENTER 5 Usare il controllo MULTI JOG per scegliere la dimensione della stanza A seco...

Страница 79: ...ofono in modo tale che sia all altezza delle orecchio nella vostra normale posizione d ascolto Altrimenti posizionare il microfono al livello dell orecchio usando un tavolo o una sedia Assicurarsi che non ci siano ostacoli tra gli altoparlanti ed il microfono 3 Premere RECEIVER sul telecomando poi premere il tasto SETUP Sul televisore viene visualizzata una schermata Usare i tasti ed ENTER sul tel...

Страница 80: ...mentre il ricevitore emette ulteriori toni di prova per determinare le impostazioni ottimali relative a livello dei canali distanza degli altoparlanti e alla funzione Acoustic Calibration EQ Cercare nuovamente di rimanere il più possibile in silenziomentrevengonoeseguitequesteoperazioni Il tempo necessario è di circa 3 a 8 minuti 10 E terminata la funzione Auto MCACC Setup Selezionare SKIP per tor...

Страница 81: ...r terminato la verifica di ciascuno di essi Alla fine selezionare SKIP per tornare al menù System Setup Altri problemi che possono sorgere durante l uso della funzione Auto MCACC Setup Se l ambiente della stanza non è ottimale per la funzione Auto MCACC Setup troppo rumore di fondo eco contro le pareti ostacoli che isolano gli altoparlanti dal microfono le impostazioni finali possono risultare err...

Страница 82: ...icevitore 1 Cavi video Cavi video RCA standard Si tratta di cavi per la connessione video del tipo più comune che si utilizzano per collegare i terminali video compositi Gli spinotti gialli consentono di distinguerli dai cavi audio Cavi S video I cavi S video forniscono una riproduzione più nitida delle immagini rispetto ai cavi video RCA standard poiché trasmettono segnali separati per luminanza ...

Страница 83: ...ta audio digitale ottica dal televisore all ingresso DIGITAL OPT 2 TV SAT al ricevitore Usare un cavo ottico per il collegamento 4 Collegare il presa video MONITOR OUT sul ricevitore all ingresso video del televisore Usare un cavo video standard RCA per il collegamento alla presa video composita 4 Nota 1 Se il lettore DVD ha solo un uscita digitale ottica è possibile collegarlo all ingresso ottico...

Страница 84: ...ticanale può essere usato solo quando è selezionato DVD 5 1 ch vedere a pagina 33 2 Se è già stato collegato il televisore agli ingressi TV SAT scegliere semplicemente un altro ingresso Per ricevere il segnale occorre tuttavia premere il pulsante di selezione dell ingresso relativo all ingresso cui è stato collegato il set top box 3 Per ottenere una migliore qualità è possibile effettuare il colle...

Страница 85: ...le registrare da un componente digitale Usare un cavo fono RCA stereo come da illustrazione 3 Se si collega un registratore collegare le uscite audio analogiche REC agli ingressi audio analogici sul registratore L esempio mostra un collegamento analogico alla presa di uscita analogica CD R TAPE MD usando un cavo fono RCA stereo 4 Se il registratore dispone di un ingresso digitale collegarlo all us...

Страница 86: ...dio e un cavo video RCA standard per il collegamento video 2 3 Collegare un uscita audio digitale coassiale sul lettore DVD all ingresso DIGITAL COAX 2 DVR VCR sul ricevitore Usare un cavo audio digitale coassiale per il collegamento 3 4 Se il componente video dispone di un ingresso digitale collegarlo all uscita digitale del ricevitore come indicato Per effettuare il collegamento usare un cavo ot...

Страница 87: ...icevitore Per effettuare il collegamento usare un cavo video component a tre vie 2 Se necessario assegnare gli ingressi video component alla sorgente di ingresso che è stata collegata Questa operazione è necessaria solo nel caso in cui per il collegamento non sia stato seguito lo schema predefinito descritto di seguito COMPONENT 1 DVD COMPONENT 2 TV COMPONENT 3 DVR Per maggiori informazioni consul...

Страница 88: ... viti fig c prima di agganciare il telaio al supporto Assicurarsi che la ricezione sia chiara 4 Collocare l antenna AM su una superficie piana e in una direzione che consenta di ottenere la ricezione migliore 5 Collegare l antenna FM a filo nello stesso modo dell antenna AM a telaio Per i migliori risultati srotolare completamente il filo dell antenna FM e fissarlo a una parete o al telaio di una ...

Страница 89: ...ale di sinistra Inoltre assicurarsi che i terminali positivo e negativo del ricevitore corrispondano a quelli degli altoparlanti 2 E possibile usare altoparlanti con un impedenza nominale compresa tra 6 Ω a 16 Ω vedi a Commutazione dell impedenza dell altoparlante a pagina 68 per usare altoparlanti con un impedenza inferiore ad 8 Ω Attenzione Assicurarsi che il filo nudo dell altoparlante sia atto...

Страница 90: ...schermatura magnetica per prevenire possibili interferenze ad esempio immagini scolorite all accensione del televisore Se gli altoparlanti non sono dotati della schermatura magnetica e notate lo scolorimento dell immagine televisiva allontanare ulteriormente gli altoparlanti dal televisore Se usate un altoparlante centrale posizionare gli altoparlanti anteriori ad un angolo più ampio Altrimenti po...

Страница 91: ...qui sotto mostrano l orientamento degli altoparlanti surround e posteriori surround La prima illustrazione fig A mostra l orientamento con un altoparlante surround posteriore o nessuno collegato La seconda illustrazione fig B mostra l orientamento con due altoparlanti surround collegati Vista 3 D dell impostazione dell altoparlante 7 1 canali 90 a 120 fig A fig B LS LS RS RS SB LS RS 0 a 60 SBL SB...

Страница 92: ... automaticamente su ALL CH ADJUST dopo aver eseguito la funzione Auto MCACC Setup pagina 9 o EQ Auto Setup pagina 39 5 ENTER 6 Controllo MULTI JOG Usare il controllo MULTI JOG per selezionare varie impostazioni ed opzioni del menù 7 Tasti LISTENING MODE STANDARD Premere questo tasto per una decodificazione standard e per commutare tra le varie opzioni Pro Logic IIx e Neo 6 pagina 28 ADVANCED SURR ...

Страница 93: ...mbiare le impostazioni di impedenza pagina 68 18 TUNING STATION Seleziona la frequenza pagina 45 e le stazioni di preselezione pagina 46 nell utilizzo del sintonizzatore 19 TUNER EDIT Premere questo per memorizzare e denominare una stazione da richiamare pagina 46 20 TONE Premere questo tasto per accedere ai comandi degli alti e dei bassi che è quindi possibile regolare con il controllo MULTI JOG ...

Страница 94: ... a pagina 28 8 ATT S illuminaquando usate ANALOG ATT per attenuare ridurre il livello del segnale d ingresso analogico 9 SLEEP S illumina quando è attiva la modalità di riposo Telecomando sotto 10 Spie del Sintonizzatore S illumina quando è impostata la modalità mono usando il tasto MPX S illumina quando la trasmissione FM stereo è in fase di ricezione nella modalità stereo automatica S illumina q...

Страница 95: ...h Seleziona la modalità del canale posteriore surround pagina 31 o la modalità posteriore surround virtuale pagina 31 ANALOG ATT Attenua diminuisce il livello di un segnale d ingresso analogico per prevenire la distorsione del suono SR Attiva o disattiva la modalità SR pagina 62 DIMMER Rende il display più tenue o più luminoso MIDNIGHT LOUDNESS Usare Midnight per ascoltare le colonne sonore cinema...

Страница 96: ...l televisore TV VOL Consente di regolare il volume del televisore INPUT SELECT Usato per selezionare il segnale d ingresso della TV TV CH Usato per selezionare i canali 7 Tasti di controllo del componente I tasti principali ecc sono stati usati per manovrare un componente dopo averlo selezionato usando i tasti MULTI CONTROL Per accedere ai controlli al di sopra di questi tasti è necessario aver se...

Страница 97: ...nienti dagli altri telecomandi a pagina 51 MULTI OP Vedi a Funzioni Multi Operation e System Off a pagina 53 SYS OFF Vedi a Funzioni Multi Operation e System Off a pagina 53 DIRECT F Vedi a Funzione diretta a pagina 53 ERASE Vedi a Programmazione dei segnali provenienti dagli altri telecomandi a pagina 51 RESET Vedi a Cancellazione di tutte le preselezioni del telecomando a pagina 53 READ ID Vedi ...

Страница 98: ...elezionare la modalità d ascolto Se la fonte è codificata Dolby Digital DTS o Dolby Surround il formato di decodificazione corretto verrà selezionato automaticamente e visualizzato sul display Con fonti a due canali selezionare tra 2 Pro Logic IIx MOVIE Suono fino a 7 1 canali particolarmente adatto per i film 2 Pro Logic IIx MUSIC Suono a 7 1 canali particolarmente adatto per le fonti musicali 2 ...

Страница 99: ...amente EFFECT CH SEL per selezionare il parametro che si desidera regolare A seconda dello stato o della modalità corrente del ricevitore alcune opzioni potrebbero non essere disponibili Per maggiori informazioni fare riferimento alla tabella che segue 2 Usare i tasti per impostare il parametro secondo le proprie esigenze Per conoscere le opzioni disponibili per ciascun parametro consultare la tab...

Страница 100: ...anale particolare F ALIGN Tutti gli altoparlanti sono allineati in conformità con le impostazioni degli altoparlanti anteriori CUSTOM 1 2 Impostazioni personalizzate EQ OFF Spegne la calibratura acustica EQ L indicatore MCACC s illumina sul pannello anteriore quando è attivata la funzione Acoustic Calibration EQ 2 Center Imageb Valido solo se si utilizza un altoparlante centrale Regola l immagine ...

Страница 101: ... formato di codifica originale del materiale ad esempio 5 1 è possibile specificare al ricevitore che questo effetto sia applicato solo alle sorgenti con codifica 6 1 quali Dolby Digital EX o DTS ES 2 Questa tabella indica quando sentirete il canale surround posteriore virtuale Il suono viene riprodotto attraverso il diffusore surround Premere SB ch SB ch PROCESSING per selezionare un opzione per ...

Страница 102: ...triever Enfatizzazione dei dialoghi Impostazione standard OFF La funzione Dialog Enhancement localizza il dialogo nel canale centrale per farlo uscire fuori dai suoni di fondo in una colonna sonora televisiva o cinematografica Premere DIALOG E per attivare disattivare dialog enhancement Uso dei controlli del tono Secondo l ascolto può essere utile regolare i bassi o gli acuti usando il controllo d...

Страница 103: ... impostare il lettore DVD per emettere l audio analogico multicanale 2 Premere DVD 3 Premere SIGNAL SEL SIGNAL SELECT per selezionare gli ingressi analogici multicanale Sul display viene visualizzata la dicitura DVD 5 1ch e l indicatore ANALOG si illumina Nota 1 Se la sorgente è il sintonizzatore incorporato dell apparecchio TV passare al canale che si desidera guardare in caso contrario accertars...

Страница 104: ...ta 2 I dispositivi USB compatibili comprendono unità disco magnetiche esterne memorie flash portatili in particolare le chiavette USB e i lettori audio digitali lettori MP3 in formato FAT16 32 Non è possibile collegare questa unità a un personal computer per la riproduzione USB Pioneer non è in grado di garantire la compatibilità riguardo al funzionamento e o all alimentazione del bus per tutti i ...

Страница 105: ...on la tecnologia di protezione DRM Digital Rights Management Sì i file audio protetti con tecnologia DRM non vengono riprodotti con questo ricevitore Informazioni sul formato MPEG 4 AAC La codifica audio avanzata AAC Advanced Audio Coding è il nucleo dello standard MPEG 4 AAC che incorpora il formato MPEG 2 AAC ed è alla base della tecnologia di compressione audio MPEG 4 Il formato e l estensione ...

Страница 106: ...zzare l effetto Acoustic Calibration EQ vedi a Configurazione manuale MCACC degli altoparlanti sotto Manual SP Setup Specificare dimensione numero distanza e bilanciamento complessivo degli altoparlanti collegati vedere Configurazione manuale degli altoparlanti a pagina 41 Input Assign Specificare cosa si è collegato agli ingressi digitale e dei componenti video vedere Menù Input Assign a pagina 6...

Страница 107: ...zare il volume se necessario 1 Selezionare Manual MCACC dal menù System Setup Vedere Come eseguire le impostazioni del ricevitore sul menù System Setup qui sopra se non si è ancora raggiunta questa schermata 2 Selezionare l impostazione da regolare Se queste sono le prime impostazioni bisogna eseguirle in ordine Fine Ch Level Effettuare regolazioni fini al bilanciamento complessivo del sistema di ...

Страница 108: ...N L unità ritornerà al menù d impostazione manuale MCACC Distanza ottimale degli altoparlanti Impostazione standard 3 0 m tutti i canali Per una profondità e separazione corretta del sistema è necessario aggiungere un certo ritardo ad alcuni degli altoparlanti in modo tale che tutti i suoni arrivino alla posizione d ascolto allo stesso tempo Le impostazioni seguenti possono aiutare ad effettuare r...

Страница 109: ...a funzione Acoustic Calibration EQ Se si sono già eseguite le operazioni descritte in Impostazione automatica del suono surround MCACC a pagina 9 ALL CH ADJUST e FRONT ALIGN sotto dovrebbero risultare già impostati Perciò se si desidera regolare le impostazioni manualmente saltare a Impostazione manuale della funzione Acoustic Calibration EQ sotto 1 Selezionare EQ AUTO Setting dal menù d impostazi...

Страница 110: ...egolare manualmente l Acoustic Calibration EQ consigliamo di copiare le impostazioni ALL CH ADJUST o FRONT ALIGN dall impostazione automatica precedente o da Impostazione automatica del suono surround MCACC a pagina 9 su una delle impostazioni personalizzate Invece della curva EQ piatta questo fornisce un punto di riferimento da cui iniziare vedi a Copiatura delle impostazioni Acoustic Calibration...

Страница 111: ...chermo 1 Selezionare EQ Data Check dal menù d impostazione manuale MCACC 2 Selezionare l impostazione che si desidera verificare E utile fare questo durante la riproduzione della fonte affinché si possano confrontare le varie impostazioni 3 Selezionare i canali desiderati premendo ENTER dopo aver terminato la verifica di ciascuno di essi 4 Al termine premere RETURN L unità ritornerà al menù d impo...

Страница 112: ... le frequenze dei bassi efficientemente oppure se non è stato collegato un subwoofer Selezionare SMALL per inviare le basse frequenze al subwoofer 1 Center Selezionare LARGE se l altoparlante centrale riproduce le basse frequenze efficientemente oppure selezionare SMALL per inviare le basse frequenze all altro altoparlante o subwoofer Se non è stato collegato un altoparlante centrale scegliere NO ...

Страница 113: ...i altoparlanti anteriori su LARGE e SMALL alternativamente e lasciare scegliere le vostre orecchie Se avete problemi l opzione più facile è far passare tutti i suoni dei bassi al subwoofer selezionando SMALL per gli altoparlanti anteriori Rete Crossover Impostazione standard 100Hz Quest impostazione decide il taglio tra i suoni dei bassi riproducendo i toni da tutti gli altoparlanti selezionati co...

Страница 114: ...alla posizione d ascolto Il ricevitore sarà poi in grado di aggiungere il ritardo necessario per un suono surround efficiente 1 Selezionare Speaker Distance dal menù Manual SP Setup 2 Regolare la distanza di ciascun altoparlante mediante i tasti La distanza dei singoli altoparlanti può essere regolata con incrementi di 0 1 metri 3 Al termine premere RETURN La schermata ritorna al menù Manual SP Se...

Страница 115: ...er una sintonizzazione ad alta velocità Rilasciare il tasto alla frequenza desiderata Miglioramento del suono FM stereo Se gli indicatori sintonizzato o stereo non s illuminano dopo la sintonizzazione di una stazione FM poiché il segnale è debole premere il tasto MPX per commutare alla modalità di ricezione mono Questo migliorerà la qualità sonora e vi consentirà di ascoltare la trasmissione Sinto...

Страница 116: ...re la stazione da denominare Vedi a Ascolto delle stazioni preselezionate qui sotto per ulteriori informazioni 2 Premere T EDIT TUNER EDIT L indicazione ST NAME appare sul display seguita da un cursore lampeggiante nella posizione del primo carattere 3 Inserire il nome desiderato Selezionare un nome della lunghezza massima di quattro caratteri Usare il controllo MULTI JOG sul pannello anteriore o ...

Страница 117: ...tare la stazione premere ENTER entro 5 secondi Se non premete ENTER la ricerca continua News Notizie Affairs Attualità Info Informazioni generali Sport Sport Educate Programmi educativi Drama Drammi radiofonici ecc Culture Cultura nazionale o regionale teatro ecc Science Scienze e tecnologia Varied Talk show quali quiz o interviste Pop M Musica pop Rock M Musica rock Easy M Musica leggera Light M ...

Страница 118: ...issioni sul traffico quando queste sono trasmesse EON NEWS Imposta il sintonizzatore per ricevere le notizie quando queste sono trasmesse OFF Cambia alla funzione EON Quando è impostata la funzione TA o NEWS l indicatore EON s illumina sul display lampeggia alla ricezione di una trasmissione EON 3 L indicatore s illumina sul display quando la stazione corrente esegue il servizio EON 4 Nota 1 Il si...

Страница 119: ...ndente al componente fonte vedi pagina 33 per ulteriori informazioni 3 Preparare la fonte da registrare Sintonizzare la stazione radio inserire il CD la videocassetta il DVD ecc 4 Preparare il registratore Inserire una cassetta un MD o una videocassetta vergine nel dispositivo di registrazione ed impostare i livelli di registrazione Vedere le istruzioni in dotazione con il registratore se non si s...

Страница 120: ...appropriato altrimenti i codici del fabbricante nel telecomando non funzioneranno per il modello usato 2 Nota È possibile annullare o uscire dalle varie operazioni premendo e tenendo premuto RECEIVER per due secondi Per ritornare indietro di un passo premere RETURN Dopo un minuto d inattività il telecomando esce automaticamente dalla funzione Nota 1 Se desiderate controllare tutti i componenti usa...

Страница 121: ...codice di preselezione del componente non è disponibile o i codici di preselezione disponibili non funzionano correttamente si possono programmare i segnali da un telecomando di un altro componente Questa procedura può essere usata anche per programmare altre funzioni tasti non inclusi nelle preselezioni dopo aver assegnato un codice di preselezione 1 Mentre si preme il tasto RECEIVER premere il t...

Страница 122: ...R Sul display LCD del telecomando viene visualizzata l indicazione PRES KEY 4 Premere il tasto e mantenerlo premuto per due secondi per cancellare il contenuto L indicazione OK o NO CODE appare sul display per confermare l avvenuta cancellazione del tasto 5 Ripetere il passo 4 per cancellare altri tasti 6 Una volta terminato premere e tenere premuto il tasto RECEIVER per due secondi Nota 1 Alcuni ...

Страница 123: ...are 4 Usare per ON o OFF l interruttore direttamente poi premere ENTER Il LCD mostra OK per confermare l impostazione Conferma dei codici di preselezione Usare questa funzione per controllare quale codice di preselezione è stato assegnato ad un tasto MULTI CONTROL 1 Mentre si preme il tasto RECEIVER premere il tasto SETUP L indicazione SETUP appare sul display LCD del telecomando 2 Usare per selez...

Страница 124: ...i del telecomando Non è necessario programmare il ricevitore per l accensione o lo spegnimento Questa operazione viene eseguita automaticamente Con i componenti Pioneer non è necessario programmarne lo spegnimento in una sequenza di spegnimento ad eccezione dei DVD recorder programmarne l accensione qualora si tratti del componente sorgente selezionato al punto 3 programmare l accensione di un tel...

Страница 125: ...televisore assegnato al tasto TV CTRL Se possedete due televisori assegnare il televisore principale al tasto TV CTRL SHIFT AUTO SURR STANDARD ADV SURR S RETRIEVER SIGNAL SEL STEREO MULTI OPE EFFECT CHSEL ACOUSTIC EQ RECEIVER Nota 1 Per evitare lo spegnimento accidentale di un DVD recorder che sta eseguendo una registrazione non viene inviato alcun codice di spegnimento per il DVD recorder RECEIVE...

Страница 126: ...via cavo TV satellitare TV Attiva TEXT OFF per i televisori TV RETURN Usato per selezionare RETURN o EXIT TV via satellite TV Tasti numerici Usati per selezionare un canale televisivo specifico TV via cavo TV satellitare TV Tasto 10 Usato per aggiungere un punto decimale alla selezione di un canale televisivo specifico TV via cavo TV satellitare TV ENTER DISC Usato per inserire un canale TV via ca...

Страница 127: ...Lettore CD MD CD R VCR DVD LD DVR Piastra a cassette Avviare la riproduzione Lettore CD MD CD R VCR DVD LD DVR Piastra a cassette Mantenerlo premuto per una riproduzione ad avanzamento rapido Lettore CD MD CD R VCR DVD LD DVR Piastra a cassette Mantenerlo premuto per una riproduzione rapida all indietro Lettore CD MD CD R VCR DVD LD DVR Piastra a cassette Ferma la riproduzione in alcuni modelli la...

Страница 128: ...iastra a cassette Riavvolge avanza il nastro rapidamente Piastra a cassette ENTER Naviga tra il menù e le opzioni del DVD Lettore DVD DVR GUIDE Premere questo per accedere allo schermo d impostazione del lettore DVD Lettore DVD DVR CH Seleziona i canali Lettore VCR DVD DVR Seleziona i brani CD MD CD R Piastra a cassette AUDIO Cambia la lingua audio o il canale Lettore DVD DVR SUBTITLE Visualizza c...

Страница 129: ...ack System Consultare Impostazione dell altoparlante surround posteriore a pagina 36 Commutazione del sistema degli altoparlanti Se si è selezionato Second Zone in Impostazione dell altoparlante surround posteriore a pagina 36 è possibile impostare tre sistemi di altoparlanti mediante il tasto SPEAKERS Se si è selezionato Normal SB o Front Bi Amp il sistema di altoparlanti è fisso e corrisponde ri...

Страница 130: ...Selezionare l impostazione Front Bi Amp dal menu Surr Back System Vedi a Impostazione dell altoparlante surround posteriore a pagina 36 per specificare come sono usati i terminali surround posteriori degli altoparlanti Attenzione La maggior parte degli altoparlanti dotati di terminali Hi e Low hanno due piastre di metallo che collegano i terminali Hi ai terminali Low Questi vanno rimossi per il bi...

Страница 131: ...one di un display al plasma Pioneer2 è possibile usare un cavo SR per collegarlo a questa unità e sfruttare varie comode funzioni come ad esempio la commutazione automatica dell ingresso video del display al plasma quando si cambia il dispositivo di ingresso Nota 1 È possibile usare un amplificatore addizionale nel canale surround posteriore anche per un unico altoparlante In questo caso bisogna c...

Страница 132: ...r a pagina 65 per ulteriori informazioni sulle impostazioni del ricevitore 1 Assicurarsi che il display plasma e questo ricevitore siano accesi e collegati tramite il cavo SR Vedi a Utilizzo di questo ricevitore con un display plasma della Pioneer sopra per ulteriori informazioni al riguardo 2 Per attivare disattivare la modalità SR premere RECEIVER poi premere il tasto SR L indicazione SR ON o OF...

Страница 133: ...e I numeri corrispondono ai numeri all interno degli ingressi sul retro del ricevitore 3 Selezionare il componente che corrisponde a quello collegato a quell ingresso Selezionare DVD TV CD CD R DVR o OFF Usare i tasti e ENTER per effettuare la selezione Se si assegna un ingresso digitale ad una certa funzione ad esempio DVD LD gli ingressi digitali precedentemente assegnati a quella funzione si sp...

Страница 134: ... sonore Dolby Digital vedi a Impostazione di controllo della gamma dinamica sotto Dual Mono Setup Isolare un canale quando si ascoltano i dischi con codifica dual mono vedere Impostazione Dual Mono sotto LFE ATT Setup Selezionare il livello dell attenuatore per il canale LFE Impostazione LFE Attenuator a pagina 65 SR Setup Specificare la modalità di controllo desiderata per il display al plasma Pi...

Страница 135: ...icevitore con un display plasma della Pioneer a pagina 61 1 Selezionare SR Setup dal menù Other Setup 2 Selezionare l impostazione desiderata per l opzione PDP Volume Control OFF Il ricevitore non controlla il volume del display plasma ON Quando il ricevitore viene commutato su uno degli ingressi che usano il display al plasma DVD LD o un altra delle funzioni che seguono il volume del display al p...

Страница 136: ...egato correttamente fare riferimento a Collegamento a pagina 12 Premere MUTE sul telecomando per disattivare la funzione corrispondente Premere SPEAKERS per selezionare la coppia di altoparlanti giusta vedi a Commutazione del sistema degli altoparlanti a pagina 59 Premere SIGNAL SELECT per selezionare il segnale d ingresso appropriato vedi a Come scegliere il segnale d ingresso a pagina 33 Non vie...

Страница 137: ...ioni in dotazione con il lettore DVD Non viene emesso alcun suono o rumore alla riproduzione di software con DTS Impostare il livello del volume digitale del lettore al massimo o nella posizione neutra Assicurarsi che le impostazioni del lettore siano corrette e o che l uscita del segnale DTS sia accesa Vedere nel manuale delle istruzioni in dotazione con il lettore DVD Impostare il tipo del segna...

Страница 138: ...ollegato ma i componenti collegati non sono manovrati con il telecomando Reinserire il cavo SR assicurandosi di collegarlo alla presa destra vedi a Utilizzo di questo ricevitore con un display plasma della Pioneer a pagina 61 Assicurarsi che ci sia un collegamento analogico tra le unità Questa funzione è disponibile solo con i prodotti Pioneer Il display è scuro o spento Premere ripetutamente DIMM...

Страница 139: ...VCR MONITOR OUT 1 Vp p 75 Ω Risposta di frequenza DVR VCR DVD LD TV SAT MONITOR 5 Hz a 7 MHz dB Rapporto segnale rumore 55 dB Diafonia crosstalk 50 dB Sezione Video Component Ingresso Sensibilità DVD LD TV SAT DVR VCR 1 Vp p 75 Ω Uscita Livello Impedenza MONITOR OUT 1 Vp p 75 Ω Risposta di frequenza DVD LD TV SAT DVR VCR MONITOR 5 Hz a 40 MHz dB Rapporto segnale rumore 60 dB Sezione del sintonizza...

Страница 140: ... non bisogna mai legare il cavo d alimentazione insieme ad altri cavi Far passare i cavi d alimentazione in modo tale che non sia possibile calpestare gli stessi Un cavo d alimentazione danneggiato può causare un incendio o dare scosse elettriche Controllare il cavo d alimentazione ogni tanto Se è danneggiato chiedere di sostituirlo al più vicino centro di servizio o concessionario autorizzato Pio...

Страница 141: ...71 It English Français Deutsch Nederlands Italiano Español ...

Страница 142: ...72 It ...

Страница 143: ...73 It English Français Deutsch Nederlands Italiano Español ...

Страница 144: ...A INC 300 Allstate Parkway Markham Ontario L3R OP2 Canada TEL 1 877 283 5901 PIONEER EUROPE NV Haven 1087 Keetberglaan 1 B 9120 Melsele Belgium TEL 03 570 05 11 PIONEER ELECTRONICS ASIACENTRE PTE LTD 253 Alexandra Road 04 01 Singapore 159936 TEL 65 6472 7555 PIONEER ELECTRONICS AUSTRALIA PTY LTD 178 184 Boundary Road Braeside Victoria 3195 Australia TEL 03 9586 6300 PIONEER ELECTRONICS DE MEXICO S...

Отзывы: