DRB1554-A
En
22
22
Searching using the
[
NEEDLE SEARCH (ALPHABET SEARCH)
] pad
(“Alphabet Search”)
Alphabet search allows you to quickly sort your tracks alphanumerically
using the [
NEEDLE SEARCH (ALPHABET SEARCH)
] pad.
!
Alphabet search sorting is applied to your library or currently selected
crate.
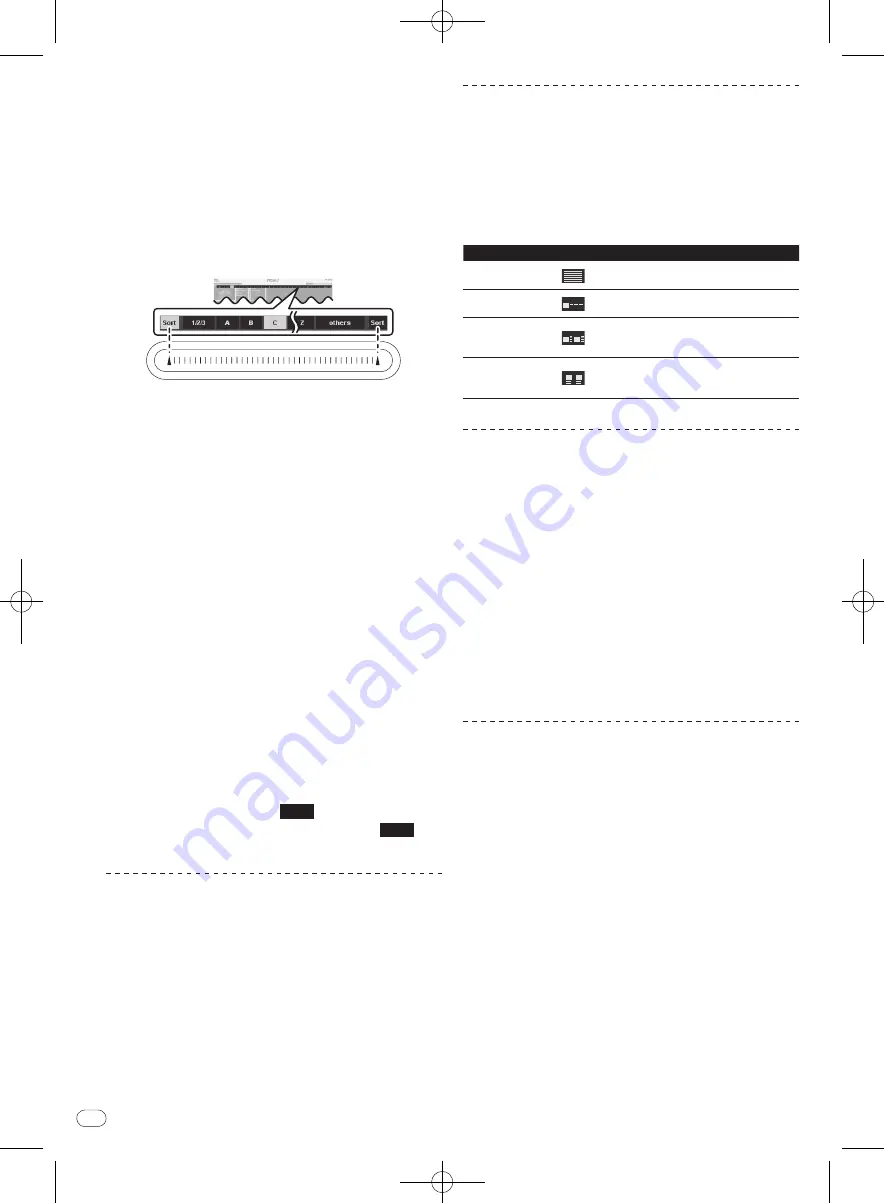
Relationship between the alphabet search panel and
[NEEDLE SEARCH (ALPHABET SEARCH)] pad
The section on the screen with the alphabet search letters and the
[
NEEDLE SEARCH (ALPHABET SEARCH)
] pad have the same positional
relationship.
1 Press the [CRATES] button.
Moves the cursor to the crate list panel.
2 Turn the rotary selector.
Select the item to be searched from the crate list panel.
!
To search all the tracks, select [
All...
].
3 Tap any position on the
[NEEDLE SEARCH (ALPHABET SEARCH)] pad while
pressing the [SHIFT] button.
Alphabet search panel is displayed on the top of screen. While the
[
SHIFT
] button is pressed, the alphabet search function is active.
4 Tap [
a
] at the left or right edge of the
[NEEDLE SEARCH (ALPHABET SEARCH)] pad while
pressing the [SHIFT] button.
The focus on the column header moves left or right each time left or right
[
a
] is tapped. The column header in bright gray shows that the column is
currently selected.
5 Slide your finger while holding in the [SHIFT] button.
Once you have selected the column you wish to sort by, move your finger
along the [
NEEDLE SEARCH (ALPHABET SEARCH)
] pad and you'll see
the cursor in the alphabet search display follow.
Tracks corresponding to the currently selected letter are displayed in the
track list.
6 Release your finger from the
[NEEDLE SEARCH (ALPHABET SEARCH)] pad and the
[SHIFT] button.
!
Numbers are searched when
1/2/3
is selected, characters
other than letters and numbers are searched when
others
is
selected.
Switching the display of the album art on
and off
If the file includes an image of the album, the image can be displayed.
!
Use a general-purpose application to load the album art image into
the track.
Click [ALBUM ART].
When clicked, the [
ALBUM ART
] panel is displayed.
!
When clicked again, the panel closes.
Displaying the album images in the track
list
The album images can be displayed in the track list. The layout of the
track information and album images can be changed as desired.
While pressing the [SHIFT] button, press the [FILES]
button (or one of the [BROWSE], [PREPARE] or [CRATES]
buttons).
The track list display switches.
Button
Layout
CRATES
button
A simply display consisting only of text
(default). Album art is not displayed.
FILES
button
A column of album art is displayed at the very
left, followed by text.
BROWSE
button
The tracks are arranged in a grid, with the
album art displayed on the left side, the track
information on the right side.
PREPARE
button
The tracks are arranged in a grid, with the
album art displayed above, the track informa-
tion below.
Using the [
PREPARE
] list
The [
PREPARE
] list is a list for selecting the tracks you want to prepare
ahead of time for playback.
1 Press the [PREPARE] button.
The [
PREPARE
] panel is displayed.
2 Drag and drop the track or crate to the [PREPARE]
panel.
The track or crate is added to the [
PREPARE
] list.
!
Tracks or crate can also be added to the [
PREPARE
] list by drag-
ging and dropping them on the [
PREPARE
] tab at the top of the
screen.
!
Tracks or crate can also be added to the [
PREPARE
] list by select-
ing them then pressing the [
LOAD PREPARE (SAVE)
] button.
!
When tracks on the [
PREPARE
] list are loaded into a deck, those
tracks are deleted from the [
PREPARE
] list.
!
When ITCH is quit, the tracks in the [
PREPARE
] panel are
cleared.
Using the [
HISTORY
] panel
Browsing the history
The [
HISTORY
] tab opens a complete log of all the tracks you have played
and allows exporting ITCH session information as a data file.
1 Play tracks.
The history of the tracks that have been played is displayed in the
[
HISTORY
] panel by session.
2 Click the [HISTORY] tab on the computer’s screen.
The [
HISTORY
] panel is displayed.
!
Only the tracks you actually play are listed in history. This is done
using an A-B algorithm, meaning a track on deck (A) is only
listed once the track on deck (B) has been changed or ejected.
You can choose to show tracks which you have auditioned, but
not actually played, by checking [
Show Unplayed Tracks
]. The
session will then also list these tracks in gray, along with actual
played tracks. Alternatively, you can mark or unmark tracks as
played manually. Select a track (or a group of tracks) and click
[
MARK PLAYED
] or [
MARK UNPLAYED
]. Tracks that you have
played are marked as orange in your library. Click [
CLEAR
] to
reset the list of recently played tracks and turn the color of your
library back to white.
Содержание Serato DJ Edition DDJ-S1
Страница 37: ...DRB1554 A 37 ...
Страница 75: ...DRB1554 A 75 ...
Страница 111: ...DRB1554 A 111 ...


