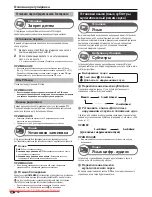
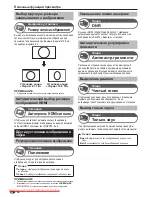
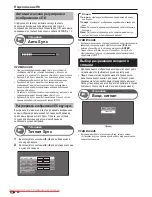
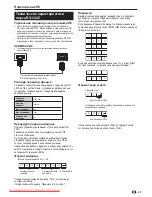
background image

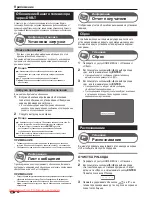
Полезные


функции


просмотра

Индикация


времени

Опция

Формат


времени

Вы


можете


выбрать


формат


времени

 (

формат

 «24

Ч

» 

или


«AM/PM») 

для


времени


часов

.

Время


воспроизведения


игры

Опция

Эта


функция


позволяет


показывать


время

прошедшее


с


момента


установки


опции


AV SELECTION

 (

ВЫБОР

 AV) 

в


положение

 «

ИГРА

».

Индикация


названия


программы

Опция

Эта


функция


позволяет


отображать


информацию


о


программе

такую


как


заголовок


и


эфирное


время


во


время


настройки


канала

.

ПРИМЕЧАНИЕ

Данная


функция


доступна


только


в


случае


выбора


режима

 DTV.

Индикация


времени

Эта


функция


позволяет


отображать


время


часов


в


нижнем


правом


углу


экрана

.

Четырехзначные


числа

 (

например

, 0001) 

отображаются


после


выбора


в


установке


страны


одной


из


пяти


Северных


стран

Индикация


времени


в


информации


о


канале

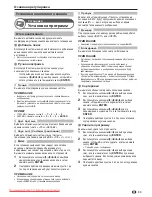
Вы


можете


отображать


информацию


о


времени

включенную


в


трансляцию

 DTV 

и


телетекста

.

ПРИМЕЧАНИЕ

Пропустите


пункт

 1 

в


случае


приема


сигналов

 DTV.

Выберите


телевизионный


канал

 (

Информация


о


времени


будет


принята


автоматически

).

Нажмите


кнопку


p

На


экране


телевизора


появится


индикация


канала

.

Нажмите


кнопку


p


еще


раз


в


течение


нескольких


секунд

на


протяжении


которых


на


экране


отображается


индикация


канала

Эта


информация


появится


на


несколько


секунд


в


нижнем


правом


углу


экрана

.

Даже


в


случае


переключения


телевизионного


канала


Вы


все


равно


сможете


просматривать


информацию


о


времени

выполняя


действия


пунктов

 2 

и

 3, 

приведенных


выше

.

ПРИМЕЧАНИЕ

В


случае


успешного


приема


информация


о


времени


будет


появляться


в


верхнем


правом


углу


экрана


при


нажатии


кнопки


h

.

*

E

1

2

3

4

Субтитры

Телетекст


Выкл

:

Новая


информация

PAL

I

NICAM

СТЕРЕО

ATV

01

BBC1

Режим

 ATV

Установки


индикации

Индикация


канала

Вы


можете


вывести


информацию


о


канале

нажав


кнопку


p


на


пульте


дистанционного


управления

.

Индикация


времени


и


заголовка

ВКЛ

:


Индикация


времени


часов

.

Вкл

 (

каждые


полчаса

):


Индикация


времени


часов


с

 30-

ти


минутными


интервалами

.

ВЫКЛ

:


Скрытие


времени


часов

.

ВКЛ

:


В


случае


подключения


к


телевизору


игровой


консоли


прошедшее


время


будет


отображаться


в


нижнем


левом


углу


экрана


через

 30-

минутные


интервалы


после


установки


опции


AV SELECTION

 (

ВЫБОР

 AV) 

в


положение

 «

ИГРА

».

ВЫКЛ

:


Скрытие


времени

.

Субтитры

ENG 1/3

:

Новая


информация

Аудио

 (ENG)

СТЕРЕО

:

Видео

1080i

:

DTV 

001 

BBC2 

Режим

 DTV

 37

Опция

Опция

KRL3237V_RU.indd   37

KRL3237V_RU.indd   37

2008/06/13   14:57:01

2008/06/13   14:57:01

Downloaded From TV-Manual.com Manuals

Содержание KRL-32V

Страница 1: ... pioneer co uk or http www pioneer eu Découvrez les nombreux avantages offerts en enregistrant votre produit en ligne maintenant sur http www pioneer fr ou http www pioneer eu Bitte nutzen Sie die Möglichkeit zur Registrierung Ihres Produktes unter http www pioneer de oder http www pioneer eu Registra il tuo prodotto su http www pioneer it o http www pioneer eu e scopri subito quali vantaggi puoi ...

Страница 2: ...6 4 95 9 96 4 55 0 55 0 57 0 57 0 517 0 581 0 517 0 581 0 572 0 638 0 572 0 638 0 101 9 101 9 281 0 281 0 451 5 451 5 701 5 824 4 701 5 824 4 395 9 463 8 395 9 463 8 332 0 369 0 332 0 369 0 15 15 KRL 32V KRL 37V KRL 32V KRL 37V KRL 32V KRL 37V Downloaded From TV Manual com Manuals ...

Страница 3: ...justment 30 Picture Settings 30 AV SELECTION 31 Sound Settings 31 Power Save Settings 31 Channel Settings 32 Auto Installation 32 Digital channel settings 32 Analogue channel settings 33 Password Parental lock settings 34 Language Settings language subtitle multi audio 34 Useful Viewing functions 35 Selecting the picture size 35 Selecting the WSS Wide Screen Signalling picture size automatically 3...

Страница 4: ...ation is provided or the manufacturer s instructions are followed The LCD panel used in this product is made of glass Therefore it can break when the product is dropped or impact applied If the LCD panel is broken be careful not to be injured by broken glass Heat sources Keep the product away from heat sources such as radiators heaters stoves and other heat generating products including amplifiers...

Страница 5: ... when no other HOME MENU screen is running h HOME MENU HOME MENU screen on off 1 2 3 4 5 6 7 8 9 0 Q Buttons for useful operations 1 Subpage Page 20 Subtitle Switch subtitle languages on off Pages 20 and 34 k Reveal hidden Teletext Page 20 3 Freeze Hold Press to freeze a moving image on the screen Teletext Stop updating teletext pages automatically or release the hold mode m Teletext ATV Display a...

Страница 6: ...ufacture code list to identify an appropriate code The mode indicator lights up for approximately one second and then goes off presetting the manufacture code is completed EXIT DVDTOPMENU GUIDE EPG 4 5 6 7 8 9 0 P INFO 1 2 3 INFO SOURCE TV STB DVR VCR DVD SELECT CTRL HDD AV SELECTION CM SKIP DVD TOOLS SCREEN SIZE 1 2 3 NOTE If you perform no operation for approximately one minute while a mode indi...

Страница 7: ...I 3 507 DAEWOO 508 GRUNDIG 1 509 GRUNDIG 2 510 GRUNDIG 3 511 GRUNDIG 4 512 HITACHI 1 513 HITACHI 2 514 HITACHI 3 515 JVC 1 516 JVC 2 517 JVC 3 518 JVC 4 519 JVC 5 520 LOEWE 1 521 LOEWE 2 522 MATSUI 523 ORION 524 PANASONIC 1 525 PANASONIC 2 526 PHILIPS 1 VCR 527 PHILIPS 2 528 PHILIPS 3 529 SANYO 530 SAMSUNG 1 531 SAMSUNG 2 532 SAMSUNG 3 533 SAMSUNG 4 534 SHARP 535 SONY 1 536 SONY 2 537 SONY 3 538 S...

Страница 8: ...er or lower channel EXIT Press to exit the broadcasting menu screen or the broadcasting guide screen ENTER Press to activate the selected function a b c d Press to select items on the broadcasting menu screen or the broadcasting guide screen MENU Press to display the broadcasting menu screen SOURCE a Turns the set top box on and off GUIDE Press to display the broadcasting guide screen RETURN When ...

Страница 9: ...URCE a Turn on and off the power of the DVD player or DVD HDD recorder DVR DVD TOP MENU When this button is pressed the DVD top menu will appear RETURN When the DVD menu is in display press to restore the immediately previous screen j CHAPTER SEARCH Each time you press you move back to the start of the previous chapter k CHAPTER SEARCH Each time you press you move ahead to the start of the next ch...

Страница 10: ...l are trademarks of Dolby Laboratories TruSurround XT SRS and h symbol are trademarks of SRS Labs Inc TruSurround XT technology is incorporated under license from SRS Labs Inc The HD ready 1080P Logo is a trademark of EICTA The DVB logo is the registered trademark of the Digital Video Broadcasting DVB project x v Colour and are trademarks of Sony Corporation Introduction 8 Downloaded From TV Manua...

Страница 11: ...ENT AUDIO terminals INPUT2 RGB terminal INPUT1 RGB terminal 7 8 9 10 11 INPUT3 terminals PHONES Headphones SERVICE socket COMMON INTERFACE slot AC INPUT terminal 12 13 14 15 16 RLS WARNING Excessive sound pressure from earphones and headphones can cause hearing loss RLS Room Light Sensor 9 Remote control sensor ON indicator SLEEP indicator STANDBY indicator HOME MENU button a Power button ik l Vol...

Страница 12: ...rom the AC INPUT terminal Before performing work spread cushioning over the surface on which you will be laying the TV This will prevent it from being damaged CAUTION Attach the stand in the correct direction Be sure to follow the instructions Incorrect installation of the stand may result in the TV falling over 10 Remote control unit g1 AC cord g2 Stand unit g1 Cable clamp g1 Pages 3 and 11 Page ...

Страница 13: ...conditions If you will not be using the remote control unit for an extended period of time remove the batteries from it When replacing the batteries use alkaline batteries instead of zinc carbon ones 1 2 3 Cautions regarding the remote control unit Do not expose the remote control unit to shock In addition do not expose the remote control unit to liquids and do not place in an area with high humid...

Страница 14: ... the right Be careful not to block the ventilation opening at the rear of the flat screen TV Be sure to install the flat screen TV on a flat surface because the LCD panel used in this product is made of glass The screw holes other than the illustrations above are to be used only for the specified products Never use them for mounting non specified products NOTE Pioneer shall not be liable for any p...

Страница 15: ...Page 16 Run the initial auto installation Page 15 Language setting English Italiano Svenska Country setting Austria A B G Finland FIN B G Greece GR B G Channel search setting Analogue Search Digital Search n o Congratulations Now you can watch TV If necessary adjust the antenna to attain maximum signal reception Page 15 n o 13 Preparation Power on and run the auto installation Watch TV Connect ext...

Страница 16: ...ct Supply Voltage and then press ENTER Press c d to select On and then press ENTER 1 2 3 4 5 Before turning on the power Bundling the cables For U K and Eire 14 Carefully insert the CA Module in the Common Interface slot with the contact side forward The logo on the CA Module must be facing forward from the rear of the TV 1 2 Cable clamp Bundle the cables with the clamp AC cord Place the TV close ...

Страница 17: ...f the power on the TV after performing step 4 the initial auto installation wizard does not appear The auto installation function allows you to execute the installation again from the Setup menu Page 32 The initial auto installation wizard will go off if you leave the TV unattended for 30 minutes before searching for channels in step 5 Checking signal strength and channel strength If you install a...

Страница 18: ...0 P INFO INFO Daily operation Switching on off Turning on off the power Press a on the TV Switch it off by pressing a on the TV Standby mode To standby mode If the TV is switched on you can switch it to standby by pressing a TV on the remote control unit Switching on from standby From standby press a TV on the remote control unit 1 2 3 4 5 6 7 8 TV INPUT 1 2 3 4 5 6 7 8 INPUT TV indicator status T...

Страница 19: ...utomatically captured while the TV is in standby mode After setting to Yes it may take some time to turn off the power using the remote control unit due to the process of the data capture NOTE If the TV main power is switched off the EPG data will not be captured Display Range Setup The Display Range Setup allows you to select three types of time spans for display on the screen E E Genre Icon Setu...

Страница 20: ...M 0 AM Today Press a b to select the desired programme and then press ENTER NOTE When you select a programme outside of the current time span the timer setting screen is displayed Page 19 5 1 2 3 Select a programme Select the time span Press c d to select the time span you want to search Continue to press d to display programmes in the next time span Select the desired programme Press a b to selec...

Страница 21: ...ess ENTER The selected TV programme is marked with an icon NOTE Refer to pages 21 23 for connecting external devices 3 Cancelling the timer recording Press EPG Press a b c d to select the programme on timer setup and then press ENTER Press c d to select Cancel and then press ENTER Press c d to select Yes and then press ENTER Cancelling using the Blue button on the remote control unit Press EPG Pre...

Страница 22: ...ence DTV interactively If provided the MHEG 5 application will start when you press m Sample MHEG 5 screen Watching TV Teletext What is Teletext Teletext broadcasts pages of information and entertainment to specially equipped TV Your TV receives teletext signals broadcast by a TV network and decodes them into graphical format for viewing News weather and sports information stock exchange prices an...

Страница 23: ...V Introduction to connections The TV is equipped with the terminals as shown below Find the cable corresponding the TV s terminal and connect the device NOTE The cables illustrated in pages 21 24 are commercially available items E When using an S video cable you also need to connect an audio cable R L 21 HDMI device Page 22 Game console or camcorder Page 22 Audio device Page 24 HDMI certified cabl...

Страница 24: ...gnal 576i 576p 480i 480p 1080i 720p 1080p See page 42 for PC signal compatibility Component connection You will enjoy accurate colour reproduction and high quality images through the INPUT8 terminal when connecting a DVD player recorder or other device Y PB CB L R PR CR COMPONENT AUDIO S VIDEO VIDEO connection You can use the INPUT3 terminal when connecting to a game console camcorder a DVD player...

Страница 25: ...tton you can automatically start recording by pressing the WYSIWYR button Preset Download Automatically transfers the channel preset information from the tuner on the TV to the one on the connected audiovisual equipment e g VCR via the INPUT2 terminal NOTE Refer to the operation manuals of external equipment for details The i o link A function works only when audiovisual equipment is connected to ...

Страница 26: ...w After connecting Digital audio output setting After connecting an amplifier with digital audio input and external speakers as shown you should set an audio output format compatible with the programme you are watching or the device connected Go to HOME MENU Option Digital Audio Output select PCM or Dolby Digital E 24 Optical audio cable Audio cable Amplifier with analogue audio input Amplifier wi...

Страница 27: ... the contact side forward The logo on the CA Module must be facing forward from the rear of the TV Do not use excessive force Make sure the module is not bent in the process 1 2 Checking CA Module information NOTE Make sure that the CA Module is properly inserted This menu is only available for digital stations Press h and the HOME MENU screen displays Press a b to select Digital Setup The content...

Страница 28: ...hich HDMI device to operate using the HDMI CTRL button NOTE When you use HDMI CONTROL make sure to use a certified HDMI cable Point the remote control unit toward the TV not to the connected HDMI device Video noise may occur depending on the type of HDMI cable used Make sure to use a certified HDMI cable Up to three HDMI recording devices one AV amplifier and two players can be connected using thi...

Страница 29: ...ress ENTER Press c d to select On and then press ENTER Auto Power On If this is activated the One Touch Play function is enabled While the TV is in standby mode it automatically turns on and plays back the image from the HDMI source 1 2 3 4 5 HDMI CONTROL Setup Repeat steps 1 to 3 in HDMI CONTROL Press a b to select Auto Power On and then press ENTER Press c d to select On and then press ENTER NOT...

Страница 30: ...I CTRL Press a b to select Media change and then press ENTER 1 2 1 2 3 1 2 3 1 2 Select the desired medium such as DVD recorder or HDD The media type changes every time you press ENTER NOTE This function may not work depending on the connected recording devices Listening with the Pioneer AV Sound system You can choose to listen to the TV sound only from the Pioneer AV Sound system Press HDMI CTRL ...

Страница 31: ...ngs is called HOME MENU The HOME MENU enables various settings and adjustments The HOME MENU can be operated with the remote control unit Common operations Operation without a remote control unit This function is useful when there is no remote control unit within your reach Press HOME MENU and the HOME MENU screen displays Press Pk l instead of a b or ik l instead of c d to select the item Press b...

Страница 32: ...ource originally encoded at 24 or 25 frames per second depending on the vertical frequency analyses it and then recreates each still film frame for high definition picture quality Active Contrast Automatically adjusts the contrast of an image according to the scene 3D Y C Provides high quality images with minimal dot crawl and cross colour noise by detecting changes in the image Off The brightness...

Страница 33: ...mode on the Picture and Sound menu screen by pressing AV SELECTION 1 2 Sound Settings Balance Treble Surround Reset 0 0 15 L 15 R Off Bass 0 15 15 DYNAMIC STANDARD For a highly defined image in a normally bright room MOVIE For viewing a movie in a darkened room GAME For playing of video games PC For PC x v Colour Produce realistic colour on the TV screen unlike any other signal USER Allows you to ...

Страница 34: ...n Programme Setup Setup Digital Setting You can reconfigure the DTV service settings automatically or manually Additional Search Use this menu to add new services automatically after auto installation has been completed Manual Search Add new services within a specified frequency band Enter the frequency using 0 9 numeric buttons You can perform Manual Search with a service number only when the fiv...

Страница 35: ...Setup Setup Analogue Setting You can reconfigure the analogue TV channels settings automatically or manually Additional Search Use this menu to add new channels automatically after auto installation has been made Start searching channels after selecting the colour system and sound system Manual Adjust Use this menu to set up analogue TV channels manually After selecting Yes on the screen press a b...

Страница 36: ...ncluding subtitles for the hearing impaired to display if subtitles are available NOTE Subtitles will not be displayed when the service does not contain subtitle information Digital Audio Language Option Set up to three preferred multi audio languages to display if the audio languages are available Switching the multi audio languages Each time you press t on the remote control unit the audio langu...

Страница 37: ...rs may appear on the top and bottom with some programmes CINEMA For 14 9 letterbox pictures Bars may appear on the top and bottom with some programmes FULL Displays with an Overscan image Crops all sides of screen Underscan Displays with an Underscan image only when receiving a 720p signal Displays with the High Definition image adjusted optimally Noise may appear on the edge of the screen with so...

Страница 38: ...DNR Digital Noise Reduction produces a clearer image Off High Low Automatic volume adjustment Auto Volume Option Different sound sources sometimes do not have the same volume level such as a programme and its commercial breaks The Automatic Volume Control Auto Volume reduces this problem by equalizing levels Emphasising dialogue Clear Voice Option This function emphasises speech against background...

Страница 39: ... p The channel display will appear on the TV Press p again within the several seconds that the channel display is on the screen Time information will be shown in the lower right corner of the screen for several seconds Even when you change the TV channel you can display the time information with steps 2 and 3 above NOTE If acquired successfully the time information will appear in the upper right c...

Страница 40: ...elect END to set the name You cannot change labels if the input source is TV 1 2 3 4 Input Skip Setup This setting allows you to skip the SCART HDMI or RGB input on the Input Source Selection operation INPUT1 SCART INPUT2 SCART INPUT4 HDMI INPUT5 HDMI INPUT6 HDMI INPUT7 RGB Yes No Colour system settings You can change the colour system to one that is compatible with the image on the screen NOTE Th...

Страница 41: ... Selecting the picture size You can select the picture size Press SCREEN SIZE The SCREEN SIZE menu displays Press SCREEN SIZE or a b to select a desired item on the menu NOTE Connect the PC before making adjustments Selectable picture size may vary with input signal type EXAMPLE 1 2 FULL An image fully fills the screen CINEMA For 14 9 letterbox pictures Bars may appear on the top and bottom with s...

Страница 42: ...uto Sync completed successfully displays If not Auto Sync failed Auto Sync may fail even if Auto Sync completed successfully displays Auto Sync may fail if the PC image has low resolution has unclear black edges or is moved while executing Auto Sync Be sure to connect the PC to the TV and switch it on before starting Auto Sync Auto Sync can be executed only when inputting analogue signals through ...

Страница 43: ...inal The input signal PC video can be selected the volume can be adjusted and various other adjustments and settings can be made enabling automatic programmed playing Use an RS 232C serial control cable cross type commercially available for the connections NOTE This operation system should be used by a person who is accustomed to using PCs Parameter Input the parameter values aligning left and fil...

Страница 44: ... VOLUME 0 60 CONTROL ITEM COMMAND PARAMETER CONTROL CONTENTS POSITION H P O S _ H POSITION AV PC V P O S _ V POSITION AV PC C L C K _ CLOCK 0 180 P H S E _ _ PHASE 0 40 SCREEN SIZE W I D E 0 _ _ _ TOGGLE AV W I D E 1 _ _ _ 4 3 AV W I D E 2 _ _ _ CINEMA 14 9 AV W I D E 3 _ _ _ WIDE AV W I D E 4 _ _ _ FULL AV W I D E 5 _ _ _ ZOOM AV W I D E 6 _ _ _ CINEMA AV W I D E 7 _ _ _ 4 3 PC W I D E 8 _ _ _ CI...

Страница 45: ...nges in temperature This does not affect the TV s performance Cautions regarding use in high and low temperature environments When the TV is used in a low temperature space e g room office the picture may leave trails or appear slightly delayed This is not a malfunction and the TV will recover when the temperature returns to normal Do not leave the TV in a hot or cold location Also do not leave th...

Страница 46: ... the method of update If the software is updated the confirmation message New download information has been detected appears If the TV receives the update service while in standby mode a confirmation message displays after turning on the power Follow the screen prompts 1 2 Yes Starts downloading immediately It takes approximately one hour to update You cannot carry out other operations while downl...

Страница 47: ...B input INPUT3 S VIDEO Y C input RCA pin AV input INPUT4 HDMI INPUT5 HDMI INPUT6 HDMI Ø 3 5 mm jack INPUT7 15 pin mini D sub Ø 3 5 mm jack INPUT8 COMPONENT IN Y PB CB PR CR RCA pin AUDIO R L DIGITAL AUDIO OUTPUT Optical SPDIF Digital audio output C I Common Interface EN50221 R206001 OUTPUT RCA pin AUDIO R L Headphones Ø 3 5 mm jack Audio output OSD language Czech Danish Dutch English Estonian Finn...

Страница 48: ...ppropriate waste handling For more information about collection and recycling of old products and batteries please contact your local municipality your waste disposal service or the point of sale where you purchased the items These symbols are only valid in the European Union For countries outside the European Union If you wish to discard these items please contact your local authorities or dealer...

Страница 49: ...Memo 47 Downloaded From TV Manual com Manuals ...

Страница 50: ...Memo 48 Downloaded From TV Manual com Manuals ...

Страница 51: ...ECTION 31 Réglages du son 31 Réglages de l économie d énergie 31 Réglages des canaux numériques 32 Réglages des canaux analogiques 33 Réglages du mot de passe contrôle parental 34 Réglages de la langue langue sous titre multi audio 34 Fonctions de visualisation pratiques 35 Sélection de la taille d image 35 Sélection automatique de la taille d image WSS Signalisation grand écran 35 Sélection manue...

Страница 52: ...t respectées Le panneau LCD utilisé dans cet appareil est en verre Il peut donc se briser s il tombe ou s il subit un choc Veillez à ne pas vous blesser avec des éclats de verre si le panneau LCD vient à se briser Sources de chaleur Éloignez l appareil des sources de chaleur comme les radiateurs les chauffages et autres appareils produisant de la chaleur y compris les amplificateurs Afin d empêche...

Страница 53: ... aucun autre écran du HOME MENU n est exécuté h HOME MENU Marche arrêt de l écran du HOME MENU 1 2 3 4 5 6 7 8 9 0 Q Touches pour les opérations pratiques 1 Sous page Page 20 Sous titre Active désactive les langues des sous titres Pages 20 et 34 k Révèle le télétexte masqué Page 20 3 Geler Maintenir Appuyez sur cette touche pour faire un arrêt sur image sur une image animée Télétexte Interrompt la...

Страница 54: ...de trouver un code adéquat Le témoin de mode s allume pendant environ une seconde puis s éteint la programmation du code fabricant est terminée EXIT DVDTOPMENU GUIDE EPG 4 5 6 7 8 9 0 P INFO 1 2 3 INFO SOURCE TV STB DVR VCR DVD SELECT CTRL HDD AV SELECTION CM SKIP DVD TOOLS SCREEN SIZE 1 2 3 REMARQUE Si vous n effectuez aucune opération pendant environ une minute alors qu un témoin de mode clignot...

Страница 55: ... 507 DAEWOO 508 GRUNDIG 1 509 GRUNDIG 2 510 GRUNDIG 3 511 GRUNDIG 4 512 HITACHI 1 513 HITACHI 2 514 HITACHI 3 515 JVC 1 516 JVC 2 517 JVC 3 518 JVC 4 519 JVC 5 520 LOEWE 1 521 LOEWE 2 522 MATSUI 523 ORION 524 PANASONIC 1 525 PANASONIC 2 526 PHILIPS 1 Magnétoscope 527 PHILIPS 2 528 PHILIPS 3 529 SANYO 530 SAMSUNG 1 531 SAMSUNG 2 532 SAMSUNG 3 533 SAMSUNG 4 534 SHARP 535 SONY 1 536 SONY 2 537 SONY 3...

Страница 56: ...récédent E 1 2 3 4 5 6 7 8 9 TV DTV RADIO 4 5 6 7 8 9 1 2 3 0 P INFO INFO P CHRETURN CTRL HDMI RECSTOP HDD AV SELECTION CM SKIP DVD TOOLS SCREEN SIZE SOURCE TV STB DVR VCR DVD SELECT TV DTV RADIO P INFO INFO CHRETURN CTRL HDMI RECSTOP HDD AV SELECTION CM SKIP DVD TOOLS SCREEN SIZE TV STB DVR DVD SELECT 5 3 4 7 6 2 1 Utilisation de la télécommande avec un autre appareil magnétoscope TV DTV RADIO 4 ...

Страница 57: ...re suivant m BALAYAGE Appuyez sur cette touche pour reculer n LECTURE Lance la lecture o BALAYAGE Appuyez sur cette touche pour effectuer une avance rapide r ARRÊT Appuyez sur cette touche pour arrêter la lecture ou l enregistrement Avec certains lecteurs DVD ou enregistreurs DVD HDD DVR si vous appuyez deux fois sur cette touche le plateau de disque peut s ouvrir REC STOP Enregistreur DVD HDD DVR...

Страница 58: ...D sont des marques de commerce de Dolby Laboratories TruSurround XT SRS et le h symbole sont des marques déposées de SRS Labs Inc TruSurround XT technologie est incorporé sous licence de SRS Labs Inc Le logo HD ready 1080P est une marque de commerce de EICTA Le logo DVB est une marque déposée du projet DVB Digital Video Broadcasting x v Colour et sont des marques de Sony Corporation 8 Downloaded F...

Страница 59: ...ise INPUT1 RGB 7 8 9 10 11 Prises INPUT3 PHONES Casque Connecteur SERVICE Fente COMMON INTERFACE Prise AC INPUT 12 13 14 15 16 RLS Room Light Sensor Capteur de lumière ambiante 9 Capteur de télécommande Indicateur ON Indicateur SLEEP Indicateur STANDBY Touche HOME MENU Touche a Alimentation ik l Touches de volume Pk l Touches de programme canal b Touche Source d entrée RLS AVERTISSEMENT Une pressi...

Страница 60: ...z le cordon secteur de la prise AC INPUT Avant de procéder aux opérations étendez un rembourrage sur la surface de travail sur laquelle vous placerez le téléviseur Ceci lui évitera d être endommagé ATTENTION Fixez le socle dans le bon sens Veillez à bien suivre les instructions Un montage incorrect du socle peut entraîner la chute du téléviseur 10 Télécommande g1 Cordon secteur g2 Ensemble du socl...

Страница 61: ...e plus courte que prévue en raison des conditions de stockage Si vous n avez pas l intention d utiliser la télécommande pendant une période prolongée retirez les piles Lorsque vous remplacez les piles utilisez des piles alcalines plutôt que des piles au zinc carbone 1 2 3 Précautions sur la télécommande N exposez pas la télécommande à des chocs Ne l exposez pas non plus à des liquides et ne la pla...

Страница 62: ...iquée à droite Prenez garde de ne pas obstruer les ouvertures d aération à l arrière du téléviseur à écran plat Assurez vous d installer le téléviseur à écran plat sur une surface plane étant donné que le panneau LCD de ce produit est en verre Les orifices des vis autres que ceux illustrés ci dessus ne sont destinés qu aux produits spécifiés Ne les utilisez jamais pour installer des produits non s...

Страница 63: ...tion initiale Page 15 Réglage de la langue English Italiano Svenska Réglage du pays Austria A B G Finland FIN B G Greece GR B G Réglage de la recherche de canaux Recherche analogique Recherche numérique n o Félicitations Vous pouvez à présent regarder la télévision Au besoin ajustez l antenne pour obtenir la meilleure réception de signal possible Page 15 n o 13 Préparation Allumer le téléviseur et...

Страница 64: ...t appuyez ensuite sur ENTER Appuyez sur c d pour sélectionner Marche et appuyez ensuite sur ENTER 1 2 3 4 5 Assemblage des câbles 14 Insérez soigneusement le module CA dans la fente COMMON INTERFACE avec la partie contact tournée vers l avant Le logo sur le module CA doit être tourné vers l extérieur par rapport au dos du téléviseur 1 2 Pour l Europe à l exception du Royaume Uni et de l Eire Serre...

Страница 65: ...sur 6 RETURN REMARQUE Si vous éteignez le téléviseur après avoir effectué l étape 4 l assistant pour l auto installation initiale n apparaît pas La fonction d auto installation vous permet d exécuter à nouveau l installation dans le menu Installation Page 32 L assistant pour l auto installation initiale disparaît si vous n utilisez pas le téléviseur pendant 30 minutes avant de chercher des chaînes...

Страница 66: ...ez sur a du téléviseur Éteignez le en appuyant sur a du téléviseur Mode de veille En mode de veille Si le téléviseur est mis sous tension vous pouvez le mettre en veille en appuyant sur a TV de la télécommande Quitter le mode de veille En veille appuyez sur B TV de la télécommande 1 2 3 4 5 6 7 8 TV INPUT 1 2 3 4 5 6 7 8 INPUT Statut de l indicateur TV Indicateur TV Statut ON Bleu Mise sous tensio...

Страница 67: ... vous souhaitez utiliser EPG pour les chaînes numériques sélectionnez oui Les données EPG doivent être automatiquement capturées pendant que le téléviseur est en mode de veille Après avoir placé cette option sur oui la mise hors tension avec la télécommande peut prendre un certain temps en raison du processus de capture des données REMARQUE Si l alimentation principale du téléviseur est éteinte le...

Страница 68: ...nner le programme de votre choix et appuyez ensuite sur ENTER REMARQUE Lorsque vous sélectionnez un programme en dehors de la durée actuelle l écran de réglage de minuterie s affiche Page 19 5 1 2 3 Sélection d un programme Sélectionnez la durée souhaitée Appuyez sur c d pour sélectionner la durée que vous souhaitez rechercher Continuez d appuyer sur d pour afficher les programmes dans la prochain...

Страница 69: ...nner Oui et appuyez ensuite sur ENTER L émission télévisée sélectionné est indiqué par une icône REMARQUE Reportez vous aux pages 21 23 pour le raccordement d appareils externes 3 Annuler l enregistrement programmé Appuyez sur EPG Appuyez sur a b c d pour sélectionner le programme du réglage de minuterie et appuyez ensuite sur ENTER Appuyez sur c d pour sélectionner Annuler et appuyez ensuite sur ...

Страница 70: ...e lorsque vous appuyez sur m Écran d exemple MHEG 5 Regarder la télévision Télétexte Qu est ce que le Télétexte Le Télétexte transmet des pages d informations et de jeux aux téléviseurs dotés d un équipement spécial Votre téléviseur reçoit les signaux Télétexte émis par des stations de télévision et les décode en format graphique pour les visionner Les informations le bulletin météo et les nouvell...

Страница 71: ...rder un ordinateur au téléviseur Présentation des branchements Le téléviseur est doté des prises présentées ci dessous Trouvez le câble correspondant à la prise du téléviseur et raccordez l appareil REMARQUE Les câbles illustrés aux pages 21 24 sont en vente dans le commerce E Lorsque vous utilisez un câble S Vidéo vous devez aussi raccorder un câble audio R L 21 Appareil HDMI Page 22 Console de j...

Страница 72: ...76i 576p 480i 480p 1080i 720p 1080p Voir page 42 pour connaître la compatibilité des signaux PC Connexion Composantes Vous bénéficierez d une restitution fidèle des couleurs et d images de qualité élevée par la prise INPUT8 au raccordement d un lecteur enregistreur DVD ou d un autre appareil Y PB CB L R PR CR COMPONENT AUDIO Connexion S VIDEO VIDEO Vous pouvez utiliser la prise INPUT3 pour branche...

Страница 73: ...rdé est dotée de la touche WYSIWYR vous pouvez commencer automatiquement à enregistrer en appuyant sur la touche WYSIWYR Téléchargement des préréglages Transfère automatiquement les informations sur les préréglages des canaux du tuner du téléviseur vers celui de l appareil audiovisuel raccordé magnétoscope par ex par la prise INPUT2 REMARQUE Reportez vous aux modes d emploi de chacun des appareils...

Страница 74: ...s Après connexion Réglage de la sortie audio numérique Après avoir raccordé un amplificateur avec entrée audio numérique et des enceintes externes comme illustré il est recommandé de régler un format de sortie audio compatible avec le programme que vous regardez ou l appareil raccordé Allez sur HOME MENU Options Sortie audio numérique sélectionnez PCM ou Dolby Digital E 24 Câble audio optique Câbl...

Страница 75: ...s fournis comme accessoires Ils sont généralement disponibles auprès de votre revendeur Insertion de la carte à mémoire dans le module CA Avec la face ayant la puce de contact dorée tournée vers le côté du module CA marqué du logo du fournisseur enfoncez la carte à mémoire dans le module CA aussi loin que possible Notez le sens de la flèche imprimée sur la carte à mémoire Insertion du module CA da...

Страница 76: ... HDMI CONTROL Commande multiple d appareils HDMI Vous pouvez sélectionner quel appareil HDMI vous souhaitez commander avec la touche HDMI CTRL REMARQUE Quand vous utilisez HDMI CONTROL assurez vous d utiliser un câble HDMI certifié Dirigez la télécommande vers le téléviseur pas vers l appareil HDMI raccordé Un bruit vidéo peut apparaître en fonction du type de câble HDMI utilisé Veillez à utiliser...

Страница 77: ...ite sur ENTER Mise sous tension auto Si cette fonction est activée la lecture une touche est possible Lorsque le téléviseur est en mode de veille il se met automatiquement sous tension et démarre la lecture de l image de la source HDMI 1 2 3 4 5 Réglage HDMI CONTROL Répétez les étapes 1 à 3 dans HDMI CONTROL Appuyez sur a b pour sélectionner Mise sous tension auto et appuyez ensuite sur ENTER Appu...

Страница 78: ... type de support Appuyez sur HDMI CTRL Appuyez sur a b pour sélectionner Changement de média et appuyez ensuite sur ENTER 1 2 1 2 3 1 2 3 1 2 Sélectionnez le média désiré enregistreur DVD ou disque dur par exemple Le type de média change à chaque pression sur ENTER REMARQUE Cette fonction risque d être inopérante selon les appareils d enregistrement raccordés Écoute avec le système audio AV Pionee...

Страница 79: ... ENTER HOME MENU MENU RETURN CTRL HDMI RECSTOP HDD AV SELECTION CM SKIP DVD TOOLS SCREEN SIZE SOURCE TV STB DVR VCR DVD SELECT TV DTV RADIO 1 2 3 4 5 6 7 8 TV INPUT 4 5 6 7 8 9 1 2 3 0 P INFO INFO P CHRETURN DVDTOPMENU GUIDE EPG CTRL HDMI RECSTOP HDD AV SELECTION CM SKIP DVD TOOLS SCREEN SIZE SOURCE TV STB DVR VCR DVD SELECT 1 Image Son Commande alimentation Installation Options Réglage numérique ...

Страница 80: ...lm codée à l origine 24 ou 25 images par seconde selon une fréquence verticale l analyse et recrée chaque image fixe du film pour une qualité d image haute définition Contraste actif Ajuste automatiquement le contraste d une image d après la scène 3D Y C Procure des images de grande qualité avec un minimum d effet de fluage et de parasites de couleurs croisées grâce à une détection des modificatio...

Страница 81: ...ages du son Balance Aigus Ambiophonie Réinitial 0 0 15 G 15 D Arrêt Graves 0 15 15 DYNAMIQUE STANDARD Pour une image haute définition dans une pièce normalement éclairée CINÉMA Pour voir un film dans une pièce sombre JEU Pour jouer à des jeux vidéos PC Pour un ordinateur x v Colour Restitue des couleurs réalistes sur l écran du téléviseur différentes de tout autre signal UTILISATEUR Vous permet de...

Страница 82: ... DTV 994 SIT 2 DTV 995 SIT 1 DTV 999 HD Monosco Verrou Saut Canal Saut EPG Tri Appuyez sur a b pour sélectionner le service désiré Appuyez sur la touche de couleur sur la télécommande correspondant à la rubrique que vous souhaitez reconfigurer Le repère indique que l opération est activée À chaque fois que vous appuyez sur la touche de couleur vous pouvez activer désactiver l opération corresponda...

Страница 83: ...s canaux désirés soient effacés E 1 2 3 4 E 1 2 3 4 Installation programme Installation Réglage analogique Vous pouvez reconfigurer les réglages des canaux de télévision analogique automatiquement ou manuellement Recherche supplémentaire Utilisez ce menu pour ajouter automatiquement de nouveaux canaux une fois l autoinstallation terminée Lancez la recherche des canaux après avoir sélectionné le sy...

Страница 84: ...érique Réglez deux langues de sous titres préférées dont les sous titres pour les malentendants à afficher si les sous titres sont disponibles REMARQUE Les sous titres ne seront pas affichés si le service ne contient pas d informations de sous titres Langue audio numérique Options Réglez trois langues multi audio préférées à afficher si plusieurs langues audio sont disponibles Passer d une langue ...

Страница 85: ...rtains programmes PLEIN Affichage de l image en Overscan Coupe tous les côtés de l écran Sous scan Affichage de l image en Underscan uniquement lors de la réception d un signal 720p Affichage de l image haute définition ajustée de façon optimale Du bruit peut apparaître sur le bord de l écran pour certains programmes Pt par Pt Affiche une image avec le même nombre de pixels sur l écran uniquement ...

Страница 86: ...Options Réduction bruit procure une image plus nette Arrêt Haut Bas Réglage automatique du volume Volume auto Options Des sources sonores différentes n ont quelquefois pas le même niveau de volume sonore une émission et ses pauses commerciales par exemple Le contrôle automatique du volume réduit ce problème en égalisant les niveaux Accentuation des dialogues Voix claire Options Cette fonction met ...

Страница 87: ...es Appuyez sur p L affichage du canal apparaît sur le téléviseur Appuyez de nouveau sur p au cours des quelques secondes où l affichage du canal est à l écran L information de l heure apparaîtra dans le coin inférieur droit de l écran pendant plusieurs secondes Même lorsque vous changez de canal télévisé vous pouvez afficher les informations de l heure avec les étapes 2 et 3 ci dessus REMARQUE Si ...

Страница 88: ... FIN pour régler son nom Vous ne pouvez pas modifier les étiquettes si la source d entrée est TV 1 2 3 4 Saut d entrée Installation Ce réglage vous permet d omettre l entrée PÉRITEL SCART HDMI ou RVB sur l opération de Sélection de la source d entrée INPUT1 SCART INPUT2 SCART INPUT4 HDMI INPUT5 HDMI INPUT6 HDMI INPUT7 RVB oui non Réglages du système couleur Vous pouvez changer le système couleur e...

Страница 89: ...éléviseur Sélection de la taille de l image Vous pouvez sélectionner la taille de l image Appuyez sur SCREEN SIZE Le menu SCREEN SIZE TAILLE D ÉCRAN s affiche Appuyez sur SCREEN SIZE ou a b pour sélectionner la rubrique souhaitée dans le menu REMARQUE Raccordez l ordinateur avant de procéder aux réglages La taille d image sélectionnable dépend du type de signal d entrée EXEMPLE 1 2 PLEIN L image r...

Страница 90: ...QUE Lorsque Sync Automat a réussi Auto Sync terminée avec succès s affiche Sinon Sync Automat a échoué Sync Automat peut échouer même si Auto Sync terminée avec succès est affiché Sync Automat risque d échouer si l image de l ordinateur est de faible résolution a des bords indéfinis noirs ou bien est déplacée sans exécuter Sync Automat Veillez à brancher l ordinateur sur le téléviseur et à le mett...

Страница 91: ... 232C Le signal d entrée ordinateur vidéo peut être sélectionné le volume peut être réglé et d autres réglages encore peuvent être effectués permettant la lecture programmée automatique Utilisez un câble série de commande RS 232C de type croisé en vente dans le commerce pour les connexions REMARQUE Le système d exploitation doit être utilisé par une personne familiarisée avec l utilisation des ord...

Страница 92: ...e de commande Commande Paramètre Contenu de la commande Emplacement H P O S _ Pos hori AV PC V P O S _ Pos vert AV PC C L C K _ Horloge 0 180 P H S E _ _ Phase 0 40 TAILLE D ÉCRAN W I D E 0 _ _ _ Commutation AV W I D E 1 _ _ _ 4 3 AV W I D E 2 _ _ _ CINÉMA 14 9 AV W I D E 3 _ _ _ LARGE AV W I D E 4 _ _ _ PLEIN AV W I D E 5 _ _ _ ZOOM AV W I D E 6 _ _ _ CINÉMA AV W I D E 7 _ _ _ 4 3 PC W I D E 8 _ ...

Страница 93: ...action du coffret suite aux changements de température Ceci n a aucune incidence sur les performances du téléviseur Précautions lors de l utilisation dans des environnements à haute ou basse température Lorsque le téléviseur est utilisé dans un endroit à basse température une pièce ou un bureau par ex l image peut laisser des traces ou apparaître avec un léger délai Ceci n est pas un défaut de fon...

Страница 94: ...mise à jour Si le logiciel est mis à jour le message de confirmation De nouvelles infos de téléchargement ont été détectées s affiche Si le téléviseur reçoit le service de mise à jour lorsqu il est en mode de veille un message de confirmation s affiche lorsque vous le rallumez Suivez les invites à l écran 1 2 oui Lance immédiatement le téléchargement Il faut environ une heure pour mettre à jour le...

Страница 95: ...eur entrée Y C AV Link entrée RVB INPUT3 S VIDEO entrée Y C fiche RCA entrée AV INPUT4 HDMI INPUT5 HDMI INPUT6 HDMI jack Ø 3 5 mm INPUT7 Mini D sub à 15 broches jack Ø 3 5 mm INPUT8 COMPONENT IN Y PB CB PR CR Fiche RCA AUDIO R L DIGITAL AUDIO OUTPUT Sortie audio numérique SPDIF optique C I Interface commune EN50221 R206001 OUTPUT Fiche RCA AUDIO R L Écouteurs Jack Ø 3 5 mm sortie audio Langue OSD ...

Страница 96: ...rocédant à la mise au rebut correcte de ces produits et piles vous contribuerez à la préservation de ressources précieuses et préviendrez les effets néfastes potentiels de leur mauvaise gestion sur l environnement et la santé humaine Pour de plus amples informations sur la collecte et le recyclage des produits anciens et piles usagées veuillez contacter votre municipalité votre décharge locale ou ...

Страница 97: ...Note 47 Downloaded From TV Manual com Manuals ...

Страница 98: ...Note 48 Downloaded From TV Manual com Manuals ...

Страница 99: ...Bildeinstellungen 30 AV SELECTION 31 Toneinstellungen 31 Stromspareinstellungen 31 Kanaleinstellungen 32 Autoinstallation 32 Digitalkanal Einstellungen 32 Analogkanal Einstellungen 33 Passwort Kindersicherung Einstellungen 34 Sprache Einstellungen Sprache Untertitel Multi Audio 34 Praktische Betrachtungsfunktionen 35 Wählen der Bildgröße 35 Automatische Bildgrößewahl über WSS Breitbild Umschaltsig...

Страница 100: ...Herstellers nicht entsprochen ist Das in diesem Produkt verwendete LCD Panel besteht aus Glas Es kann daher zerbrechen wenn das Produkt fallen gelassen oder Druck darauf ausgeübt wird Seien Sie vorsichtig damit Sie sich nicht durch gebrochene Glasstücke verletzen falls das LCD Panel bricht Wärmequellen Stellen Sie das Produkt nicht in der Nähe von Heizkörpern Heizgeräten Öfen oder anderen Geräten ...

Страница 101: ...ezeigt ist h HOME MENU Zum Anzeigen Schließen des HOME MENU 1 2 3 4 5 6 7 8 9 0 Q Tasten für praktische Funktionen 1 Unterseite Seite 20 Untertitel Schaltet Untertitelsprachen ein aus Seiten 20 und 34 k Verdeckten Teletext anzeigen Seite 20 3 Einfrieren Halten Zum Anhalten eines Bewegtbilds auf dem Bildschirm Teletext Zum Stoppen des automatischen Aktualisierens der Teletextseiten bzw Deaktivieren...

Страница 102: ...e der Herstellercode Liste Die Modusanzeige leuchtet etwa eine Sekunde lang und erlischt dann wieder womit die Voreinstellung des Herstellercodes beendet ist EXIT DVDTOPMENU GUIDE EPG 4 5 6 7 8 9 0 P INFO 1 2 3 INFO SOURCE TV STB DVR VCR DVD SELECT CTRL HDD AV SELECTION CM SKIP DVD TOOLS SCREEN SIZE 1 2 3 ZUR BEACHTUNG Falls Sie bei blinkender Modusanzeige nicht innerhalb von circa einer Minute di...

Страница 103: ... 507 DAEWOO 508 GRUNDIG 1 509 GRUNDIG 2 510 GRUNDIG 3 511 GRUNDIG 4 512 HITACHI 1 513 HITACHI 2 514 HITACHI 3 515 JVC 1 516 JVC 2 517 JVC 3 518 JVC 4 519 JVC 5 520 LOEWE 1 521 LOEWE 2 522 MATSUI 523 ORION 524 PANASONIC 1 525 PANASONIC 2 526 PHILIPS 1 VCR 527 PHILIPS 2 528 PHILIPS 3 529 SANYO 530 SAMSUNG 1 531 SAMSUNG 2 532 SAMSUNG 3 533 SAMSUNG 4 534 SHARP 535 SONY 1 536 SONY 2 537 SONY 3 538 SONY...

Страница 104: ... Zum Schließen des Programmmenüs oder der Programmführers Broadcasting Guide ENTER Zum Aktivieren der gewählten Funktion a b c d Zum Wählen von Gegenständen im Programmmenü oder Programmführer Broadcasting Guide MENU Zum Aufrufen des Programmmenüs drücken SOURCE a Schaltet die Set Top Box ein und aus GUIDE Zum Aufrufen des Programmführers Broadcasting Guide RETURN Wenn das Programmmenü angezeigt i...

Страница 105: ...sschalten des DVD Spielers oder DVD HDD Recorders DVR DVD TOP MENU Auf Drücken dieser Taste erscheint das DVD Topmenü RETURN Wenn das DVD Menü angezeigt ist ruft diese Taste den unmittelbar zuvor angezeigten Bildschirm zurück j KAPITELSUCHE Jedes Drücken schaltet auf den Anfang des vorherigen Kapitels zurück k KAPITELSUCHE Jedes Drücken schaltet auf zum Anfang des nächsten Kapitels weiter m SCAN Z...

Страница 106: ... sind Warenzeichen von Dolby Laboratories TruSurround XT SRS und das h Symbol sind Warenzeichen von SRS Labs Inc TruSurround XT Technologie wird unter Lizenz von SRS Labs Inc mit eingeschlossen Das HD ready 1080P Logo ist ein Warenzeichen von EICTA Das DVB Logo ist eine eingetragenes Warenzeichen des Projekts Digital Video Broadcasting DVB x v Colour und sind Marken von Sony Corporation 8 Download...

Страница 107: ...RGB Buchse INPUT1 RGB Buchse 7 8 9 10 11 INPUT3 Buchsen PHONES Kopfhörer SERVICE Anschluss COMMON INTERFACE Steckplatz AC INPUT Buchse Netzeingang 12 13 14 15 16 RLS WARNUNG Ein übermäßig hoher Schalldruck vom Ohr oder Kopfhörer kann eine Gehörschädigung verursachen RLS Room Light Sensor Raumlichtsensor Fernbedienungssensor ON Anzeige SLEEP Anzeige STANDBY Anzeige HOME MENU Taste a Stromtaste ik l...

Страница 108: ...bitte das Netzkabel vom Netzeingang AC INPUT trennen Vor den Arbeiten bitte eine Decke oder Ähnliches auf der vorgesehenen Ablagefläche für den TV ausbreiten So schützen Sie den TV vor einer etwaigen Beschädigung VORSICHT Befestigen Sie den Ständer in korrekter Ausrichtung Stellen Sie sicher dass die Anweisungen befolgt werden Bei falsch angebrachtem Ständer besteht die Gefahr dass der TV umkippt ...

Страница 109: ...n Batterien die dem Produkt beiliegen kann die Lebensdauer lagerungsbedingt verkürzt sein Wenn die Fernbedienung längere Zeit nicht benutzt wird entnehmen Sie bitte deren Batterien Verwenden Sie beim Auswechseln der Batterien bitte Alkalibatterien anstelle von Zink Kohle Batterien 1 2 3 Vorsichtsmaßregeln zur Fernbedienung Setzen Sie die Fernbedienung keinen Stößen aus Setzen Sie die Fernbedienung...

Страница 110: ...cht Bitte achten Sie darauf dass die Belüftungsöffnungen auf der Rückseite des Flachbildschirm TVs nicht blockiert werden Installieren Sie den Flachbildschirm TV unbedingt auf eine ebenen Fläche da das LCD Panel des Produkts aus Glas hergestellt ist Die in den Illustrationen nicht gezeigten Schraubenlöscher sind ausschließlich für die dafür bestimmten Produkte zu verwenden Benutzen Sie sie auf kei...

Страница 111: ...a ein Seite 16 Führen Sie die anfängliche Autoinstallation durch Seite 15 Sprache Einstellung English Italiano Svenska Land Einstellung Austria A B G Finland FIN B G Greece GR B G Kanalsuche Einstellung Analogsuche Digitalsuche n o Herzlichen Glückwunsch Jetzt können Sie fernsehen Richten Sie erforderlichenfalls die Antenne auf maximalen Signalempfang aus Seite 15 n o 13 Vorbereitung Einschalten u...

Страница 112: ...n Sie dann ENTER Wählen Sie mit c d Ein und drücken Sie dann ENTER 1 2 3 4 5 Bündeln der Kabel Vor dem Einschalten des Geräts 14 Kabelklemme Bündeln Sie die Kabel mit der Klemme Netzkabel Stellen Sie den TV nahe an einer Netzsteckdose auf und sorgen Sie dafür dass der Netzstecker gut zugänglich ist Standardstecker DIN45325 IEC 169 2 75 q Koaxialkabel Für U K und Irland Setzen Sie das CA Modul vors...

Страница 113: ...nn Schritt 4 ausgeführt worden ist bevor der TV wieder ausgeschaltet wird erscheint der Assistent für die anfängliche Autoinstallation danach nicht mehr Die Autoinstallation kann über das Einstellungen Menü auch später wieder neu gestartet werden Seite 32 Der Assistent für die anfängliche Autoinstallation wird automatisch geschlossen wenn der TV länger als 30 Minuten nicht bedient wird bevor in Sc...

Страница 114: ...sschalten Ein und Ausschalten des Geräts Drücken Sie a am TV Drücken Sie zum Ausschalten a am TV Bereitschaftsmodus In Bereitschaftsmodus Wenn der TV eingeschaltet ist können Sie diesen mit a TV an der Fernbedienung auf Bereitschaft schalten Einschalten aus Bereitschaft Drücken Sie aus der Bereitschaft a TV an der Fernbedienung 1 2 3 4 5 6 7 8 TV INPUT 1 2 3 4 5 6 7 8 INPUT Status der TV Anzeigela...

Страница 115: ...ür digitale Programme wünschen Die EPG Daten müssen automatisch erfasst werden während der TV im Bereitschaftsmodus ist Durch die erforderliche Datenerfassung kann es nach dem Einstellen auf Ja eine Weile dauern bis das Gerät mit der Fernbedienung ausgeschaltet werden kann ZUR BEACHTUNG Wenn der TV mit dem Hauptschalter ausgeschaltet wird werden die EPG Daten nicht erfasst Anzeigebereich Setup Übe...

Страница 116: ...Wählen Sie mit a b das gewünschte Programm und drücken Sie dann ENTER ZUR BEACHTUNG Wenn Sie ein Programm außerhalb des aktuellen Zeitfensters wählen erscheint die Timer Einstellanzeige Seite 19 5 1 2 3 Wählen eines Programms Wählen Sie das Zeitfenster Drücken Sie c d zum Wählen des Zeitfensters für die Programmsuche Drücken Sie weiter d um die Programme des nächsten Zeitraums anzuzeigen E 1 Ferns...

Страница 117: ...lte TV Programm wird mit einem Icon markiert ZUR BEACHTUNG Näheres zum Anschließen externer Geräte finden Sie auf den Seiten 21 23 3 Annullieren der Timeraufnahme Drücken Sie EPG Wählen Sie mit a b c d das Programm im Timer Setup und drücken Sie dann ENTER Wählen Sie mit c d Annullieren und drücken Sie dann ENTER Wählen Sie mit c d Ja und drücken Sie dann ENTER Annullieren mit Taste Blau an der Fe...

Страница 118: ...ht Wenn vorhanden startet die MHEG 5 Anwendung auf Drücken von m Beispiel für MHEG 5 Bildschirm Fernsehen Teletext Was ist Teletext Teletext bezeichnet von den Sendeanstalten zur Information und Unterhaltung ausgestrahlte Textdaten die mit entsprechend ausgestatteten TVs empfangbar sind Der TV decodiert die empfangenen Teletextsignale zum Betrachten auf ein grafisches Format Zum Teletext Angebot z...

Страница 119: ... Sie auf Seite 39 Einführung zu den Anschlüssen Der TV ist mit den unten gezeichneten Anschlussbuchsen ausgestattet Verwenden Sie das für die jeweilige TV Buchse geeignete Kabel und verbinden Sie damit die Geräte ZUR BEACHTUNG Die auf den Seiten 21 24 gezeigten Kabel sind im Fachhandel erhältlich E Bei Verwendung eines S Video Kabels ist auch ein Audiokabel R L anzuschließen 21 HDMI Gerät Seite 22...

Страница 120: ...lt Unterstützte Videosignale 576i 576p 480i 480p 1080i 720p 1080p Näheres zur Kompatibilität mit PC Signalen finden Sie auf Seite 42 Komponentenanschluss Der Anschluss eines DVD Spieler Recorder oder anderen Geräts über INPUT8 ermöglicht eine verbesserte Farbwiedergabe und hohe Bildqualität Y PB CB L R PR CR COMPONENT AUDIO S VIDEO VIDEO Anschluss Sie können die Buchse INPUT3 für den Anschluss von...

Страница 121: ...nalquelle z B Videorecorder DVD Spieler Recorder wieder TV Bereitschaft Wenn der TV in Bereitschaft wechselt schaltet sich das angeschlossene AV Gerät z B Videorecorder DVD Spieler Recorder ebenfalls auf Bereitschaft WYSIWYR What You See Is What You Record Was Sie sehen ist was Sie aufnehmen Wenn die Fernbedienung des angeschlossenen Videorecorders eine WYSIWYR Taste besitzt startet die Aufnahme a...

Страница 122: ...m Anschließen Digital Audio Ausgabeeinstellung Wenn Sie wie gezeigt einen Verstärker mit digitalem Audioeingang und externen Lautsprechern anschließen sollten Sie ein Audio Ausgabeformat einstellen das mit dem betrachteten Programm oder dem angeschlossenen Gerät kompatibel ist Gehen Sie zu HOME MENU Optionen Digital Audioausgang und wählen Sie PCM oder Dolby Digital E 24 Optisches Audiokabel Audio...

Страница 123: ...n Sie sind normalerweise über den Fachhändler erhältlich Einsetzen der Smart Karte in das CA Modul Schieben Sie die Smart Karte bis zum Anschlag in das CA Modul ein wobei die Kartenseite mit dem goldfarbenen Kontaktchip der Seite des CA Moduls zugewendet sein muss die mit dem Anbieter Logo gekennzeichnet ist Bitte halten Sie die auf der Smart Karte angegebene Pfeilrichtung ein Einsetzen des CA Mod...

Страница 124: ... gesteuert werden soll ZUR BEACHTUNG Bitte achten Sie bei der Benutzung der Funktion HDMI CONTROL darauf dass Sie ein zertifiziertes HDMI Kabel benutzen Richten Sie die Fernbedienung auf den TV nicht auf das angeschlossene HDMI Gerät Abhängig vom Typ des verwendeten HDMI Kabels kann Videorauschen auftreten Verwenden Sie daher unbedingt ein diesbezüglich geprüftes HDMI Kabel Sie können über dieses ...

Страница 125: ...en Sie dann ENTER Einschalt Automatik Wenn aktiviert ist die One Touch Play Funktion verwendbar Wenn der TV auf Bereitschaft geschaltet ist schaltet er sich automatisch ein und gibt das Bild von der HDMI Signalquelle wieder 1 2 3 4 5 HDMI CONTROL Einstellungen Wiederholen Sie die Schritte 1 bis 3 unter HDMI CONTROL Wählen Sie mit a b Einschalt Automatik und drücken Sie dann ENTER Wählen Sie mit c ...

Страница 126: ... CTRL Drücken Sie a b zum Wählen von Medienänderung und drücken Sie dann ENTER 1 2 1 2 3 1 2 3 1 2 Wählen Sie das gewünschte Medium wie z B DVD Recorder oder HDD Der Medientyp wechselt mit jedem Drücken von ENTER ZUR BEACHTUNG Je nach angeschlossenem Aufnahmegerät ist diese Funktion eventuell nicht wirksam Ton über Pioneer AV Sound System wiedergeben Sie können den TV Ton wahlweise nur über das Pi...

Страница 127: ...MENU GUIDE EPG ENTER HOME MENU MENU RETURN CTRL HDMI RECSTOP HDD AV SELECTION CM SKIP DVD TOOLS SCREEN SIZE SOURCE TV STB DVR VCR DVD SELECT TV DTV RADIO 1 2 3 4 5 6 7 8 TV INPUT 4 5 6 7 8 9 1 2 3 0 P INFO INFO P CHRETURN DVDTOPMENU GUIDE EPG CTRL HDMI RECSTOP HDD AV SELECTION CM SKIP DVD TOOLS SCREEN SIZE SOURCE TV STB DVR VCR DVD SELECT 1 Bild Ton ECO Einstellungen Optionen Digitale Einstellunge...

Страница 128: ...uf Kinofilmen basieren ursprünglich 24 oder 25 Bilder pro Sekunde je nach vertikaler Bildfrequenz analysiert die Signale und bereitet die einzelnen Standbilder für eine High Definition Bildqualität auf Aktiver Kontrast Passt den Kontrast eines Bilds automatisch an die jeweilige Szene an 3D Y C Erfasst Änderungen im Bild um durch Unterdrückung von Effekten wie Dot Crawl und Farbübersprechen eine ho...

Страница 129: ...nen den Modus auch im Menü Bild und Ton umschalten indem Sie AV SELECTION drücken 1 2 Toneinstellungen Balance Höhen Raumklang Rücksetzen 0 0 15 Li 15 Re Aus Bass 0 15 15 DYNAMISCH STANDARD Für ein definitionsstarkes Bild in einem normalen hellen Raum FILM Zum Betrachten von Filmen in einem abgedunkelten Raum SPIELE Zum Spielen von Videospielen PC Für PC x v Colour Für eine naturgetreuere Farbwied...

Страница 130: ...eben Sie die Frequenz mit den Zifferntasten 0 9 ein Manuelle Suche mit einer Service Nummer ist nur möglich wenn bei der Landeinstellung die fünf nordischen Länder gewählt wurden Manuelle Einstellung Zum Konfigurieren verschiedener Einstellungen für die einzelnen Dienste mit den Farbentasten Rot Grün Gelb Blau DTV 993 Dienstnummer Alte LCN EPG überspringen Kanal überspringen Sperre Dienstname SIT ...

Страница 131: ...e gelöscht sind E 1 2 3 4 E 1 2 3 4 Programm Einstellungen Einstellungen Analog Tuner Einstellung Sie können die Einstellungen für analoge TV Kanäle automatisch oder manuell neu konfigurieren Zusätzliche Suche Verwenden Sie dieses Menü um nach erfolgter Autoinstallation neue Kanäle hinzuzufügen Starten Sie die Kanalsuche nach dem Wählen von Farbsystem und Tonsystem Manuelle Einstellung Verwenden S...

Страница 132: ...enisch Lettisch Litauisch Niederländisch Norwegisch Polnisch Portugiesisch Russisch Schwedisch Slowakisch Slowenisch Spanisch Tschechisch Türkisch Ungarisch Untertitel Digitale Einstellungen Stellen Sie bis zu zwei bevorzugte Untertitelsprachen einschließlich Untertitel für Hörbehinderte für die Anzeige etwaiger Untertitel an ZUR BEACHTUNG Wenn ein Programm keine Untertiteldaten überträgt werden k...

Страница 133: ...e gewählte Variante sofort auf dem Display wiedergegeben Es ist nicht erforderlich ENTER zu drücken Im Prinzip wird für jede Sendung Videorecorder oder DVD Spieler Recorder der optimale Breitbildmodus WSS gewählt wenn Sie den SCREEN SIZE BILDSCHIRMGRÖSSE im Menü Einstellungen auf Ein einstellen ZUR BEACHTUNG Auch wenn SCREEN SIZE BILDSCHIRMGRÖSSE manuell wunschgemäß eingestellt wurde schaltet der ...

Страница 134: ...rückung Optionen Die digitale Rauschunterdrückung DNR sorgt für ein saubereres Bild Aus Starker Effekt Schwacher Effekt Automatischer Lautstärkeabgleich Lautst Abgleich Optionen Verschiedene Klangquellen besitzen nicht immer die gleiche Grundlautstärke wie z B bei einem Programm und seinen Werbespots Der automatische Lautstärkeabgleich reduziert dieses Problem durch Abgleichen der Pegel Dialog bet...

Страница 135: ...e p Die Kanalanzeige erscheint auf dem TV Drücken Sie vor dem Erlöschen der mehrere Sekunden lang angezeigten Kanalanzeige erneut p In der unteren rechten Ecke des Bildschirms wird einige Sekunden lang die Zeitinformation angezeigt Auch wenn Sie den TV Kanal wechseln kann die Zeitinformation mit den obigen Schritten 2 und 3 angezeigt werden ZUR BEACHTUNG Falls erfolgreich erfasst wird die Zeitinfo...

Страница 136: ... zum Einspeichern des Namens bitte ENDE wählen Sie können keine Kennungen ändern wenn die Eingangsquelle auf TV geschaltet ist 1 2 3 4 Input Skip Einstellungen Diese Einstellung ermöglicht das Überspringen des SCART HDMI oder RGB Eingangs im Wahlmenü für die Eingangsquelle INPUT1 SCART INPUT2 SCART INPUT4 HDMI INPUT5 HDMI INPUT6 HDMI INPUT7 RGB Ja Nein Farbsystem Einstellungen Hier können Sie auf ...

Страница 137: ...n des Breitbild Formats Sie können die Bildgröße wählen Drücken Sie SCREEN SIZE Das SCREEN SIZE BILDSCHIRMGRÖSSE Menü erscheint Drücken Sie SCREEN SIZE oder a b zum Wählen des gewünschten Menüpunkts ZUR BEACHTUNG Schließen Sie den PC vor dem Vornehmen von Einstellungen an Die wählbare Bildgröße ändert sich mit dem Eingangssignaltyp BEISPIEL 1 2 VOLL Das Bild füllt den Bildschirm aus KINO Für Bilde...

Страница 138: ...chronisierung erfolgreich beendet Falls die Meldung nicht erscheint war Auto Sync nicht möglich Unter Umständen kann Auto Sync auch scheitern wenn Automatische Synchronisierung erfolgreich beendet erscheint Auto Sync kann scheitern wenn das PC Bild eine niedrige Auflösung oder unscharfe schwarze Kanten aufweist oder während der Ausführung von Auto Sync bewegt wird Schließen Sie den PC unbedingt an...

Страница 139: ...es Eingangs PC Video das Regeln der Lautstärke und verschiedene andere Regel und Einstellmöglichkeiten was automatische programmierte Wiedergabe ermöglicht Verwenden Sie für die Anschlüsse ein gekreuztes Serielles RS 232C Steuerkabel überkreuzt im Fachhandel erhältlich ZUR BEACHTUNG Diese Bedienungsschritte sollten nur von Personen ausgeführt werden die mit der Verwendung von PCs vertraut sind Par...

Страница 140: ...and Befehl Parameter Steuerungsinhalt Bildlage H P O S _ H Position AV PC V P O S _ V Position AV PC C L C K _ Clock 0 180 P H S E _ _ Phase 0 40 BILDSCHIRMGRÖSSE W I D E 0 _ _ _ Toggle AV W I D E 1 _ _ _ 4 3 AV W I D E 2 _ _ _ KINO 14 9 AV W I D E 3 _ _ _ BREITBILD AV W I D E 4 _ _ _ VOLL AV W I D E 5 _ _ _ ZOOM AV W I D E 6 _ _ _ KINO AV W I D E 7 _ _ _ 4 3 PC W I D E 8 _ _ _ KINO PC W I D E 9 _...

Страница 141: ... Benutzung bei hohen und niedrigen Umgebungstemperaturen Wenn der TV bei niedrigen Temperaturen z B unbeheizter Raum Büro verwendet wird kann das Bild nachziehen oder leicht verzögert angezeigt werden Dies ist keine Fehlfunktion und der TV funktioniert wieder normal wenn sich die Temperaturen im Raum normalisieren Der TV nicht an einem warmen oder kalten Ort stehen lassen Der TV sollte auch nicht ...

Страница 142: ...hlen Wenn die Software aktualisiert worden ist erscheint zur Kontrolle die Meldung Neue Download Information gefunden Falls der TV den Update Service im Bereitschaftsmodus empfängt wird nach dem Einschalten eine Bestätigungsmeldung angezeigt Folgen Sie den Anleitungen auf dem Bildschirm 1 2 Ja Download sofort starten Ein Update dauert ungefähr eine Stunde Bei laufendem Download ist keine andere Be...

Страница 143: ... Cinch AV Eingang INPUT4 HDMI INPUT5 HDMI INPUT6 HDMI 3 5 mm Ø Klinkenbuchse INPUT7 15 pin Mini D sub 3 5 mm Ø Klinkenbuchse INPUT8 COMPONENT IN Y PB CB PR CR RCA Cinch AUDIO R L DIGITAL AUDIO OUTPUT SPDIF Digital Audioausgang optisch C I Common Interface EN50221 R206001 OUTPUT RCA Cinch AUDIO R L Kopfhörer 3 5 mm Ø Klinkenbuchse Audioausgang OSD Anzeigesprache Dänisch Deutsch Englisch Estnisch Fi...

Страница 144: ...geeigneten Annahmestelle Durch die richtige Entsorgung dieser Produkte und Batterien tragen Sie zur Schonung wertvoller Ressourcen bei und helfen nachteiligen Einflüssen auf die menschliche Gesundheit und die Umwelt vorzubeugen die bei unsachgemäßer Handhabung auftreten könnten Für nähere Informationen zur Sammlung und zum Recycling von Altgeräten und alten Batterien wenden Sie sich bitte an die z...

Страница 145: ...Notizen 47 Downloaded From TV Manual com Manuals ...

Страница 146: ...Notizen 48 Downloaded From TV Manual com Manuals ...

Страница 147: ...mpostazioni risparmio energetico 31 Impostazioni canale 32 Autoinstallazione 32 Impostazioni canale digitale 32 Impostazioni canale analogico 33 Password Impostazioni blocco parentale 34 Impostazioni lingua lingua sottotitoli multi audio 34 Utili funzioni per la visione 35 Selezione della dimensione dell immagine 35 Selezione automatica dimensione immagine WSS Segnalazione schermo Wide 35 Selezion...

Страница 148: ... fabbricante Il pannello LCD utilizzato in questo prodotto è fatto di vetro Quindi si può rompere se il prodotto cade o se viene colpito Se il pannello LCD si dovesse rompere fare a attenzione a non ferirsi con il vetro rotto Sorgenti di calore Mantenere il prodotto lontano dalle sorgenti di calore come termosifoni stufe caldaie e altri generatori di calore incluso amplificatori Per evitare incend...

Страница 149: ...è alcuna altra schermata di HOME MENU in corso h HOME MENU Schermata HOME MENU attivata disattivata 1 2 3 4 5 6 7 8 9 0 Q Tasti per utili operazioni 1 Sottopagina Pagina 20 Sottotitoli Attivare disattivare le lingue per i sottotitoli Pagina 20 e 34 k Mostra Televideo nascosto Pagina 20 3 Fermo immagine sospensione Premere per bloccare un immagine in movimento sullo schermo Televideo Arresta l aggi...

Страница 150: ...indicatore di modalità s illumina per circa un secondo e poi si spegne la preimpostazione del codice del fabbricante è stata completata EXIT DVDTOPMENU GUIDE EPG 4 5 6 7 8 9 0 P INFO 1 2 3 INFO SOURCE TV STB DVR VCR DVD SELECT CTRL HDD AV SELECTION CM SKIP DVD TOOLS SCREEN SIZE 1 2 3 NOTA Se per circa un minuto non viene eseguita alcuna operazione mentre l indicatore di modalità sta lampeggiando l...

Страница 151: ...506 AKAI 3 507 DAEWOO 508 GRUNDIG 1 509 GRUNDIG 2 510 GRUNDIG 3 511 GRUNDIG 4 512 HITACHI 1 513 HITACHI 2 514 HITACHI 3 515 JVC 1 516 JVC 2 517 JVC 3 518 JVC 4 519 JVC 5 520 LOEWE 1 521 LOEWE 2 522 MATSUI 523 ORION 524 PANASONIC 1 525 PANASONIC 2 526 PHILIPS 1 VIDEOREGISTRATORE 527 PHILIPS 2 528 PHILIPS 3 529 SANYO 530 SAMSUNG 1 531 SAMSUNG 2 532 SAMSUNG 3 533 SAMSUNG 4 534 SHARP 535 SONY 1 536 SO...

Страница 152: ... Quando in modalità videoregistratore i tasti del telecomando funzionano come segue 0 9 Funzionamento come tasti numerici Pk l Premere per selezionare i canali del sintonizzatore TV sul videoregistratore l PAUSA FERMO Imposta pause e fermo immagini p REC Avvio registrazione SOURCE a Accende e spegne il videoregistratore m REW Avanza rapidamente il nastro e consente la ricerca immagini n RIPRODUZIO...

Страница 153: ...VR TOP MENU DVD Quando viene premuto questo tasto compare il top menu DVD RETURN Quando viene visualizzato il menu DVD premere per ripristinare immediatamente la schermata precedente j RICERCA CAPITOLO Ogni volta che si preme si torna all inizio del capitolo precdente k RICERCA CAPITOLO Ogni volta che si preme si va all inizio del capitolo successivo m SCANDIRE Premere per andare indietro n RIPROD...

Страница 154: ...ppia D sono marchi della Dolby Laboratories TruSurround XT SRS e h il simbolo è un marchio dei laboratori di SRS Labs Inc La tecnologia TruSurround XT è registrata su licenza di SRS Labs Inc Il logo HD ready 1080P è un marchio registrato di EICTA Il logo DVB è un marchio registrato della Digital Video Broadcasting DVB project x v Colour e sono marchi della Sony Corporation 8 Downloaded From TV Man...

Страница 155: ...UDIO Terminale INPUT2 RGB Terminale INPUT1 RGB 7 8 9 10 11 Terminali INPUT3 PHONES cuffie Presa SERVICE Slot COMMON INTERFACE Terminale AC INPUT 12 13 14 15 16 RLS AVVERTENZA L eccessiva pressione acustica degli auricolari e delle cuffie può causare perdita dell udito RLS Room Light Sensor Sensore della luce della stanza Sensore del telecomando Indicatore ON Indicatore SLEEP Indicatore STANDBY Tas...

Страница 156: ... terminale AC INPUT Prima di mettersi all opera porre un materiale morbido sulla base su cui verrà appoggiato il televisione In questo modo si eviterà di danneggiare il prodotto ATTENZIONE Fissare lo stand nella direzione corretta Attenersi scrupolosamente alle istruzioni La scorretta installazione dello stand potrebbe causare la caduta del televisore 1 2 10 Telecomando g1 Cavo CA g2 Stand g1 Mors...

Страница 157: ...oni di conservazione Se si prevede di non usare il telecomando durante un lungo periodo di tempo togliere le batterie Quando si sostituiscono le batterie utilizzare batterie alcaline invece di batterie zinco carbone 1 2 3 Avvertenze per l uso del telecomando Evitare che il telecomando subisca colpi Inoltre evitare che il telecomando entri in contatto con liquidi e non collocarlo in ambienti altame...

Страница 158: ... rimosso le guarnizioni nere e le viti ATTENZIONE Utilizzare viti M6 che vanno in profondità da 12 mm a 15 mm dalla superficie di montaggio del televisore a schermo piatto Si veda la vista laterale illustrata a destra Fare attenzione a non ostruire l apertura per la ventilazione nella parte posteriore del televisore a schermo piatto Assicurarsi d installare il televisore a schermo piatto su una su...

Страница 159: ...utoinstallazione iniziale Pagina15 Impostazione lingua English Italiano Svenska Impostazione paese Austria A B G Finland FIN B G Greece GR B G Impostazione ricerca canale Ricerca analogica Ricerca digitale n o Congratulazioni Ora potete guardare la televisione Se necessario regolare l antenna per ottenere la massima ricezione del segnale Pagina 15 n o 13 Preparativi Accendere ed eseguire l autoins...

Страница 160: ...oi premere ENTER Premere c d per selezionare On e poi premere ENTER 1 2 3 4 5 Prima di accendere Raggruppare i cavi 14 Morsetto per il cavo Raccogliere i cavi con il morsetto Cavo CA Posizionare il televisore vicino alla presa CA di corrente e mantenere la spina a poca distanza Presa standard DIN45325 IEC 169 2 75 q cavo coassiale Per Regno Unito e Irlanda Inserire con cautela il modulo CA nello s...

Страница 161: ... NOTA Se spegnete il televisore dopo aver eseguitio la fase 4 non compare l assistente dell autoinstallazione iniziale La funzione autoinstallazione consente di eseguire nuovamente l installazione dal menu di Regolazione Pagina 32 L assistente per l autoinstallazione iniziale scomparirà se non utilizzate il televisore per 30 minuti prima di aver effettuato la ricerca dei canali nella fase 5 Contro...

Страница 162: ...Funzionamento giornaliero Accensione Spegnimento Accensione Spegnimento Premere a sul televisore Spegnere premendo a sul televisore Modalità di attesa In modalità di attesa Se il televisore è acceso potete metterlo in standby premendo a TV sul telecomando Ripresa dallo standby In standby premere a TV sul telecomando 1 2 3 4 5 6 7 8 TV INPUT 1 2 3 4 5 6 7 8 INPUT Stato indicatore del televisore Ind...

Страница 163: ...tali selezionare Sì I dati EPG devono essere catturati automaticamente mentre il televisore si trova in modalità di attesa Dopo aver impostato Sì potrebbe essere necessario del tempo per spegnere con il telecomando e ciò è dovuto al processo di ottenimento dei dati NOTA Se l alimentazione principale del televisore è spenta non è possibile ottenere i dati EPG Gamma visualizzazione L impostazione de...

Страница 164: ...l programma desiderato e poi premere ENTER NOTA Quando selezionate un programma al di fuori del corrente arco di tempo compare la schermata d impostazione programmata Pagina 19 5 1 2 3 Selezione di un programma Selezionare l arco di tempo Premere c d per selezionare l arco di tempo in cui si desidera ricercare Continuare a premere d per visualizzare i programmi nel successivo arco di tempo Selezio...

Страница 165: ...to è segnato con un icona NOTA Fare riferimento alle pagine 21 23 per il collegamento di dispositivi esterni 3 Annullamento della registrazione programmata Premere EPG Premere a b c d per selezionare il programma sull impostazione timer e poi premere ENTER Premere c d per selezionare Cancellare e poi premere ENTER Premere c d per selezionare Sì e poi premere ENTER Cancellazione utilizzando il tast...

Страница 166: ...icazione MHEG 5 inizia quando premete m Modello di schermata MHEG 5 Guardare la TV Televideo Che cosa è il televideo Il televideo trasmette pagine d informazione e di svago per televisori appositamente predisposti Il televisore riceve i segnali del televideo attraverso una rete televisiva e li trasforma in un formato grafico per la visualizzazione Notizie previsioni del tempo e informazioni sporti...

Страница 167: ... per il collegamento di un PC alla TV Introduzione ai collegamenti Il televisore è munito dei terminali come mostrati sotto Trovare il cavo corrispondente al terminale del televisore e collegare il dispositivo NOTA I cavi illustrati a pagina 21 24 sono disponibili in commercio E Quando si utilizza un cavo S video è necessario collegare anche un cavo audio R L 21 Dispositivo HDMI Pagina 22 Console ...

Страница 168: ...76i 576p 480i 480p 1080i 720p 1080p Si veda pagina 42 per la compatibilità del segnale PC Collegamento componente Godrete di una precisa riproduzione del colore e di un alta qualità d immagini attraverso il terminale INPUT8 quando collegate un lettore registratore DVD o un altro dispositivo Y PB CB L R PR CR COMPONENT AUDIO Collegamento S VIDEO VIDEO Potete utilizzare un terminale INPUT3 quando co...

Страница 169: ...del tasto WYSIWYR è possibile avviare automaticamente la registrazione premendo il tasto WYSIWYR Trasferimento di canali preselezionati Trasferimento automatico delle informazioni preselezionate del canale dal sintonizzatore del televisore a quello dell apparecchiatura audiovisiva collegata per es videoregistratore tramite il terminale INPUT2 NOTA Per dettagli fare riferimento al manuale d istruzi...

Страница 170: ...Prima del collegamento Impostazione uscita audio digitale Dopo aver collegato un amplificatore con ingresso audio digitale e altoparlanti esterni come mostrato dovete impostare un formato di uscita audio compatibile con il programma che state guardando o con il dispositivo collegato Andare su HOME MENU Opzioni Uscita audio digitale selezionare PCM o Dolby Digital E 24 Cavo audio ottico Cavo audio ...

Страница 171: ...ssori che vengono forniti Solitamente sono disponibili presso il proprio rivenditore Inserimento della scheda smart nel modulo CA Inserire la scheda smart con il lato dove c è il chip di contatto color oro di fronte al lato del modulo CA con il logo del provider nel modulo CA Osservare la direzione della freccia stampata sulla scheda smart Inserimento del modulo CA nello slot Interfaccia comune In...

Страница 172: ...te selezionare quale dispositivo HDMI azionare utilizzando il tasto HDMI CTRL NOTA Quando utilizzate HDMI CONTROL assicuratevi di utilizzare un cavo HDMI certificato Puntare il telecomando control il televisore non verso il dispositivo HDMI collegato È possibile che si verifichino disturbi video a seconda del tipo del cavo HDMI utilizzato Assicurarsi di utilizzare un cavo HDMI certificato Utilizza...

Страница 173: ...poi premere ENTER Accensione automatica Se è attivato la funzione riproduzione con tasto singolo è attivata Quando il televisore è in modalità di attesa si accende automaticamente e riproduce l immagine dalla sorgente HDMI 1 2 3 4 5 Impostazione HDMI CONTROL Ripetere le fasi dalla 1 alla 3 in HDMI CONTROL Premere a b per selezionare Accensione automatica e poi premere ENTER Premere c d per selezio...

Страница 174: ...l tipo di media Premere HDMI CTRL Premere a b per selezionare Cambio media e poi premere ENTER 1 2 1 2 3 1 2 3 1 2 Selezionare il supporto desiderato per esempio registratore DVD o HDD Il tipo di supporto cambia ogni volta che si preme ENTER NOTA Questa funzione potrebbe non funzionare a seconda dei dispositivi di registrazione collegati Ascolto con il sistema suono AV Pioneer Potete optare di asc...

Страница 175: ...MENU GUIDE EPG ENTER HOME MENU MENU RETURN CTRL HDMI RECSTOP HDD AV SELECTION CM SKIP DVD TOOLS SCREEN SIZE SOURCE TV STB DVR VCR DVD SELECT TV DTV RADIO 1 2 3 4 5 6 7 8 TV INPUT 4 5 6 7 8 9 1 2 3 0 P INFO INFO P CHRETURN DVDTOPMENU GUIDE EPG CTRL HDMI RECSTOP HDD AV SELECTION CM SKIP DVD TOOLS SCREEN SIZE SOURCE TV STB DVR VCR DVD SELECT 1 Immagine Suono Controllo alimentazione Regolazione Opzion...

Страница 176: ...film originariamente codificata a 24 o 25 frame per secondo a seconda della frequenza verticale l analizza e poi ricrea ogni frame fissi del film per una qualità immagine ad alta definizione Contrasto attivo Regola automaticamente il contrasto di un immagine in base alla scena 3D Y C Fornisce immagini ad alta qualità con minimo dot crawl e rumore video rilevando i cambiamenti nell immagine Off La ...

Страница 177: ...CTION 1 2 Impostazioni suono Bilanc Acuti Surround Reset 0 0 15 S 15 D Off Bassi 0 15 15 DINAMICO STANDARD Per un immagine ad alta definizione in una stanza con normale luminosità FILM Per guardare un film in una stanza buia GIOCO Per giocare con i videogiochi PC Per PC x v Colour Produce colore realistico sulla schermata TV se non vi è alcun altro segnale UTENTE Vi permette di personalizzare le i...

Страница 178: ...SIT 1 DTV 999 HD Monosco Blocco CANALE Saltare EPG Saltare Riordina Premere a b per selezionare il servizio desiderato Premere il tasto colorato sul telecomando che corrisponde alla voce che si desidera configurare Il segno indicata che il funzionamento è stato impostato su on Ogni volta che il tasto colorato viene premuto potete attivare disattivare il funzionamento E E E 1 2 Impostazioni canale ...

Страница 179: ... tutti i canali desiderati E 1 2 3 4 E 1 2 3 4 Impostazione programma Regolazione Impostazione analogica Potete riconfigurare i canali TV analogica automaticamente o manualmente Ricerca aggiuntiva Utilizzare questo menu per aggiungere automaticamente nuovi canali dopo che l autoinstallazione è stata completata Inizio ricerca canali dopo la selezione del sistema colore e del sistema suono Regolazio...

Страница 180: ... russo slovacco sloveno spagnolo svedese turco Sottotitoli Impostazione digitale È possibile impostare fino a due lingue per i sottotitoli compresi sottotitoli per i non udenti da visualizzare se i sottotitoli sono disponibili NOTA I sottotitoli non verranno visualizzati se il servizio non contiene informazioni per i sottotitoli Lingua audio digitale Opzioni È possibile impostare fino a tre lingue...

Страница 181: ...grammi possono comparire barre sulla parte superiore e su quella inferiore FULL Visualizzazione con un immagine in sovrascansione Taglia tutti i lati dello schermo Sottoscansione Visualizzazione con un immagine in sottoscansione solo quando si riceve un segnale 720p Visualizzazione con l immagine ad alta definizione regolata di forma ottimale Con alcuni programmi possono comparire barre sulla part...

Страница 182: ...Opzioni Riduzione del rumore Digital Noise Reduction produce un immagine più chiara Off Alto Basso Regolazione automatica del volume Volume automatico Opzioni A volte fonti audio diverse non hanno lo stesso volume come per esempio un programma e i suoi intervalli pubblicitari Il controllo automatico del volume riduce questo problema diminuendo la differenza tra i livelli Enfatizzazione del dialogo...

Страница 183: ...remere p La visualizzazione del canale comparirà sul televisore Premere di nuovo p entro i pochi secondi in cui la visualizzazione canale è sullo schermo Le informazioni inerenti il tempo verranno mostrate nell angolo in basso a destra dello schermo per vari secondi Anche quando cambiare il canale TV potete visualizzare le informazioni orari con le fasi 2 e 3 i cui sopra NOTA Se acquisite corretta...

Страница 184: ...iore a sei caratteri selezionare FINE per impostare il nome Non è possibile cambiare le etichette se la fonte d ingresso è TV 1 2 3 4 Ingresso salto Regolazione Questa impostazione consente di saltare l ingresso SCART HDMI o RGB nell operazione Selezione fonte d ingresso INPUT1 SCART INPUT2 SCART INPUT4 HDMI INPUT5 HDMI INPUT6 HDMI INPUT7 RGB Sì No Impostazioni del sistema colore Potete cambiare i...

Страница 185: ...bile selezionare la dimensione dell immagine Premere SCREEN SIZE Compare il menu SCREEN SIZE DIMENSIONE SCHERMO Premere SCREEN SIZE o a b per selezionare una voce desiderata nel menu NOTA Collegare il PC prima di effettuare le regolazioni La dimensione selezionabile dell immagine può cambiare con il tipo di segnale immesso ESEMPIO 1 2 FULL Un immagine riempie completamente lo schermo CINEMA Per le...

Страница 186: ... la scritta Sincronizzazione automatica terminata In caso contrario Sinc auto non riuscita La Sinc auto può non riuscire anche se compare Sincronizzazione automatica terminata La Sinc auto può non riuscire se un immagine del PC ha una bassa risoluzione bordi poco chiari neri o se è stata spostata con la Sinc auto in corso Assicurarsi di collegare il PC al televisore e accenderlo prima di avviare l...

Страница 187: ...e selezionare il segnale d ingresso PC video regolare il volume ed eseguire numerose altre regolazioni e impostazioni abilitando la riproduzione automatica programmata Utilizzare un cavo di controllo seriale RS 232C incrociato disponibile in commercio per i collegamenti NOTA Questo sistema operativo dovrebbe essere utilizzato da una persona che sappia usare bene il PC Parametro Immettere i valori ...

Страница 188: ...ARAMETRO CONTROLLO CONTENUTI POSIZIONE H P O S _ POSIZIONE H AV PC V P O S _ POSIZIONE V AV PC C L C K _ CLOCK 0 180 P H S E _ _ FASE 0 40 DIMENSIONE SCHERMO W I D E 0 _ _ _ COMMUTAZIONE AV W I D E 1 _ _ _ 4 3 AV W I D E 2 _ _ _ CINEMA 14 9 AV W I D E 3 _ _ _ WIDE AV W I D E 4 _ _ _ FULL AV W I D E 5 _ _ _ ZOOM AV W I D E 6 _ _ _ CINEMA AV W I D E 7 _ _ _ 4 3 PC W I D E 8 _ _ _ CINEMA PC W I D E 9...

Страница 189: ...a esterna si espande e si restringe leggermente a causa dei cambi di temperatura Ciò non influisce sulle prestazioni del televisore Precauzioni circa l uso in ambienti con alte o basse temperature Quando il televisore viene utilizzato in ambienti con bassa temperatura per es stanza ufficio l immagine può lasciare tracce o apparire leggermente ritardata Non si tratta di un guasto il televisore funz...

Страница 190: ...del software Potete selezionare il metodo di aggiornamento Se il software è aggiornato compare il messaggio È stata trovata nuova informazione da scaricare Se il televisore riceve il servizio di aggiornamento quando si trova nella modalità di attesa dopo la ripresa comparirà un messaggio di conferma Seguire i prompt della schermata 1 2 Sì Inizia subito lo scaricamento L aggiornamento richiede circ...

Страница 191: ...itor ingresso Y C AV Link ingresso RGB INPUT3 S VIDEO ingresso Y C pin RCA ingresso AV INPUT4 HDMI INPUT5 HDMI INPUT6 HDMI presa da Ø 3 5 mm INPUT7 15 pin mini D sub presa da Ø 3 5 mm INPUT8 COMPONENT IN Y PB CB PR CR RCA pin AUDIO R L DIGITAL AUDIO OUTPUT Uscita audio digitale SPDIF C I Interfaccia comune EN50221 R206001 OUTPUT RCA pin AUDIO R L Cuffie Presa da Ø 3 5mm Uscita audio Lingua dell OS...

Страница 192: ...la propria legislazione nazionale Smaltendo correttamente questi prodotti e le batterie contribuite al recupero di preziose risorse e prevenite potenziali effetti negativi sulla salute umana e sull ambiente che sorgerebbero invece in seguito allo scorretto trattamento di questi rifiuti Per maggiori informazioni inerenti la raccolta e il riciclaggio dei vecchi prodotti e batterie si prega di contat...

Страница 193: ...Promemoria 47 Downloaded From TV Manual com Manuals ...

Страница 194: ...Promemoria 48 Downloaded From TV Manual com Manuals ...

Страница 195: ...31 Geluidsinstellingen 31 Stroombesparingsinstellingen 31 Kanaalinstellingen 32 Automatische Installatie 32 Instellingen voor digitale kanalen 32 Instellingen voor analoge kanalen 33 Wachtwoord Kinderbeveiliging instellingen 34 Taalinstellingen taal ondertiteling multi audio 34 Handige weergavefuncties 35 Kiezen van de beeldgrootte 35 Automatisch selecteren van de WSS breedbeeld signalering beeldg...

Страница 196: ... apparaat is gemaakt van glas Het paneel kan breken wanneer het apparaat valt of als er hard tegen gestoten wordt Wees voorzichtig dat u geen letsel oploopt door de glassplinters wanneer het LCD paneel zou breken Warmtebronnen Houd het apparaat uit de buurt van warmtebronnen zoals verwarmingsradiators haarden kachels en andere toestellen die warmte afgeven inclusief versterkers Om brand te voorkom...

Страница 197: ...an verborgen teletekst Blz 20 3 Bevriezen Vasthouden Voor het stopzetten van een bewegend beeld op het scherm Teletekst Automatisch bijwerken van de teletekstpagina s stoppen of de blokkeerfunctie opheffen m Teletekst ATV Voor het weergeven van analoge teletekst Blz 20 DTV Voor het selecteren van MHEG 5 en teletekst voor DTV Blz 20 P INFO Druk op deze toets om de programma informatie die met de di...

Страница 198: ...pleeg de fabrikantcodelijst om de juiste code te weten te komen De functie indicator licht ongeveer één seconde op en gaat dan uit het instellen van de fabrikantcode is voltooid EXIT DVDTOPMENU GUIDE EPG 4 5 6 7 8 9 0 P INFO 1 2 3 INFO SOURCE TV STB DVR VCR DVD SELECT CTRL HDD AV SELECTION CM SKIP DVD TOOLS SCREEN SIZE 1 2 3 OPMERKING Als u gedurende ongeveer één minuut geen bedieningshandeling ve...

Страница 199: ...I 3 507 DAEWOO 508 GRUNDIG 1 509 GRUNDIG 2 510 GRUNDIG 3 511 GRUNDIG 4 512 HITACHI 1 513 HITACHI 2 514 HITACHI 3 515 JVC 1 516 JVC 2 517 JVC 3 518 JVC 4 519 JVC 5 520 LOEWE 1 521 LOEWE 2 522 MATSUI 523 ORION 524 PANASONIC 1 525 PANASONIC 2 526 PHILIPS 1 Videorecorder 527 PHILIPS 2 528 PHILIPS 3 529 SANYO 530 SAMSUNG 1 531 SAMSUNG 2 532 SAMSUNG 3 533 SAMSUNG 4 534 SHARP 535 SONY 1 536 SONY 2 537 SO...

Страница 200: ...schreven 0 9 Deze toetsen werken als cijfertoetsen Pk l Druk op deze toetsen om de kanalen van de TV tuner op de videorecorder te selecteren l PAUZE STILSTAAND BEELD Druk op deze toets om het afspelen te pauzeren en naar een stilstaand beeld te kijken p OPNEMEN Druk op deze toets om te beginnen met opnemen SOURCE a Druk op deze toets om de videorecorder in en uit te schakelen m TERUGSPOELEN Druk o...

Страница 201: ...er DVR in en uit te schakelen DVD TOP MENU Wanneer u op deze toets drukt verschijnt het DVD hoofdmenu RETURN Wanneer het DVD menu wordt weergegeven kunt u op deze toets drukken om meteen naar het vorige scherm terug te keren j HOOFDSTUK ZOEKEN Wanneer u op deze toets drukt gaat u terug naar het begin van het vorige hoofdstuk k HOOFDSTUK ZOEKEN Wanneer u op deze toets drukt gaat u vooruit naar het ...

Страница 202: ...ijn handelsmerken van Dolby Laboratories TruSurround XT SRS en het h symbool zijn handelsmerken van SRS Labs Inc TruSurround XT technologie is geinkorporeerd met verlof van de licentiehouder SRS Labs Inc Het HD ready 1080P logo is een handelsmerk van EICTA Het DVB logo is het gedeponeeerde handelsmerk van Digital Video Broadcasting DVB project x v Colour en zijn handelsmerken van Sony Corporation ...

Страница 203: ...ting INPUT1 RGB aansluiting 7 8 9 10 11 INPUT3 aansluitingen PHONES hoofdtelefoon SERVICE aansluiting COMMON INTERFACE sleuf AC INPUT aansluiting 12 13 14 15 16 WAARSCHUWING Een te hoog ingesteld volume van de oortelefoon of hoofdtelefoon kan resulteren in gehoorverlies HOME MENU toets a Stroomvoorziening toets ik l Volumetoetsen Pk l Programma kanaal toetsen b Ingangsbron toets TV Voorkant RLS RL...

Страница 204: ... AC INPUT aansluiting voordat u begint met het bevestigen of losmaken van de standaard Leg een deken of een zacht kussen op de ondergrond en leg hierop de TV voordat u met de werkzaamheden begint Dit om beschadigingen te voorkomen VOORZICHTIG Bevestig de standaard in de juiste richting Volg altijd de aanwijzingen op Bij een verkeerde montage van de standaard kan de TV omvallen 10 Afstandsbediening...

Страница 205: ...lg van de condities waarbij de batterijen zijn opgeslagen Als u de afstandsbediening langere tijd niet denkt te gebruiken moet u de batterijen eruit nemen Bij vervangen van de batterijen moeten alkalibatterijen en geen zinkkoolbatterijen worden gebruikt 1 2 3 Opmerkingen betreffende de afstandsbediening Stel de afstandsbediening niet aan harde schokken bloot Let er tevens op dat er geen vloeistof ...

Страница 206: ...n de zijkant rechts hiernaast Let op dat u de ventilatieopening aan de achterkant van de vlakscherm TV niet afsluit Zorg dat de vlakscherm TV op een vlak oppervlak wordt geïnstalleerd want het LCD paneel dat in dit product wordt gebruikt is gemaakt van glas De andere schroefgaten dan die getoond in de afbeeldingen hierboven mogen alleen voor de voorgeschreven producten worden gebruikt Gebruik deze...

Страница 207: ...he installatie bij eerste gebruik uit Blz 15 Instelling van de taal English Italiano Svenska Instelling van het land Austria A B G Finland FIN B G Greece GR B G Instelling voor zoeken van kanalen Analoog zoeken Digitaal zoeken n o Gefeliciteerd U kunt nu TV kijken Richt indien nodig de antenne om een maximale signaalsterkte te verkrijgen Blz 15 n o 13 Voorbereidingen Inschakelen en automatische in...

Страница 208: ...an op ENTER Druk op c d om Aan te selecteren en druk dan op ENTER 1 2 3 4 5 Voordat u de stroom inschakelt Bundelen van de kabels 14 Kabelklem Bundel de kabels met de klem Netsnoer Plaats de TV in de buurt van het stopcontact en zorg dat de netstekker gemakkelijk bereikbaar is Standaard DIN45325 stekker IEC 169 2 75 q coaxiale kabel Voor Groot Brittannië en Ierland Steek de CA module voorzichtig i...

Страница 209: ...om op de TV uitschakelt nadat u stap 4 hebt uitgevoerd zal de assistent voor automatische installatie bij eerste gebruik niet verschijnen U kunt de automatische installatiefunctie opnieuw uitvoeren vanaf het Instellingen menu Blz 32 De assistent voor automatische installatie bij eerste gebruik wordt uitgeschakeld als u gedurende 30 minuten geen bedieningshandelingen op de TV uitvoert voordat u beg...

Страница 210: ...asisbediening In uitschakelen In uitschakelen van de stroom Druk op a van de TV Schakel uit door op a van de TV te drukken Standby modus In de ruststand standby zetten Als de TV ingeschakeld is kunt u het apparaat in de ruststand standby zetten door op a TV van de afstandsbediening te drukken Inschakelen vanuit de ruststand standby Druk in de ruststand standby op a TV van de afstandsbediening 1 2 ...

Страница 211: ...e zenders wilt gebruiken selecteert u Ja De EPG gegevens worden automatisch ontvangen wanneer de TV in de ruststand standby staat Nadat Ja is ingesteld kan het even duren wanneer de stroom met de afstandsbediening wordt uitgeschakeld als gevolg van de data opname OPMERKING Als de hoofdstroomvoorziening van de TV wordt uitgeschakeld worden de EPG gegevens niet ontvangen Instelling displaybereik Met...

Страница 212: ... AM Vandaag Druk op a b om het gewenste programma te selecteren en druk dan op ENTER OPMERKING Wanneer u een programma selecteert dat buiten de huidige tijdsperiode is zal het timerinstelscherm verschijnen Blz 19 5 1 2 3 Een programma kiezen Selecteer de tijdsperiode Druk op c d om de tijdsperiode te selecteren waarin u wilt zoeken E 1 TV kijken Kiezen van een programma met EPG Basisbediening In d...

Страница 213: ...TV programma wordt met een pictogram gemarkeerd OPMERKING Zie blz 21 23 voor het aansluiten van externe apparaten 3 Annuleren van een timeropname Druk op EPG Druk op a b c d om het programma in de timerinstellingen te selecteren en druk dan op ENTER Druk op c d om Annuleren te selecteren en druk dan op ENTER Druk op c d om Ja te selecteren en druk dan op ENTER Annuleren met behulp van de Blauwe to...

Страница 214: ...orbeeld van MHEG 5 scherm TV kijken Teletekst Wat is teletekst Teletekstuitzendingen bestaan uit pagina s met informatie die op hiervoor geschikte TV s kunnen worden weergegeven Uw TV kan teletekstsignalen ontvangen die door TV zenders worden uitgezonden en deze vervolgens decoderen zodat zij in grafisch formaat kunnen worden weergegeven Nieuws weerberichten sportinformatie financiële informatie e...

Страница 215: ...n van een PC op de TV Inleiding tot de aansluitingen De TV is uitgerust met de hieronder aangegeven aansluitingen Gebruik een kabel die geschikt is voor de aansluiting op de TV en sluit de apparatuur aan OPMERKING De kabels afgebeeld op blz 21 24 zijn los verkrijgbare onderdelen E Bij gebruik van een S videokabel moet u ook een audiokabel R L aansluiten 21 HDMI apparaat blz 22 Videospelconsole of ...

Страница 216: ... 1080p Zie blz 42 voor de compatibiliteit van de PC signalen Component verbinding U kunt genieten van een accurate kleurweergave en topkwaliteit beelden via de INPUT8 aansluiting wanneer u hierop een DVD speler recorder of andere apparatuur aansluit Y PB CB L R PR CR COMPONENT AUDIO S VIDEO VIDEO verbinding U kunt de INPUT3 aansluiting gebruiken voor het aansluiten van een videospelconsole camcord...

Страница 217: ...der een WYSIWYR toets heeft kunt u automatisch beginnen met opnemen door op de WYSIWYR toets te drukken Verzenden van de gegevens De kanaalinformatie van de tuner van de TV wordt automatisch via de INPUT2 aansluiting naar de aangesloten audiovisuele apparatuur bijv een videorecorder gezonden OPMERKING Raadpleeg de gebruiksaanwijzingen van de externe apparatuur voor nadere bijzonderheden De i o lin...

Страница 218: ...ers Na het aansluiten Instelling voor de digitale audio uitgang Nadat een versterker met een digitale audio ingang en externe luidsprekers op de afgebeelde wijze zijn aangesloten moet u een audio uitgangsformaat instellen dat compatibel is met het programma waarnaar u kijkt of het apparaat dat is aangesloten Ga naar HOME MENU Opties Digitale audio uitgang selecteer PCM of Dolby Digital E 24 Optisc...

Страница 219: ...et logo op de CA module moet naar voren gekeerd zijn weg van de achterkant van de TV Druk niet te hard tegen de module Wees voorzichtig dat de module niet wordt verbogen 1 2 Controleren van de CA module informatie OPMERKING Controleer of de CA module juist is geplaatst Dit menu is alleen bij digitale zenders beschikbaar Druk op h om het HOME MENU scherm weer te geven Druk op a b om Digitale instel...

Страница 220: ...et de HDMI CTRL toets kunt u kiezen welk HDMI apparaat u wilt bedienen OPMERKING Bij gebruik van HDMI CONTROL moet u een goedgekeurde HDMI kabel gebruiken Richt de afstandsbediening naar de TV en niet naar het aangesloten HDMI apparaat Er kan videoruis optreden afhankelijk van het gebruikte type HDMI kabel Zorg dat u een goedgekeurde HDMI kabel gebruikt Via dit systeem kunnen drie HDMI opnameappar...

Страница 221: ...matisch inschakelen Als deze functie is geactiveerd is de één toets weergave ingeschakeld Wanneer de TV in de ruststand standby staat zal deze automatisch worden ingeschakeld en het beeld van een HDMI bron weergeven 1 2 3 4 5 HDMI CONTROL instelling Herhaal de stappen 1 t m 3 in HDMI CONTROL Druk op a b om Automatisch inschakelen te selecteren en druk dan op ENTER Druk op c d om Aan te selecteren ...

Страница 222: ...e selecteren en druk dan op ENTER 1 2 1 2 3 1 2 3 1 2 Selecteer het gewenste medium zoals DVD recorder of HDD Het mediatype verandert telkens wanneer u op ENTER drukt OPMERKING Deze functie werkt mogelijk niet afhankelijk van de aangesloten opnameapparaten Luisteren met het Pioneer AV geluidssysteem Indien gewenst kunt u het TV geluid ook alleen via het Pioneer AV geluidssysteem weergeven Druk op ...

Страница 223: ...de bedieningsaanduiding Het gidsdisplay onderaan op het scherm toont de bediening via het OSD scherm Keuze Enter Einde Terug De bovenstaande balk geeft aan welke toetsen van de afstandsbediening u kunt gebruiken De balk verandert overeenkomstig de menu instelling TV DTV RADIO 1 2 3 4 5 6 7 8 TV INPUT 4 5 6 7 8 9 1 2 3 0 P INFO INFO P CHRETURN EXIT DVDTOPMENU GUIDE EPG ENTER HOME MENU MENU RETURN C...

Страница 224: ...al d w z oorspronkelijk opgenomen met 24 of 25 frames per seconde afhankelijk van de verticale frequentie detecteren waarna deze geanalyseerd wordt en elk beeld zodanig wordt weergegeven dat een beeldkwaliteit met hoge definitie wordt verkregen Actief contrast Hiermee wordt het contrast van een beeld automatisch afgesteld overeenkomstig de scène 3D Y C Via detectie van de veranderingen in het beel...

Страница 225: ...enuscherm door op AV SELECTION te drukken 1 2 Geluidsinstellingen Balans Hoog Surround Reset 0 0 15 L 15 R Uit Laag 0 15 15 DYNAMISCH STANDAARD Voor een goed gedefinieerd beeld in een normaal verlichte kamer FILM Voor het kijken naar een film in een donker gemaakte kamer SPEL Voor het spelen van videospelletjes PC Voor de PC x v Colour Voor een ongekend realistische weergave van de kleuren op het ...

Страница 226: ...nstelling wordt op het scherm aangegeven Programma instellen Instellingen Digitale instelling U kunt de instellingen voor de DTV services automatisch of handmatig maken Extra zoeken Gebruik dit menu om automatisch nieuwe services toe te voegen nadat de automatische installatie is voltooid Handmatig zoeken Voor het toevoegen van services binnen een bepaalde frequentieband Voer de frequentie met de ...

Страница 227: ...2 3 4 E 1 2 3 4 Programma instellen Instellingen Analoge instelling U kunt de instellingen voor de analoge TV kanalen automatisch of handmatig maken Extra zoeken Gebruik dit menu om automatisch nieuwe kanalen toe te voegen nadat de automatische installatie is voltooid Start met het zoeken van kanalen nadat u het kleursysteem en het geluidssysteem hebt geselecteerd Manuele instelling Gebruik dit me...

Страница 228: ...eds Turks Ondertiteling Digitale instelling U kunt twee voorkeurstalen voor de ondertiteling instellen inclusief ondertiteling voor slechthorenden om weer te geven wanneer er ondertiteling beschikbaar is OPMERKING Er is geen ondertiteling als het zendersignaal geen ondertitelingsinformatie bevat Digitale audiotaal Opties U kunt drie voorkeurstalen voor multi audio instellen om weer te geven wannee...

Страница 229: ... er balken aan de boven en onderkant van het beeld zijn CINEMA Voor 14 9 letterbox beelden Bij sommige programma s kunnen er balken aan de boven en onderkant van het beeld zijn VOLLEDIG Met een Overscan beeld weergeven Alle zijden van het beeld worden afgesneden Underscan Met een Underscan beeld weergeven allleen bij ontvangst van een 720p signaal Met het hoge definitie beeld optimaal afgesteld we...

Страница 230: ...isonderdrukking functie zorgt voor een scherper beeld Uit Hoog Laag Automatische volume instelling Autom Volume Opties Verschillende geluidsbronnen hebben soms niet hetzelfde volumeniveau zoals een TV programma en de reclame die er tussen is Met automatische volumeregeling kunt u dit probleem verminderen door de niveaus aan elkaar aan te passen Benadrukken van de dialoog Heldere stem Opties Deze f...

Страница 231: ...t op de TV Druk nog een keer op p binnen een paar seconden nadat het kanaaldisplay op het scherm is verschenen De tijdinformatie wordt een paar seconden in de rechter benedenhoek van het scherm aangegeven Wanneer u een ander TV kanaal kiest kunt u de tijdinformatie opnieuw weergeven door de bovenstaande stappen 2 en 3 opnieuw uit te voeren OPMERKING Indien juist ontvangen zal de tijdinformatie in ...

Страница 232: ...eert u EINDE om de naam in te stellen U kunt geen namen veranderen als de ingangsbron TV is 1 2 3 4 Ingang overslaan Instellingen Gebruik deze functie om de SCART HDMI of RGB ingang over te slaan bij de Ingangsbronkeuze INPUT1 SCART INPUT2 SCART INPUT4 HDMI INPUT5 HDMI INPUT6 HDMI INPUT7 RGB Ja Nee Kleursysteeminstellingen U kunt het kleursysteem veranderen naar het systeem dat compatibel is met h...

Страница 233: ...en Druk op SCREEN SIZE Het SCREEN SIZE SCHERMFORMAAT menu verschijnt Druk op SCREEN SIZE of a b om het gewenste onderdeel in het menu te selecteren OPMERKING Sluit de PC aan voordat u begint met het maken van de instellingen De beschikbare beeldgrootten variëren afhankelijk van het ingangssignaaltype VOORBEELD 1 2 VOLLEDIG Het beeld vult het volledige scherm CINEMA Voor 14 9 letterbox beelden Bij ...

Страница 234: ...ces afgesloten Indien niet dan is Auto Sync mislukt Auto Sync kan toch mislukt zijn ook al verschijnt het bericht Auto Sync met succes afgesloten Auto Sync kan mislukken als het PC beeld een lage resolutie heeft als er onduidelijke zwarte randen zijn of als het beeld wordt verplaatst terwijl Auto Sync wordt uitgevoerd U moet de PC op de TV aansluiten en daarna inschakelen voordat u Auto Sync start...

Страница 235: ... de PC het ingangssignaal PC video kiezen het volume instellen en tevens diverse andere afstellingen en instellingen maken zodat u de beschikking hebt over automatische geprogrammeerde weergave Gebruik een RS 232C seriële bedieningskabel cross type los verkrijgbaar voor het maken van de verbinding OPMERKING De diverse instellingen op de PC moeten worden gemaakt door een persoon die vertrouwd is me...

Страница 236: ...N FUNCTIE COMMANDO PARAMETER INHOUD VAN DE GEKOZEN FUNCTIE POSITIE H P O S _ H POSITIE AV PC V P O S _ V POSITIE AV PC C L C K _ KLOK 0 180 P H S E _ _ FASE 0 40 SCHERMFORMAAT W I D E 0 _ _ _ BEURTELINGS KIEZEN AV W I D E 1 _ _ _ 4 3 AV W I D E 2 _ _ _ CINEMA 14 9 AV W I D E 3 _ _ _ BREEDBEELD AV W I D E 4 _ _ _ VOLLEDIG AV W I D E 5 _ _ _ ZOOM AV W I D E 6 _ _ _ CINEMA AV W I D E 7 _ _ _ 4 3 PC W...

Страница 237: ...ratuur Dit is niet van invloed op de prestatie van de TV Belangrijke informatie betreffende het gebruik in warme en koude ruimten Wanneer de TV in een koude ruimte wordt gebruikt bijv in een kantoor met een lage temperatuur kunnen er nabeelden zijn of kan het beeld enigszins vertraagd zijn Dit verschijnsel duidt niet op een storing en de TV zal weer normaal werken wanneer de temperatuur hoger word...

Страница 238: ...schikbaar is verschijnt het bericht Nieuwe downloadinformatie gevonden Als de TV een update service ontvangt terwijl deze in de ruststand standby staat zal er een bevestigingsmelding verschijnen wanneer het apparaat wordt ingeschakeld Volg de instructies die op het scherm verschijnen 1 2 Ja Begin onmiddellijk met downloaden Het updaten duurt ongeveer één uur Tijdens het downloaden kunt u geen ande...

Страница 239: ...ink RGB ingang INPUT3 S VIDEO Y C ingang RCA tulpstekkerbus AV ingang INPUT4 HDMI INPUT5 HDMI INPUT6 HDMI Ø 3 5 mm aansluitbus INPUT7 15 pins mini D sub Ø 3 5 mm aansluitbus INPUT8 COMPONENT IN Y PB CB PR CR RCA tulpstekkerbus AUDIO R L DIGITAL AUDIO OUTPUT Optische SPDIF digitale audio uitgang C I gemeenschappelijk interface EN50221 R206001 OUTPUT RCA tulpstekkerbus AUDIO R L Hoofdtelefoon Ø 3 5 ...

Страница 240: ...enkomstig de plaatselijke wetgeving Door deze producten en batterijen op een verantwoorde manier weg te gooien helpt u verspilling van waardevolle grondstoffen tegen te gaan en voorkomt u potentiële negatieve effecten op de menselijke gezondheid en het milieu die anders zouden kunnen ontstaan door het verkeerd verwerken van het afval Voor verdere informatie over de inzameling en recycling van oude...

Страница 241: ...Memo 47 Downloaded From TV Manual com Manuals ...

Страница 242: ...Memo 48 Downloaded From TV Manual com Manuals ...

Страница 243: ...sico 30 Ajustes de imagen 30 AV SELECTION 31 Ajustes del audio 31 Ajustes de ahorro de energía 31 Ajustes de canal 32 Autoinstalación 32 Ajustes de canal digital 32 Ajustes de canal analógico 33 Ajustes de Contraseña Bloqueo de los padres 34 Ajustes del idioma idioma subtítulos y audio múltiple 34 Funciones de visualización útiles 35 Selección de tamaño de la imagen 35 Selección automática del tam...

Страница 244: ...lo especifique La pantalla LCD usada en este aparato es de cristal Por lo tanto puede romperse si el televisor se cae o recibe un golpe Si se rompe la pantalla LCD tenga cuidado de no hacerse daño con los cristales rotos Fuentes de calor Mantenga el aparato alejado de fuentes de calor tales como radiadores calefactores estufas y cualquier artefacto que genere calor incluidos los amplificadores Par...

Страница 245: ...stá activa ninguna otra pantalla de HOME MENU 1 2 3 4 5 6 7 8 9 0 Botones para operaciones útiles 1 Subpágina Página 20 Subtítulos Activar desactivar idiomas del teletexto Páginas 20 y 34 k Presentación de teletexto oculto Página 20 3 Congelación Retención Pulse para congelar una imagen en movimiento en la pantalla Teletexto Detiene automáticamente la actualización de páginas de teletexto o cancel...

Страница 246: ...ricante El indicador de modo se enciende durante aproximadamente un segundo y luego se apaga con esto se completa el preajuste del código de fabricante EXIT DVDTOPMENU GUIDE EPG 4 5 6 7 8 9 0 P INFO 1 2 3 INFO SOURCE TV STB DVR VCR DVD SELECT CTRL HDD AV SELECTION CM SKIP DVD TOOLS SCREEN SIZE 1 2 3 NOTA Si transcurre aproximadamente un minuto sin que ejecute una operación mientras un indicador de...

Страница 247: ...AKAI 3 507 DAEWOO 508 GRUNDIG 1 509 GRUNDIG 2 510 GRUNDIG 3 511 GRUNDIG 4 512 HITACHI 1 513 HITACHI 2 514 HITACHI 3 515 JVC 1 516 JVC 2 517 JVC 3 518 JVC 4 519 JVC 5 520 LOEWE 1 521 LOEWE 2 522 MATSUI 523 ORION 524 PANASONIC 1 525 PANASONIC 2 526 PHILIPS 1 Videograbadora 527 PHILIPS 2 528 PHILIPS 3 529 SANYO 530 SAMSUNG 1 531 SAMSUNG 2 532 SAMSUNG 3 533 SAMSUNG 4 534 SHARP 535 SONY 1 536 SONY 2 53...

Страница 248: ...n el modo VCR los botones en el mando a distancia funcionan de la siguiente forma 0 9 Funcionan como los botones numéricos Pk l Pulse para seleccionar canales del sintonizador del televisor en la videograbadora l Pausa imagen fija Ajusta pausas e imágenes fijas p Grabación Comenzar a grabar SOURCE a Enciende y apaga la videograbadora m Retroceso Rebobina la cinta y permite buscar imágenes n Reprod...

Страница 249: ...el capítulo siguiente m Barrido Pulse para retroceder n Reproducción Comenzar la reproducción o Barrido Pulse para avanzar rápido r Parar Pulse para detener la reproducción o la grabación Con algunos reproductores de DVD o grabadores de DVD HDD DVRs pulsando el botón dos veces puede abrirse la bandeja del disco REC STOP solamente grabador de DVD HDD DVR Pulse p y r al mismo tiempo para detener la ...

Страница 250: ...le D son marcas comerciales de Dolby Laboratories TruSurround XT SRS y h el símbolo es una marca registrada de SRS Labs Inc TruSurround XT tecnología esta incorporada bajo licencia de SRS Labs Inc El logotipo HD ready 1080P es una marca comercial de EICTA El logotipo DVB es la marca registrada del proyecto Digital Video Broadcasting DVB x v Colour y son marcas comerciales de Sony Corporation 8 Dow...

Страница 251: ...minal INPUT2 RGB Terminal INPUT1 RGB 7 8 9 10 11 Terminales INPUT3 PHONES Auriculares Conexión SERVICE Ranura de COMMON INTERFACE Terminal AC INPUT 12 13 14 15 16 RLS ADVERTENCIA La presión del sonido excesivo proveniente de auriculares puede causar sordera RLS Room Light Sensor Sensor de luz de la habitación Sensor del mando a distancia Indicador ON Indicador SLEEP Indicador STANDBY Botón HOME ME...

Страница 252: ...e el cable de CA del terminal AC INPUT Antes de empezar a trabajar extienda un material blando sobre la superficie donde va a colocar el televisor Esto evitará que se estropee la pantalla PRECAUCIÓN Acople el soporte en la dirección correcta Cerciórese de seguir las instrucciones La instalación incorrecta del soporte puede causar la caída del televisor 10 Mando a distancia g1 Cable de CA g2 Soport...

Страница 253: ...ciones de almacenamiento Extraiga las pilas de la unidad si no va a utilizar el mando a distancia durante un periodo de tiempo prolongado Al reemplazar las pilas use pilas alcalinas en lugar de las de zinc carbón 1 2 3 Precauciones relacionadas con el mando a distancia No exponga el mando a distancia a golpes Además no exponga el mando a distancia a líquidos y no lo deje en lugares excesivamente h...

Страница 254: ...s de quitar los sellos negros y los tornillos PRECAUCIÓN Use tornillos M6 los cuales penetran de 12 mm a 15 mm en la superficie de montaje del televisor de pantalla plana Consulte la vista lateral mostrada a la derecha Cuide de no bloquear la abertura para ventilación en la parte trasera del televisor de pantalla plana Asegúrese de instalar el televisor de pantalla plana sobre una superficie plana...

Страница 255: ...stalación automática inicial Página 15 Ajuste del idioma English Italiano Svenska Ajuste del país Austria A B G Finland FIN B G Greece GR B G Ajuste de búsqueda de canal Búsqueda analógica Búsqueda digital n o Felicitaciones Ahora puede ver televisión De ser necesario ajuste la antena para obtener la máxima recepción de señal Página 15 n o 13 Preparación Encienda y ejecute la instalación automátic...

Страница 256: ...lse c d para seleccionar Encendido y luego pulse ENTER 1 2 3 4 5 Antes de conectar la alimentación Atado de los cables 14 Abrazadera del cable Una los cables con la abrazadera Coloque el televisor cerca de la toma de CA y mantenga el enchufe al alcance de la mano Enchufe estándar DIN45325 IEC 169 2 Cable coaxial de 75 q Para el Reino Unido y la República de Irlanda Inserte cuidadosamente el módulo...

Страница 257: ...sor después de ejecutar el paso 4 no aparece el asistente de la instalación automática inicial La función de autoinstalación le permite ejecutar la instalación nuevamente desde el menú Instalación Página 32 El asistente de la instalación automática inicial se apagará si deja el televisor sin atender durante 30 minutos antes de la búsqueda de canales en el paso 5 Comprobación de la potencia de la s...

Страница 258: ... de la alimentación Pulse a en el televisor Apague pulsando a en el televisor Modo de espera Al modo de espera Si el televisor está encendido puede cambiarlo a en espera pulsando a TV en el mando a distancia Encendiendo estando en espera Estando en espera pulse a TV en el mando a distancia 1 2 3 4 5 6 7 8 TV INPUT 1 2 3 4 5 6 7 8 INPUT Estado de los indicadores del televisor Indicador del televiso...

Страница 259: ... EPG deben capturarse automáticamente mientras el televisor está en el modo de espera Después del ajuste a Sí el apagado de la alimentación utilizando el mando a distancia puede demorar algún tiempo debido al proceso de captura de datos NOTA Si el interruptor principal de alimentación del televisor está apagado no se capturarán los datos de EPG Ajuste gama visualiz El Ajuste gama visualiz le permi...

Страница 260: ... y luego pulse ENTER NOTA Cuando selecciona un programa fuera del intervalo de tiempo actual se visualiza la pantalla de ajuste de temporizador Página 19 5 1 2 3 Seleccione un programa Seleccione el intervalo de tiempo Pulse c d para seleccionar el intervalo de tiempo que quiere para buscar Proceda a pulsar d para visualizar los programas en el siguiente intervalo de tiempo Seleccione el programa ...

Страница 261: ...e televisión seleccionado está marcado con un icono NOTA Consulte las páginas 21 23 para la conexión de dispositivos externos 3 Cancelación de la grabación con temporizador Pulse EPG Pulse a b c d para seleccionar el programa en la configuración de temporizador y luego pulse ENTER Pulse c d para seleccionar Cancelar y luego pulse ENTER Pulse c d para seleccionar Sí y luego pulse ENTER Cancelación ...

Страница 262: ...ute interactivo de DTV Si se ofrece la aplicación MHEG 5 comenzará cuando pulse m Ejemplo de pantalla MHEG 5 Viendo televisión Teletexto Qué es el Teletexto El teletexto emite páginas de información y entretenimiento hacia televisores especialmente equipados El televisor recibe señales de Teletexto emitidas por una red de televisión y las descodifica para mostrarlas en formato gráfico Algunos de l...

Страница 263: ...roducción a las conexiones El televisor está equipado con los terminales que se muestran abajo Encuentre el cable correspondiente al terminal del televisor y conecte el equipo NOTA Los cables mostrados en las páginas 21 24 se venden en el comercio E Cuando utiliza un cable S video también necesita conectar un cable de audio R L 21 Dispositivo HDMI Página 22 Consola de juegos o videocámara Página 2...

Страница 264: ... la señal de PC consulte la página 42 Conexión de componente Disfrutará de imágenes de alta calidad y reproducción de color fiel a través del terminal INPUT8 al conectar un reproductor grabador de DVD u otros equipo Y PB CB L R PR CR COMPONENT AUDIO Conexión S VIDEO VIDEO Puede utilizar el terminal INPUT3 al conectar una consola de juegos una videocámara un reproductor grabador de DVD u otro equip...

Страница 265: ...deograbadora conectada tenga un botón WYSIWYR usted podrá iniciar automáticamente la grabación pulsando ese botón Descarga de preajustes Transfiere automáticamente la información preestablecida de canales desde el sintonizador del televisor a uno de los equipos audiovisuales conectados por ejemplo una videograbadora a través del terminal INPUT2 NOTA Para los detalles consulte los manuales del usua...

Страница 266: ...de conectar Ajuste de la salida de audio digital Después de conectar un amplificador con entrada de audio digital y altavoces externos como se muestra debe ajustar un formato de salida de audio compatible con el programa que está viendo o el dispositivo conectado Vaya a HOME MENU Opciones Salida audio digital seleccione PCM o Dolby Digital E 24 Cable de audio óptico Cable de audio Amplificador con...

Страница 267: ...ministrados Por lo general puede adquirirlos a través de su distribuidor Inserción de la tarjeta smart en el módulo CA Con el lado con el chip de contacto de color dorado mirando hacia el lado del módulo CA marcado con el logotipo del proveedor empuje la tarjeta smart en el módulo CA tan profundo como pueda entrar Tenga en cuenta la dirección de la flecha impresa en la tarjeta smart Inserción del ...

Страница 268: ...HDMI Puede seleccionar cuál dispositivo HDMI operar utilizando el botón HDMI CTRL NOTA Cuando utilice HDMI CONTROL debe asegurarse de utilizar un cable HDMI certificado Apunte el mando a distancia hacia el televisor no hacia el dispositivo HDMI conectado Dependiendo del tipo de cable de HDMI utilizado puede ocurrir ruido de vídeo Asegúrese de utilizar un cable HDMI certificado Utilizando este sist...

Страница 269: ...se c d para seleccionar Encendido y luego pulse ENTER Encendido automático Si se activa esto se activa la función Reproducción de un toque Mientras el televisor está en el modo de espera se enciende automáticamente y reproduce la imagen desde la fuente HDMI 1 2 3 4 5 Ajuste HDMI CONTROL Repita los pasos 1 al 3 HDMI CONTROL Pulse a b para seleccionar Encendido automático y luego pulse ENTER Pulse c...

Страница 270: ...leccione aquí el tipo de medio Pulse HDMI CTRL Pulse a b para seleccionar Cambio de medio y luego pulseENTER 1 2 1 2 3 1 2 3 1 2 Seleccione el medio deseado como grabador de DVD o HDD El tipo de medio cambia cada vez que pulse ENTER NOTA Esta función puede que no trabaje dependiendo de los equipos conectados Escuchando con el sistema Pioneer AV Sound Usted puede elegir escuchar el sonido del telev...

Страница 271: ...N EXIT DVDTOPMENU GUIDE EPG ENTER HOME MENU MENU RETURN CTRL HDMI RECSTOP HDD AV SELECTION CM SKIP DVD TOOLS SCREEN SIZE SOURCE TV STB DVR VCR DVD SELECT TV DTV RADIO 1 2 3 4 5 6 7 8 TV INPUT 4 5 6 7 8 9 1 2 3 0 P INFO INFO P CHRETURN DVDTOPMENU GUIDE EPG CTRL HDMI RECSTOP HDD AV SELECTION CM SKIP DVD TOOLS SCREEN SIZE SOURCE TV STB DVR VCR DVD SELECT 1 Imagen Sonido Control alimentación Instalaci...

Страница 272: ...máticamente una fuente basada en película codificada originalmente a 24 ó 25 fotogramas por segundo dependiendo de la frecuencia vertical la analiza y luego recrea cada fotograma fijo para ofrecer una calidad de imagen de alta definición Contraste activo Ajusta automáticamente el contraste de una imagen de acuerdo a la escena 3D Y C Proporciona imágenes de alta calidad con el mínimo de corrimiento...

Страница 273: ...Agudos Sonido ambiental Reiniciar 0 0 15 L 15 R Apagado Graves 0 15 15 DINÁMICO ESTÁNDAR Para una imagen altamente definida en una habitación con brillo normal PELÍCULA Para ver una película en una habitación oscura JUEGO Para jugar videojuegos PC Para PC x v Colour Produce en la pantalla del televisor un color realista imposible de igualar por otra señal USUARIO Le permite personalizar los ajuste...

Страница 274: ...ial Instalación Ajuste digital Puede reconfigurar los ajustes de los servicios DTV automáticamente o manualmente Búsqueda adicional Utilice este menú para añadir servicios nuevos automáticamente después de haber completado la instalación automática Búsqueda manual Añade servicios nuevos dentro de una banda de frecuencias especificada Introduzca la frecuencia utilizando los botones numéricos 0 9 Só...

Страница 275: ... Instalación Ajuste analógico Puede reconfigurar los ajustes de los canales de televisión analógica automáticamente o manualmente Búsqueda adicional Utilice este menú para añadir canales nuevos automáticamente después de haber completado la instalación automática Comienza la búsqueda de canales después de seleccionar el sistema de color y el sistema de sonido Ajuste manual Utilice este menú para c...

Страница 276: ...urco Subtítulo Ajuste digital Si hay subtítulos disponibles ajuste hasta dos idiomas de subtítulos preferidos para visualizar incluyendo subtítulos para las personas con problemas de audición NOTA Los subtítulos no aparecerán en pantalla cuando el servicio no contenga información de subtítulos Idioma del audio digital Opciones Si hay idiomas de audio disponibles ajuste hasta tres idiomas de audio ...

Страница 277: ...CINE Para imágenes tipo buzón 14 9 Con algunos programas puede que aparezcan barras en la parte superior e inferior COMPLETA Visualización con una imagen de Sobrescaneado Corta todos los lados de la pantalla Subescaneado Visualización con una imagen de subescaneado solamente cuando se recibe una señal 720p Visualización con la imagen en alta definición ajustada óptimamente Con algunos programas pu...

Страница 278: ... de ruido Opciones La Reducción de ruido brinda una imagen más nítida Apagado Alta Baja Ajuste de volumen automático Volumen automático Opciones Fuentes de sonido diferentes en ocasiones no tienen el mismo nivel de volumen como un programa y sus bloques publicitarios El Control de Volumen Automático reduce este problema ecualizando los niveles Realzando diálogo Voz clara Opciones Esta función enfa...

Страница 279: ...evisor aparecerá la visualización de canal Pulse p otra vez dentro de los varios segundos en los que la visualización del canal está en la pantalla La información de la hora se mostrará en la esquina inferior derecha de la pantalla durante algunos segundos Incluso cuando cambie el canal de televisión puede visualizar la información de la hora con los pasos 2 y 3 anteriores NOTA Si se adquirió con ...

Страница 280: ...s seleccione FIN No puede cambiar etiquetas si la fuente de entrada es TV 1 2 3 4 Ignorar entrada Instalación Este ajuste le permite ignorar la entrada SCART HDMI o RGB en la operación Selección de fuente de entrada INPUT1 SCART INPUT2 SCART INPUT4 HDMI INPUT5 HDMI INPUT6 HDMI INPUT7 RGB Sí No Ajustes del sistema del color Puede cambiar el sistema de color a uno que sea compatible con la imagen de...

Страница 281: ...ño de la imagen Pulse SCREEN SIZE Se visualiza el menú SCREEN SIZE TAMAÑO DE LA PANTALLA Pulse SCREEN SIZE o a b para seleccionar un elemento deseado en el menú NOTA Conecte el PC antes de hacer ajustes El tamaño de la imagen seleccionable puede variar según el tipo de la señal de entrada EJEMPLO 1 2 COMPLETA Una imagen llena completamente la pantalla CINE Para imágenes tipo buzón 14 9 Con algunos...

Страница 282: ...incronización automática terminada con éxito De lo contrario falló la Sinc auto La Sinc auto puede fallar incluso aunque se visualice Sincronización automática terminada con éxito La Sinc auto puede fallar si la imagen del PC tiene baja resolución bordes no definidos negros o se ha movido mientras se ejecuta Sinc auto Asegúrese de conectar el PC al televisor y encenderlo antes de comenzar la Sinc ...

Страница 283: ...e entrada PC vídeo se puede seleccionar el volumen se puede ajustar y también se pueden realizar otros ajustes lo que permitirá realizar la reproducción programada automática Utilice un cable de control en serie RS 232C tipo cruzado de venta en el comercio para las conexiones NOTA Este sistema de operación deberá ser utilizado por una persona acostumbrada a utilizar PCs Parámetro Introduzca los va...

Страница 284: ...CONTENIDO DE CONTROL POSICIÓN H P O S _ POSICIÓN H AV PC V P O S _ POSICIÓN V AV PC C L C K _ RELOJ 0 180 P H S E _ _ FASE 0 40 TAMAÑO DE LA PANTALLA W I D E 0 _ _ _ CONMUTACIÓN AV W I D E 1 _ _ _ 4 3 AV W I D E 2 _ _ _ CINE 14 9 AV W I D E 3 _ _ _ PANORÁMICA AV W I D E 4 _ _ _ COMPLETA AV W I D E 5 _ _ _ ZOOM AV W I D E 6 _ _ _ CINE AV W I D E 7 _ _ _ 4 3 PC W I D E 8 _ _ _ CINE PC W I D E 9 _ _ ...

Страница 285: ...e expande y contrae ligeramente según los cambios de temperatura Esto no afecta el funcionamiento del televisor Advertencias relativas al uso en lugares con altas y bajas temperaturas Cuando el televisor se utiliza en un lugar con temperatura baja por ejemplo habitación oficina la imagen puede dejar trazas o parecer ligeramente retrasada No se trata de una avería el televisor volverá a funcionar c...

Страница 286: ...actualización Si el software está actualizado aparece el mensaje de confirmación Se ha detectado información nueva para la descarga Si el televisor recibe el servicio de actualización estando en el modo de espera después de encender la alimentación se visualiza un mensaje de confirmación Siga las indicaciones en la pantalla 1 2 Sí Comenzar descarga inmediatamente La actualización demora aproximada...

Страница 287: ... TV INPUT2 SCART entrada AV salida de monitor entrada Y C AV Link entrada RGB INPUT3 S VIDEO entrada Y C clavija RCA entrada AV INPUT4 HDMI INPUT5 HDMI INPUT6 HDMI toma de 3 5 mm Ø INPUT7 D sub mini 15 clavijas toma de 3 5 mm Ø INPUT8 COMPONENT IN Y PB CB PR CR clavija RCA AUDIO R L DIGITAL AUDIO OUTPUT Salida audio digital SPDIF óptico C I Interfaz común EN50221 R206001 OUTPUT Clavija RCA AUDIO R...

Страница 288: ...signados de acuerdo con las leyes de su país Al desechar estos productos y pilas correctamente ayudará a ahorrar recursos valiosos y a prevenir posibles efectos negativos en la salud humana y en el medio ambiente que de otra forma podrían producirse debido a una manipulación de residuos inapropiada Para más información sobre recogida y reciclaje de productos viejos y baterías usadas contacte con a...

Страница 289: ...Memorando 47 Downloaded From TV Manual com Manuals ...

Страница 290: ...Memorando 48 Downloaded From TV Manual com Manuals ...

Страница 291: ...9 Основные операции 29 Основная регулировка 30 Настройки изображения 30 AV SELECTION 31 Установки звука 31 Установки экономии энергии 31 Установки канала 32 Автоинсталляция 32 Установки цифрового канала 32 Установки аналогового канала 33 Установки пароля родительской блокировки 34 Установки языка язык субтитры мультиплексный режим звука 34 Полезные функции просмотра 35 Выбор размера изображения 35...

Страница 292: ...едовательно она может разбиться при падении или сильной встряске изделия В случае повреждения панели жидкокристаллического дисплея будьте осторожны чтобы не пораниться осколками стекла Источники тепла Храните изделие вдали от источников тепла таких как радиаторы нагреватели печи и другие изделия выделяющие тепло включая усилители Для предотвращения возгорания никогда не размещайте сверху или снизу...

Страница 293: ...другой экран HOME MENU h HOME MENU Включение выключение экрана HOME MENU 1 2 3 4 5 6 7 8 9 0 Q Кнопки для полезных операций 1 Субстраница Стр 20 Субтитры Включение выключение языков субтитров Стр 20 и 34 k Отображение скрытого телетекста Стр 20 3 Стоп кадр Приостановка Нажмите для приостановки движущегося изображения на экране Телетекст Прекращение автоматического обновления страниц телетекста или...

Страница 294: ...о технологического кода См список технологических кодов для определения необходимого кода Индикатор режима будет гореть приблизительно в течение одной секунды а затем погаснет предварительная установка технологического кода будет завершена EXIT DVDTOPMENU GUIDE EPG 4 5 6 7 8 9 0 P INFO 1 2 3 INFO SOURCE TV STB DVR VCR DVD SELECT CTRL HDD AV SELECTION CM SKIP DVD TOOLS SCREEN SIZE 1 2 3 ПРИМЕЧАНИЕ ...

Страница 295: ...06 AKAI 3 507 DAEWOO 508 GRUNDIG 1 509 GRUNDIG 2 510 GRUNDIG 3 511 GRUNDIG 4 512 HITACHI 1 513 HITACHI 2 514 HITACHI 3 515 JVC 1 516 JVC 2 517 JVC 3 518 JVC 4 519 JVC 5 520 LOEWE 1 521 LOEWE 2 522 MATSUI 523 ORION 524 PANASONIC 1 525 PANASONIC 2 526 PHILIPS 1 Видеомагнитофон 527 PHILIPS 2 528 PHILIPS 3 529 SANYO 530 SAMSUNG 1 531 SAMSUNG 2 532 SAMSUNG 3 533 SAMSUNG 4 534 SHARP 535 SONY 1 536 SONY ...

Страница 296: ... для выхода с экрана меню трансляции или экрана программы трансляции ENTER Нажимайте для включения выбранной функции a b c d Нажимайте для выбора пунктов на экране меню трансляции или экране программы трансляции MENU Нажимайте для отображения экрана меню трансляции SOURCE a Включение и выключение приставки GUIDE Нажимайте для отображения экрана программы трансляции RETURN Нажимайте для мгновенного...

Страница 297: ...D рекордера DVR DVD TOP MENU При нажатии этой кнопки появится главное меню DVD RETURN Нажимайте для мгновенного восстановления предыдущего экрана при отображении меню DVD j ПАУЗА СТОП КАДР При каждом нажатии выполняется перемещение назад к началу предыдущей главы k ПАУЗА СТОП КАДР При каждом нажатии выполняется перемещение вперед к началу следующей главы m ЗАПИСЬ Нажимайте для перемещения назад n ...

Страница 298: ...ной буквы D являются торговыми марками Dolby Laboratories TruSurround XT SRS и обозначение h товарные знаки SRS Labs Inc Технология TruSurround XT используется по лицензии от SRS Labs Inc Логотип HD ready 1080P является торговой маркой EICTA Логотип DVB является зарегистрированной торговой маркой Digital Video Broadcasting DVB project x v Colour и являются торговыми марками Sony Corporation 8 Down...

Страница 299: ...Гнездо INPUT1 RGB 7 8 9 10 11 Гнезда INPUT3 PHONES Наушники Разъем SERVICE Слот Common Interface Гнездо AC INPUT 12 13 14 15 16 RLS ОСТОРОЖНО Избыточное звуковое давление открытых и закрытых наушников может привести к потере слуха RLS Room Light Sensor Датчик освещенности помещения Датчик дистанционного управления ON индикатор SLEEP индикатор STANDBY индикатор HOME MENU кнопка a Кнопка питание ik ...

Страница 300: ...ем работы расстелите амортизирующий материал на поверхности куда положите телевизор Это предотвратит его повреждение ПРЕДОСТЕРЕЖЕНИЕ Прикрепите подставку в правильном положении Обязательно следуйте приведенным ниже инструкциям Неправильная установка подставки может привести к падению телевизора 10 Пульт дистанционного управления g1 Шнур питания переменного тока g2 Подставка g1 Кабельный зажим g1 С...

Страница 301: ...онного управления в течение длительного периода времени извлеките из него батареи При замене батарей используйте щелочные батареи вместо угольно цинковых 1 2 3 Предостережения относительно пульта дистанционного управления Не подвергайте пульт дистанционного управления ударам Кроме того не подвергайте пульт дистанционного управления воздействию жидкостей а также не размещайте его в местах с высокой...

Страница 302: ... не закрыть вентиляционные отверстия с задней стороны телевизора с плоским экраном Обязательно устанавливайте телевизор с плоским экраном на ровной поверхности так как панель жидкокристаллического дисплея используемая в данном изделии сделана из стекла Другие отверстия помимо указанных на вышеприведенных иллюстрациях предназначены только для определенных изделий Ни в коем случае не используйте их ...

Страница 303: ...начальную автоматическую инсталляцию Стр 15 Установка языка English Italiano Svenska Установка страны Austria A B G Finland FIN B G Greece GR B G Установка поиска канала Поиск аналоговых каналов Цифровой поиск n o Поздравляем Теперь Вы можете смотреть телевизор В случае необходимости отрегулируйте антенну для получения максимально устойчивого приема сигнала Стр 15 n o 13 Подготовка Включите питани...

Страница 304: ...ния а затем нажмите кнопку ENTER Воспользуйтесь кнопками c d для выбора опции ВКЛ а затем нажмите кнопку ENTER 1 2 3 4 5 Перед включением питания Связывание шнуров 14 Кабельный зажим Свяжите кабели с помощью зажима Шнур питания переменного тока Расположите телевизор вблизи сетевой розетки так чтобы штепсельная вилка была в пределах досягаемости Стандартный штекер DIN45325 IEC 169 2 75 q коаксиальн...

Страница 305: ...МЕЧАНИЕ В случае выключения питания телевизора после выполнения пункта 4 мастер первоначальной автоматической инсталляции не появится Функция автоматической инсталляции позволяет повторно выполнять автоматическую инсталляцию из меню Установка Стр 32 Мастер первоначальной автоматической инсталляции исчезнет если оставить телевизор без присмотра на 30 минут перед поиском каналов в пункте 5 Проверка ...

Страница 306: ...пку a на телевизоре Выключите его нажатием кнопки a на телевизоре Режим ожидания В режим ожидания Если телевизор включен Вы можете переключить его в режим ожидания нажав кнопку a TV на пульте дистанционного управления Включение из режима ожидания Когда телевизор находится в режиме ожидания нажмите кнопку a TV на пульте дистанционного управления 1 2 3 4 5 6 7 8 TV INPUT 1 2 3 4 5 6 7 8 INPUT Индика...

Страница 307: ... Если Вы хотите использовать EPG для цифровых станций выберите опцию да Данные EPG должны приниматься автоматически в то время когда телевизор находится в режиме ожидания После установки в положение да может потребоваться некоторое время для выключения питания с помощью пульта дистанционного управления из за процесса приема данных ПРИМЕЧАНИЕ Если главное питание телевизора выключено данные EPG не ...

Страница 308: ...ня Воспользуйтесь кнопками a b для выбора нужной программы а затем нажмите кнопку ENTER ПРИМЕЧАНИЕ В случае выбора программы за пределами текущего диапазона времени будет показан экран установки таймера Стр 19 5 1 2 3 Выберите программу Выберите интервал времени Воспользуйтесь кнопками c d для выбора диапазона времени который Вы хотите найти Продолжайте нажимать кнопку d для отображения программ в...

Страница 309: ...мите кнопку ENTER Выбранная телевизионная программа будет помечена пиктограммой ПРИМЕЧАНИЕ Обратитесь к страницам 21 23 для подключения внешних устройств 3 Отмена записи по таймеру Нажмите кнопку EPG Воспользуйтесь кнопками a b c d для выбора программы для установки таймера а затем нажмите кнопку ENTER Воспользуйтесь кнопками c d для выбора опции Отменить а затем нажмите кнопку ENTER Воспользуйтес...

Страница 310: ... m Образец экрана MHEG 5 Просмотр телевизора Телетекст Что такое телетекст Телетекст обеспечивает трансляцию страниц деловой и развлекательной информации принимаемая специально оборудованным телевизором Ваш телевизор принимает сигналы телетекста транслируемые по телевизионной сети и переводит их в графический формат для просмотра Среди множества доступных программ телетекста есть новости прогнозы ...

Страница 311: ...ия ПК к телевизору Введение перед выполнением подключений Телевизор оснащен гнездами как показано ниже Найдите кабель соответствующий гнезду телевизора и подключите устройство ПРИМЕЧАНИЕ Кабели показанные на страницах с 21 24 продаются отдельно E В случае использования кабеля S video Вам также необходимо будет подключить аудиокабель R L 21 Устройство HDMI Стр 22 Игровая консоль или видеокамера Стр...

Страница 312: ...ации о совместимости сигналов ПК Компонентное подключение В случае подключения DVD плеера рекордера или другого устройства для записи к гнезду INPUT8 Вы сможете наслаждаться точным воспроизведением цветов и высоким качеством изображений Y PB CB L R PR CR COMPONENT AUDIO Подключение S VIDEO VIDEO Вы можете воспользоваться гнездом INPUT3 для подключения игровой консоли видеокамеры DVD плеера рекорде...

Страница 313: ...равления подключенного видеомагнитофона имеет кнопку WYSIWYR Вы можете автоматически начать запись нажав кнопку WYSIWYR Загрузка настроек Автоматическая передача информации о настроенных каналах с тюнера телевизора на одно из аудиовизуальных устройств например видеомагнитофон подключенное к гнезду INPUT2 ПРИМЕЧАНИЕ Для получения более подробной информации обратитесь к инструкциям по эксплуатации в...

Страница 314: ...становка цифрового звукового выхода После подключения усилителя с цифровым звуковым входом и внешних громкоговорителей как показано на рисунке Вам необходимо будет установить формат выходного звука совместимый с просматриваемой программой или с подключенным устройством Откройте пункт HOME MENU Опция Цифровой аудио выход выберите опцию PCM или Dolby Digital E 24 Оптический аудиокабель Аудиокабель У...

Страница 315: ...т карта не входят в комплект поставки Обычно их можно приобрести у своего дилера Установка смарт карты в модуль CA Вставьте до конца смарт карту в модуль CA таким образом чтобы сторона схемы с позолоченными контактами была обращена к стороне модуля CA помеченной логотипом поставщика Обратите внимание на направление стрелки напечатанной на смарт карте Установка модуля CA в слот Common Interface Ост...

Страница 316: ...стройствами HDMI С помощью кнопки HDMI CTRL Вы можете выбрать устройство HDMI которым будете управлять ПРИМЕЧАНИЕ При пользовании HDMI CONTROL обязательно используйте сертифицированный кабель HDMI Направляйте пульт дистанционного управления в сторону телевизора а не подключенного устройства HDMI В зависимости от используемого типа кабеля HDMI на изображении могут появляться помехи Убедитесь что ис...

Страница 317: ...ите кнопку ENTER Автоматическое включение питания В случае активации этой функции будет включена функция воспроизведения нажатием одной кнопки Когда телевизор находится в режиме ожидания он автоматически включается и начинает воспроизведение изображения с источника сигнала HDMI 1 2 3 4 5 Установка HDMI CONTROL Повторите пункты с 1 до 3 в разделе HDMI CONTROL Воспользуйтесь кнопками a b для выбора ...

Страница 318: ...нопками a b для выбора опции Изменение носителя а затем нажмите кнопку ENTER 1 2 1 2 3 1 2 3 1 2 Выберите нужный носитель такой как DVD рекордер или HDD Тип носителя будет изменяться при каждом нажатии кнопки ENTER ПРИМЕЧАНИЕ Эта функция может не работать в зависимости от подсоединенных записывающих устройств Прослушивание с помощью аудиовизуальной системы Pioneer Вы можете выбрать опцию прослушив...

Страница 319: ...INFO INFO P CHRETURN EXIT DVDTOPMENU GUIDE EPG ENTER HOME MENU MENU RETURN CTRL HDMI RECSTOP HDD AV SELECTION CM SKIP DVD TOOLS SCREEN SIZE SOURCE TV STB DVR VCR DVD SELECT TV DTV RADIO 1 2 3 4 5 6 7 8 TV INPUT 4 5 6 7 8 9 1 2 3 0 P INFO INFO P CHRETURN DVDTOPMENU GUIDE EPG CTRL HDMI RECSTOP HDD AV SELECTION CM SKIP DVD TOOLS SCREEN SIZE SOURCE TV STB DVR VCR DVD SELECT 1 Картинка Звук Контроль пи...

Страница 320: ... на основе пленки обычно закодирован в формате 24 или 25 кадров в секунду в зависимости от частоты вертикальной синхронизации анализирует его и затем воссоздает каждый неподвижный кадр пленки для повышения четкости изображения Активная контрастность Автоматически регулирует контрастность изображения в соответствии со сценой 3D Y C Обеспечивает высокое качество изображения с минимальным смещением т...

Страница 321: ...и звука Баланс Выс част Окруж звук Сброс 0 0 15 Л 15 П ВЫКЛ Низк част 0 15 15 ДИНАМИЧНЫЙ СТАНДАРТ Для вывода высокоточного изображения при нормальном освещении в комнате КИНОФИЛЬМ Для просмотра кинофильма в затемненной комнате ИГРА Для видеоигр ПК Для ПК x v Colour Позволяет получить на экране телевизора реалистичные цвета отличные от любого другого сигнала ПОЛЬЗОВАТЕЛЬ Позволяет Вам настраивать у...

Страница 322: ... частот Введите частоту с помощью цифровых кнопок 0 9 Вы можете выполнить Ручная поиск с помощью номера программы только при выборе в установке страны одной из пяти Северных стран Ручная настройка Измените различные установки для каждой программы с помощью кнопок Цветные Красная Зеленая Желтая Синяя DTV 993 Номер программы Стар кан EPG Пропуск CH Пропуск Блокировка Название программы SIT 3 DTV 994...

Страница 323: ...пунктов 2 и 3 до полного удаления нужных каналов E 1 2 3 4 E 1 2 3 4 Установка программ Установка Устан аналогового Вы можете автоматически или вручную изменять конфигурацию установок каналов аналогового телевидения Добавить поиск Воспользуйтесь этим меню для автоматического добавления новых каналов после выполнения автоматической инсталляции Запуск поиска каналов после выбора системы цветного тел...

Страница 324: ... людей с нарушениями слуха в случае если субтитры доступны ПРИМЕЧАНИЕ Если программа не содержит информации о субтитрах они не будут отображаться Язык цифр аудиос Опция Установка до трех избранных языков мультиплексного звука в случае если эти языки звука доступны Переключение языков мультиплексного звука Во время каждого нажатия кнопки t на пульте дистанционного управления язык звука будет изменя...

Страница 325: ...осы КИНОЭКРАН Для изображений формата letterbox 14 9 В некоторых программах в верхней и нижней частях экрана могут появиться полосы ПОЛНЫЙ Показ с увеличенным растром изображения Обрезаны все края экрана Уменьшение растра Показ с уменьшенным растром изображения только в случае приема сигнала 720p Показ изображения высокой четкости с оптимальной регулировкой В некоторых программах изображение по кр...

Страница 326: ... может быть недоступной DNR Опция Функция DNR Digital Noise Reduction Цифровое уменьшение шумов позволяет получить более чистое изображение ВЫКЛ Высокий Низкий Автоматическая регулировка громкости Автонастр громкости Опция Различные источники звука очень часто имеют разный уровень громкости например программа и реклама во время ее перерывов Функция автонастройки громкости уменьшает эту проблему пу...

Страница 327: ...кация канала Нажмите кнопку p еще раз в течение нескольких секунд на протяжении которых на экране отображается индикация канала Эта информация появится на несколько секунд в нижнем правом углу экрана Даже в случае переключения телевизионного канала Вы все равно сможете просматривать информацию о времени выполняя действия пунктов 2 и 3 приведенных выше ПРИМЕЧАНИЕ В случае успешного приема информаци...

Страница 328: ...игнала длиной менее шести символов выберите опцию ЗАВЕРШ для установки названия Вы не можете изменять метки если источником входного сигнала является ТВ 1 2 3 4 Пропуск вход сигнала Установка Эта установка позволяет пропускать входной сигнал SCART HDMI или RGB при выбора источника входного сигнала INPUT1 SCART INPUT2 SCART INPUT4 HDMI INPUT5 HDMI INPUT6 HDMI INPUT7 RGB да нет Установки цветовой си...

Страница 329: ...мат изображения Нажмите кнопку SCREEN SIZE Появится меню SCREEN SIZE РАЗМЕР ЭКРАНА Воспользуйтесь кнопками SCREEN SIZE или a b для выбора нужной опции меню ПРИМЕЧАНИЕ Подключите ПК перед выполнением регулировок Доступные форматы изображения могут изменяться в зависимости от типа входного сигнала ПРИМЕР 1 2 ПОЛНЫЙ Изображение заполняет весь экран КИНОЭКРАН Для изображений формата letterbox 14 9 В н...

Страница 330: ...ена Если оно не появится это означает что функция Авто Sync не выполнена Функция Авто Sync может быть не выполнена даже в случае отображения сообщения Авто Sync успешно завершена Функция Авто Sync может быть не завершена если изображение ПК имеет низкое разрешение непрозрачные черные края или было перемещено во время выполнения функции Авто Sync Не забудьте подключить компьютер к телевизору и вклю...

Страница 331: ...идео регулировать громкость и выполнять различные другие регулировки и установки что делает возможным автоматическое запрограммированное воспроизведение Используйте последовательный управляющий кабель RS 232C перекрестного типа продается отдельно для этих подключений ПРИМЕЧАНИЕ Эта процедура должна выполняться человеком имеющим навыки использования ПК Параметр Введите значения параметра начиная сл...

Страница 332: ...ИЕ ПО ГОРИЗОНТАЛИ AV ПК V P O S _ ПОЛОЖЕНИЕ ПО ВЕРТИКАЛИ AV ПК C L C K _ ЧАСЫ 0 180 P H S E _ _ ФАЗА 0 40 РАЗМЕР ЭКРАНА W I D E 0 _ _ _ ПЕРЕКЛЮЧЕНИЕ AV W I D E 1 _ _ _ 4 3 AV W I D E 2 _ _ _ КИНОЭКРАН 14 9 AV W I D E 3 _ _ _ ШИРОКИЙ AV W I D E 4 _ _ _ ПОЛНЫЙ AV W I D E 5 _ _ _ МАСШТАБИРОВАНИЕ AV W I D E 6 _ _ _ КИНОЭКРАН AV W I D E 7 _ _ _ 4 3 ПК W I D E 8 _ _ _ КИНОЭКРАН ПК W I D E 9 _ _ _ ПОЛНЫЙ...

Страница 333: ... изменений Это не отражается на эксплуатационных качествах телевизора Предостережения относительно эксплуатации в условиях высокой и низкой температуры Если телевизор используется в помещении например в комнате офисе с низкой температурой изображение может оставлять следы или выглядеть слегка замедленным Это не является неисправностью и работа телевизора восстановится после того как температура ве...

Страница 334: ...спечения Загрузка программного обеспечения Вы можете выбрать метод обновления В случае обновления программного обеспечения появится сообщение о подтверждении Обнаружена новая информация для загрузки Если телевизор принимает программу обновления находясь в режиме ожидания сообщение о подтверждении появится после включения питания Следуйте инструкциям на экране 1 2 да Немедленно начать загрузку Обно...

Страница 335: ...T2 SCART Вход AV выход монитора вход Y C AV Link вход RGB INPUT3 S VIDEO Вход Y C Разъем RCA Вход AV INPUT4 HDMI INPUT5 HDMI INPUT6 HDMI гнездо Ø 3 5 мм INPUT7 15 штырьковый мини D sub гнездо Ø 3 5 мм INPUT8 COMPONENT IN Y PB CB PR CR штекер RCA AUDIO R L DIGITAL AUDIO OUTPUT Оптический разъем SPDIF для Цифровой аудиовыход C I Общий интерфейс EN50221 R206001 OUTPUT Разъем RCA AUDIO R L Наушники Гн...

Страница 336: ... родителей Взросл Всеобщий просмотр С разрешения родителей Взросл Всеобщий просмотр С разрешения родителей Взросл 46 Возрастнаякатегория регулируемаяпользователем Возрастнаякатегория телевизионноговещания Возрастнаякатегория регулируемаяпользователем Возрастная категория телевизионного вещания Downloaded From TV Manual com Manuals ...

Страница 337: ...Заметки 47 Downloaded From TV Manual com Manuals ...

Страница 338: ...Заметки 48 Downloaded From TV Manual com Manuals ...

Отзывы: