DRB1569-A
En
10
10
!
The message [
Installing device driver software
] may appear when this unit is
first connected to the computer or when it is connected to a different USB port
on the computer. Wait awhile until the message [
Your devices are ready for
use
] appears.
!
When installing on Windows XP
—
[
Can Windows connect to Windows Update to search for software?
]
may appear while the installation is in progress. Select [
No, not this time
],
then click [
Next
] to continue installation.
—
[
What do you want the wizard to do?
] may appear while the instal-
lation is in progress. Select [
Install the software automatically
(Recommended)
], then click [
Next
] to continue installation.
—
If [
Windows Security
] appears on the screen while the installation is in
progress, click [
Install this driver software anyway
] and continue with
the installation.
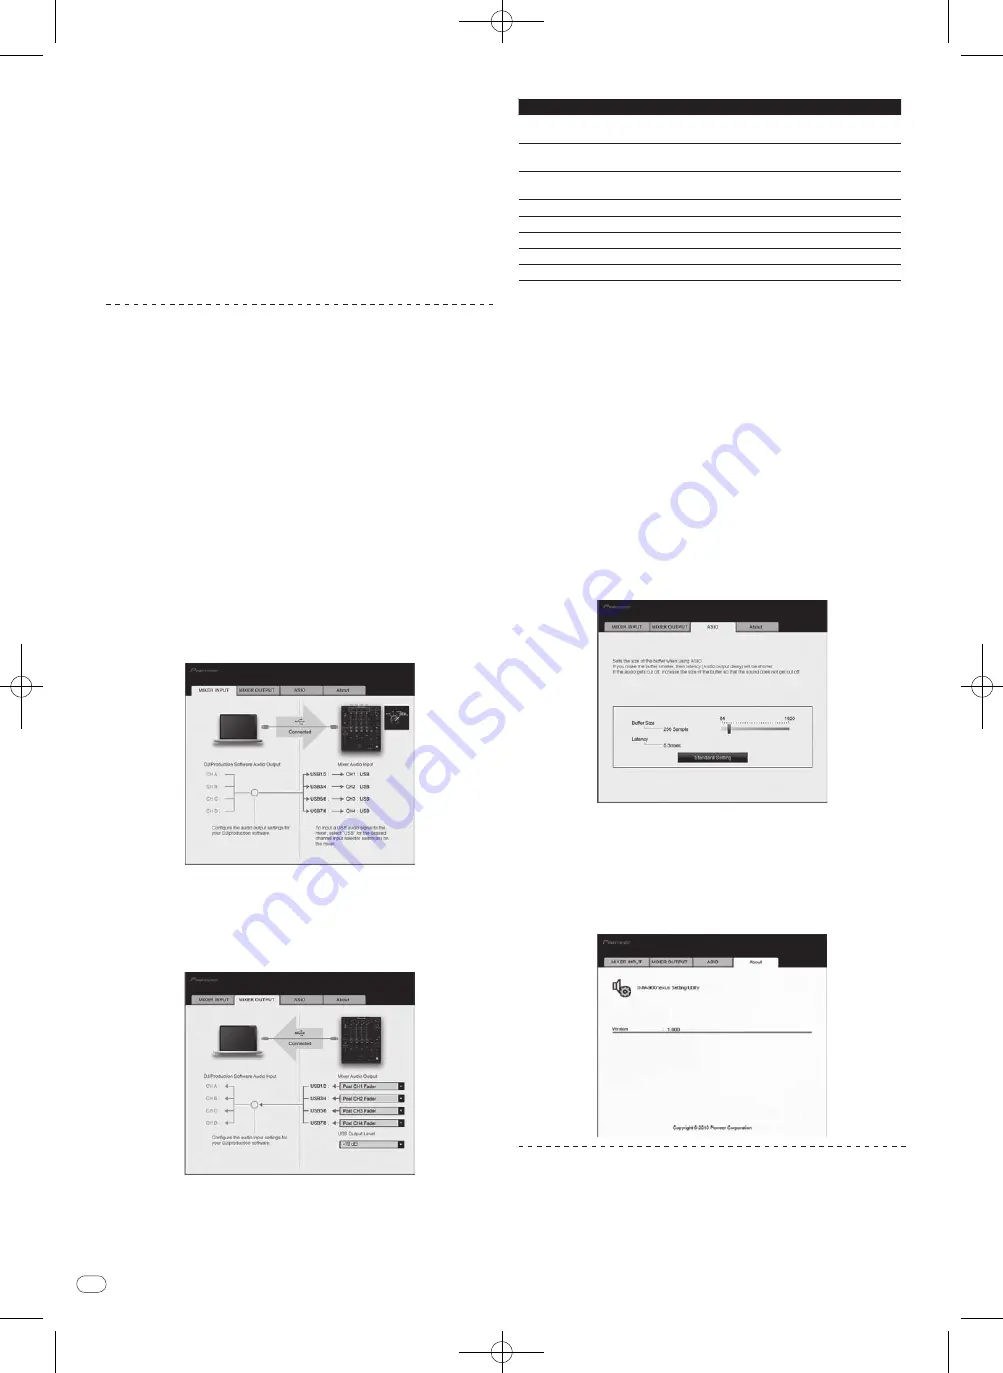
About the setting utility software
The setting utility can be used to make the checks and settings described below.
—
Checking the status of this unit’s [
DIGITAL
,
CD/
LINE
,
PHONO
,
LINE
,
USB */*
]
selector switch
—
Setting the audio data output from this unit to the computer
—
Adjusting the buffer size (when using Windows ASIO)
—
Checking the version of the driver software
Displaying the setting utility
For Windows
Click [
Start
] menu > [
All Programs
] > [
Pioneer
] > [
DJM-900nexus
] > [
DJM-
900nexus
Settings Utility
].
For Mac OS X
Click [
Macintosh HD
] icon > [
Application
] > [
Pioneer
] > [
DJM-900nexus
] >
[
DJM-900nexus
Settings Utility
].
Checking the status of this unit’s [
DIGITAL
,
CD/
LINE
,
PHONO
,
LINE
,
USB */*
] selector switch
Display the setting utility before starting.
Click the [MIXER INPUT] tab.
Setting the audio data output from this unit to the
computer
Display the setting utility before starting.
1 Click the [MIXER OUTPUT] tab.
2 Click the [Mixer Audio Output] pull-down menu.
Select and set the audio data to be output to the computer from the flow of audio
signals inside this unit.
CH1
CH2
CH3
CH4
CH1 Timecode
PHONO
1
CH2 Timecode CD/
LINE
1
CH3 Timecode CD/
LINE
1
CH4 Timecode
PHONO
1
CH1 Timecode CD/
LINE
1
CH2 Timecode
LINE
1
CH3 Timecode
LINE
1
CH4 Timecode CD/
LINE
1
CH1 Timecode
DIGITAL
1
CH2 Timecode
DIGITAL
1
CH3 Timecode
DIGITAL
1
CH4 Timecode
DIGITAL
1
POST CH1 Fader
2
POST CH2 Fader
2
POST CH3 Fader
2
POST CH4 Fader
2
Cross Fader A
2
Cross Fader A
2
Cross Fader A
2
Cross Fader A
2
Cross Fader B
2
Cross Fader B
2
Cross Fader B
2
Cross Fader B
2
MIC
MIC
MIC
MIC
REC OUT
2
REC OUT
2
REC OUT
2
REC OUT
2
1
: The audio data is output with the same volume at which it is input to this unit, regardless of
the [
USB Output Level
] setting.
2
: When using for applications other than recording, pay attention to the DJ application’s
settings so that no audio loops are generated. If audio loops are generated, sound may be input
or output at unintended volumes.
3 Click the [USB Output Level] pull-down menu.
Adjust the volume of the audio data output from this unit.
!
The [
USB Output Level
] setting is applied equally to all audio data. However,
when
1
on the table at step 2 is selected, the audio data is output with the same
volume at which it is input to this unit.
!
If not enough volume can be achieved with the DJ software’s volume adjustment
alone, change the [
USB Output Level
] setting to adjust the volume of the audio
data output from this unit. Note that the sound will be distorted if the volume is
raised too high.
Adjusting the buffer size (when using Windows ASIO)
If an application using this unit as the default audio device (DJ software, etc.) is run-
ning, quit that application before adjusting the buffer size.
Display the setting utility before starting.
Click the [ASIO] tab.
!
If the buffer size is made large, drops in audio data (breaks in the sound)
occur less easily, but the time lag due to the delay in the transfer of the
audio data (latency) increases.
Checking the version of the driver software
Display the setting utility before starting.
Click the [About] tab.
Checking the latest information on the driver
software
For the latest information on the driver software for exclusive use with this unit, visit
our website shown below.
http://www.prodjnet.com/support/
!
Operation cannot be guaranteed when multiple units of this mixer are connected
to a single computer.
Содержание DJM-900nexus
Страница 51: ...DRB1569 A 51 ...
Страница 77: ...DRB1569 A 77 ...
Страница 103: ...DRB1569 A 103 ...
Страница 129: ...DRB1569 A 129 ...
Страница 155: ...DRB1569 A 155 ...
Страница 181: ...DRB1569 A 181 ...
Страница 182: ...DRB1569 A 182 ...
Страница 183: ...DRB1569 A 183 ...


