57
DEH-M6156ZH,M6356ZH
CD CHANGER
(MD PLAYER) ........... [9] [15]
• The proper Honda CD changer (MD
Player) (sold separately) is required
to play CDs (MDs).
Playing of a CD (MD) is started by
pressing button [9], and stopped by
pressing button [15].
SWITCHING POWER ON ... [15]
If button [15] is pressed when the
power is off, the power supply of the
source before power was turned off is
turned on.
ADJUSTING VOLUME ............. [15]
The volume is increased by turning
dial [15] to the right, and decreased by
turning it to the left. (Display shows
“VOL 0” ~ “VOL 40”.)
ADJUSTING AUDIO ........... [10]
Press button [10] to switch to the
mode in which you want to make the
adjustment, and turn the dial to make
the adjustment. The adjustment mode
changes each time the dial is pressed,
as shown below.
Radio and other indicators
(Volume Adjustment)
BASS (Bass Adjustment)
TREB (Treble Adjustment)
FAD (Fader Adjustment)
BAL (Balance Adjustment)
Adjusting Bass
Select the bass adjustment mode.
Bass intensity is gradually increased
by turning dial [10] to the right, and
decreased by turning dial [10] to the
left. (Display shows “BASS –6” ~
“BASS +6”.)
Adjusting Treble
Select the treble adjustment mode.
Treble intensity is gradually increased
by turning dial [10] to the right, and
decreased by turning dial [10] to the
left. (Display shows “TREB –6” ~
“TREB +6 ”.)
Adjusting the Fader
Select the fader adjustment mode. The
balance is gradually changed to front
speaker sound only, by turning dial
[10] to the right, and to rear speaker
sound only, by turning it to the left.
(Display shows “FAD F+9” ~
“FAD R+9”.)
Adjusting Balance
Select the balance adjustment mode.
The balance is gradually changed to
left speaker sound only, by turning
dial [10] to the left, and to right
speaker sound only, by turning it to
the right. (Display shows “BAL L+9” ~
“BAL R+9”.)
Advice
• When bass, treble, balance and
fader adjustments are made, even
if maximum or minimum levels
are set, a beep will be heard at the
center position. The adjustment
mode is canceled approximately 5
seconds after an adjustment is
made.
Advice
• When driving, a volume level
should be selected that allows
sounds outside the vehicle to be
heard.
Advice
• When a CD is loaded, pressing
button [9] will alternate between
CD and CD changer (MD Player)
playback.
TIME DISPLAY/SETTING
Displaying the time ................ [11]
Press button [11] and the time is
displayed.
To cancel the display, press button
[11] again.
In the initial setting, the time is
displayed.
Setting the Hours ..... [11]
[12]
While pressing the [11] button, press
button [12] 1 to set the hour.
Setting the Minutes
.................................... [11] [12]
While pressing button [11], press
button [12] 2 to set the minute. When
you release button [11], the second
count begins from 00 seconds.
Synchronizing with the time
announcement ......... [11]
[12]
While pressing button [11], press
button [12] 3 to reset the minute and
second indications to zero.
Example: When synchronizing
between 11:30 and 12:29.
SWITCHING BETWEEN 12 HOUR
AND 24 HOUR TIME DISPLAYS
.................................... [12] [15]
1. Press button [15] for 2 seconds or
longer to select the function setting
mode.
2. Each time you press button [12] 5,
the display changes as shown
below.
12H (12 hour indications)
24H (24 hour indications)
OFF (No clock display)
OTHER FUNCTION
Illumination
The radio illumination is linked to the
car light switch, and the button area
lights up when the car lights are
turned on.
Advice
• [2] lights when a CD is loaded.
Advice
• If you do not perform an operation
within 5 seconds of selecting the
function setting mode, the
function setting mode is canceled.
• You can also cancel the function
setting mode by pressing button
[15].
• Even if power to this unit is
switched OFF, time indications
continue to be displayed unless
switched OFF.
2
Advice
• If the time is not adjusted, time
indications continue flashing.
Advice
• When a two-speaker system is
used, you should set “FAD C”.
Содержание DEH-M6156EW
Страница 4: ...4 DEH M6156ZH M6356ZH 2 2 EXTERIOR A B ...
Страница 6: ...6 DEH M6156ZH M6356ZH C D 2 3 CD MECHANISM MODULE ...
Страница 13: ...13 DEH M6156ZH M6356ZH 5 6 7 8 5 6 7 8 D C B A 4 4dBs B KEYBOARD UNIT SYST LCD DRIVER 9V A a A a A b B 5 6 ...
Страница 21: ...21 DEH M6156ZH M6356ZH ...
Страница 23: ...23 DEH M6156ZH M6356ZH 5 6 7 8 5 6 7 8 D C B A A FRONT PCLA TESTA ANTENNA FM AM TUNER UNIT SIDE A ...
Страница 24: ...24 DEH M6156ZH M6356ZH 1 2 3 4 1 2 3 4 D C B A FRONT A A TUNER AMP UNIT ...
Страница 25: ...25 DEH M6156ZH M6356ZH 5 6 7 8 5 6 7 8 D C B A A SIDE B ...
Страница 27: ...27 DEH M6156ZH M6356ZH 1 2 3 4 1 2 3 4 D C B A B B KEYBOARD UNIT SIDE B A CN602 ...
Страница 29: ...29 DEH M6156ZH M6356ZH D C B A 1 2 3 4 1 2 3 4 SIDE B C CLAMP CONTROL UNIT C ...
Страница 38: ...38 DEH M6156ZH M6356ZH Grating waveform Ech Xch 20mV div AC Fch Ych 20mV div AC 45 0 75 60 30 90 ...
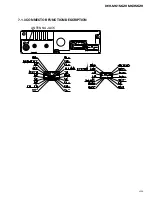
Страница 45: ...45 DEH M6156ZH M6356ZH 7 1 3 CONNECTOR FUNCTION DESCRIPTION ANTENNA JACK ...
Страница 55: ...55 DEH M6156ZH M6356ZH 8 OPERATIONS AND SPECIFICATIONS 8 1 OPERATIONS DEH M6156ZH X1P EW DEH M6356ZH X1P EW ...

