background image

3

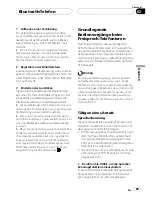
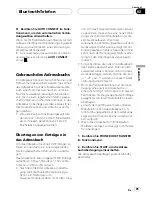
Verwenden Sie Ihr Mobiltelefon, um

das Adressbuch zu übertragen.

Führen Sie die Adressbuch-Übertragung aus-
gehend von Ihrem Mobiltelefon durch. Detail-
lierte Anweisungen hierzu können Sie der
Bedienungsanleitung Ihres Mobiltelefons ent-
nehmen.

#

Während der Übertragung des Adressbuchs

wird ein Sanduhr-Symbol angezeigt.

#

Im Display wird die Anzahl der bereits übertra-

genen sowie die Anzahl der insgesamt zu über-
tragenden Einträge ausgewiesen.

#

Zum Abbrechen der Übertragung berühren

Sie

STOP

.

4

Completed erscheint im Display, d. h.

die Adressbuch-Übertragung ist abge-
schlossen.

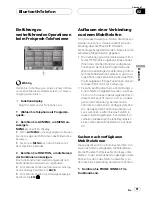
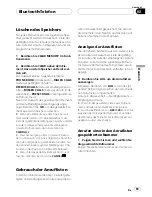
Ändern der Anzeigereihenfolge
der Adressbucheinträge

Für die Anzeige der Adressbucheinträge kön-
nen Sie zwischen einer alphabetischen Sortie-
rung nach Vor- und nach Nachnamen wählen.

!

Mit manchen Mobiltelefonen steht diese
Funktion ggf. nicht zur Verfügung.

%

Berühren Sie PHONEBOOK NAME VIEW

im Funktionsmenü, um die Anzeigefunk-
tion für die Adressbucheinträge einzuschal-
ten.

Die Anzeigereihenfolge der Adressbucheinträ-
ge wird geändert.

#

Um zur anderen Anzeigereihenfolge zu wech-

seln, berühren Sie

PHONEBOOK NAME VIEW

erneut.

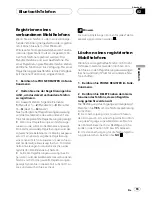
Anrufen einer im Adressbuch
gespeicherten Nummer

Sie können den gewünschten Eintrag im
Adressbuch auswählen und die entsprechen-
de Nummer direkt anrufen.

1

Berühren Sie PHONE BOOK, um das

Adressbuch anzuzeigen.

2

Berühren Sie den Eintrag im Adress-

buch, dessen Nummer angerufen werden
soll.

Der Bildschirm zur Adressbuchbearbeitung
erscheint.

#

Durch Berühren von

PREV

oder

NEXT

können

Sie zu anderen Einträgen im Adressbuch um-
schalten.

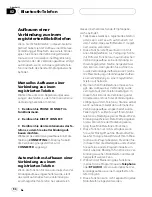
3

Berühren Sie die Rufnummer im ge-

wählten Adressbucheintrag, die angerufen
werden soll.

Wenn für einen Eintrag mehrere Telefonnum-
mern eingegeben wurden, berühren Sie die
gewünschte Nummer.
Das Display kehrt zur normalen Anzeige zu-
rück, wobei der von Ihnen gewählte Adressbu-
cheintrag in der Informationsleiste angezeigt
wird.

4

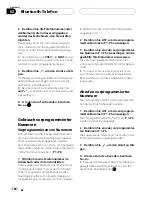
Berühren Sie

, um den Anruf zu täti-

gen.

Im Display wird die geschätzte Anrufdauer an-
gezeigt (diese weicht ggf. leicht von der tat-
sächlichen Anrufdauer ab).

#

Bei einem Anruf ins Ausland berühren Sie

add "+"

, um der Rufnummer ein Pluszeichen (

+

)

hinzuzufügen.

5

Um den Anruf zu beenden, berühren

Sie

.

Im Display wird die geschätzte Anrufdauer an-
gezeigt (diese weicht ggf. leicht von der tat-
sächlichen Anrufdauer ab).

Bluetooth-Telefon

De

96

Abschnitt

02

Содержание CD-BTB20

Страница 1: ...Owner s Manual Mode d emploi Bluetooth adapter Adaptateur Bluetooth CD BTB200 English Français Deutsch Español ...

Страница 2: ...En 2 ...

Страница 3: ...ular phone 13 Registering connected cellular phone 13 Deleting a registered phone 13 Connecting to a registered cellular phone 14 Connecting to a registered phone manually 14 Connecting to a registered phone automatically 14 Using the Phone Book 14 Transferring entries to the Phone Book 15 Changing the Phone Book display order 15 Calling a number in the Phone Book 15 Searching a number in the Phon...

Страница 4: ...Voice recognition 32 Setting the automatic answering 33 Connecting to a registered phone automatically 33 Setting the ring tone 33 Displaying the device information of this unit 33 Connecting a Bluetooth audio player 34 Disconnecting a Bluetooth audio player 34 Connections Connecting the units 36 Installation Installing this unit 37 Mounting with Velcro fasteners 37 Installing the microphone 37 Wh...

Страница 5: ...contact with liquids Electrical shock could result Also this unit damage smoke and overheat could result from contact with liquids Keep this manual handy as a reference for op erating procedures and precautions Always keep the volume low enough so that you can hear sounds from outside the vehicle Protect this unit from moisture Should this product fail to operate properly contact your dealer or ne...

Страница 6: ...luetooth word mark and logos are owned by the Bluetooth SIG Inc and any use of such marks by Pioneer Corporation is under license Other trademarks and trade names are those of their respective owners Resetting this unit CAUTION Pressing RESET button of this unit with the igni tion switch ON ACC ON erasing the contents of the unit s memory Resetting this unit without erasing the data about phone Pr...

Страница 7: ...a pen tip or other pointed instrument All memory is now completely cleared It takes about 10 seconds to delete the data To make it sure leave the ignition switch ACC or ON position for 10 seconds after you operate the deletion Please confirm if all data have been comple tely cleared For confirmation of the data status refer to Registering connected cellular phone on page 13 If all phone s statuses...

Страница 8: ...n on page 10 7 Incoming call notice indication Shows when an incoming call has been re ceived and not checked yet 8 Automatic answering indicator Shows when the automatic answering func tion is on for more details refer to Setting the automatic answering on page 20 9 Battery strength indicator Shows the battery strength of cellular phone Battery strength indicator may differ from the actual batter...

Страница 9: ...ndby in the background all the while the connection is sustained This means you can freely use the other functions of the head unit but still be ready to receive a call Touch the source icon and then touch Telephone to select the telephone When the source icon is not displayed you can display it by touching the screen Setting up for hands free phoning Before you can use the hands free phoning func...

Страница 10: ...e with your cellular phone for detailed instructions This function can be operated only when the connection is established with HFP Hands Free Profile 1 Touch VOICE to turn the voice recogni tion function on Voice dial icon appears on the information bar Voice recognition function is now ready If your cellular phone does not feature voice recognition function you can not touch VOICE 2 Pronounce th...

Страница 11: ... between callers Rejecting a call waiting If you would rather not interrupt your current call to answer a call waiting you can reject it Touch to reject a call waiting The number you have rejected is not added to the call history list Introduction of advanced hands free phoning operation 1 1 1 Important To perform this operation be sure to park your ve hicle and apply the parking brake 1 Function ...

Страница 12: ...ce names or Name Not Found if names cannot be obtained are displayed If this unit fails to find any available cellular phones NOT FOUND is displayed 3 Touch the device name you want to connect While connecting CONNECTING is displayed To complete the connection please check the device name Pioneer BT unit and enter the link code on your cellular phone If the con nection is established CONNECTED is ...

Страница 13: ...t 2 If the registration is succeeded the device name of the connected phone is displayed in the selected assignment If the assignment is empty the device name is not displayed If the assignment is already taken the device name appears To replace an assign ment with a new phone first delete the current assignment For more detailed instructions see Deleting a registered phone on this page If the reg...

Страница 14: ... the connection may not be made until you confirm it on the phone even if the Automatic Connection of this unit is set to on If possible set your cellu lar phone to not seeking a confirmation for the Bluetooth connection For details please refer to the operation manual that came with your cellular phone This feature is not possible if you are play ing back songs on your Bluetooth audio player via ...

Страница 15: ...ed via Bluetooth wireless technology this unit cannot display the Phone Book correctly Some characters may be garbled If the phone book in the cellular phone con tains image data phone book may not be correctly transferred 1 Touch PHONEBOOK TRANSFER on the function menu 2 Touch START to turn the Phone Book Transfer function on The Phone Book Transfer is now on standby 3 Use cellular phone to perfo...

Страница 16: ...uch SEARCH to display the Phone Book search display 3 Touch an alphabet letter to select the first letter of the name you are looking for 4 Touch ENTER to show entries starting with the letter you chose The display shows the first six Phone Book en tries starting with that letter e g Ben Brian and Burt when B is selected Touch PREV or NEXT to display other phone book entries To refine the search w...

Страница 17: ...Book entry You can delete Phone Book entries in the Phone Book one by one To clear all of your entries in the Phone Book refer to Clearing memory on this page 1 Touch PHONE BOOK to display the Phone Book 2 Select a Phone Book entry you want to delete See step two to three on Calling a number in the Phone Book on page 15 for how to do this 3 Touch DELETE to delete the Phone Book entry A confirmatio...

Страница 18: ...ayed You can switch between phone number and name if entered by touching ABC 123 Calling a number from the Call History 1 Display the list and select a phone num ber Display the phone number you want to make a call 2 Touch a phone number or name if en tered you want to call The display returns to the normal display and the phone number you selected is displayed on the information bar Touch PREV or...

Страница 19: ...ch 0 9 to input numbers For an international call touch add to add to the phone number Touch CLEAR to delete the number Up to 24 digits can be entered 3 When you completed entering the number touch to make a call 4 To end the call touch The estimated call time appears in the display this may differ slightly from the actual call time Echo canceling and noise reduction When you are operating hands f...

Страница 20: ...o turn the automatic answer off touch AUTO ANSWER again Note If both the automatic reject and automatic an swer functions are set to on the automatic reject is prioritized and all incoming calls are automati cally rejected Displaying BD Bluetooth Device address Each device featuring Bluetooth wireless tech nology is allocated a unique 48 bit device ad dress Each device address consists of a 12 dig...

Страница 21: ... refrain from operat ing on your cellular phone as much as possible If you try operating on your cellular phone the signal from your cellular phone may cause a noise on the song playback When you are talking on the cellular phone connected to this unit via Bluetooth wireless technology the song playback from your Blue tooth audio player connected to this unit is muted Even if while you are listeni...

Страница 22: ...quires a PIN code to establish a connection look for the code on the player or in its accompa nying documentation Enter the PIN code refer ring to Entering PIN code for Bluetooth wireless connection on page 24 Playing songs on Bluetooth audio player Important Operation varies depending on the type of your Bluetooth audio player Refer to the instruction manual that came with your Bluetooth audio pl...

Страница 23: ...e address consists of a 12 digit of hexadecimal string You can display the BD address of this unit Should this unit fails to operate properly and you consult with dealer for repair you may be asked to indicate the system versions of this unit and of Bluetooth module You can display the versions and confirm them 1 Touch AV MENU to display MENU MENU appears on the display When AV MENU is not display...

Страница 24: ...function names are displayed and oper able ones are highlighted When AV MENU is not displayed you can dis play it by touching the screen You can also display MENU by clicking the joystick To go to the next group of function names touch NEXT To return to the previous group of function names touch PREV To return to the previous display touch BACK To return to the display of each source touch ESC 3 T...

Страница 25: ...h wireless technology using this unit without running the engine can result in battery drainage In order to use Bluetooth wireless technology devices must be able to interpret certain pro files When using as an external unit this unit is compatible with the following profiles GAP Generic Access Profile SDP Service Discovery Protocol HSP Head Set Profile HFP Hands Free Profile A2DP Advanced Audio D...

Страница 26: ...and your cellular phone must be 10 meters or less for sending and receiving voice and data via Bluetooth wireless technology However the transmission distance may become short er than the estimated distance depending on the environment in use TEL and BT AUDIO are set to the same vo lume and the same SLA Source Level Adjust ment volume Change the volume value for TEL or BT AUDIO each time if needed...

Страница 27: ... as a source press and hold c or d Controls of Bluetooth audio Select a function When selecting BT AUDIO as a source press FUNC TION FUNC Pause a song When selecting BT AUDIO as a source press a or b in FUNC1 F1 Put the unit in C OPEN mode When selecting BT AUDIO as a source press and hold a or b in FUNC1 F1 Play songs When selecting BT AUDIO as a source press a or b in FUNC2 F2 Put the unit in DI...

Страница 28: ...ce press MULTI CON TROL in FUNC3 F3 Turn the automatic connection on or off When selecting TEL as a source press and hold MULTI CONTROL in FUNC3 F3 Controls of Bluetooth telephone Turn the ring tone on or off When selecting TEL as a source press MULTI CON TROL in FUNC4 F4 Display and switch the device informa tion When selecting TEL as a source press and hold MULTI CONTROL in FUNC4 F4 Controls of ...

Страница 29: ...ed and received call history touch a Select a function When selecting TEL as a source touch AV MENU and then touch FUNCTION Scroll a phone num ber in the call history When selecting TEL as a source touch ab in FUNC TION1 Put the unit in C OPEN mode When selecting TEL as a source keep touching ab in FUNCTION1 Put the unit in RE GIST mode When selecting TEL as a source touch ab in FUNC TION2 Put the...

Страница 30: ... call When a call comes in press a End a call Press b Display the received missed call history Press c Display the dialled call history Press d Select a phone num ber from the dialled or received missed call history When displaying the dialled or received missed call his tory press c or d If you want to return to the telephone standby display press b Make a call When selecting a phone number from ...

Страница 31: ...as an external unit this unit doesn t automatically return to the original source after a phone call Select a desired source manually after a phone call Connecting a cellular phone To use a phone wirelessly with this unit it is necessary first to establish a connection using Bluetooth wireless technology Connection is normally established by HFP which gives you a full control of functions availabl...

Страница 32: ...in REGIST mode Refer to Function compatibility charts on page 26 Before you put the unit in REGIST mode TEL is displayed 2 Use cellular phone to register to this unit When the registration is completed TEL REG is displayed Operation varies depending on the type of your cellular phone Refer to the instruction man ual that came with your cellular phone for de tailed instructions You may need to ente...

Страница 33: ...tion on or off Refer to Function compatibility charts on page 26 The status will be displayed e g AUTO ON When you turn the automatic connection on and this unit is searching for the registered cellu lar phone SEARCH is displayed When you turn the automatic connection on and this unit is establishing a connection with the registered cellular phone WAIT is dis played Setting the ring tone The unit ...

Страница 34: ...OPEN mode Refer to Function compatibility charts on page 26 This unit is now on standby for connection from Bluetooth audio player If your Bluetooth audio player is set ready for Bluetooth wireless connection connection to this unit will be automatically established Before you put the unit in C OPEN mode NO AUDIO is displayed 2 Use the Bluetooth audio player to con nect to this unit When the conne...

Страница 35: ...g parts such as gear shift and seat rails Place all cables away from hot places such as near the heater outlet Do not pass the yellow cable through a hole into the engine compartment to con nect to a battery Cover any disconnected cable connectors with insulating tape Do not shorten any cables Never cut the insulation of the power cable of this unit in order to share the power to other equipment C...

Страница 36: ...se 3 A Yellow To terminal always supplied with power regardless of ignition switch position 3 m IP BUS cable IP BUS cable Blue To IP BUS input blue Multi CD player sold separately Head unit Black Black This unit Microphone supplied Connections En 36 Section 06 ...

Страница 37: ...heck behind where you want to drill the holes Do not drill into the gas line brake line electrical wiring or other important parts If this unit installed in the passenger compart ment anchor it securely so it does not break free while the vehicle is moving and cause in jury or an accident If this unit is installed under a front seat make sure it does not obstruct seat move ment Route all leads and...

Страница 38: ...ions Clamps Use clamps to secure the lead where necessary inside the vehicle Microphone clip When installing the microphone on the steering column 1 Install the microphone on the micro phone clip Fit the microphone lead into the groove Microphone clip Microphone 2 Install the microphone clip on the steer ing column Install the microphone clip on the rear side of the steering column Double sided ta...

Страница 39: ...Adjusting the microphone angle The microphone angle can be adjusted by moving forward or backward the microphone clip angle Installation En 39 English Section 07 ...

Страница 40: ...4 V DC 10 8 V to 15 1 V allowable Max current consumption 0 2 A Dimensions W H D 146 25 90 mm Weight 0 37 kg Version Bluetooth 1 2 certified Output power 4 dBm Max Power class 2 Profile GAP Generic Access Pro file SDP Service Discovery Pro tocol HSP Head Set Profile HFP Hands Free Profile A2DP Advanced Audio Dis tribution Profile AVRCP Audio Video Re mote Control Profile OPP Object Push Profile No...

Страница 41: ...exión 51 Desconexión de un teléfono móvil 51 Registro del teléfono móvil conectado 52 Eliminación de un teléfono registrado 52 Conexión a un teléfono móvil registrado 52 Conexión manual a un teléfono registrado 52 Conexión automática a un teléfono registrado 53 Uso del Directorio de teléfonos 53 Transferencia de entradas al Directorio de teléfonos 53 Cambio del orden de visualización del Directori...

Страница 42: ...2 Uso de un teléfono móvil para iniciar una conexión 72 Registro del teléfono móvil conectado 73 Desconexión de un teléfono móvil 73 Reconocimiento de voz 73 Ajuste de la respuesta automática 73 Conexión automática a un teléfono registrado 73 Cambio del tono de llamada 74 Visualización de la información del dispositivo de esta unidad 74 Conexión de un reproductor de audio Bluetooth 75 Desconexión ...

Страница 43: ...ioneer que permite conectar un te léfono móvil provisto de tecnología inalámbri ca Bluetooth para utilizar la función manos libres y escuchar canciones en el reproductor de audio Bluetooth Esta unidad está diseñada para ser utili zada únicamente en vehículos PRECAUCIÓN No permita que esta unidad entre en contacto con líquidos ya que ello puede producir una descarga eléctrica Además el contacto con...

Страница 44: ...caso de problemas En caso de que este producto no funcione co rrectamente comuníquese con su concesio nario o el Servicio técnico oficial Pioneer más próximo a su domicilio Acerca de Bluetooth Bluetooth es una tecnología inalámbrica de conectividad por radio de corto alcance desa rrollada para sustituir los cables de los teléfo nos móviles ordenadores de bolsillo y otros dispositivos Bluetooth ope...

Страница 45: ... la fun ción manos libres 1 Gire la llave de contacto a la posición OFF apagado 2 Pulse RESET con la punta de un lapicero u otro instrumento con punta Botón RESET Reposición de la unidad borrando toda la memoria Para proteger su información personal y priva da es posible eliminar los datos sobre el telé fono almacenados en esta unidad 1 Gire la llave de contacto a la posición ACC accesorio u ON en...

Страница 46: ... no móvil 6 Indicador de reconocimiento de voz Aparece cuando está activada la función de reconocimiento de voz para obtener más información consulte Reconocimiento de voz en la página 48 7 Indicación de aviso de llamada en espe ra Aparece cuando se ha recibido una llamada externa que no ha sido revisada todavía 8 Indicador de respuesta automática Aparece cuando está activada la función de respues...

Страница 47: ...tos de radio o DAB transmisión de audio digital y activa la espera por anuncio de tráfico es po sible interrumpir una llamada telefónica reci biendo una señal por anuncio de tráfico Cuando el teléfono está seleccionado como fuente el volumen y la curva de ecualización cambian automáticamente a los ajustes ade cuados para la fuente telefónica Cuando se vuelve a otra fuente los ajustes del volumen y...

Страница 48: ...esconecte el teléfono de esta unidad Funciones básicas manos libres A continuación se indican las funciones bási cas para utilizar manos libres a través de la tecnología inalámbrica Bluetooth En Introduc ción al uso avanzado de la función manos libres en la página 50 se explican las funciones más avanzadas y cómo utilizarlas Importante Las operaciones avanzadas que exigen concen tración tales como...

Страница 49: ...de historial de llamadas perdidas Para obtener in formación sobre la lista de historial de llamadas perdidas consulte Uso del Historial de llamadas en la página 57 Atender una llamada en espera Si le entra otra llamada telefónica mientras está hablando por teléfono el número de la llamada entrante o nombre de la persona si fi gura en el directorio de teléfonos aparecerá en el display para indicarl...

Страница 50: ...isten varias formas de realizar esto La conexión se establece normalmente me diante HFP que le otorga un pleno control de las funciones disponibles sobre la fuen te telefónica Sin embargo en algunos casos cuando se realiza la conexión desde su teléfono móvil puede que ésta se haga mediante HSP y que algunas funciones no se estén disponibles Un teléfono se puede conectar a través de tecnología inal...

Страница 51: ...tablecer una cone xión inalámbrica Bluetooth desde su teléfono Es posible que tenga que consultar el manual de funcionamiento de su teléfono si no está seguro de cómo iniciar una conexión desde el teléfono 1 Toque PHONE CONNECT en el menú de funciones 2 Toque CONNECTION OPEN La unidad está ahora en espera de una cone xión desde un teléfono móvil 3 Uso del teléfono móvil para la conexión a esta uni...

Страница 52: ...sta página Si el registro no se ha realizado correctamen te el nombre del dispositivo del teléfono conec tado no se mostrará en la asignación seleccionada En este caso vuelva al paso 1 e in téntelo de nuevo Nota El ajuste de audio se puede fijar independiente mente para cada usuario Eliminación de un teléfono registrado Si ya no necesita utilizar un teléfono registra do en esta unidad puede elimin...

Страница 53: ...ecnología inalámbrica Bluetooth En tal caso detenga la reproducción o cambie a otra fuente para que su teléfono móvil pueda conectarse a esta unidad por medio de esta función Cuando utiliza la unidad en el menú de funciones de la fuente Telephone o la fuente BT AUDIO la unidad no realiza una conexión automática a su teléfono registra do Esta función no se puede configurar para cada teléfono de usu...

Страница 54: ... 1 Toque PHONEBOOK TRANSFER en el menú de funciones 2 Toque START para activar la función de transferencia del Directorio de teléfonos La función de transferencia del Directorio del teléfonos quedará en espera 3 Utilice el teléfono móvil para realizar la transferencia del Directorio de teléfonos Realice la transferencia del Directorio de telé fonos utilizando el teléfono móvil Para obte ner más in...

Страница 55: ...ue SEARCH para visualizar la panta lla de búsqueda del Directorio de teléfo nos 3 Toque una letra del alfabeto para selec cionar la primera letra del nombre que está buscando 4 Toque ENTER para mostrar las entradas que empiezan por la letra que ha seleccio nado El display muestra las seis primeras entradas del Directorio de teléfonos que empiezan por dicha letra p ej Ben Brian y Burt cuan do B est...

Страница 56: ...te léfono Toque CLEAR para eliminar el número 5 Toque c o d para mover el cursor y editar el número Repita estos pasos hasta que termine 6 Toque ENTER para guardar el nuevo nú mero Borrado de una entrada del Directorio de teléfonos Puede eliminar entradas del Directorio de telé fonos una a una Para borrar todas las entradas del Directorio de teléfonos consulte Borrado de la memoria en esta página ...

Страница 57: ... del Historial de llamadas El Historial de llamadas se divide en tres gru pos Llamadas perdidas Llamadas marcadas y Llamadas recibidas Puede ver el número y el nombre si el número está en el Directorio de teléfonos Toque LOG para mostrar el historial de llamadas Si toca LOG varias veces se alternará entre los siguientes historiales de llamadas Llamada perdida Llamada marcada Lla mada recibida Si n...

Страница 58: ... teléfonos de invitado Recuperación de números predefinidos Es posible recuperar fácilmente los números de teléfono predefinidos 1 Toque LIST para visualizar los números predefinidos P 1 P 6 Los números de presintonías P 1 P 6 se mos trarán en el display 2 Toque uno de los números predefinidos P 1 P 6 El número de teléfono seleccionado se mos trará en la barra de información 3 Toque para hacer una...

Страница 59: ... TONE Ajuste del rechazo automático Si esta función está activada la unidad recha zará automáticamente todas las llamadas en trantes Esta función no se puede configurar para cada teléfono de usuario distinto La llamada rechazada no se memoriza en la lista del historial de llamadas recibidas o perdidas Toque REFUSE ALL CALLS en el menú de funciones para activar la función de re chazo automático de ...

Страница 60: ...namiento en la unidad y debe ponerse en contacto con un concesionario para que realice la reparación es posible que tenga que indicar la versión del sistema de esta unidad y el módulo Bluetooth Puede visualizar las versiones y confirmarlas Toque DEVICE INFO en el menú de fun ciones para seleccionar la dirección BD Se mostrará diferente información sobre la tecnología inalámbrica Bluetooth BD ADDRE...

Страница 61: ... Bluetooth no realice operaciones innecesarias en su teléfono móvil Si intenta realizar una operación en su teléfono móvil la señal de su teléfono móvil puede ocasionar ruido en la reproducción de canciones Cuando habla con el teléfono móvil conectado a esta unidad a través de tecnología inalám brica Bluetooth la reproducción de canciones del reproductor de audio Bluetooth conectado a esta unidad ...

Страница 62: ...ooth se establecerá automáticamente la conexión a esta unidad Nota Antes de que pueda utilizar algunos reproducto res de audio es necesario que introduzca el códi go PIN en esta unidad Si su reproductor requiere un código PIN para establecer una conexión lo calice el código en el reproductor o en su docu mentación Consulte Ingreso del código PIN para la conexión inalámbrica Bluetooth en la página ...

Страница 63: ...isualización de la dirección BD Bluetooth Device Cada dispositivo que posee tecnología inalám brica Bluetooth recibe una dirección de dispo sitivo única de 48 bits Cada dirección del dispositivo está formada por una cadena hexa decimal de 12 dígitos Puede visualizar la dirección BD de esta uni dad Si se produce un fallo de funcionamiento en la unidad y debe ponerse en contacto con un concesionario...

Страница 64: ...ones y las que se pueden usar aparecen resaltadas Si no se visualiza AV MENU toque la pantalla para poder visualizarlo También se puede visualizar MENU haciendo clic en el joystick Para ir al siguiente grupo de nombres de fun ciones toque NEXT Para volver al grupo anterior de nombres de funciones toque PREV Para volver a la visualización anterior toque BACK Para volver a la visualización de cada f...

Страница 65: ...S D7R RS D7RN Importante Puesto que esta unidad se encuentra en espe ra para conectar con sus teléfonos móviles mediante la tecnología inalámbrica Bluetooth utilizarla sin encender el motor puede descar gar la batería Para utilizar la tecnología inalámbrica Blue tooth los dispositivos deben ser capaces de interpretar ciertos perfiles Cuando la unidad se utiliza como unidad externa es compatible co...

Страница 66: ...de teléfono móvil y el reproductor de audio Bluetooth Consulte el manual de los dos dis positivos para ver más instrucciones Notas La recepción de llamadas telefónicas de esta unidad entra en espera cuando la llave de contacto está en la posición ACC accesorio u ON encendido La distancia de visibilidad entre esta unidad y su teléfono móvil deber ser de 10 metros o in ferior para el envío y recepci...

Страница 67: ... F3 cuando selec cione TEL como fuente Controles del teléfono Bluetooth Activar o desactivar el tono de llamada Presione a o b en FUNC4 F4 cuando seleccione TEL como fuente Mostrar y cambiar la información del dis positivo Mantenga presionado a o b en FUNC4 F4 cuando selec cione TEL como fuente Controles del audio Bluetooth Seleccionar TEL BT AUDIO como fuente Presione SOURCE Cambiar entre TEL y B...

Страница 68: ...al de llamadas marcadas y recibidas Controles del teléfono Bluetooth Seleccionar una fun ción Utilice MULTI CONTROL cuando seleccione TEL como fuente Desplazarse por los números de teléfono en el historial de lla madas Presione MULTI CONTROL en FUNC1 F1 cuando selec cione TEL como fuente Ajuste de la unidad en modo C OPEN Mantenga presionado MULTI CONTROL en FUNC1 F1 cuando seleccione TEL como fue...

Страница 69: ...uetooth Seleccionar TEL BT AUDIO como fuente Presione SOURCE Cambiar entre TEL y BT AUDIO Toque BAND cuando selec cione TEL BT AUDIO como fuente Ajuste la unidad en modo VOICE ON 3 Mantenga pulsado BAND cuando seleccione TEL como fuente Aceptación de una llamada telefónica Cuando entre una llamada toque a Finalización de una llamada Toque b Visualización del his torial de llamadas re cibidas perdi...

Страница 70: ...n te Avance rápido retro ceso 2 Mantenga pulsado c o d cuando seleccione BT AUDIO como fuente Seleccionar una fun ción Toque AV MENU y luego FUNCTION cuando seleccio ne BT AUDIO como fuente Poner en pausa una canción Toque ab en FUNCTION1 cuando seleccione BT AUDIO como fuente Controles del audio Bluetooth Ajuste de la unidad en modo C OPEN Mantenga pulsado ab en FUNCTION1 cuando selec cione BT AU...

Страница 71: ...GIST Presione el botón FUNCTION 2 cuando seleccione TEL como fuente Ajuste de la unidad en modo DISCONN Mantenga presionado el botón FUNCTION 2 cuando seleccione TEL como fuente Activar o desactivar la respuesta automá tica Presione el botón FUNCTION 3 cuando seleccione TEL como fuente Activar o desactivar la conexión automáti ca Mantenga presionado el botón FUNCTION 3 cuando seleccione TEL como f...

Страница 72: ...logía inalámbrica Bluetooth sin estar registrado con esta unidad En este caso el teléfono estará temporalmente conectado pero con las funciones disponibles limi tadas Para aprovechar completamente todas las funciones disponibles se reco mienda registrar su teléfono en esta uni dad Consulte Registro del teléfono móvil conectado en la página siguiente para obte ner más información Si la unidad se us...

Страница 73: ...ad de funciones en la página 66 Una vez completada la desconexión aparece NO TEL Reconocimiento de voz Si su teléfono móvil posee tecnología de reco nocimiento de voz puede hacer una llamada mediante comandos de voz El funcionamiento es diferente según el tipo de teléfono móvil Consulte el manual de su teléfono móvil para ver más instruc ciones Esta función se puede utilizar únicamente cuando la c...

Страница 74: ...d no tiene efecto en el tono de llamada utilizado por su teléfono Si no desea que su teléfono y esta unidad suenen al mismo tiem po se recomienda desactivar el tono de llama da de uno de los dispositivos Activar o desactivar el tono de llamada Consulte Tablas de compatibilidad de funciones en la página 66 Se mostrará el estado ej BEEP ON Visualización de la información del dispositivo de esta unid...

Страница 75: ...ón inalámbrica Blue tooth se establecerá automáticamente la conexión a esta unidad Antes de ajustar la unidad en el modo C OPEN se mostrará NO AUDIO 2 Utilice el reproductor de audio Blue tooth que se conectará a esta unidad Si la conexión se establece se visualizará BT AUDIO El funcionamiento es diferente según el repro ductor de audio Bluetooth Consulte el manual de su reproductor de audio Bluet...

Страница 76: ...ieles de los asientos Coloque todos los cables alejados de luga res calientes como cerca de la salida del calefactor No pase el cable amarillo a través de un orificio en el compartimiento del motor para conectarlo a la batería Cubra con cinta aislante los conectores de cables que queden desconectados No acorte ningún cable Nunca corte el aislamiento del cable de ali mentación de esta unidad para c...

Страница 77: ...Conexión de las unidades Conexiones Es 77 Sección Español 06 ...

Страница 78: ...l calefactor en donde podría resultar afectada por el calor o cerca de las puertas donde puede sufrir salpicaduras de agua de lluvia Antes de perforar orificios de montaje siem pre revise detrás de donde desee hacer la per foración No perfore hacia la línea de combustible la línea de frenos el cableado eléctrico u otras partes importantes Si la unidad se instala en el compartimiento del pasajero f...

Страница 79: ...de la persona que utiliza el sistema Instalación del micrófono en el parasol 1 Instale el micrófono en la abrazadera del micrófono 2 Instale la abrazadera del micrófono en el parasol Levante el parasol e instale la abrazadera del micrófono si lo baja se reducirá el reconoci miento de las operaciones de voz Instalación del micrófono en la columna de dirección 1 Instale el micrófono en la abrazadera...

Страница 80: ...Ajuste del ángulo del micrófono Es posible ajustar el ángulo del micrófono des plazando adelante o atrás el ángulo de la abra zadera del micrófono Instalación Es 80 Sección 07 ...

Страница 81: ...ido Especificaciones Generales Fuente de alimentación 14 4 V CC 10 8 a 15 1 V per misible Consumo máximo de corriente 0 2 A Dimensiones An Al Pr 146 25 90 mm Peso 0 37 kg Versión Certificada para Bluetooth 1 2 Potencia de salida 4 dBm Máx Clase de potencia 2 Perfil GAP Generic Access Profi le SDP Service Discovery Pro tocol HSP Head Set Profile HFP Hands Free Profile A2DP Advanced Audio Dis tribut...

Страница 82: ...dungsaufbaus über das Mobiltelefon 92 Trennen der Verbindung zu einem Mobiltelefon 92 Registrieren eines verbundenen Mobiltelefons 93 Löschen eines registrierten Mobiltelefons 93 Aufbauen einer Verbindung zu einem registrierten Mobiltelefon 94 Manuelles Aufbauen einer Verbindung zu einem registrierten Telefon 94 Automatisches Aufbauen einer Verbindung zu einem registrierten Telefon 94 Gebrauch des...

Страница 83: ... 117 Starten des Verbindungsaufbaus über das Mobiltelefon 117 Registrieren eines verbundenen Mobiltelefons 117 Trennen der Verbindung zu einem Mobiltelefon 118 Spracherkennung 118 Einstellen der automatischen Rufannahme 118 Automatisches Aufbauen einer Verbindung zu einem registrierten Telefon 118 Einstellen des Ruftons 119 Anzeigen der Geräteinformationen für dieses Gerät 119 Aufbauen einer Verbi...

Страница 84: ...Hauptgerät von Pioneer und ermöglicht unter Rückgriff auf die Bluetooth Wireless Technolo gie den Aufbau einer Freisprechverbindung mit einem Mobiltelefon sowie die Wiedergabe von Musik auf einem Bluetooth Audio Player Dieses Gerät ist ausschließlich für eine Ver wendung in Kraftfahrzeugen vorgesehen VORSICHT Dieses Gerät darf keinesfalls mit Flüssigkeiten in Berührung kommen da dies einen elektri...

Страница 85: ...rungsfall Sollte dieses Produkt nicht ordnungsgemäß funktionieren dann wenden Sie sich bitte an Ihren Händler oder an die nächstgelegene Pioneer Kundendienststelle Zu Bluetooth Bluetooth ist eine Technologie für drahtlose Funkverbindungen von kurzer Reichweite Sie wurde als Alternative zu drahtgestützten Ver bindungen für Mobiltelefone Handheld PCs und andere Geräte entwickelt Bluetooth nutzt das ...

Страница 86: ...us OFF 2 Drücken Sie RESET mit Hilfe eines Ku gelschreibers oder eines anderen spitz zu laufenden Gegenstands Taste RESET Zurücksetzen dieses Geräts und Löschen des gesamten Speichers Um den Schutz persönlicher und privater In formationen zu gewährleisten können die in diesem Gerät gespeicherten telefonspezifi schen Daten gelöscht werden 1 Schalten Sie die Zündung ein Position ON bzw positionieren...

Страница 87: ...ätename Zeigt den Gerätenamen des Mobiltelefons an 6 Spracherkennungsanzeige Erscheint wenn die Spracherkennung sfunktion eingeschaltet ist für weitere Ein zelheiten siehe Spracherkennung auf Seite 89 7 Hinweis Eingehender Anruf Erscheint wenn ein Anruf in Abwesenheit empfangen und noch nicht geprüft wurde 8 Anzeige Automatische Rufannahme Erscheint wenn die Funktion zur automati schen Rufannahme ...

Страница 88: ...unk verwenden und die Durchsagebereitschaft einschalten kann ein Anruf durch den Empfang eines Durchsagesignals unterbrochen werden Bei der Wahl des Telefons als Programmquel le werden Lautstärke und Equalizer Kurve au tomatisch auf eine für die Telefonquelle geeignete Einstellung geschaltet Wenn Sie zu einer anderen Programmquelle zurückkehren kehren auch die Lautstärke und die Equalizer Kurve zu...

Страница 89: ...autstärkepegel Null bleibt diese Einstellung auch nach der Verbin dungstrennung für das Telefon aktiv Grundlegende Bedienvorgänge beim Freisprech Telefonieren Nachfolgend werden alle grundlegenden Schritte für ein Telefonieren im Freisprechmo dus per Bluetooth beschrieben Weiterführen de Operationen beim Freisprech Telefonieren werden ab Einführung zu weiterführenden Ope rationen beim Freisprech T...

Страница 90: ...Der Anruf wird abgewiesen Hinweis Der manuell abgewiesene Anruf wird in der Liste der Anrufe in Abwesenheit aufgezeichnet Für In formationen zu dieser Liste siehe Gebrauch der Anruflisten auf Seite 99 Annehmen eines anklopfenden Anrufs Wenn ein Anruf eingeht während Sie bereits telefonieren wird die Nummer des zweiten An rufers oder dessen Name wenn dieser im Adressbuch gespeichert ist im Display ...

Страница 91: ...ichkeiten gegeben Die Verbindung wird normalerweise mithil fe des HFP Profils aufgebaut Dies erlaubt Ihnen die volle Kontrolle der verfügbaren Funktionen der Telefon Programmquelle Wenn Sie allerdings die Verbindung mithil fe Ihres Mobiltelefons herstellen wird in ei nigen Fällen die Verbindung über das HSP Profil aufgebaut Einige Funktionen stehen in diesem Fall nicht zur Verfügung Es kann per Bl...

Страница 92: ...hnen die genaue Vorgehensweise für den Aufbau einer Verbin dung über Ihr Mobiltelefon nicht bekannt ist dann schlagen Sie diese in der Bedienungsan leitung des Telefons nach 1 Berühren Sie PHONE CONNECT im Funktionsmenü 2 Berühren Sie CONNECTION OPEN Damit wird das Gerät auf Standby für einen Verbindungsaufbau ausgehend vom Mobilte lefon geschaltet 3 Verwenden Sie das Mobiltelefon um eine Verbindu...

Страница 93: ...ung einem neuen Telefon zuzuweisen müssen Sie zu erst die derzeitige Zuweisung löschen Für detail lierte Anweisungen hierzu siehe Löschen eines registrierten Mobiltelefons auf Seite 93 Sollte die Registrierungszuweisung misslin gen dann wird der Gerätename des verbundenen Telefons nicht für die gewählte Registrierung an gezeigt Kehren Sie in diesem Fall zu Schritt 1 zu rück und versuchen Sie es er...

Страница 94: ...den Diese Funktion steht eventuell nicht mit allen Mobiltelefonen zur Verfügung Sollte mit Hilfe der Funktion zum automatischen Verbindungsaufbau keine Verbindung zu Ihrem registrierten Telefon hergestellt wer den können dann greifen Sie auf die ma nuelle Verbindungsmethode zurück siehe die Beschreibung unter Manuelles Aufbau en einer Verbindung zu einem registrierten Telefon auf Seite 94 Bei manc...

Страница 95: ...Nach dem Start der Adressbuchübertra gung wird die Bluetooth Verbindung ge trennt ein Telefonieren im Freisprechmodus ist dann nicht mehr mög lich Um das Freisprechtelefonieren erneut zu aktivieren müssen Sie eine neue Verbin dung zwischen dem Mobiltelefon und die sem Gerät aufbauen Wenn der automatische Verbindungsaufbau auf dem Gerät eingeschaltet wurde erfolgt der Ver bindungsaufbau mehrere Sek...

Страница 96: ... wech seln berühren Sie PHONEBOOK NAME VIEW erneut Anrufen einer im Adressbuch gespeicherten Nummer Sie können den gewünschten Eintrag im Adressbuch auswählen und die entsprechen de Nummer direkt anrufen 1 Berühren Sie PHONE BOOK um das Adressbuch anzuzeigen 2 Berühren Sie den Eintrag im Adress buch dessen Nummer angerufen werden soll Der Bildschirm zur Adressbuchbearbeitung erscheint Durch Berühr...

Страница 97: ...r Anrufen einer im Adressbuch gespeicherten Nummer auf Seite 96 Bearbeiten des Namens in einem Adressbucheintrag Sie können die Namen in den Einträgen in Ihrem Adressbuch wunschgemäß bearbeiten Jeder Name kann dabei bis zu 16 Zeichen um fassen 1 Berühren Sie PHONE BOOK um das Adressbuch anzuzeigen 2 Wählen Sie den Eintrag im Adressbuch der bearbeitet werden soll Siehe hierzu die Schritte 2 bis 3 u...

Страница 98: ...n Wiederholen Sie diese Schritte für alle erfor derlichen Zahlenänderungen 6 Berühren Sie ENTER um die neue Ruf nummer zu speichern Löschen eines Adressbucheintrags Sie können die Einträge in Ihrem Adressbuch einzeln löschen Wenn Sie alle Einträge im Adressbuch gleich zeitig löschen möchten siehe Löschen des Speichers auf Seite 99 1 Berühren Sie PHONE BOOK um das Adressbuch anzuzeigen 2 Wählen Sie...

Страница 99: ...10 Se kunden in der Position ACC bzw ON belassen Wenn Sie das gewählte Element doch nicht löschen möchten berühren Sie CANCEL Gebrauch der Anruflisten In den Anruflisten werden die 12 zuletzt getä tigten und empfangenen Anrufe sowie die An rufe in Abwesenheit gespeichert Sie können die Anruflisten durchlaufen und die darin ent haltenen Nummern direkt anrufen Anzeigen der Anruflisten Die Anrufliste...

Страница 100: ...mmer im Adressbuch oder in einer der Anruflisten finden Sie auf den vorhergehenden Seiten Das Display sollte zur normalen Anzeige zu rückgekehrt sein wobei die von Ihnen gewähl te Telefonnummer in der Informationsleiste angezeigt wird 2 Berühren Sie LIST um die vorprogram mierten Nummern P 1 P 6 anzuzeigen 3 Berühren Sie eine der vorprogrammier ten Nummern P 1 P 6 etwas länger um die gewählte Tele...

Страница 101: ...parat für jedes Mobiltelefon eingestellt werden Berühren Sie ECHO CANCEL im Funkti onsmenü um die Echounterdrückung ein zuschalten Zum Ausschalten der Echounterdrückung drücken Sie ECHO CANCEL erneut Umschalten des Klingeltons Das Gerät ermöglicht Ihnen die Aktivierung bzw Deaktivierung des Ruftons für eingehen de Anrufe Der für das Gerät gewählte Rufton wirkt sich in keiner Weise auf den von Ihre...

Страница 102: ...en der Bluetooth Geräteadresse BD Adresse Jedem Gerät das die Bluetooth Wireless Tech nologie unterstützt wird eine einmalige 48 Bit Geräteadresse zugewiesen Diese Geräteadres se besteht aus einer 12 stelligen hexadezima len Zeichenfolge Sie können die BD Geräteadresse Ihres Mobil telefons und dieses Geräts anzeigen Sollten beim Betrieb dieses Geräts Probleme auftreten und Sie sich für eine Repara...

Страница 103: ...aufe ne Spielzeit Titelname Titelindex usw kön nen auf diesem Gerät nicht angezeigt werden Während der Wiedergabe von Musiktiteln auf Ihrem Bluetooth Audio Player sollten Sie so weit möglich jede Bedienung Ihres Mobiltele fons vermeiden Bei einer Bedienung des Mobiltelefons kann es durch die vom Telefon ausgegebenen Signale zu einer Erzeugung von Störgeräuschen bei der Titelwiedergabe kommen Wenn ...

Страница 104: ...rem Mobiltelefon darf für das Sen den und Empfangen von Sprache und Daten per Bluetooth nicht mehr als zehn Meter betragen Je nach Umgebung fällt die Übertragungsentfer nung u U noch geringer aus als diese geschätz te Entfernung Bluetooth Audio De 104 Abschnitt 03 ...

Страница 105: ... Gerät auf Standby für einen Verbindungs aufbau ausgehend vom Bluetooth Audio Player geschaltet Wenn Sie auf Ihrem Bluetooth Audio Player den Bluetooth Verbindungsaufbau aktiviert haben wird automatisch eine Verbindung zu diesem Gerät hergestellt Hinweis Um bestimmte Audio Player verwenden zu kön nen müssen Sie ggf zunächst den entsprechen den PIN Code in dieses Gerät eingeben Wenn für den Aufbau ...

Страница 106: ...zeigt wird können Sie die Anzeige durch Berühren des Bildschirms bewirken Sie können MENU auch durch Klicken mit dem Joystick einblenden 2 Berühren Sie FUNCTION um die Namen der Funktionen anzuzeigen Die Funktionsnamen werden angezeigt und bedienbare Funktionen hervorgehoben Zum Zurückschalten auf die jeweils vorherge hende Anzeige berühren Sie BACK Zum Zurückschalten zur Wiedergabeanzeige berühre...

Страница 107: ...ende Anzeige berühren Sie BACK Zum Zurückschalten zur Wiedergabeanzeige berühren Sie ESC 3 Berühren Sie DEVICE INFO um die BD Adresse anzuzeigen Verschiedene Informationen mit Bezug auf die Bluetooth Wireless Technologie werden ange zeigt BD ADDRESS Systemadresse SYSTEM NAME Systemname SYSTEM VER Version BT MODULE VER Bluetooth Modulversion Bluetooth Audio De 107 Abschnitt Deutsch 03 ...

Страница 108: ... AV MENU nicht angezeigt wird können Sie die Anzeige durch Berühren des Bildschirms bewirken Sie können MENU auch durch Klicken mit dem Joystick einblenden Um zur nächsten Gruppe von Funktionsna men zu wechseln berühren Sie NEXT Für die Rückkehr zur vorherigen Gruppe von Funktionsnamen berühren Sie PREV Zum Zurückschalten auf die jeweils vorherge hende Anzeige berühren Sie BACK Zum Zurückschalten ...

Страница 109: ...te er möglichen eine Bedienung über Sensortasten AVH P7500DVDN AVH P6600DVD AVH P5700DVD Hauptgeräte Gruppe 4 RS D7R RS D7RN Wichtig Da dieses Gerät kontinuierlich auf Verbin dungs Standby geschaltet ist um jederzeit per Bluetooth eine Verbindung zu Ihrem Mobilte lefon herstellen zu können kann eine Verwen dung des Geräts bei ausgeschaltetem Motor eine Entleerung der Fahrzeugbatterie zur Folge hab...

Страница 110: ...Sie über das per Bluetooth mit diesem Gerät verbundene Mobiltelefon ein Gespräch führen wird die Wiedergabe der Titel auf dem verbundenen Bluetooth Audio Player stumm geschaltet Auch wenn Sie während der Wiedergabe eines Musiktitels auf Ihrem Bluetooth Audio Player zu einer anderen Programmquelle um schalten wird die Titelwiedergabe fortgesetzt Die Bedienung fällt je nach dem Typ Ihres Mo biltelef...

Страница 111: ...tzen des Geräts in den Modus C OPEN Bei der Auswahl von TEL als Programmquelle drücken und halten Sie a oder b in FUNC1 F1 gedrückt Setzen des Geräts in den Modus REGIST Bei der Auswahl von TEL als Programmquelle drücken Sie a oder b in FUNC2 F2 Setzen des Geräts in den Modus DIS CONN Bei der Auswahl von TEL als Programmquelle drücken und halten Sie a oder b in FUNC2 F2 gedrückt Ein oder Ausschal ...

Страница 112: ...ro grammquelle Drücken Sie SOURCE Umschalten zwi schen TEL und BT AUDIO Bei der Auswahl von TEL BT AUDIO als Programmquelle drücken Sie BAND Setzen des Geräts in den Modus VOICE ON 2 Bei der Auswahl von TEL als Programmquelle drücken und halten Sie BAND ge drückt Annehmen eines An rufs Wenn ein Anruf eingeht drücken Sie MULTI CON TROL nach oben Beenden eines An rufs Drücken Sie MULTI CON TROL nach...

Страница 113: ...elle Drücken Sie SOURCE Umschalten zwi schen TEL und BT AUDIO Bei der Auswahl von TEL BT AUDIO als Programmquelle drücken Sie BAND Vor oder Zurück springen zu einem anderen Titel 1 Bei der Auswahl von BT AUDIO als Programmquelle drücken Sie MULTI CON TROL nach links oder rechts Schnellvorlauf rück lauf 2 Bei der Auswahl von BT AUDIO als Programmquelle drücken und halten Sie MULTI CONTROL nach link...

Страница 114: ...s Anrufs Bei der Auswahl einer Tele fonnummer in der Liste der getätigten bzw der emp fangenen Anrufe berühren Sie a Wählen einer Funk tion Bei der Auswahl von TEL als Programmquelle berühren Sie AV MENU und anschlie ßend FUNCTION Abrollen einer Tele fonnummer in den Anruflisten Bei der Auswahl von TEL als Programmquelle berühren Sie ab in FUNCTION1 Setzen des Geräts in den Modus C OPEN Bei der Au...

Страница 115: ...Gerät kehrt dieses Gerät nach einem Telefonanruf nicht auto matisch zur ursprünglichen Programmquelle zu rück Wählen Sie die gewünschte Programmquelle im Anschluss an einen Telefo nanruf jeweils manuell Hauptgeräte Gruppe 4 Steuerungen des Bluetooth Telefons Wählen von TEL BT AUDIO als Pro grammquelle Drücken Sie SOURCE AUX Umschalten zwi schen TEL und BT AUDIO Bei der Auswahl von TEL BT AUDIO als...

Страница 116: ...rammquelle drücken und halten Sie die Funktions taste FUNCTION 4 gedrückt Steuerungen des Bluetooth Audio Geräts Wählen von TEL BT AUDIO als Pro grammquelle Drücken Sie SOURCE AUX Umschalten zwi schen TEL und BT AUDIO Bei der Auswahl von TEL BT AUDIO als Programmquelle drücken Sie BAND Vor oder Zurück springen zu einem anderen Titel 1 Bei der Auswahl von BT AUDIO als Programmquelle drücken Sie c o...

Страница 117: ...Gerät als externes Gerät ver wendet wird sucht es nicht nach verfügba ren Mobiltelefonen Benutzen Sie Ihr Mobiltelefon um eine Verbindung herzu stellen Starten des Verbindungsaufbaus über das Mobiltelefon Wenn Sie das Gerät in den Modus C OPEN setzen können Sie eine Bluetooth Verbindung ausgehend von Ihrem Telefon herstellen Wenn Ihnen die genaue Vorgehensweise für den Aufbau einer Verbindung über...

Страница 118: ...rstützt können Sie Ihren Anruf über gesprochene Befehle tätigen Die Bedienung dieser Funktion fällt je nach dem Typ Ihres Mobiltelefons unterschied lich aus Detaillierte Anweisungen hierzu können Sie der Bedienungsanleitung Ihres Mobiltelefons entnehmen Diese Funktion ist nur verfügbar wenn eine Verbindung per HFP Hands Free Profile hergestellt wird 1 Setzen Sie das Gerät in den Modus VOICE ON 2 S...

Страница 119: ...Gerät eine Verbindung zum re gistrierten Mobiltelefon herstellt Einstellen des Ruftons Das Gerät ermöglicht Ihnen die Aktivierung bzw Deaktivierung des Ruftons für eingehen de Anrufe Der für das Gerät gewählte Rufton wirkt sich in keiner Weise auf den von Ihrem Mobiltele fon verwendeten Rufton aus Wenn Ihr Telefon und dieses Gerät nicht gleichzeitig einen Ruf ton ausgeben sollen dann sollten Sie e...

Страница 120: ...dio Player geschaltet Wenn Sie auf Ihrem Bluetooth Audio Player den Bluetooth Verbindungsaufbau aktiviert haben wird automatisch eine Verbindung zu diesem Gerät hergestellt Bis Sie das Gerät in den Modus C OPEN set zen wird NO AUDIO im Display angezeigt 2 Verwenden Sie Ihren Bluetooth Audio Player um eine Verbindung zu diesem Gerät herzustellen Sobald die Verbindung hergestellt ist wird BT AUDIO a...

Страница 121: ... Sitzschienen Bringen Sie die Kabel in größtmöglicher Entfernung von Stellen an die sich erhit zen wie z B die Heizungsöffnung Führen Sie das gelbe Kabel nicht durch ein Loch in den Motorraum um die Verbin dung mit der Fahrzeugbatterie herzustel len Kleben Sie freie Kabelanschlüsse mit Iso lierband ab Kürzen Sie die Kabel nicht Entfernen Sie niemals die Isolierung des Stromkabels dieses Geräts um ...

Страница 122: ...Anschließen der Geräte Anschlüsse De 122 Abschnitt 06 ...

Страница 123: ...t weder in der Nähe einer Heizungsöffnung an wo es der Wärme einwirkung ausgesetzt ist noch neben einer Wagentür wo es durch Regenwasser beschä digt werden kann Prüfen Sie vor dem Bohren von Montagelö chern die Hinterseite der zu durchbohrenden Fläche Sie dürfen beim Bohren keinesfalls die Benzinleitung die Bremskabel die elektri schen Leiter oder andere wichtige Fahrzeug teile beschädigen Bei der...

Страница 124: ...ung der Stimme der das System bedie nenden Person ermöglicht Installieren des Mikrofons auf der Sonnenblende 1 Befestigen Sie das Mikrofon auf der Mi krofonklammer 2 Bringen Sie die Mikrofonklammer auf der Sonnenblende an Bringen Sie die Mikrofonklammer bei hochge klappter Sonnenblende an durch das Herun terklappen der Sonnenblende wird die Erfassungsrate bei der Sprachbedienung re duziert Install...

Страница 125: ...Anpassen des Mikrofonwinkels Der Mikrofonwinkel kann durch Versetzen der Mikrofonklammer nach vorn oder nach hinten angepasst werden Installation De 125 Abschnitt Deutsch 07 ...

Страница 126: ...ndung aus und wieder ein Technische Daten Allgemein Stromversorgung 14 4 V Gleichspannung To leranz 10 8 V bis 15 1 V Max Leistungsaufnahme 0 2 A Abmessungen B H T 146 25 90 mm Gewicht 0 37 kg Version Bluetooth 1 2 zertifiziert Ausgangsleistung Max 4 dBm Leistungsklasse 2 Profile GAP Generic Access Profi le SDP Service Discovery Pro tocol HSP Head Set Profile HFP Hands Free Profile A2DP Advanced A...

Страница 127: ...lulaire pour établir une connexion 137 Déconnexion d un téléphone cellulaire 137 Enregistrement d un téléphone cellulaire connecté 138 Suppression d un téléphone enregistré 138 Connexion à un téléphone cellulaire enregistré 138 Connexion manuelle à un téléphone enregistré 138 Connexion automatique à un téléphone enregistré 139 Utilisation de l Annuaire 139 Transfert des entrées dans l Annuaire 140...

Страница 128: ... une connexion 159 Enregistrement d un téléphone cellulaire connecté 159 Déconnexion d un téléphone cellulaire 160 Reconnaissance vocale 160 Réglage de la réponse automatique 160 Connexion automatique à un téléphone enregistré 160 Réglage de la tonalité de sonnerie 161 Affichage des informations sur l appareil pour cet appareil 161 Connexion d un lecteur audio Bluetooth 161 Déconnexion d un lecteu...

Страница 129: ...un lecteur audio Bluetooth Cet appareil est conçu pour une utilisation à bord de véhicules uniquement PRÉCAUTION Ne laissez pas cet appareil venir en contact avec des liquides Cela pourrait provoquer une électrocution Tout contact avec des liquides pourrait aussi provoquer des dommages de la fumée et une surchauffe de l appareil Conservez ce mode d emploi à portée de main afin de vous y référer po...

Страница 130: ... câble pour les télé phones mobiles les ordinateurs de poche et d autres appareils Bluetooth fonctionne dans la gamme de fréquences 2 4 GHz et transmet la voix et les données à une vitesse allant jus qu à 1 mégabit par seconde Bluetooth a été lancé en 1998 par un groupe d intérêt spécial SIG comprenant Ericsson Inc Intel Corp Nokia Corp Toshiba et IBM et est maintenant développé par près de 2 000 ...

Страница 131: ... appareil en effaçant toute la mémoire Pour protéger les informations personnelles et privées les données relatives au téléphone en registrées dans cet appareil peuvent être effa cées 1 Placez le contact d allumage en position ON ou ACC 2 Appuyez sur RESET avec la pointe d un stylo ou un autre instrument pointu Toute la mémoire est maintenant complète ment effacée La suppression des données prend ...

Страница 132: ...hone cel lulaire 6 Indicateur de reconnaissance vocale Indique quand la fonction reconnaissance vocale est en service pour avoir plus de dé tails reporte vous à la page 134 Reconnais sance vocale 7 Indication notification d appel entrant Indique quand un appel entrant a été reçu et non encore pris en compte 8 Indicateur de réponse automatique Indique quand la fonction répondeur auto matique est en...

Страница 133: ...z l attente de bulletin d infor mations un appel téléphonique peut être interrompu par la réception d un signal de bulletin d informations Quand le téléphone est sélectionné comme source le volume et la courbe d égalisation sont automatiquement réglés sur les valeurs appropriées pour la source téléphone Quand une autre source redevient la source sélec tionnée le volume et les paramètres de l égali...

Страница 134: ...ppareil Utilisation élémentaire de la téléphonie mains libres Voici les opérations élémentaires pour utiliser la téléphonie mains libres via la technologie sans fil Bluetooth Les utilisations plus avan cées de la téléphonie mains libres sont expli quées à partir de la page 136 Introduction à l utilisation avancée de la téléphonie mains li bres Important Les opérations avancées qui requièrent votre...

Страница 135: ...enregistré dans l historique des appels manqués Pour des infor mations sur l historique des appels manqués re portez vous à la page 143 Utilisation de l Historique des appels Réponse à un appel en attente Si un autre appel arrive alors que vous êtes déjà en communication le numéro ou le nom si ce numéro est dans votre annuaire du nou vel appelant s affiche sur l écran pour signaler que vous avez u...

Страница 136: ...ration La connexion est en principe établie par HFP ce qui vous permet un contrôle total des fonctions disponibles sur le téléphone source Toutefois dans certains cas lorsque vous établissez la connexion de puis votre téléphone mobile la connexion peut être établie par HSP et certaines fonc tions peuvent ne pas être disponibles Un téléphone peut être connecté via la télé phonie sans fil Bluetooth ...

Страница 137: ...z peut être vous reporter au mode d emploi fourni avec votre téléphone si vous n êtes pas sûr de la procédure à suivre pour établir une connexion à partir de votre téléphone 1 Touchez PHONE CONNECT sur le menu des fonctions 2 Touchez CONNECTION OPEN L appareil est maintenant en attente de conne xion à partir du téléphone cellulaire 3 Utilisez le téléphone cellulaire pour le connecter à cet apparei...

Страница 138: ...éphone enregistré Si l enregistrement a échoué le nom d appa reil du téléphone connecté n est pas affiché dans l affectation sélectionnée Dans ce cas revenez à l étape 1 et réessayez Remarque Le réglage audio peut être effectué de façon indé pendante pour chaque utilisateur Suppression d un téléphone enregistré Si vous n avez plus besoin d utiliser un télé phone enregistré avec cet appareil vous p...

Страница 139: ...ur ni avec votre téléphone cellulaire L exécution de cette fonction n est pas pos sible pendant que vous lisez des plages musicales sur votre lecteur audio Blue tooth via la technologie sans fil Bluetooth Dans ce cas arrêtez la lecture et passez à une autre source pour que votre téléphone cellulaire se connecte à cet appareil au moyen de cette fonction Si vous êtes en train d utiliser le menu de f...

Страница 140: ...ment Certains caractè res peuvent être altérés Si l annuaire du téléphone cellulaire contient des données image son transfert peut ne pas s effectuer correctement 1 Touchez PHONEBOOK TRANSFER sur le menu des fonctions 2 Touchez START pour mettre la fonction Transfert d Annuaire en service Le Transfert d Annuaire est maintenant en at tente 3 Utilisez le téléphone cellulaire pour ef fectuer le trans...

Страница 141: ... SEARCH pour afficher l écran de recherche dans l Annuaire 3 Touchez une lette de l alphabet pour choisir la première lettre du nom que vous recherchez 4 Touchez ENTER pour afficher les en trées commençant par la lettre que vous avez choisie L écran affiche les six premières entrées de l Annuaire commençant par cette lettre par exemple Ben Brian et Burt quand B est sélectionné Touchez PREV ou NEXT...

Страница 142: ...ur un appel international touchez add pour ajouter au numéro de téléphone Touchez CLEAR pour supprimer le numéro 5 Touchez c ou d pour déplacer le cur seur et modifier le numéro Répétez ces étapes jusqu à ce que vous ayez terminé les modifications 6 Touchez ENTER pour mettre en mé moire le nouveau numéro Effacement d une entrée de l Annuaire Vous pouvez supprimer des entrées d An nuaire de l Annua...

Страница 143: ...des appels Vous pouvez parcourir l Historique des appels et appeler des numéros à partir de celui ci Affichage de l Historique des appels L Historique des appels est divisé en trois groupes Appels manqués Appels composés et Appels reçus Vous pouvez voir le numéro et le nom si le numéro est dans l Annuaire Touchez LOG pour afficher l Historique des Appels Toucher LOG répétitivement fait basculer en...

Страница 144: ...strés et des deux téléphones invités peut être stocké en mémoire Rappel des numéros présélectionnés Vous pouvez rappeler facilement les numéros d appel présélectionnés 1 Touchez LIST pour afficher les numéros présélectionnés P 1 P 6 Les numéros de présélection P 1 P 6 s affi chent sur l écran 2 Touchez un des numéros de pré sélectionP 1 P 6 Le numéro de téléphone sélectionné doit maintenant être a...

Страница 145: ...e Touchez à nouveau RING TONE pour désacti ver la sonnerie Réglage du rejet automatique Si cette fonction est en service cet appareil re jette automatiquement tous les appels en trants Cette fonction ne peut pas être paramétrée pour les téléphones de chaque utilisateur L appel rejeté n est pas enregistré dans l historique des appels reçus ou manqués Touchez REFUSE ALL CALLS sur le menu de fonction...

Страница 146: ...eil ne fonctionnerait pas correctement et où vous consulteriez votre re vendeur pour le faire réparer on pourrait vous demander d indiquer les versions du système de cet appareil et du module Bluetooth Vous pouvez afficher ces versions et les confirmer Touchez DEVICE INFO sur le menu de fonctions pour afficher l adresse BD Diverses informations sur la technologie sans fil Bluetooth sont affichées ...

Страница 147: ...dio Bluetooth abstenez vous autant que possible d utiliser votre téléphone cellulaire Si vous essayez d utiliser votre télé phone cellulaire le signal émis par celui ci peut générer du bruit sur la lecture de la plage musicale Quand vous parlez sur le téléphone cellulaire connecté à cet appareil via la technologie sans fil Bluetooth le son de la lecture des pla ges de votre lecteur audio Bluetooth...

Страница 148: ...ppareil sera établie automatique ment Remarque Avant de pouvoir utiliser des lecteurs audio vous devrez peut être entrer le code PIN dans cet appa reil Si votre lecteur nécessite un code PIN pour établir une connexion recherchez le code sur le lecteur ou sur la documentation qui l accompa gne Entrez le code PIN en vous reportant à la page 150 Saisie du code PIN pour la connexion sans fil Bluetooth...

Страница 149: ...onnected s affiche Affichage de l adresse BD Bluetooth Device Une adresse d appareil de 48 bits unique est attribuée à chaque appareil utilisant la techno logie sans fil Bluetooth Chaque adresse d ap pareil est constituée d une chaîne hexadécimale de 12 chiffres Vous pouvez afficher l adresse BD de cet appa reil Au cas où cet appareil ne fonctionnerait pas correctement et où vous consulteriez votr...

Страница 150: ...chés et celles qui peuvent être utilisées sont en surbrillance Quand AV MENU n est pas affiché vous pou vez l afficher en touchant l écran Vous pouvez aussi afficher MENU en cliquant sur le joystick Pour passer au groupe suivant de noms de fonctions touchez NEXT Pour revenir au groupe précédent de noms de fonctions touchez PREV Touchez BACK pour revenir à l affichage pré cédent Touchez ESC pour re...

Страница 151: ...H P6600DVD AVH P5700DVD Appareils centraux du groupe 4 RS D7R RS D7RN Important Comme cet appareil est en attente d une connexion avec vos téléphones cellulaires via la technologie sans fil Bluetooth son utilisa tion avec le moteur arrêté peut entraîner l é puisement de la batterie Pour utiliser la technologie sans fil Bluetooth les appareils doivent pouvoir interpréter cer tains profils Lorsqu il...

Страница 152: ...dio Bluetooth connecté à cet appareil est coupé Même si vous passez sur une autre source pendant que vous écoutez une plage musicale sur votre lecteur audio Bluetooth la lecture de la plage se poursuit Le mode opératoire dépend du type de votre téléphone cellulaire et de votre lecteur audio Bluetooth Reportez vous au mode d emploi fourni avec ceux ci pour les instructions dé taillées Remarques La ...

Страница 153: ...en mode C OPEN Quand vous choisissez TEL comme source appuyez de façon prolongée sur a ou b dans FUNC1 F1 Mettre l appareil en mode REGIST Quand vous choisissez TEL comme source appuyez sur a ou b dans FUNC2 F2 Mettre l appareil en mode DISCONN Quand vous choisissez TEL comme source appuyez de façon prolongée sur a ou b dans FUNC2 F2 Mettre la réponse au tomatique en service ou hors service Quand ...

Страница 154: ...yez sur SOURCE Basculement entre TEL et BT AUDIO Quand vous choisissez TEL BT AUDIO comme source appuyez sur BAND Mettre l appareil en mode VOICE ON 2 Quand vous choisissez TEL comme source appuyez de façon prolongée sur BAND Prendre un appel Quand un appel arrive pous sez MULTI CONTROL vers le haut Terminer un appel Poussez MULTI CONTROL vers le bas Afficher l historique des appels reçus manqués ...

Страница 155: ...ce Appuyez sur SOURCE Basculement entre TEL et BT AUDIO Quand vous choisissez TEL BT AUDIO comme source appuyez sur BAND Commandes de l audio Bluetooth Saut à une plage pré cédente ou suivante 1 Quand vous choisissez BT AUDIO comme source poussez MULTI CONTROL vers la gauche ou vers la droite Avance retour ra pide 2 Quand vous choisissez BT AUDIO comme source poussez et maintenez MULTI CONTROL ver...

Страница 156: ...ez TEL comme source touchez AV MENU puis touchez FUNC TION Faire défiler un numé ro de téléphone dans l historique des ap pels Quand vous choisissez TEL comme source touchez ab dans FUNCTION1 Mettre l appareil en mode C OPEN Quand vous choisissez TEL comme source continuez à toucher ab dans FUNC TION1 Mettre l appareil en mode REGIST Quand vous choisissez TEL comme source touchez ab dans FUNCTION2...

Страница 157: ...ulement entre TEL et BT AUDIO Quand vous choisissez TEL BT AUDIO comme source appuyez sur BAND Mettre l appareil en mode VOICE ON 3 Quand vous choisissez TEL comme source appuyez de façon prolongée sur BAND Prendre un appel Quand un appel arrive ap puyez sur a Terminer un appel Appuyez sur b Afficher l historique des appels reçus manqués Appuyez sur c Afficher l historique des appels effectués App...

Страница 158: ...e 1 Quand vous choisissez BT AUDIO comme source ap puyez sur c ou d Avance retour ra pide 2 Quand vous choisissez BT AUDIO comme source ap puyez de façon prolongée sur c ou d Commandes de l audio Bluetooth Sélection d une fonc tion Quand vous choisissez BT AUDIO comme source ou vrez le couvercle du boîtier de télécommande Pause d une plage musicale Quand vous choisissez BT AUDIO comme source ap pu...

Страница 159: ...loi fourni avec votre téléphone si vous n êtes pas sûr de la procédure à suivre pour établir une conne xion à partir de votre téléphone 1 Mettre l appareil en mode C OPEN Reportez vous à la page 153 Tableaux de compatibilité des fonctions Avant que vous mettiez l appareil en mode C OPEN NO TEL est affiché 2 Utilisez le téléphone cellulaire pour le connecter à cet appareil Quand la connexion est ét...

Страница 160: ...éphone enregistré Lorsque la Connexion Automatique est acti vée l appareil établit automatiquement une connexion avec un téléphone enregistré quand celui ci arrive à portée de connexion Cette fonctionnalité peut ne pas fonction ner avec tous les téléphones Avec certains téléphones cellulaires il peut vous être demandé de faire une confirma tion sur le téléphone cellulaire lors de la connexion à ce...

Страница 161: ...vez afficher ces versions et les confirmer Une adresse d appareil de 48 bits unique est attribuée à chaque appareil utilisant la technologie sans fil Bluetooth Chaque adresse d appareil est constituée d une chaîne de 12 chiffres hexadécimaux Afficher et basculer entre les informa tions sur les appareils Reportez vous à la page 153 Tableaux de compatibilité des fonctions Chaque fois que vous opérez...

Страница 162: ... Reportez vous au mode d emploi fourni avec lecteur audio Bluetooth pour les instructions détaillées Vous devrez peut être saisir le code de liaison sur votre lecteur audio Bluetooth pour achever la connexion Déconnexion d un lecteur audio Bluetooth Quand vous avez fini d utiliser votre lecteur audio Bluetooth avec cet appareil vous pou vez fermer la connexion sans fil Bluetooth Mettez l appareil ...

Страница 163: ...es Placez les câbles à l écart de tous les en droits chauds par exemple les sorties de chauffage Ne faites pas passer le câble jaune à tra vers un trou dans le compartiment moteur pour le connecter à la batterie Recouvrez tous les connecteurs de câbles qui ne sont pas connectés avec du ruban adhésif isolant Ne raccourcissez pas les câbles Ne coupez jamais l isolation du câble d ali mentation de ce...

Страница 164: ...Connexion des appareils Connexions Fr 164 Section 06 ...

Страница 165: ...d un orifice de chauffage où il se rait affecté par la chaleur ou près des portes où il pourrait être mouillé par la pluie Avant de percer un trou de montage vérifiez toujours derrière l emplacement où vous vou lez percer le trou Ne percez pas de trou dans le conduit d essence le conduit de frein un câble électrique ou d autres pièces importan tes Si l appareil est installé dans le compartiment pa...

Страница 166: ...apter la voix de la personne qui utilise le système Si vous installez le microphone sur le pare soleil 1 Installez le microphone sur le clip micro phone 2 Installez le clip microphone sur le pare soleil Avec le pare soleil relevé installez le clip mi crophone Abaisser le pare soleil réduit le taux de reconnaissance pour les opérations vocales Si vous installez le microphone sur la colonne de direc...

Страница 167: ...Réglage de l angle du microphone L angle du microphone peut être ajusté en dé plaçant l angle du clip microphone vers l avant ou vers l arrière Installation Fr 167 Section Français 07 ...

Страница 168: ...e Caractéristiques techniques Généralités Alimentation 14 4 V DC 10 8 V à 15 1 V acceptable Consommation maximale 0 2 A Dimensions L H P 146 25 90 mm Poids 0 37 kg Version Certifié Bluetooth 1 2 Puissance de sortie 4 dBm Max Classe de puissance 2 Profil GAP Generic Access Pro file SDP Service Discovery Pro tocol HSP Head Set Profile HFP Hands Free Profile A2DP Advanced Audio Dis tribution Profile ...

Страница 169: ...3195 Australia TEL 03 9586 6300 PIONEER ELECTRONICS OF CANADA INC 300 Allstate Parkway Markham Ontario L3R OP2 Canada TEL 1 877 283 5901 PIONEER ELECTRONICS DE MEXICO S A de C V Blvd Manuel Avila Camacho 138 10 piso Col Lomas de Chapultepec Mexico D F 11000 TEL 55 9178 4270 先鋒股份有限公司 總公司 台北市中山北路二段44號13樓 電話 02 2521 3588 先鋒電子 香港 有限公司 香港九龍尖沙咀海港城世界商業中心 9樓901 6室 電話 0852 2848 6488 Published by Pioneer Co...

Отзывы: