background image

X:\print\Pioneer\18AVH_H_N\18_Navi_UC_CRI1052(A6_Vertical)_EN\020Chapt
er.fm

AVIC-W8400NEX/AVIC-W6400NEX

18_Navi_UC_CRI1052(A6_Vertical)

En
g

lis

h

- 159 -

If you have problems operating this 
product, refer to this section. The most 
common problems are listed below, along 
with likely causes and solutions. If a 
solution to your problem cannot be found 
here, contact your dealer or the nearest 
authorized Pioneer service facility.

A black screen is displayed, and 
operation is not possible using the touch 
panel keys.

[Power OFF] mode is on.
– Press any button on this product to 

release the mode.

– Press and hold the RESET button to 

release the rear view camera screen 
and then change the camera polarity 
setting to [Battery].

CD or DVD playback is not possible.

The disc is inserted upside down.
– Insert the disc with the label upward.

The disc is dirty.
– Clean  the  disc.

The disc is cracked or otherwise 
damaged.
– Insert a normal, round disc.

The files on the disc are in an irregular 
file format.
– Check the file format.

The disc format cannot be played back.
– Replace the disc.

The loaded disc is a type this product 
cannot play.
– Check what type of disc it is.

The screen is covered by a caution 
message and the video cannot be shown.

The parking brake lead is not connected 
or the parking brake is not applied.
– Connect the parking brake lead 

correctly, and apply the parking brake.

The parking brake interlock is activated.
– Park your vehicle in a safe place and 

apply the parking brake.

No video output from the connected 
equipment.

The [AV Input] or [AUX Input] setting is 
incorrect.
– Correct the settings.

The audio or video skips.

This product is not firmly secured.
– Secure this product firmly.

No sounds are produced. The volume 
level will not rise.

Cables are not connected correctly.
– Connect the cables correctly.

The system is performing still, slow 
motion, or frame-by-frame playback 
with DVD-Video.
– There is no sound during still, slow 

motion, or frame-by-frame playback 
with DVD-Video.

The system is paused or performing fast 
reverse or forward during the disc 
playback.
– For the media other than music CD 

(CD-DA), there is no sound on fast 
reverse or forward.

Appendix

Troubleshooting

Common problems

Problems with the AV screen

Содержание AVIC-W6400NEX

Страница 1: ...s This software requires that the product is properly connected to your vehicle s parking brake and depending on your vehicle additional installation may be required For more information please contact your Authorized Pioneer Electronics retailer or call us at 800 421 1404 Be sure to read Important Information for the User first Important Information for the User includes the important information...

Страница 2: ... your trip 46 Navigation Settings 51 Updating the map 61 Bluetooth 62 Bluetooth connection 62 Bluetooth settings 62 Hands free phoning 63 Bluetooth audio 68 Wi Fi 70 Wi Fi connection 70 Wi Fi settings 70 Wi Fi audio 71 AV source 72 Supported AV source 72 Displaying the AV operation screen 72 Selecting a source 73 Changing the display order of source 73 Adjusting the range of favorite source icons ...

Страница 3: ...stening to SiriusXM 113 Basic operation 113 TuneScan 115 SportsFlash 116 SmartFavorites 116 Using Featured Favorites Band 117 Parental lock 117 Using the content alerts function 117 SiriusXM settings 118 HDMI 120 Starting procedure 120 Basic operation 120 AUX 121 Starting procedure 121 Basic operation 122 AV input 123 Starting procedure 123 Basic operation 124 Wireless Mirroring 125 Starting proce...

Страница 4: ...oth 180 SiriusXM Satellite Radio 180 Wi Fi 181 HD Radio Technology 181 SDXC 181 WMA WMV 181 FLAC 181 DivX 182 AAC 182 Google Google Play Android 182 Android Auto 182 Detailed information regarding connected iPod devices 182 Using app based connected content 183 Pandora 184 HDMI 184 IVONA Text to Speech 184 Notice regarding video viewing 184 Notice regarding DVD Video viewing 185 Notice regarding M...

Страница 5: ... Some of the settings and recorded contents will not be reset This manual uses diagrams of actual screens to describe operations However the screens on some units may not match those shown in this manual depending on the model used Precaution Notes on internal memory About this manual Meanings of symbols used in this manual This indicates model names that are supported by the described operations ...

Страница 6: ... 6 X print Pioneer 18AVH_H_N 18_Navi_UC_CRI1052 A6_Vertical _EN 020Chapt er fm AVIC W8400NEX AVIC W6400NEX 18_Navi_UC_CRI1052 A6_Vertical English Parts and controls Main unit W8400NEX W6400NEX ...

Страница 7: ...te Press to display the top menu screen or back to previous screen Press and hold to turn off the display Press to activate the voice recognition mode with a connected iPhone or smartphone Press and hold to display the connectable device list screen or device search screen RESET Press to reset the microprocessor page 10 SD card slot Refer to Inserting and ejecting an SD memory card page 86 Auto EQ...

Страница 8: ...t source and the rear source Thumb pad Use to select a menu on the DVD menu MUTE MENU Displays the DVD menu during DVD playback AUDIO SUBTITLE ANGLE Press to change the audio language subtitle language or viewing angle during DVD playback BAND ESC Press to select the tuner band when tuner is selected as a source Press to switch between media file types when playing the following types of data Disc...

Страница 9: ... English 9 1 Press the button 2 Gently grip the bottom of the detachable faceplate and slowly pull it outward Detachable faceplate 1 Slide the detachable faceplate all the way into this product 2 Push the lower part of the detachable faceplate until you hear a click Removing the detachable faceplate Attaching the detachable faceplate ...

Страница 10: ...oduct is operated while the LCD panel is opening or closing the LCD panel may stop at that angle for safety Do not place glass or can on the open LCD panel 1 Press 2 Touch or to adjust the angle of the LCD panel 3 Touch Returns to the previous screen CAUTION Pressing the RESET button resets settings and recorded contents to the factory settings Do not perform this operation when a device is connec...

Страница 11: ...nside any part of the body seek immediate medical attention Batteries battery pack or batteries installed must not be exposed to excessive heat such as sunshine fire or the like CAUTION Remove the battery if the remote control is not used for a month or longer There is a danger of explosion if the battery is incorrectly replaced Replace only with the same or equivalent type Do not handle the batte...

Страница 12: ...er depending on the previous conditions From the second time on enter the password for the anti theft function if the password entry screen appears 2 Touch the language 3 Touch The Speaker Mode Settings screen appears 4 Touch the speaker modes Standard Mode 4 speaker system with front and rear speakers or a 6 speaker system with front and rear speakers and subwoofers Network Mode 3 way system with...

Страница 13: ...an initial setup process starts automatically Follow the steps below TIP You can change the language later using Regional in the Settings screen Other settings can be restarted later using Start Configuration Wizard in the Settings screen 1 Press 2 Touch 3 Touch the language that you want to use on the navigation screen then touch Select 4 Read the terms carefully check the details and then touch ...

Страница 14: ...e previous screen Close the screen Using the touch panel Common touch panel keys Operating list screens Touching an item on the list allows you to narrow down the options and proceed to the next operation Appears when all characters are not displayed on the display area If you touch the key the rests are scrolled for display NOTE This function is available only when you stop your vehicle in a safe...

Страница 15: ...time bar You can change the playback point by dragging the key The playback time corresponding to the position of the key is displayed while dragging the key Operating the menu bar Switches the dimmer duration by day or night NOTE When AppRadio Mode is on AppRadio Mode SideControlBar is displayed Switches between playback and pause Skips files forward or backward Performs fast reverse or fast forw...

Страница 16: ...ters that are entered Moves the cursor to the right or left for a number of characters equivalent to the number of touches Enters the characters in the text box Deletes the input text to the left of the cursor one letter at a time Touching and holding the key deletes the letters to the left of the cursor in rapid succession Confirms the entry and proceeds to the next step Enters a space Switches b...

Страница 17: ...ou can turn off almost all functions The Power OFF mode is released in the following cases An incoming call is received only for hands free phoning via Bluetooth A rear view camera image is input when the vehicle is in reverse A button on this unit is pressed The ignition switch is turned off ACC OFF then turned on ACC ON AV Device source operation key Displays the current source TIP When the last...

Страница 18: ... the favorite application key area with the following steps 1 Touch and hold appears at the top right of the favorite application key 2 Drag to the desired position To finish the adjusting touch any place of the display except for the favorite application key You can also switch the mobile device to be connected with the following steps 1 Touch 2 Touch 3 Select desired device then follow the instr...

Страница 19: ...ifications that contain important information Displays the previous or next page of the navigation menu The locations that you saved as favorites Switches between 2D 3D and 2D North up view modes The User Profiles screen where you can create new profiles or edit the existing profiles If multiple drivers are using this product they can create their own profiles with their own settings If you select...

Страница 20: ...plays the traffic screen page 43 Displays useful information to support your driving page 46 Configures the navigation related settings page 51 Displays information about your navigation system e g the version information or license Main menu screen icons with a planned route only appear when a route is planned Adds a waypoint page 36 Displays route alternatives parts of the route to avoid or spec...

Страница 21: ...maneuver The type of the event turn traffic circle exiting freeway etc is displayed page 24 Shows the distance to the next guidance point maneuver Shows the maneuver after the next maneuver Indicates the current location of your vehicle The apex of the triangular mark indicates your orientation and the display moves automatically as you drive NOTE When there is no GPS position the triangular mark ...

Страница 22: ...the following procedure 1 Press then touch 2 Touch then Settings 3 Touch Navigation Map then Map Display 4 Touch Viewpoint 5 Drag the pop up window and touch Manual 6 Press 7 Touch or Smart Zoom Your navigation system features Smart Zoom that works in two ways When the route is set When approaching a turn Smart Zoom will zoom in and raise the view angle to enable you to easily recognize your maneu...

Страница 23: ...ion to scroll If you place the cursor on the desired location a brief overview about the location will appear at the top of the screen showing the street name and other information for the location Switching between 2D 3D and 2D North up views Heading up The map display always shows the vehicle s direction as proceeding toward the top of the screen North up The map display always has north at the ...

Страница 24: ...s guides by voice text indications and signs Frequently shown route events The following are some examples of the maneuvers that are displayed Changes the map view mode The current map mode is shown on the control key Zooms in or out on the map You can also zoom out or in by pinching or expanding the map Rotates the map clockwise or counterclockwise Cancels map rotation Tilts the map angle up or d...

Страница 25: ...ocation on the map You can set it as a waypoint easily The data fields are different when you are navigating a route and when you have no specified destination For example the data field provides the following information Enter traffic circle maneuver after the next maneuver Freeway entrance or freeway exit Board ferry or leave ferry Approaching the destination or a waypoint Lane information When ...

Страница 26: ...lue calculated based on the speed limit value set in Max Speed of vehicle type setting and the actual driving speed The estimated time of arrival is only a reference value and does not guarantee arrival at that time For details refer to page 51 Search for a destination or waypoint using the address or another method You can also set a destination by touching the map on the screen Once the destinat...

Страница 27: ...ns when driving 1 Press 2 Touch 3 Touch New Route The following screen appears Suggests a destination based on your navigation habits using parameters such as current time of day day of week and current location Displays the previous or next page of the searching for a destination menu Searches for a location by entering the specific address page 28 Searches for various facilities Points Of Intere...

Страница 28: ...e route 5 Select Select House Number or Intersection This item will be displayed after a street is set If the house number is not available touch Go to Street and select the street This way the center of the selected street becomes the destination of the route After you touch the selected address to finish the address search the searched location appears on the map screen 6 Touch Select as Destina...

Страница 29: ...tegory or directly from the name of the facilities You can search for POIs by their categories and subcategories You can also search for POIs by their names in each of their categories 1 Touch Places 2 Touch Search Among All Places 3 Touch Around Here and then select the area in which the POIs should be searched for Category View You can select whether or not POI categories are displayed Around He...

Страница 30: ...ch Search by Name 5 Touch the POI The searched location appears on the map screen TIP If you touch you can change the sort method of the results 6 Touch Select as Destination Storing locations you visit frequently saves time and effort Selecting an item from the list provides an easy way to specify the position NOTE This function is available if locations have been registered in Saved Location tha...

Страница 31: ...y its name and search area TIP The Combined Search function also searches your stored data 1 Touch Combined Search 2 Touch the right text box to enter the country and city town 3 Enter the name address or category of the destination to the left text box then touch 4 Touch the entry The searched location appears on the map screen 5 Touch the right of the list to narrow down the search results TIP I...

Страница 32: ...r degrees minutes and decimal seconds NOTE When a value is already entered in the text field delete the value first Specifying a location after scrolling the map enables you to set the position as a destination or waypoint 1 Press 2 Touch and drag the screen to scroll the map 3 Touch the location that you want to select as your destination The cursor appears 4 Touch Select as Destination Once a lo...

Страница 33: ...en the key is activated Calculates the route prioritizing the use of per use charged toll roads when the key is activated Calculates the route prioritizing the use of ferries when the key is activated Calculates the route prioritizing the use of carpool and HOV lanes when the key is activated Returns to the previous screen Sets the cursor position to your destination or waypoint Displays the short...

Страница 34: ... Touch Start Navigation Your navigation system starts the route guidance TIP See page 24 for details on the route summary screen When navigation is already started there are several ways to modify the current route The following sections describe some of those options The Route Planner or My Route feature lets you build your route using the list of destinations TIP Once you set the route you can e...

Страница 35: ...creen Displays the options for the location Move Up Move Down Edits the order you want to visit the locations Delete Deletes the destination or waypoint Save Location Stores the location in Saved Location page 40 Change Changes the destination or waypoint to another location Show on Map Shows the selected location on the map Displays the shortcuts Delete All Deletes all waypoints and the destinati...

Страница 36: ...he starting position for route calculation returns to the current position 1 Press then touch 2 Touch Add Waypoint 3 Search for a location 4 Touch Select as Waypoint The route is recalculated and the Route Summary screen appears When the waypoint is already set the My Route screen appears Touch Show Route and proceed to the next step 5 Touch Start Navigation Your navigation system starts the route...

Страница 37: ...ch Detours Alternatives 3 Touch one of the options Checking detour routes Menu Item Description Alternative Routes Shows the alternative routes page 36 Avoid Special Sections Shows the route avoiding certain sections Touch the list item to select the section you want to avoid The distance and time difference suggested route current route and the section avoided are shown Touch Accept to apply the ...

Страница 38: ...tion of the displayed route is shown in the upper left by an icon The total length of the route and approximate required time for the route are in the lower left TIP You can scroll the map by dragging the map Restore Original Route Cancels the route with avoidances and restores the previous route Checking route information and preferences Shows the information for a transit point on the route Touc...

Страница 39: ...nd then touch 4 Touch Simulation The simulation starts from the starting point of the route and using a realistic speed it leads you through the whole recommended route NOTE To stop the simulation touch Close Displays the shortcuts Route Preferences Shows the route setting preferences If you change the preferences the route is recalculated Itinerary Shows all transit points in detail Touch a trans...

Страница 40: ...ou have already stored your home or workplace touch Home or Work to show the location on the Map Location screen 4 Search for a location page 26 5 Touch Save Location The cursor position has been stored You can store a frequently visited location such as a relative s home to allow easy routing 1 Press then touch 2 Touch New Route and then Saved Location You can also display the Saved Location scre...

Страница 41: ...rs 4 Touch the item you want to delete and touch Delete A message will appear asking you to confirm the deletion NOTES Home and Work cannot be deleted The location can be set again If you touch and then touch Delete All all entries including the home and workplace locations can be deleted 5 Touch OK 6 Touch Done You can save any map location such as a school zone or railroad crossing as an alert p...

Страница 42: ...ss 2 Scroll the map and move the cursor over the stored alert point and then touch 3 Touch Edit Alert Points 4 Set the necessary parameters If you touch and then touch Delete the selected alert point will be deleted 5 Touch Edit Storing your favorite routes in Saved Routes allows you to save the time and effort used on re entering this information 1 Set a route to your destination page 26 2 Press ...

Страница 43: ...ame and touch Rename 6 Enter the name and then touch 7 Touch Done 1 Press then touch 2 Touch New Route and then 3 Touch Saved Routes 4 Touch and then touch Edit 5 Touch the item you want to delete and touch Delete NOTE If you touch and then touch Delete All all entries can be deleted 6 Touch Delete The Traffic Message Channel TMC provides real time traffic reports If the navigation system is equip...

Страница 44: ...Touch Traffic Events A list with traffic information that has been received is shown The list is sorted by distance from your current position Places street names where incidents have occurred are displayed on the list NOTES If a route is set relevant events for your current route are shown in the upper section of the list Touching the desired item allows you to check its position on the map Touch...

Страница 45: ... indicate the degree of the congestion by color The notification icon shows the status of traffic information reception 1 Touch the relevant traffic event icon on the map Traffic notification icon Traffic notification icon Indicates that there are no traffic incidents in your coverage area Indicates that information on traffic incidents are being received Indicates that there are no significant tr...

Страница 46: ...ch Traffic to turn the switch on or off The Useful Information menu contains various information to support your driving 1 Press then touch 2 Touch Useful Information The Useful Information screen appears Information on each option in the Useful Information menu Turning the traffic information on or off Checking useful information about your trip About the Useful Information menu Menu Item Descrip...

Страница 47: ...ogger is activated The touch key changes to Stop Recording Touching Stop Recording allows you to deactivate the trip logger NOTES If there is not enough space in the built in memory the oldest trip log will be overwritten by the new one If you want the system to always activate the trip logger whenever the GPS signal is available turn on Enable Auto Saving For details refer to Setting the trip log...

Страница 48: ... size indicates the current data size of the trip log track log included Editing a trip log 1 Press then touch 2 Touch Useful Information 3 Touch Trip Monitor 4 Touch and then touch Edit 5 Touch any of the items to edit Menu Item Description View on Map Shows the trip log on the map screen Export Track Log Exports the track log currently selected to an external storage device Menu Item Description...

Страница 49: ... can return to the map screen The fuel consumption monitor helps you keep track of the fuel consumption of your car even if you do not use the navigation system for all your journeys Set the initial odometer value and then record the distance driven and the amount of fuel whenever you fill up your car You can also set reminders for regular car maintenance Change Color Changes the color by selectin...

Страница 50: ...onsumption information To calculate the fuel consumption for the distance you have traveled enter the distance driven and the amount of fuel whenever you fill up your car 1 Press then touch 2 Touch Useful Information 3 Touch Fuel Consumption 4 Touch Add 5 Touch Current Odometer Value and then enter the current odometer value 6 Touch Gas Amount to enter the amount of fuel pumped this time 7 Touch G...

Страница 51: ...odify the behavior of this system 1 Press then touch 2 Touch and then touch Settings The Settings screen appears 3 Touch one of the following categories then select the options Route Preferences page 51 Sound page 54 Warnings page 55 Navigation Map page 57 Regional page 59 Display page 60 Traffic page 60 Trip Monitor page 61 Start Configuration Wizard page 61 SyncTool page 61 Sets the type of vehi...

Страница 52: ... maneuvers available at intersections are taken into account Directional constraints are taken into account in the same way as travel in the opposite direction is allowed at low speeds Only private roads that need to be used to access the destination are included Walkways are excluded from routes Bus Maneuver restrictions and directional constraints are taken into account when planning a route Roa...

Страница 53: ...onomical Calculates a route that is quick and saves fuel Navigation Mode Enable or disable off road navigation On road The route is planned towards the destination along the roads on the map Off road The route is planned towards the destination in a straight line not along the roads on the map Highways Set to off to avoid prioritizing freeways for calculating the route NOTE This function is useful...

Страница 54: ...Beeps Adjust the volume of the non verbal alert sounds beeps Ding Adjust the volume of the sound ding that precedes the verbal instructions Voice Guidance Enable or disable voice guidance Announce Streets and Roads in Native Language Area Select whether to have the navigation system announce the street names in the native language of the area only the road numbers or only the maneuvers Announce St...

Страница 55: ...Select whether to have the navigation system announce by voice the traffic information whenever a traffic incident on your route is received Announce System Messages Select whether to read out the message when a system message appears Warnings Menu Item Description Speed Warning Set the type of speed and alert warnings Warn When Speeding Select whether to receive visible and or audible warnings Di...

Страница 56: ...Audio and Visual in the warning type setting you can change the reception timing of the audio alert If you select Only When Speeding the audio alert is only played when you exceed the given speed limit If you select When Approaching the audio alert is always played when approaching one of these alert points In order to draw your attention the alert is different when you exceed the speed limit Aler...

Страница 57: ...ns of prominent or well known objects Buildings Shows or hides 3D city models which are 3D artistic or block representations of complete city building data containing actual building sizes and actual positions on the map 3D Terrain Shows or hides the 3D elevation of the surrounding terrain Track Logs Turns on or off track log saving which saves the sequence of the locations you go through on your ...

Страница 58: ...ghways When you slow down while driving on a freeway due to a traffic congestion this navigation system offers you a detour using the next exit The message shows you the distance to the exit and the difference in the distance and estimated time compared to the original route You can choose from one of the following options Touch Dismiss or just ignore the message if you want to keep the original r...

Страница 59: ... you can select a new language from the list of available languages This system will restart if you change this setting Voice Language Displays the current voice guidance profile By touching the key you can select a new voice guidance language from the list of available languages and speakers Touch any of these keys to hear a sample voice prompt Units and Formats Set the various units to be used b...

Страница 60: ...u Item Description Menu Animations When animation is turned on the keys on the menus and keyboard screens are animated Screen transitions are also animated Day Skin Theme Select the style and colors of the navigation menu used in the daytime Night Skin Theme Select the style and colors of the navigation menu used in the nighttime Traffic Menu Item Description Traffic Enable or disable the TMC rece...

Страница 61: ...DE http pioneer naviextras com Color And Icon Icons for the relevant traffic incidents and lines indicating the traffic flow are shown on the map Show Free Traffic Flow As Well Select whether to receive information on smooth traffic flow Offer Detour if it Saves at Least Set the minimum time to be saved when having the system suggest a detour route If the estimated time saved by the planned detour...

Страница 62: ... are already paired Memory Full is displayed Delete a paired device first page 63 If your device supports SSP Secure Simple Pairing a six digit number appears on the display of this product Touch Yes to pair the device If a PIN code input is required enter a PIN code The default PIN code is 0000 TIP The Bluetooth connection can also be made by detecting this product from the Bluetooth device Befor...

Страница 63: ... disconnect the device touch the name of the connected device in the list NOTE Connect the Bluetooth device manually in the following cases Two or more Bluetooth devices are registered and you want to manually select the device to be used You want to reconnect a disconnected Bluetooth device Connection cannot be established automatically for some reason Auto Connect On Off Select On to connect the...

Страница 64: ...r phone Using preset dial list page 65 Using phone book Select a contact from the phone book Touch the desired name on the list then select the phone number TIPS The contacts on your phone will be automatically transferred to this product Update the phone book manually NOTE Visibility of the Bluetooth screen should be on page 63 Using call history Make a phone call from the received call dialed ca...

Страница 65: ... 1 Touch 2 Touch the desired entry on the list to make a call The dial screen appears and dialing starts Deleting a phone number 1 Press 2 Touch 3 Touch 4 Touch 5 Touch Yes 1 Touch to answer the call Touch to end the call TIPS Touch while getting a call waiting switch to the talking person Touch while getting a call waiting to reject the call You can use the voice recognition function of iPhone or...

Страница 66: ...on screen touch again NOTES The dial confirmation screen cannot be minimized on the AV operation screen AV sources cannot be selected even if the dial confirmation screen is minimized while talking on the phone or receiving an incoming call 1 Press 2 Touch then During a conversation you can switch to private mode talk directly on your cellular phone 1 Touch or to turn private mode on or off Minimi...

Страница 67: ...duct Making and receiving calls You may hear a noise in the following situations When you answer the phone using the button on the phone When the person on the other end of the line hangs up the phone If the person on the other end of the line cannot hear the conversation due to an echo decrease the volume level for hands free phoning With some cellular phones even after you press the accept butto...

Страница 68: ...le A2DP and AVRCP Audio Video Remote Control Profile Playing back pausing selecting songs etc are possible Depending on the Bluetooth device connected to this product the available operations with this product may be limited or differ from the descriptions in this manual While you are listening to songs on your Bluetooth device refrain from operating the phone function as much as possible If you t...

Страница 69: ...ressing then touch or you can also skip files forward or backward By pressing then touch and hold or you can also perform fast reverse or fast forward Selects a file or folder from the list to playback NOTE This function is available only when the AVRCP version of the Bluetooth device is 1 4 or higher Switches among the Bluetooth devices when the devices are connected to this product via Bluetooth...

Страница 70: ... Set Wi Fi to ON 6 Touch Device Information 7 Connect this product with the dislayed network name in Device Information from the mobile device 1 Press 2 Touch then 3 Touch Wi Fi Settings NOTE This setting is available only when you stop your vehicle in a safe place and apply the parking brake The menu items vary according to the source Wi Fi Wi Fi connection Wi Fi settings Menu Item Description Wi...

Страница 71: ...irelessly page 106 1 Press then touch 2 Touch Wi Fi Audio The Wi Fi audio playback screen appears NOTES Wi Fi Audio is displayed as Android Auto when the Android Auto is in use Wi Fi Audio is displayed as Apple CarPlay when the Apple CarPlay is in use Wi Fi audio screen Example Apple CarPlay Wi Fi audio with Apple CarPlay operation is same as the iPod source function For details of the operation r...

Страница 72: ...mpressed audio or video files on discs DVD Video Video CD The following sources can be played back or used by connecting an auxiliary device USB SD iPod Pandora Bluetooth audio Wi Fi audio Apple CarPlay Android Auto SiriusXM Satellite Radio AV input AV AUX HDMI Wireless Mirroring Car Sources iDatalink AVIC W8400NEX 1 Press then touch the AV operation key The AV operation screen appears AV source S...

Страница 73: ...e AV operation key 2 Touch 3 Touch the source key When you select Source OFF the AV source is turned off NOTE This function is available only when you stop your vehicle in a safe place and apply the parking brake Displays the source list Shows the navigation information This is not displayed for some sources Recalls equalizer curves page 144 Selecting a source Source on the AV source selection scr...

Страница 74: ...h 4 Drag the source key to the desired position NOTE This function is available only when you stop your vehicle in a safe place and apply the parking brake 1 Press 2 Touch and hold appears at the top left of the favorite source icons 3 Drag to the desired position To finish the adjusting touch any place of the display except for the favorite source icons area Changing the display order of source i...

Страница 75: ...be operable right after it is changed This setting is available only when a hands free telephone is not used The setting will change after the following processes are automatically executed The source is turned off AppRadio Mode Apple CarPlay or Android Auto is exited The smartphone connection USB and Bluetooth is disconnected Compatible iPod iPhone models iPhone 7 iPhone 7 Plus iPhone SE iPhone 6...

Страница 76: ...re displayed 6 Touch OK Compatible smartphones Compatibility with all smartphones is not guaranteed For details about smartphone compatibility with this product refer to the information on our website 1 Press 2 Touch then 3 Touch Smartphone related Settings 4 Touch Smartphone Setup 5 Touch Others 6 Touch Android Auto to use Android Auto Touch AppRadio Mode to use AppRadio Mode The available functi...

Страница 77: ...r AM stations HD Radio stations feature the following High quality audio FM multicasting Data service Digital CD quality sound HD Radio Technology enables local radio stations to broadcast a clean digital signal AM sounds like today s FM and FM sounds like a CD HD Radio Technology About HD Radio stations Sub channel AM band Analog AM Analog AM Digital AM FM band Analog FM Analog FM Digital FM Anal...

Страница 78: ... Guide and other relevant data streams Adjacent to traditional main stations are extra local FM channels These HD2 HD3 Channels provide new original music as well as deep cuts into traditional genre Visual information related to content being played on your HD Radio receiver such as Album Art historical photographs still art from live broadcasts among other related content 1 Press then touch 2 Tou...

Страница 79: ...h the preset channel list display key 2 Touch to begin search While the message is displayed the six strongest broadcast frequencies will be stored under the preset channel keys in the order of their signal strength 1 Touch Cancel Recalls the preset channel stored to a key from memory Stores the current broadcast frequency to a key Displays the preset channel list Select an item on the list 1 to 6...

Страница 80: ... analog broadcast of the same frequency level automatically when reception of a digital broadcast becomes weak Select Off to receive only a digital signal Seek Select the method of seek tuning Seek All Seeks stations from both analog and digital broadcasting Seek HD Only seeks stations from digital broadcasting Local Off FM Level1 Level2 Level3 Level4 AM Level1 Level2 Local seek tuning allows you ...

Страница 81: ...children s hands and fingers CAUTION Do not insert anything other than a disc into the disc loading slot 1 Press 2 Touch to open the LCD panel 3 Insert a disc into the disc loading slot The source changes and then playback will start 1 Insert a disc into the disc loading slot The source changes and then playback will start NOTE If the disc is already set select Disc as the playing source 1 Press 2...

Страница 82: ...s forward or backward By pressing then touch and hold or you can also perform fast reverse or fast forward If a Video CD with PBC playback control On is being played appears You can set the screen size for the video image page 155 Audio source screen 1 Basic operation Audio source Switches between playback and pause Skips files forward or backward Selects a track from the list Touch a track on the...

Страница 83: ...ON For safety reasons video images cannot be viewed while your vehicle is in motion To view video images stop in a safe place and apply the parking brake Video source screen 1 Sets a repeat play for the current disc the current track Plays or does not play tracks in random order Video source Hides the touch panel keys To display the keys again touch anywhere on the screen ...

Страница 84: ...wing order 1 16 1 8 1 4 1 2 Displays the DVD menu NOTE This function may not work properly with some DVD disc content In that case use touch panel keys to operate the DVD menu Switches the audio subtitle language Searches for the part you want to play Touch Title Chapter 10key or Track then input the desired number from 0 to 9 To start playback from the number you registered touch TIPS To cancel a...

Страница 85: ...current title Displays the DVD menu keypad If items on the DVD menu appear the touch panel keys may overlay them If so select an item using these touch panel keys Touch or to select the menu item then touch NOTE The way to display the menu differs depending on the disc TIP If you touch you can operate the DVD menu directly Resumes playback Bookmark This function is available for DVD Video You can ...

Страница 86: ... SD memory cards into the SD card slot Ejecting an SD memory card during data transfer can damage the SD memory card Be sure to eject the SD memory card by the procedure described in this manual Do not press when an SD memory card is not fully inserted Doing so may damage the card Do not press before an SD memory card has been completely removed Doing so may damage the card 1 Press 2 Touch to open...

Страница 87: ...C Compatibility with all SD memory cards is not guaranteed This product may not achieve optimum performance with some SD memory cards 1 Press 2 Touch to open the LCD panel 3 Press the middle of the SD memory card gently until it clicks 4 Pull the SD memory card out straight 5 Press 1 Pull out the plug from the USB port of the USB cable 2 Plug a USB storage device into the USB cable NOTES This prod...

Страница 88: ...out the USB storage device Turn off ACC OFF the ignition switch before unplugging the USB storage device 1 Insert the disc page 86 TIP If the disc is already set select Disc as the playing source 1 Insert the SD memory card into the SD card slot or plug the USB storage device into the USB connector 2 Press then touch 3 Touch USB or SD Playback is performed in order of folder numbers Folders are sk...

Страница 89: ...e you can also perform fast reverse or fast forward You can set the screen size for the video and image files page 155 Audio source screen 1 Example USB Basic operation Audio source Displays the link search screen Touch the song to play back followed by touching the song information after switching to Music Browse mode page 90 TIP If you touch the artwork the list of songs in the album is displaye...

Страница 90: ...SD only Music Browse mode cannot be held once the power is turned off Switches the current music information display Selects a file from the list Touch a file on the list to playback TIP Touching a folder on the list shows its contents You can play a file on the list by touching it NOTE When you play compressed audio files stored in an external storage device USB SD you can search for a file using...

Страница 91: ...ile folder list screen and touching the desired track TIP Once the database is created in the USB storage there is no need to create the database again as long as the same contents are saved To enter the Music Browse mode directly touch and then touch Tag before selecting the song CAUTION For safety reasons video images cannot be viewed while your vehicle is in motion To view video images stop in ...

Страница 92: ...le in the folder the search is not performed Performs fast reverse or fast forward Touch again to change the playback speed Stops playback Performs frame by frame playback Performs slow motion playback Sets a repeat play range for all files the current folder the current file Switches the audio subtitle language Selects a file from the list Touch a file on the list to playback TIP Touching a folde...

Страница 93: ...e types Music Compressed audio files Video Compressed video files Photo Image files Skips files forward or backward Selects the previous folder or the next folder Rotates the displayed picture 90 clockwise Sets a repeat play range for all files the current folder Plays all files in the current repeat play range or does not play them in random order Selects a file from the list Touch a file on the ...

Страница 94: ...usic app from your iPod since some functions may not be available When connecting an iPhone or iPod touch quit all applications before connecting the device 1 Connect your iPod via USB 2 Press then touch 3 Touch iPod NOTE For details on USB connection refer to the Installation Manual TIPS By pressing then touch or you can also skip files forward or backward By pressing then touch and hold or you c...

Страница 95: ... between playback and pause Skips files forward or backward Selects a song from the list Touch the category then the title of the list to playback of the selected list TIPS If you use English as the system language the alphabet search function is available Touch the initial search bar to use this function When you touch Apple Music Radio station in the list screen Apple Music Radio screen appears ...

Страница 96: ...music NOTE This function is only available when using the iPod function with an iPhone 7 iPhone 7 Plus iPhone SE iPhone 6s iPhone 6s Plus iPhone 6 iPhone 6 Plus iPhone 5s iPhone 5c iPhone 5 or iPod touch 5th and 6th generation 1 Touch 2 Touch Radio Changes the audiobook speed Normal Fast Slow NOTE The audiobook speed icon may not change depending on the connected iPod iPhone Sets a repeat play ran...

Страница 97: ...ayback and pause Displays the pop up menu for Apple Music Radio Touch Play More Like This to play back songs similar to the current song Touch Play Less Like This to set it not to play back the current song again Touch Add to iTunes Wish List to add the current song to the iTunes wish list NOTE This function may not be used depending on your Apple Music account status Skips tracks forward ...

Страница 98: ...e iPhone or smartphone may not be legal while driving in your jurisdiction so you must be aware of and obey any such restrictions If in doubt as to a particular function only perform it while the car is parked No feature should be used unless it is safe to do so under the driving conditions you are experiencing Important To use AppRadio Mode install the AppRadio app on the iPhone or smartphone in ...

Страница 99: ...ode compatible application is already running the application operation screen will appear on this product The desired application is launched and the application operation screen appears Press to go back to the top menu screen AppRadio Mode Press then touch to hide the AppRadio Mode SideControlBar Press then touch again to display the AppRadio Mode SideControlBar again and are not available depen...

Страница 100: ...The AppRadio app is launched When you tap the text input area of an application for iPhone a keyboard will be displayed on the screen You can input desired text directly from this product NOTES This function may not be available depending on your iPhone This function is only available in AppRadio Mode on the iPhone CAUTION For your safety the keyboard functionality is only available when the vehic...

Страница 101: ...n the screen NOTES The audio mix menu is displayed for four seconds If the screen disappears press VOL again The screen reappears The AV operation screen and the Application screen can be switched by pressing TIP The AV operation screen and the Application screen can be switched by pressing Using the audio mix function Touch to mute Touch again to cancel mute Sets whether to switch the sound mix f...

Страница 102: ...xperiencing Important Apple CarPlay may not be available in your country or region For details about Apple CarPlay visit the following site http www apple com ios carplay The content and functionality of the supported applications are the responsibility of the App providers In Apple CarPlay usage is limited while driving with availability of functions and content determined by the App providers Ap...

Страница 103: ... 2 Press 3 Touch 4 Touch Apple CarPlay 5 Touch the Apple CarPlay icon in the tab The application screen appears Before using Apple CarPlay wirelessly connect the device to this product via Bluetooth and turn on Apple CarPlay in the Bluetooth setting menu of the device page 62 1 Turn on the Wi Fi function on the device 2 Press 3 Touch The device search screen appears Touch then skip to step 4 since...

Страница 104: ...pple CarPlayis turned on only a Bluetooth audio connection will be possible for devices other than the device connected via Apple CarPlay Hands free phoning via Bluetooth wireless technology is not available while Apple CarPlay is on If Apple CarPlay is turned on during a call on a cellular phone other than an Apple CarPlay compatible device the Bluetooth connection will be terminated after the ca...

Страница 105: ...eriencing Important Android Auto may not be available in your country or region For details about Android Auto please refer to the Google support site http support google com androidauto The content and functionality of the supported applications are the responsibility of the App providers In Android Auto usage is limited while driving with availability of functions and content determined by the A...

Страница 106: ...B 2 Press 3 Touch 4 Touch Android Auto 5 Touch the Android Auto icon in the tab A Bluetooth connection with the Android Auto compatible device is automatically established and a Bluetooth connection with any other devices are terminated Before using Android Auto wirelessly connect the device to this product via Bluetooth page 62 1 Turn on the Wi Fi function on the device 2 Press 3 Touch The device...

Страница 107: ...3 If Android Auto is turned on during a call on a cellular phone other than the Android Auto compatible device the Bluetooth connection will switch to the Android Auto compatible device after the call You can adjust the guidance volume separately from the main sound volume when Android Auto is used 1 While Android Auto is activated press VOL The volume menu will be displayed on the screen NOTE The...

Страница 108: ...NEX AVIC W6400NEX 18_Navi_UC_CRI1052 A6_Vertical English NOTE Android Auto will launch automatically only when an Android Auto compatible device is correctly connected to this product 1 Press 2 Touch then 3 Touch Smartphone related Settings 4 Touch Android Auto Auto launch to switch On or Off ...

Страница 109: ...site http www pandora com account register Limitations The Pandora service is subject to change without notice The service could be affected by any of the following firmware version of the iPhone or smartphone firmware version of the Pandora application changes to the Pandora music service Certain functions of the Pandora service are not available when accessing the service through Pioneer car aud...

Страница 110: ... Recalls the preset station stored to a key from the memory Stores the current station to a key Displays the preset station list Select an item on the list 1 to 6 to switch to the preset station Switches between playback and pause Skips tracks forward TIP By pressing then touch you can skip songs forward Gives a Thumbs Up to the playing track Gives a Thumbs Down to the playing track and skips to t...

Страница 111: ... list Switches to the station list Switches to the genre list Plays only one track based on particular musical characteristics from several shuffled stations Deletes the station A Z Sorts the items in the list alphabetically Date Sorts the items in the list in the order of the dates TIP Shared stations are indicated by Creates a new station Touch Track or Artist to create a new station Adds inform...

Страница 112: ... ensure that your SiriusXM Connect Vehicle Tuner is installed correctly 3 Switch to Channel 0 and check the Radio ID The SiriusXM Radio ID can be found by tuning in to Channel 0 In addition the Radio ID is located on the bottom of the SiriusXM Connect Vehicle Tuner and its packaging You will need this number to activate your subscription NOTE The SiriusXM Radio ID does not include the letters I O ...

Страница 113: ...lay time indicator screen By pressing then touch and hold or you can move channels up or down on the current channel screen and perform fast reverse or fast forward on the play time indicator screen On the Featured Favorites Band the current broadcast frequency cannot be stored to a key page 117 If fewer than two music channels are stored as presets you cannot use the TuneMix function RADIO ID is ...

Страница 114: ...annel number down up Performs fast channel number down up Switches to the channel broadcasting the traffic and weather information for the selected city Traffic Weather Now Touch the Traffic Weather Now button and you will be able to hear the latest report for the selected city from the beginning To cancel Traffic Weather Now touch TIPS Grayed out Traffic and weather broadcast for your market is n...

Страница 115: ...ts a channel from the list Select the category name or the list of all channels then touch the desired channel To switch the display list touch TIPS The displayed list switches in the following order Channel Name Artist Name Song Title Content Info If you touch you can scan each channel in the selected category NOTES The types of categories available depend on the types of channels available It ma...

Страница 116: ...r the play unfold like it was live Continue listening to the game or you can return to your previous channel For details see SportsFlash page 119 and SportsFlash List page 119 in SiriusXM settings NOTE SportsFlash is only compatible with SXV300 or later tuner models sold separately All preset channels will buffer the content to be used for Replay TuneStart TuneScan and TuneMix features NOTE SmartF...

Страница 117: ...d the Parental Control feature requires you to enter a passcode to tune to the locked channels For details see Parental Control in SiriusXM settings page 118 The song titles artist names and your favorite sport teams that you are listening to can be memorized on an alert list When a program that matches a keyword memorized to the alert list is broadcast a beep sounds and a message is displayed For...

Страница 118: ... then touch to set this function the default passcode is 0000 To edit the passcode touch Edit Code then touch followed by entering the new passcode To lock the channel touch the appropriate channel appears and the channel is locked TIPS When you touch the locked channel the channel is unlocked When you touch Clear All all locked channels are unlocked Alert List Select to activate the alert functio...

Страница 119: ...vorite teams for SportsFlash Touch Edit List then select a league and team to set the favorite TIPS You can touch an item again to deselect it If you want to remove all the teams you have set touch Clear All Setting of priorities If you set many Favorite Teams SportsFlash notifications can be received for up to 5 Favorite Teams at once Set the priorities if more than six teams are set as Favorite ...

Страница 120: ...w video images stop in a safe place and apply the parking brake NOTE A High Speed HDMI Cable sold separately is required for connection For details refer to the Installation Manual 1 Press then touch 2 Touch HDMI The HDMI source screen appears HDMI source screen HDMI Starting procedure Basic operation Hides the touch panel keys To display the keys again touch anywhere on the screen TIP You can set...

Страница 121: ... cannot be viewed while your vehicle is in motion To view video images stop in a safe place and apply the parking brake NOTES A Mini jack AV cable CD RM10 sold separately is required for connection For details refer to the Installation Manual You can set the screen size for the video image page 155 1 Press 2 Touch then 3 Touch Input Output Settings 4 Confirm that AUX Input is turned on 5 Press the...

Страница 122: ...VIC W8400NEX AVIC W6400NEX 18_Navi_UC_CRI1052 A6_Vertical English AUX screen Basic operation Hides the touch panel keys To display the keys again touch anywhere on the screen TIP You can set the screen size for the video image page 155 Switches between the video input and audio input ...

Страница 123: ...TION For safety reasons video images cannot be viewed while your vehicle is in motion To view video images stop in a safe place and apply the parking brake 1 Press 2 Touch then 3 Touch Input Output Settings 4 Touch AV Input 5 Touch Source for AV source or Camera for camera 6 Press then touch 7 Touch AV for AV source or Camera View for camera The image is displayed on the screen NOTE If Source is s...

Страница 124: ... 18_Navi_UC_CRI1052 A6_Vertical _EN 020Chapt er fm AVIC W8400NEX AVIC W6400NEX 18_Navi_UC_CRI1052 A6_Vertical English AV source screen Basic operation Hides the touch panel keys To display the keys again touch anywhere on the screen ...

Страница 125: ...p your vehicle in a safe place and apply the parking brake 1 Press 2 Touch then 3 Touch Wi Fi Settings 4 Confirm that Wi Fi is turned on 5 Press then touch 6 Touch Mirroring A connection is configured then the instruction message appears on the display NOTES When Apple CarPlay or Android Auto with wireless connection is activated the connection swtiching confirmation screen appears Android Auto fu...

Страница 126: ...vi_UC_CRI1052 A6_Vertical English Wireless Mirroring screen Example NOTES The screen shown in the example may differ from the connected mobile device If the Android device is not ready for Miracast UIBC you cannot perform touch operation Basic operation Displays Full screen Disconnect Disconnects Wireless Mirroring ...

Страница 127: ...guide of the iDatalink adapter After installing the iDatalink adapter be sure to check the operations Functions and displays vary depending on the vehicle model For details of the functions available for each model refer to the information on our website Please note that the device number of this product and a computer with internet access are required to program your Maestro RR module For trouble...

Страница 128: ... to iDatalink Maestro website For details on connecting this product to iDatalink Maestro refer to the Installation Manual You can also check the device number on the Firmware Information screen of this product page 139 1 Connect the iDatalink Maestro adapter to this product For details refer to the Installation manual 2 Press then touch 3 Touch Car Sources or Car Features The touched menu screen ...

Страница 129: ..._EN 020Chapt er fm AVIC W8400NEX AVIC W6400NEX 18_Navi_UC_CRI1052 A6_Vertical English 129 Gauges screen Vehicle Information screen Displays the Gauge screen Displays the Vehicle Information screen Displays the Climate screen Displays the Parking Assist screen ...

Страница 130: ...ly to assist the driver s vision It does not detect all dangers and obstacles and is not a substitute for your attentiveness judgment and care while parking your vehicle NOTE This function is only available for vehicles equipped with a parking sensor system 1 Press 2 Touch then 3 Touch OEM Settings or OEM Volume Settings The setting screen for iDatalink appears Displaying obstacle detection inform...

Страница 131: ...NEX AVIC W6400NEX 18_Navi_UC_CRI1052 A6_Vertical English 131 Menu Item Description OEM Settings Setting for iDatalink function when the iDatalink adapter is connected to the unit OEM Volume Settings Setting for iDatalink function volume when the iDatalink adapter is connected to the unit ...

Страница 132: ...ccording to the source Settings Displaying the setting screen System settings Navigation Related Settings Menu Item Description Navigation info window On Off You can set whether to display the guidance information of the navigation on the AV operation screen AV App Guide Mode On Off You can set whether to automatically switch to the navigation screen from the AV screen or the application screen wh...

Страница 133: ... Settings Menu Item Description Smartphone Setup Setting the connected mobile device page 75 Driving Position Right Left Setting the driving position Apple CarPlay page 102 Android Auto page 105 Android Auto Auto launch On Off Select On to automatically launch Android Auto when an Android device is connected to the unit Input Output Settings Menu Item Description AppRadio Mode Sound Set where the ...

Страница 134: ... full screen rear view camera image during normal driving switch to the opposite setting in Reverse Gear Setting If you touch while the camera image is displayed the displayed image turns off temporarily When the camera view of both the rear view camera and 2nd camera are available the key to switch the display appears Touch this key to switch the display between the rear view image and 2nd camera...

Страница 135: ... wrong or wrong camera setting is made press RESET button to release the rear view camera screen and then change the camera polarity setting to Battery Wi Fi Settings Menu Item Description Wi Fi Settings page 70 Demo Mode Menu Item Description Demo Mode On Off Setting the demo mode System Language Menu Item Description System Language Select the system language NOTES If the embedded language and t...

Страница 136: ...le in a safe place and apply the parking brake Audio Settings Restore to default Audio settings NOTE This setting is available when the source is turned off Theme Settings Restore to default Theme settings Bluetooth Settings Restore to default Bluetooth settings Keyboard Menu Item Description Keyboard You can use the keyboard in AppRadio Mode by setting the language of the keyboard for iPhone NOTE...

Страница 137: ...center of the mark displayed on the screen The target indicates the order When you press the previous adjustment position returns When you press and hold the adjustment is canceled 5 Press and hold The adjustment results are saved Dimmer Settings Menu Item Description Dimmer Trigger Setting the dimmer brightness Auto Switches the dimmer to on or off automatically according to your vehicle s headli...

Страница 138: ...re placed on the same point the dimmer available time is 0 hours When the cursor for off time setting is placed on the left end and the cursor for on time setting is placed on the right end the dimmer available time is 0 hours When the cursor for on time setting is placed on the left end and the cursor for off time setting is placed on the right end the dimmer available time is 24 hours NOTE The t...

Страница 139: ...oduct is equipped with by touching License in this menu Firmware Update CAUTION The external storage device for updating must contain only the correct update file Never turn this product off eject the SD memory card or disconnect the USB storage device while the firmware is being updated You can only update the firmware when the vehicle is stopped and the parking brake is engaged You cannot update...

Страница 140: ...ception is poor change the installation position of the GPS antenna Positioning Status Displays the positioning status 3D positioning 2D positioning or no positioning the number of satellites used for positioning orange and the number of satellites that have received signals yellow If signals from more than three satellites are received the current location can be measured Installation Indicates w...

Страница 141: ...set items in this product or original pictures via the external device such as USB storage device and SD memory card TIP The wall paper can be set from selections for the top menu screen and AV operation screen Preset Display Selects the desired preset background display custom Displays the background display image imported from the external storage device To set the image from an external device ...

Страница 142: ...olor in the memory touch and hold Memo and the customized color will be available at the next illumination setting by touching TIP You can also adjust the color tone by dragging the color bar rainbow Shifts gradually between the preset colors in sequence Theme Select the theme color TIP You can preview the top menu screen or the AV operation screen by touching Home or AV respectively Clock Select ...

Страница 143: ...port 1 USB storage device USB port 2 This setting is available only when you stop your vehicle in a safe place and apply the parking brake Exporting Theme settings 1 Set the external storage device page 86 2 Press 3 Touch then 4 Touch Export 5 Touch the item you want export Illumination Theme Splash Screen Select All 6 Touch Export Importing Theme settings 1 Set the external storage device page 86...

Страница 144: ...ars of multiple equalizer bands the equalizer curve settings will be set to the value of the touched point on each bar If the preset equalizer curve other than Custom1 or Custom2 is modified the curve setting will be overwritten in Custom1 Fader Balance Touch or to adjust the front rear speaker balance Set Front and Rear to 0 when using a dual speaker system Touch or to adjust the left right speak...

Страница 145: ...t enable or disable rear subwoofer output from this product NOTE If Off is selected the subwoofer adjustment is not available in Speaker Level Time Alignment and Crossover Speaker Level Listening position 1 2 Off Front Left Front Right Front All Standard Mode 3 Front Left Front Right Rear Left Rear Right Subwoofer Network Mode 3 High Left High Right Mid Left Mid Right Subwoofer Speaker output leve...

Страница 146: ...able only when the listening position setting is set to Front Left or Front Right Auto EQ On Off Set the auto adjusted equalizer to suit the vehicle s acoustics To use this function the Auto EQ measurement must be done in advance page 148 A EQ TA Measurement Measures and adjusts the vehicles acoustics equalizer and time alignment automatically to suit the vehicle interior page 148 Save Settings Sa...

Страница 147: ...y be damaged if this is performed under the following conditions Rear Speaker Output Rear Subwoofer Select the rear speaker output NOTES This function is available when Standard Mode is selected as the speaker mode If Subwoofer is selected the rear speaker adjustment is not available in Speaker Level Time Alignment and Crossover Loudness Off Low Mid High Compensates for deficiencies in the low fre...

Страница 148: ... Auto EQ the front speakers must be connected When this product is connected to a power amp with input level control Auto EQ may be impossible if the power amp s input level is set below the standard level When this product is connected to a power amp with an LPF low pass filter turn the LPF off before performing Auto EQ Also set the cutoff frequency for the built in LPF of an active subwoofer to ...

Страница 149: ...asurement 9 Connect the microphone for acoustical measurement sold separately with this product Plug the microphone into the Auto EQ microphone input jack on this product page 6 Plug the microphone into the AUX input jack on the back panel of this product refer to the Installation Manual NOTE Use an extension cable sold separately if the cord of the microphone sold separately is not long enough 10...

Страница 150: ...er settings are available only when Subwoofer is On Rear speaker settings are available only when Rear Speaker Output is Rear 1 Press 2 Touch then 3 Touch Crossover or Subwoofer Settings 4 Touch or to switch the speaker 5 Drag the graph line to set the cutoff position 6 Drag the lowest point of the graph to set the cutoff slope The following items can also be set The menu items vary according to t...

Страница 151: ... digit code of the desired language then touch Multi Angle On Off Set to display the angle icon on the screen TV Aspect Set the aspect ratio suitable for your rear display 16 9 wide screen display or 4 3 regular display We recommend use of this function only when you want to fit the aspect ratio to the rear display NOTES When playing discs that do not have a panscan system the disc is played back ...

Страница 152: ...he included booklet or the disc itself You cannot use parental lock with discs that do not feature a recorded parental lock level With some discs parental lock operates to skip certain scenes only after which normal playback resumes For details refer to the disc s instructions When you set a parental lock level and then play a disc featuring parental lock code number input indications may be displ...

Страница 153: ... NOTE Some DVDs may not operate properly If this function is not fully operable turn this function off and start playback Time Per Photo Slide Menu Item Description Time Per Photo Slide 5sec 10sec 15sec Manual Select the interval of image file slideshows on this product Video Signal Setting Menu Item Description AV Auto PAL NTSC PAL M PAL N SECAM Select the suitable video signal setting when you c...

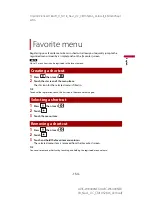
Страница 154: ...in the favorite menu 1 Press then touch 2 Touch the star icon of the menu item The star icon for the selected menu is filled in TIP To cancel the registration touch the star icon in the menu column again 1 Press then touch 2 Touch 3 Touch the menu item 1 Press then touch 2 Touch 3 Touch and hold the favorite menu column The selected menu item is removed from the Favorites screen TIP You can also r...

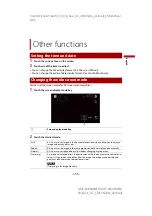
Страница 155: ...he desired mode Other functions Setting the time and date Changing the wide screen mode Screen display mode key Full A 4 3 picture is enlarged in the horizontal direction only enabling you to enjoy an image without any omissions Zoom A 4 3 picture is enlarged in the same proportion both vertically and horizontally Normal A 4 3 picture is displayed normally without changing its proportion Trimming ...

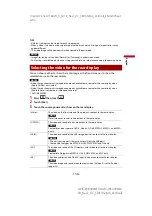
Страница 156: ... not available as a source for the rear display when Android Auto is activated in Smartphone Setup AVIC W8400NEX 1 Press then touch 2 Touch Rear 3 Touch the source you want to show on the rear display Selecting the video for the rear display Mirror The video on the front screen of this product is output to the rear display NOTE Not all videos or sounds can be output to the rear display DVD CD The ...

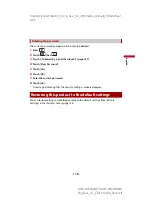
Страница 157: ...assword contact the nearest authorized Pioneer Service Station 1 Press 2 Touch then 3 Touch 1 followed by 2 and then touch 3 4 Touch Set Password 5 Enter the password 5 to 16 characters can be entered for a password 6 Touch Go 7 Enter a password hint Up to 40 characters can be entered for a hint 8 Touch Go If you want to change the password currently set enter the current password and then enter t...

Страница 158: ...ess 2 Touch then 3 Touch 1 followed by 2 and then touch 3 page 157 4 Touch Clear Password 5 Touch Yes 6 Touch OK 7 Enter the current password 8 Touch Go A message indicating that the security setting is canceled appears You can restore settings or recorded content to the default settings from Restore Settings in the System menu page 135 Deleting the password Restoring this product to the default s...

Страница 159: ...t The disc format cannot be played back Replace the disc The loaded disc is a type this product cannot play Check what type of disc it is The screen is covered by a caution message and the video cannot be shown The parking brake lead is not connected or the parking brake is not applied Connect the parking brake lead correctly and apply the parking brake The parking brake interlock is activated Par...

Страница 160: ...e is extremely unclear distorted and dark during playback The disc features a signal to prohibit copying Some discs may have this Since this product is compatible with the copy guard analog copy protect system the picture may suffer from horizontal stripes or other imperfections when a disc with that kind of protection signal is viewed on some displays This is not a malfunction iPod cannot be oper...

Страница 161: ...active Your phone is out of range for service Retry after re entering the range for service The connection between the cellular phone and this product cannot be established Perform the connection process A black screen is displayed While operating an application the application was ended on the smartphone side Press to display the top menu screen The smartphone OS may be awaiting screen operation ...

Страница 162: ... some problem occured in the product The temperature is too high for this product to operate Follow the instructions displayed on the screen If this does not solve the problem contact your dealer or an authorized Pioneer Station for assistance Positioning is not possible due to the hardware Please contact your dealer or Pioneer service center The location display is not possible due to hardware fa...

Страница 163: ...connector or USB cable is not caught in something or damaged The connected USB storage device consumes more than maximum allowable current Disconnect the USB storage device and do not use it Turn the ignition switch to OFF then to ACC or ON and then connect a compliant USB storage device Poor network connection Listening will resume when it s restored The Pandora application is accessed relocated ...

Страница 164: ...The channel that you have requested is not included in your SiriusXM subscription package Check the content of your SiriusXM subscription package In the U S A visit www siriusxm com or call 1 866 635 2349 if you have questions about your subscription package or would like to subscribe to this channel In Canada visit www siriusxm ca or call 1 877 438 9677 Channel Locked Please Enter the Lock Code L...

Страница 165: ...nserted disc contains expired DivX VOD content Select a file that can be played Video resolution not supported Files that cannot be played on this product are included in the file Select a file that can be played Unable to write to flash memory The playback history for VOD contents cannot be saved for some reason Retry If the message appears frequently consult your dealer Your device is not author...

Страница 166: ...USB storage device consumes more than maximum allowable current Disconnect the USB storage device and do not use it Turn the ignition switch to OFF then to ACC or ON and then connect a compliant USB storage device HUB Error The connected USB hub is not supported by this product Directly connect the USB storage device to this product No Response This product cannot recognize the connected USB stora...

Страница 167: ... to ON If the error message is still displayed after performing the above action please contact your dealer or an authorized Pioneer Service Station Android Auto has stopped The connected device is not compatible with Android Auto Check if the device is compatible with Android Auto The startup of Android Auto failed for some reasons Disconnect the cable from the smartphone and then connect the sma...

Страница 168: ...and correct the discrepancies in the distance traveled caused by driving along winding roads or up slopes If you use this navigation system with connecting the speed pulse the system will become more accurate than no connection of speed pulse So you connect the speed pulse without fail to get the accuracy of positioning The position of the speed detection circuit vary depending on the vehicle mode...

Страница 169: ... correct your position by adjusting it to a nearby road This is called map matching With map matching Without map matching Positioning errors are kept to a minimum by combining GPS dead reckoning and map matching However in some situations these functions may not work properly and the error may become bigger GPS positioning is disabled if signals cannot be received from more than two GPS satellite...

Страница 170: ...signal has not been received for a long time your vehicle s actual position and the current position mark on the map may diverge considerably or may not be updated In such case once GPS reception is restored accuracy will be recovered Conditions likely to cause noticeable positioning errors For various reasons such as the state of the road you are traveling on and the reception status of the GPS s...

Страница 171: ...18_Navi_UC_CRI1052 A6_Vertical English 171 If you drive in zigzags If the road has a series of hairpin bends If there is a loop or similar road configuration If you take a ferry If you are driving on a long straight road or a gently curving road If you are on a steep mountain road with many height changes ...

Страница 172: ...r similar structure using a spiral ramp If your vehicle is turned on a turntable or similar structure If your vehicle s wheels spin such as on a gravel road or in snow If you put on chains or change your tires for ones with a different size If trees or other obstacles block the GPS signals for a considerable period If you drive very slowly or in a start and stop manner as in a traffic congestion ...

Страница 173: ...s The calculated route is one example of the route to your destination decided by the navigation system while taking the type of streets or traffic regulations into account It is not necessarily an optimum route In some cases you may not be able to set the streets you want to take If you need to take a certain street set a waypoint on that street If the destination is too far there may be instance...

Страница 174: ...d chipped warped or otherwise damaged discs as they may damage the built in drive Use 12 cm discs Do not use 8 cm discs or an adapter for 8 cm discs When using discs that can be printed on label surfaces check the instructions and the warnings of the discs Depending on the discs inserting and ejecting may not be possible Using such discs may result in damage to this equipment Do not attach labels ...

Страница 175: ...of a DualDisc may result in scratches to the disc Serious scratches can lead to playback problems on this product In some cases a DualDisc may become stuck in the disc loading slot and will not eject To prevent this we recommend you refrain from using DualDisc with this product Please refer to the manufacturer for more detailed information about DualDiscs This product will down mix Dolby Digital s...

Страница 176: ...disc may not be displayed by this product in the case of audio data CD DA Read the precautions with CD R CD RW discs before using them Common notes about the external storage device USB SD SD function is only available for AVIC W8400NEX Do not leave the external storage device USB SD storage device in any location with high temperatures Depending on the kind of the external storage device USB SD s...

Страница 177: ... 43 seconds Search operations beyond this time limit are prohibited DivX VOD file playback requires supplying the ID code of this product to the DivX VOD provider Regarding the ID code refer to Displaying your DivX VOD registration code on page 152 For details on the DivX video versions that can be played on this product refer to Specifications page 186 For more details about DivX visit the follow...

Страница 178: ... for the file and folder name Depending on the display area this product may try to display them with a reduced font size However the maximum number of the characters that you can display varies according to the width of each character and of the display area Folder selection sequence or other operations may be altered depending on the encoding or writing software Regardless of the length of blank...

Страница 179: ...rmation composition such as the number of audio streams there may be a slight delay in the start of playback on discs If a file contains more than 4 GB playback stops before the end Some special operations may be prohibited because of the composition of DivX files Files with high transfer rates may not be played back correctly The standard transfer rate is 4 Mbps for CDs and 10 08 Mbps for DVDs Di...

Страница 180: ...patible video codec MPEG4 H 264 H 263 Maximum resolution 1 920 x 1 080 Maximum frame rate 30 fps Compatible video codec MPEG4 H 264 H 263 Maximum resolution 1 920 x 1 080 Maximum frame rate 30 fps Compatible video codec MPEG4 H 264 Xvid Maximum resolution 1 920 x 1 080 Maximum frame rate 30 fps Compatible video codec MPEG4 H 264 H 263 Maximum resolution 1 920 x 1 080 Maximum frame rate 30 fps Comp...

Страница 181: ...osoft Licensing Inc Copyright 2000 2009 Josh Coalson Copyright 2011 2013 Xiph Org Foundation Redistribution and use in source and binary forms with or without modification are permitted provided that the following conditions are met Redistributions of source code must retain the above copyright notice this list of conditions and the following disclaimer Redistributions in binary form must reproduc...

Страница 182: ... your device at vod divx com Find your registration code in the DivX VOD section of your device setup menu AAC is short for Advanced Audio Coding and refers to an audio compression technology standard used with MPEG 2 and MPEG 4 Several applications can be used to encode AAC files but file formats and extensions differ depending on the application which is used to encode This unit plays back AAC f...

Страница 183: ...d other countries Apple Music is a trademark of Apple Inc registered in the U S and other countries Apple CarPlay is a trademark of Apple Inc Use of the Works with Apple badge means that an accessory has been designed to work specifically with the technology identified in the badge and has been certified by the developer to meet Apple performance standards Works with Siri through the microphone An...

Страница 184: ...content The content and functionality of the supported applications are the responsibility of the App providers In AppRadio Mode Apple CarPlay and Android Auto functionality through the product is limited while driving with available functions determined by the App providers Availability of AppRadio Mode Apple CarPlay and Android Auto functionalities is determined by the App provider and not deter...

Страница 185: ...a For details about the map coverage of this product refer to the information on our website When the LCD screen is subjected to direct sunlight for a long period of time it will become very hot resulting in possible damage to the LCD screen When not using this product avoid exposing it to direct sunlight as much as possible The LCD screen should be used within the temperature ranges shown in Spec...

Страница 186: ...een At low temperatures using the LED backlight may increase image lag and degrade the image quality because of the characteristics of the LCD screen Image quality will improve with an increase in temperature The product lifetime of the LED backlight is more than 10 000 hours However it may decrease if used in high temperatures If the LED backlight reaches the end of its product lifetime the scree...

Страница 187: ... temperature range 20 C to 80 C 4 F to 176 F Power off Audio Maximum power output 50 W 4 ch 4 Ω 50 W 2 ch 4 Ω 70 W 1 ch 2 Ω for subwoofer Continuous power output 22 W 4 50 Hz to 15 kHz 5 THD 4 Ω LOAD Both Channels Driven Load impedance 4 Ω 4 Ω to 8 Ω allowable Preout output level max 4 0 V Equalizer 13 Band Graphic Equalizer Frequency 50 Hz 80 Hz 125 Hz 200 Hz 315 Hz 500 Hz 800 Hz 1 25 kHz 2 kHz 3...

Страница 188: ...ep DVD drive System DVD V VCD CD MP3 WMA AAC DivX MPEG player Usable discs DVD VIDEO VIDEO CD CD CD R CD RW DVD R DVD RW DVD R DL Region number 1 Frequency response 5 Hz to 44 000 Hz with DVD at sampling frequency 96 kHz Signal to noise ratio 96 dB 1 kHz IHF A network RCA level Video output level Video 1 0 V p p 75 Ω 0 2 V Number of channels 2 stereo MP3 decoding format MPEG 1 2 2 5 Audio Layer 3 ...

Страница 189: ... Layer 3 MPEG 2 5 Layer 3 WMA decoding format WMA 10 Std WMA 10 Pro WMA 9 Lossless AAC decoding format MPEG 2 AAC LC MPEG 4 AAC LC WAV signal format Linear PCM FLAC signal format Ver 1 3 0 SD image JPEG decoding format JPEG SD video H 264 video decoding format Base Line Profile Main Profile High Profile WMV video decoding format VC 1 SP MP AP WMV 7 8 MPEG4 video decoding format Simple Profile Adva...

Страница 190: ...nglish 190 1 6 11 ch 2 4 GHz 149 151 155 ch 5 GHz Security WPA 2 personal Output power 16 dBm Max 2 4 GHz 13 dBm Max 5 GHz CEA2006 Specifications Power output 14 W RMS 4 Channels 4 Ω and 1 THD N S N ratio 91 dBA reference 1 W into 4 Ω NOTE Specifications and design are subject to possible modifications without notice due to improvements ...

Страница 191: ...fm 2018 PIONEER CORPORATION All rights reserved CRI1052 D UC AVIC W8400NEX AVIC W6400NEX 18_Navi_UC_CRI1052 D A6_Vertical To keep up to date with the latest navigational data you can periodically update your navigation system For further details please visit http pioneer naviextras com ...

Отзывы: